Cute Paper Strip 3D Pumpkin Craft
Today we have this paper strip 3D pumpkin craft. It’s a quick and fun fall craft for kids and adults.

Fall is coming up, and we are loving all types of fun fall crafts here!
And pumpkins of course always top the list! So if your looking for some fun pumpkin crafts for kids, we’ve got just the thing for you.
Of course, you can also grab our free printable pumpkin templates to get creative with your own craft project ideas.
But today we are crafting up some fun with paper strips!
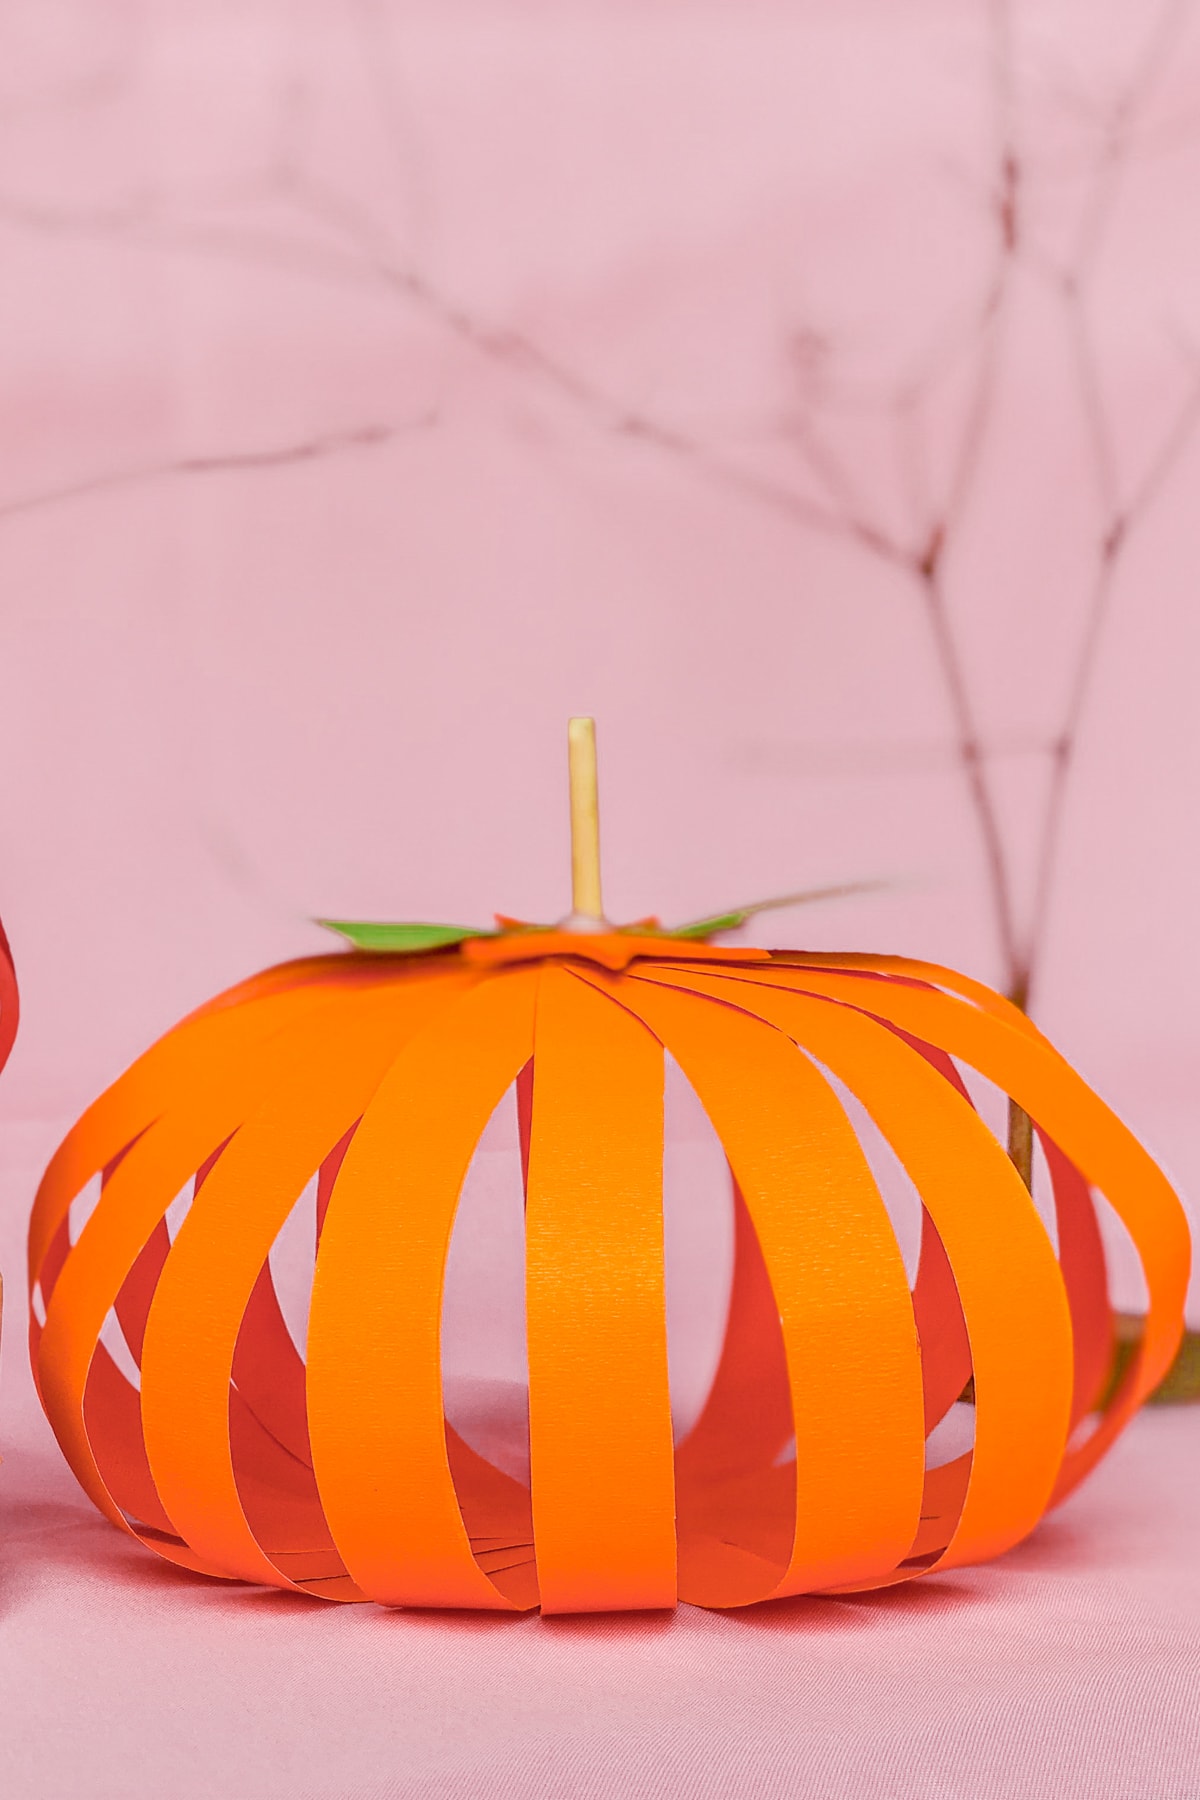
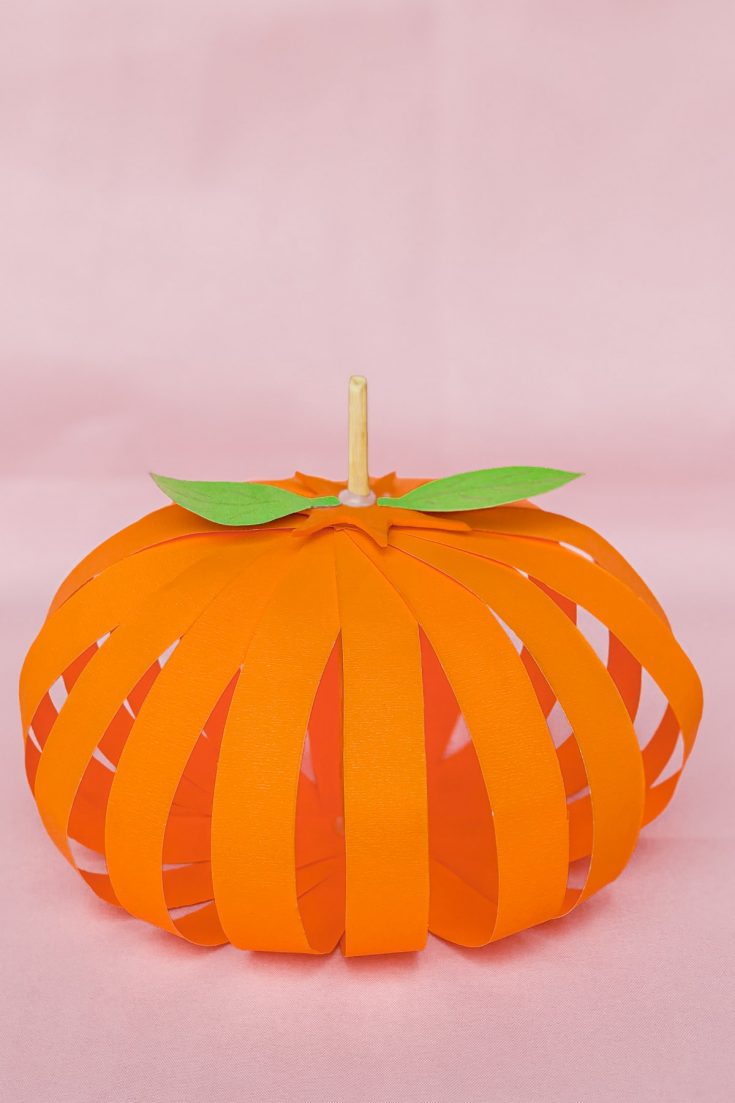
Did you know with just some orange paper strips you can make a 3D paper pumpkin?
Today we’ll show you just how easy it is with this fun and simple pumpkin craft. Make sure to check out all of our easy craft ideas for kids.
And if you like this craft, you’ll like our free Jack O Lantern coloring pages too.
Supplies
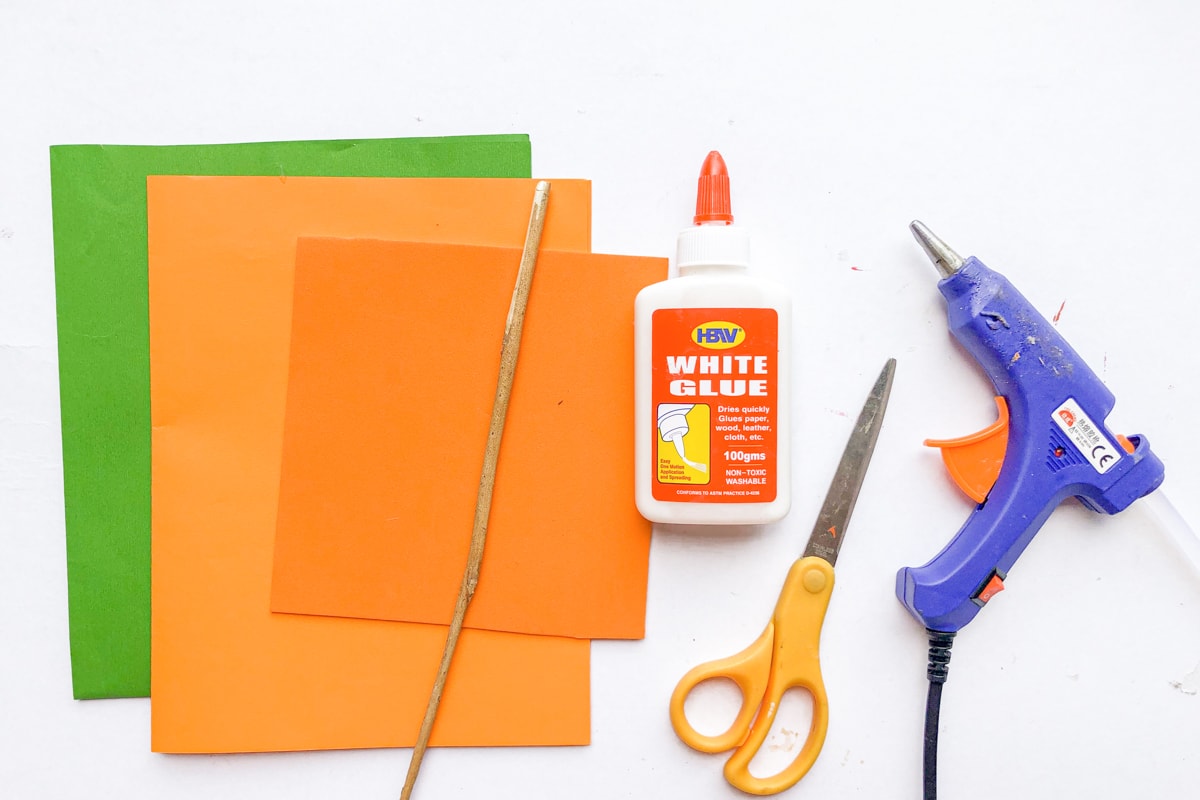
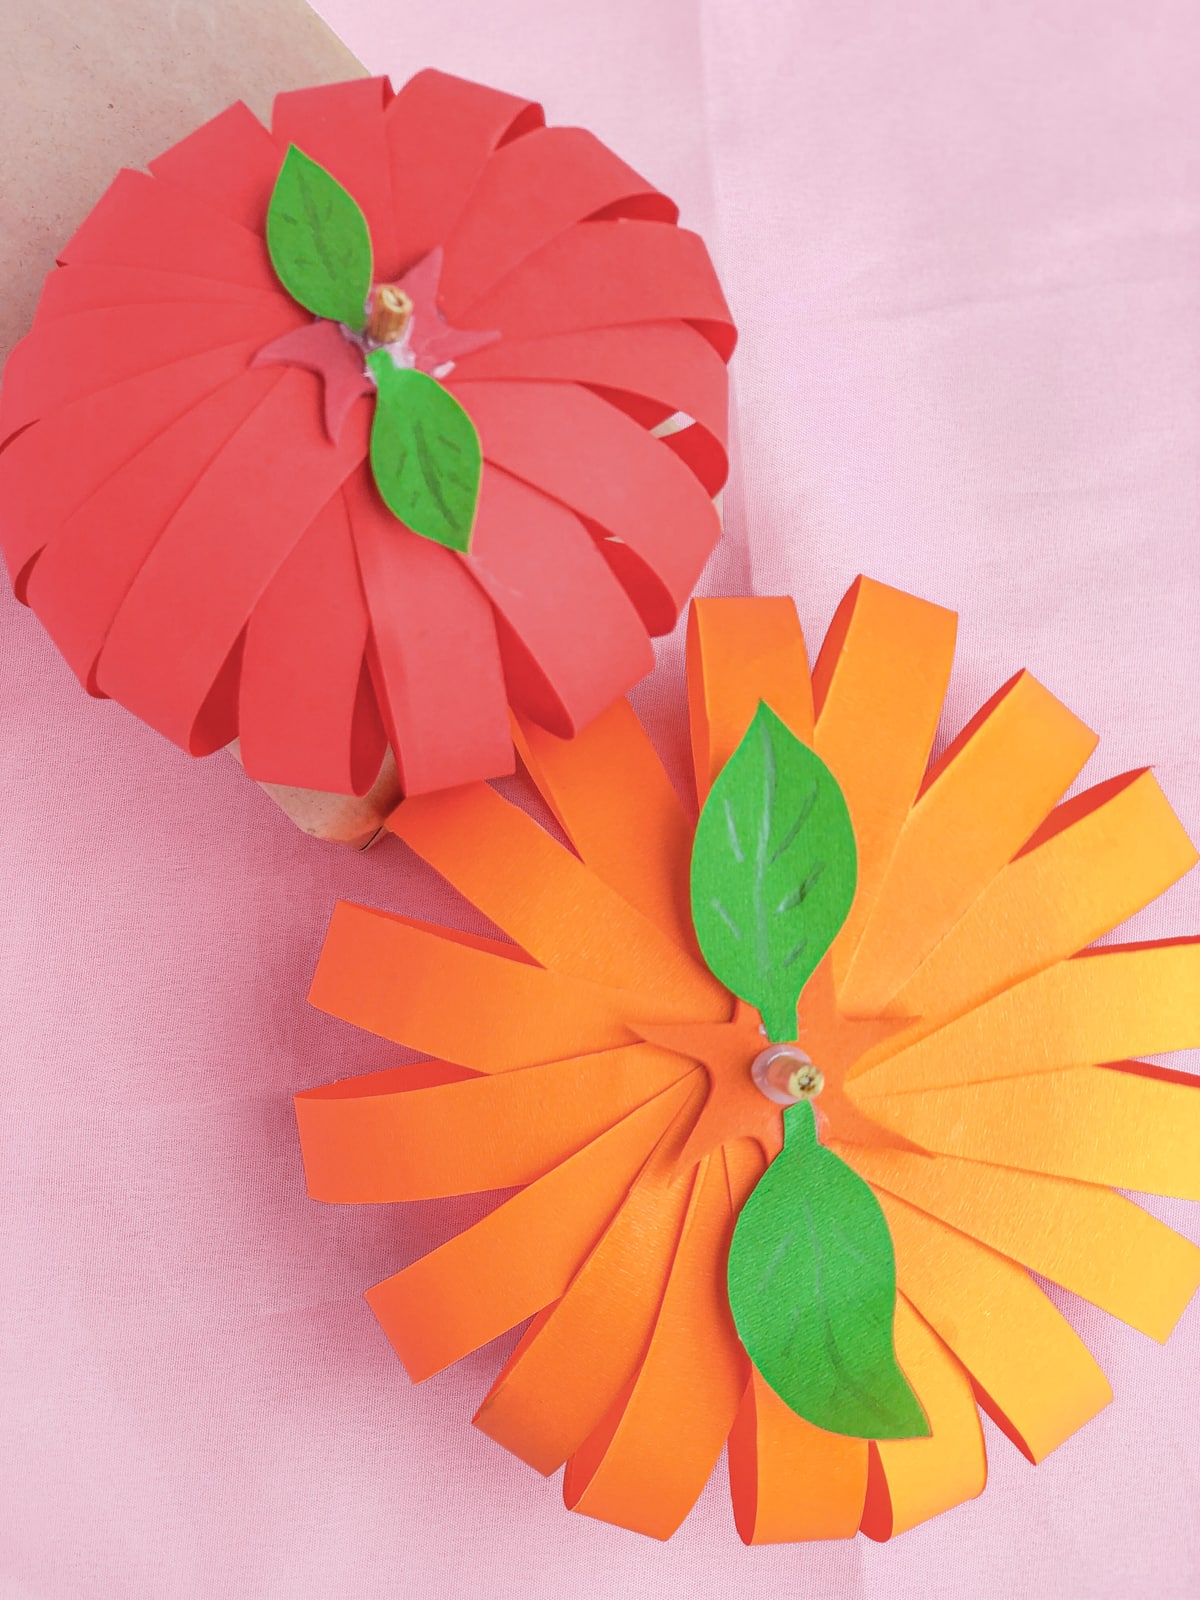
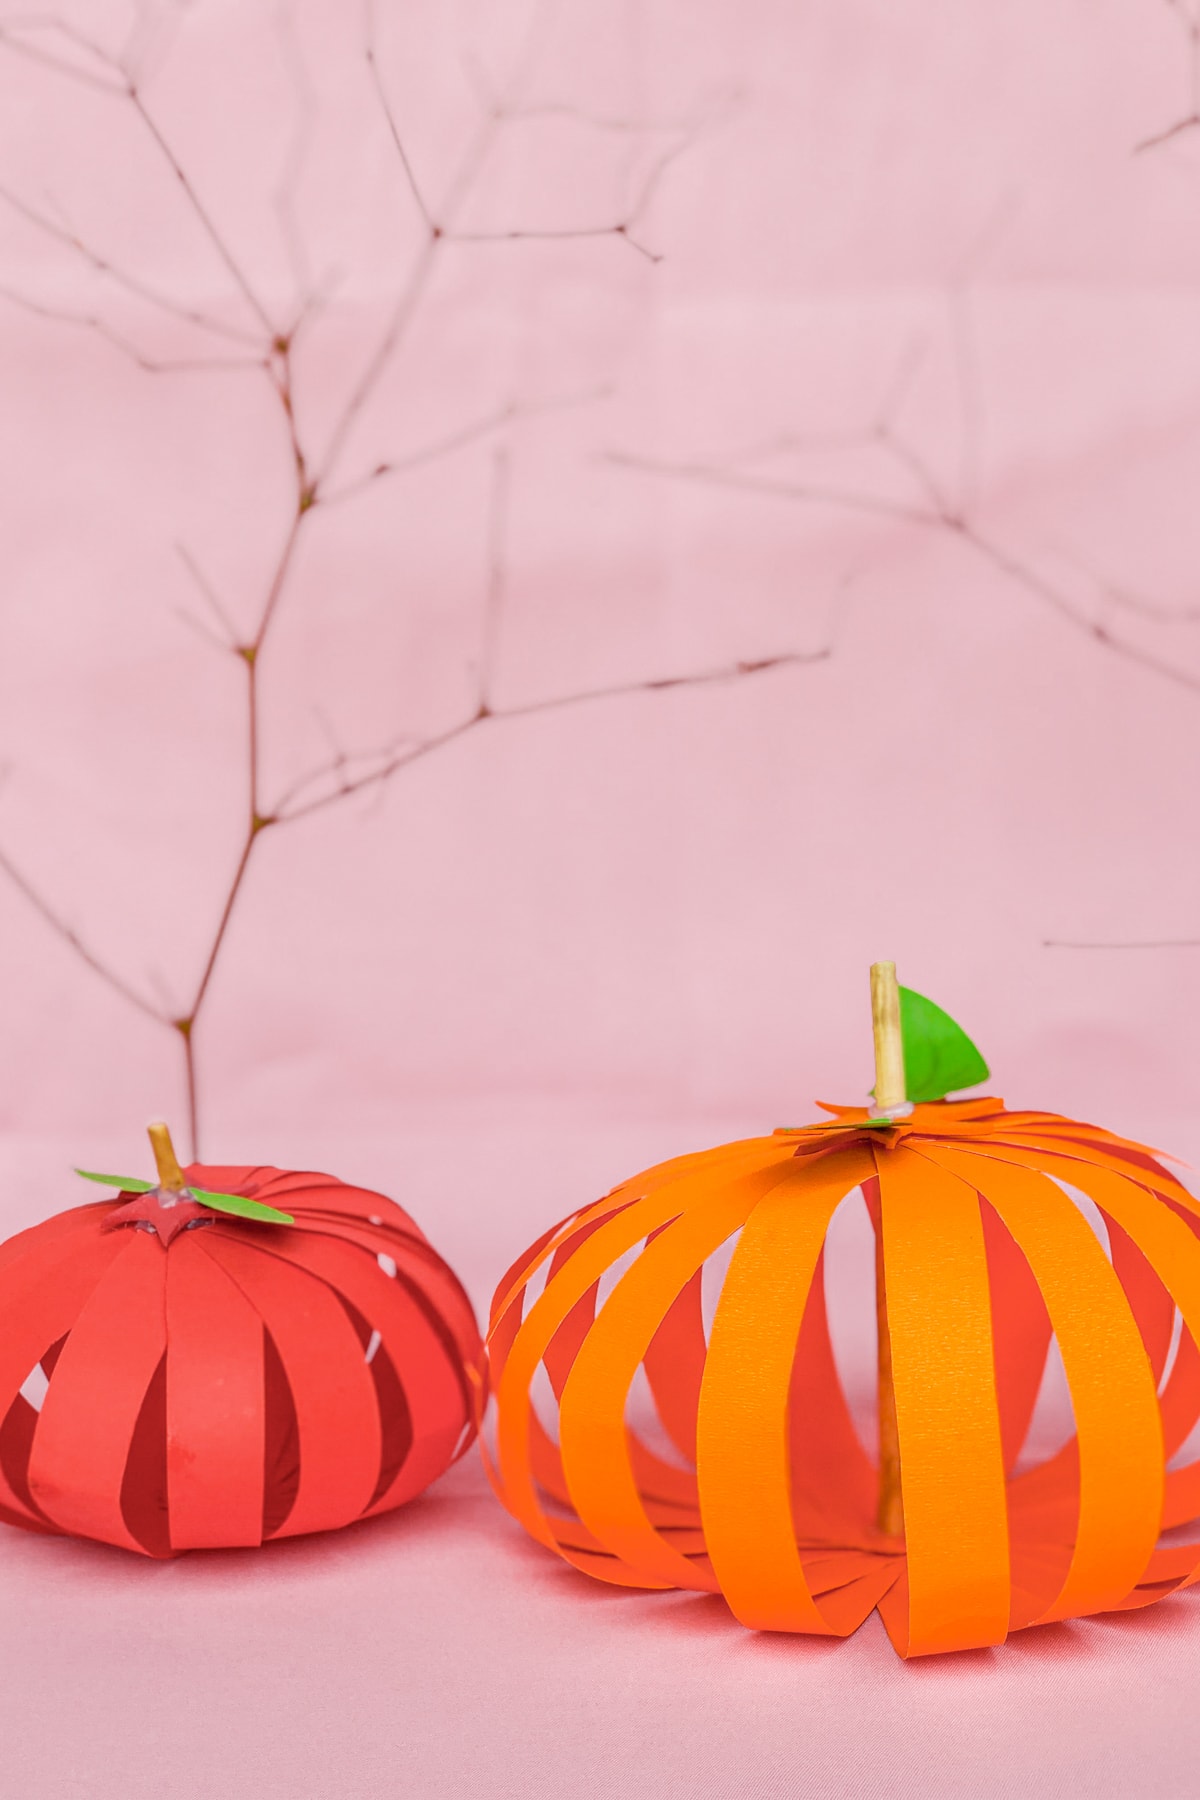
Colored craft paper: We used orange and red for our pumpkins, and green for the leaves. Scrapbook paper works great for this too.
Foam sheet: To match your pumpkin color. This is optional, you could use orange paper, but the foam sheet makes it a little more durable.
Twigs: A thin one, to make the stem of the pumpkin.
You’ll also need some basic supplies like:
- A glue gun & glue stick
- Craft glue
- Scissors
- Ruler
How to Make a Paper 3D pumpkin
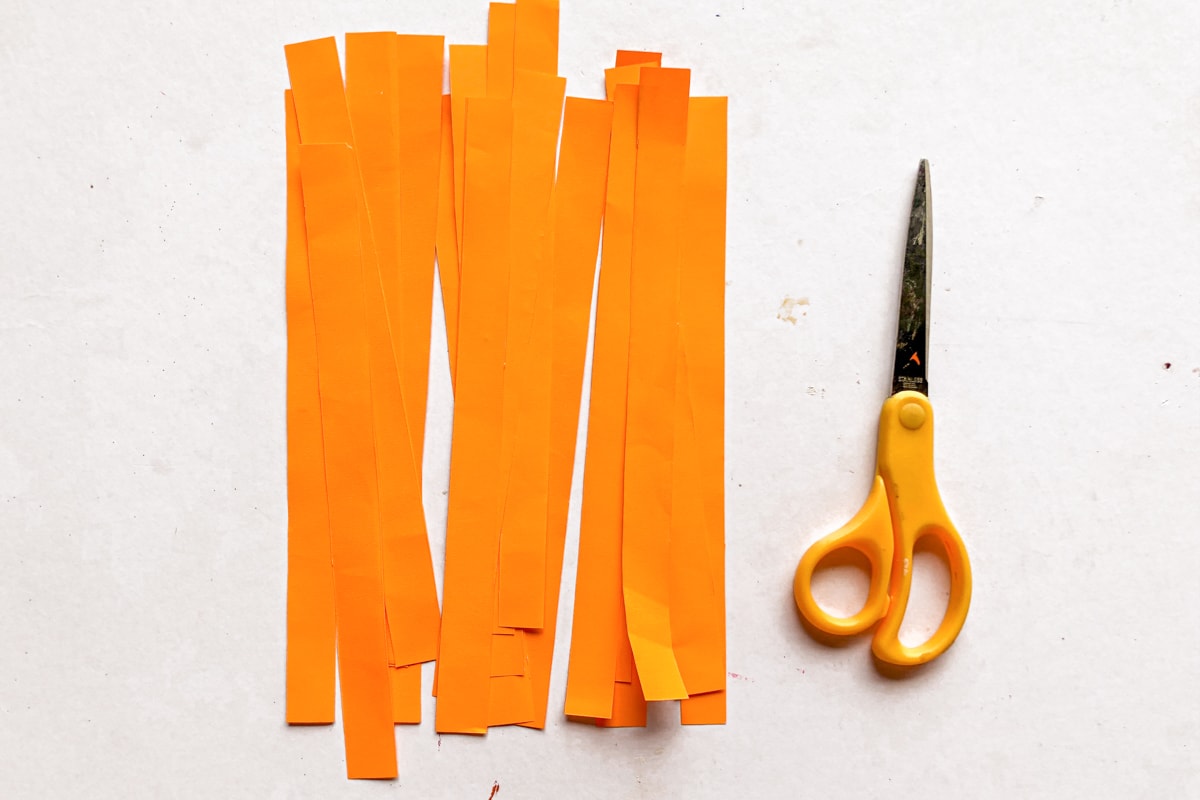
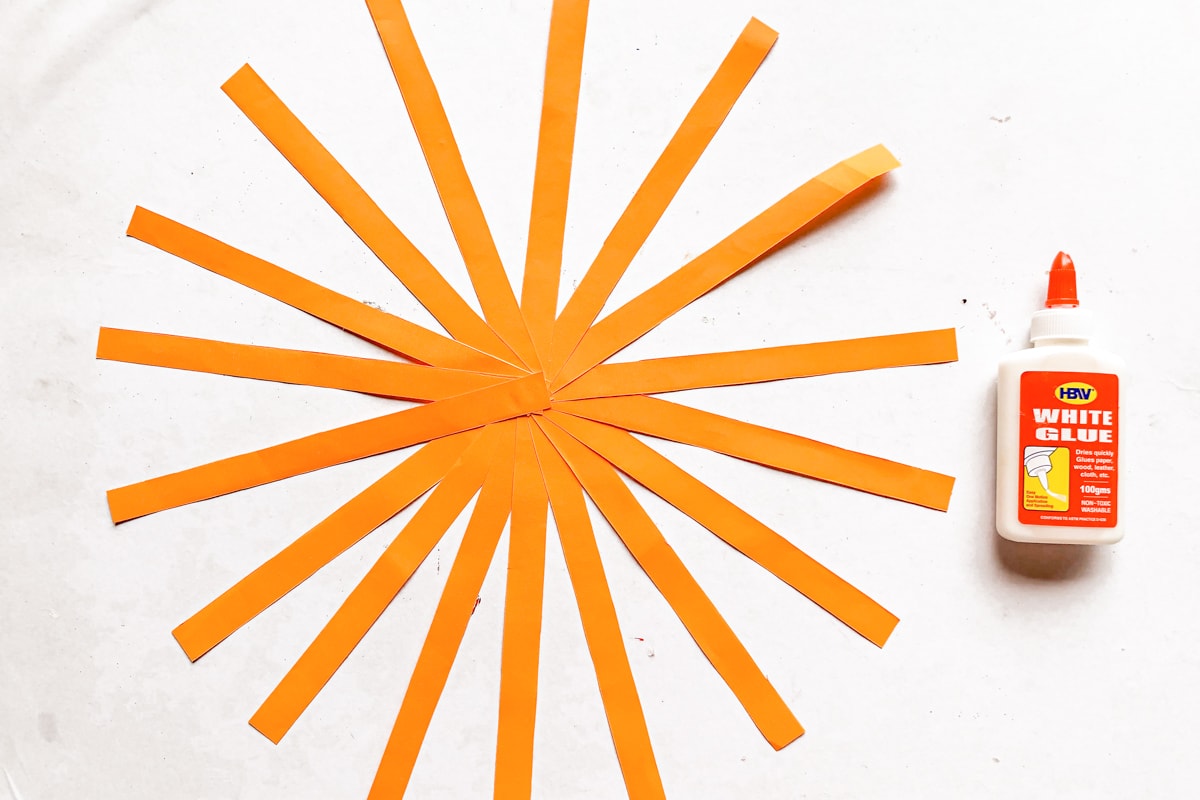
Start by taking your orange construction paper and cutting it into even paper strips.
We used 17 strips for this pumpkin, but you can use as many or as few as you like. The longer the strips are the larger your pumpkin will be.
The more strips you use, the fuller your pumpkin will look.
Try not to make your strips too thick. I found that 1/2-inch strips work well.
Next gather up all the strips of paper and start layering them all on one end, so they start forming a circle, like shown below.
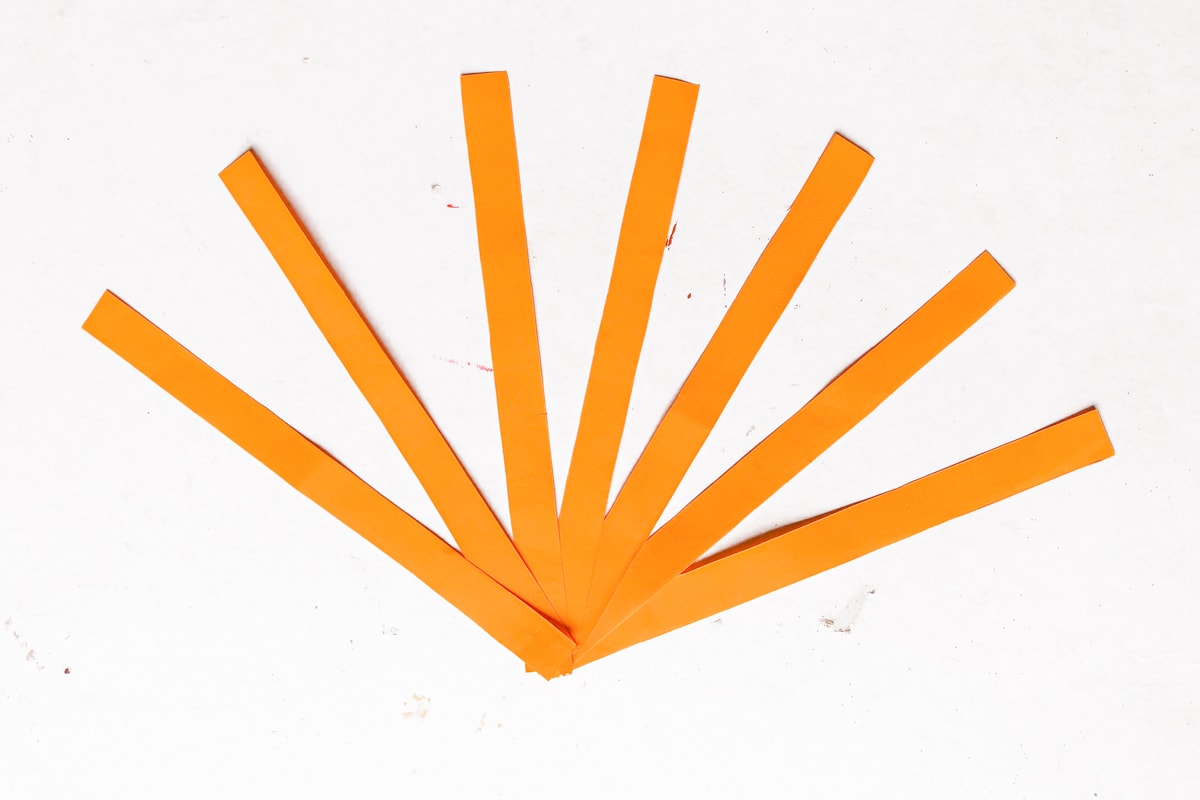
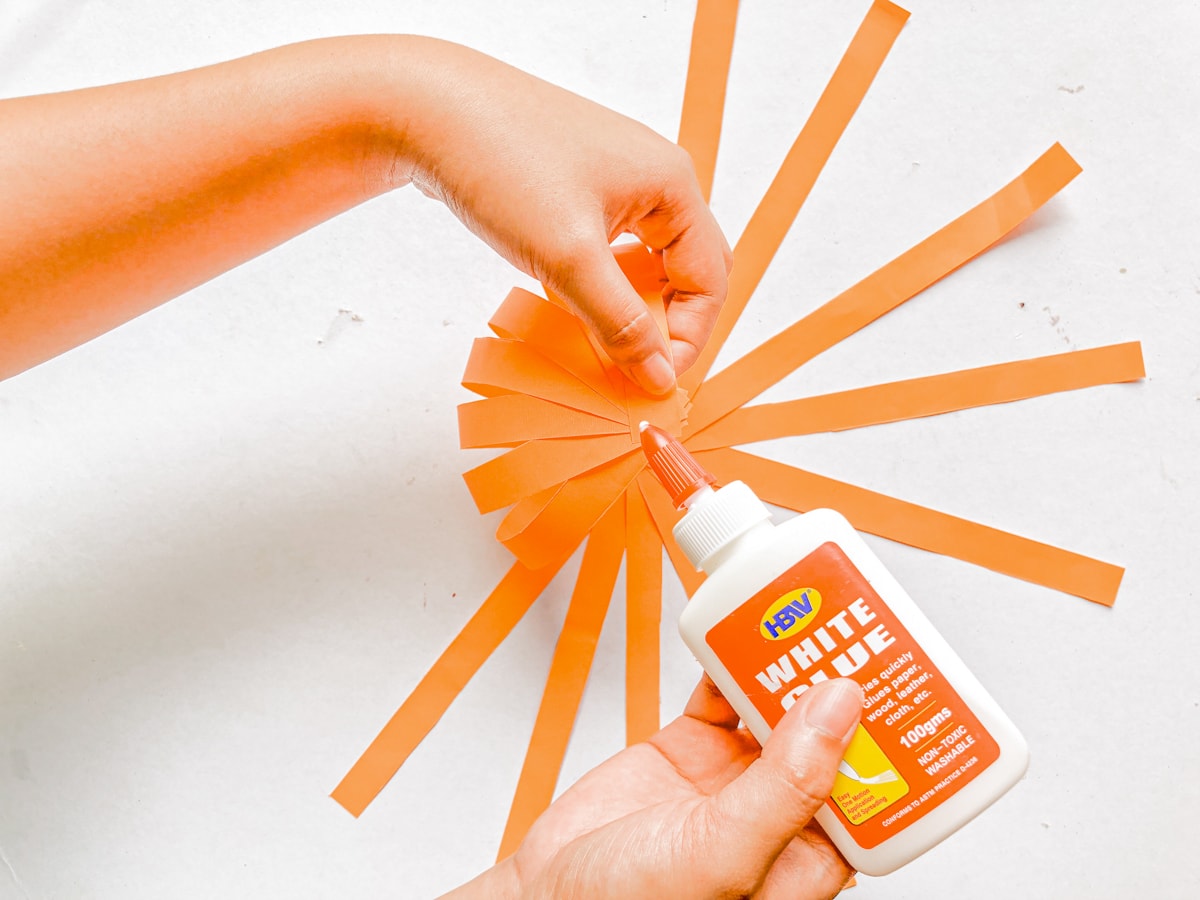
Glue all the pieces together, one to top of another, until you have a full circle of paper strips.
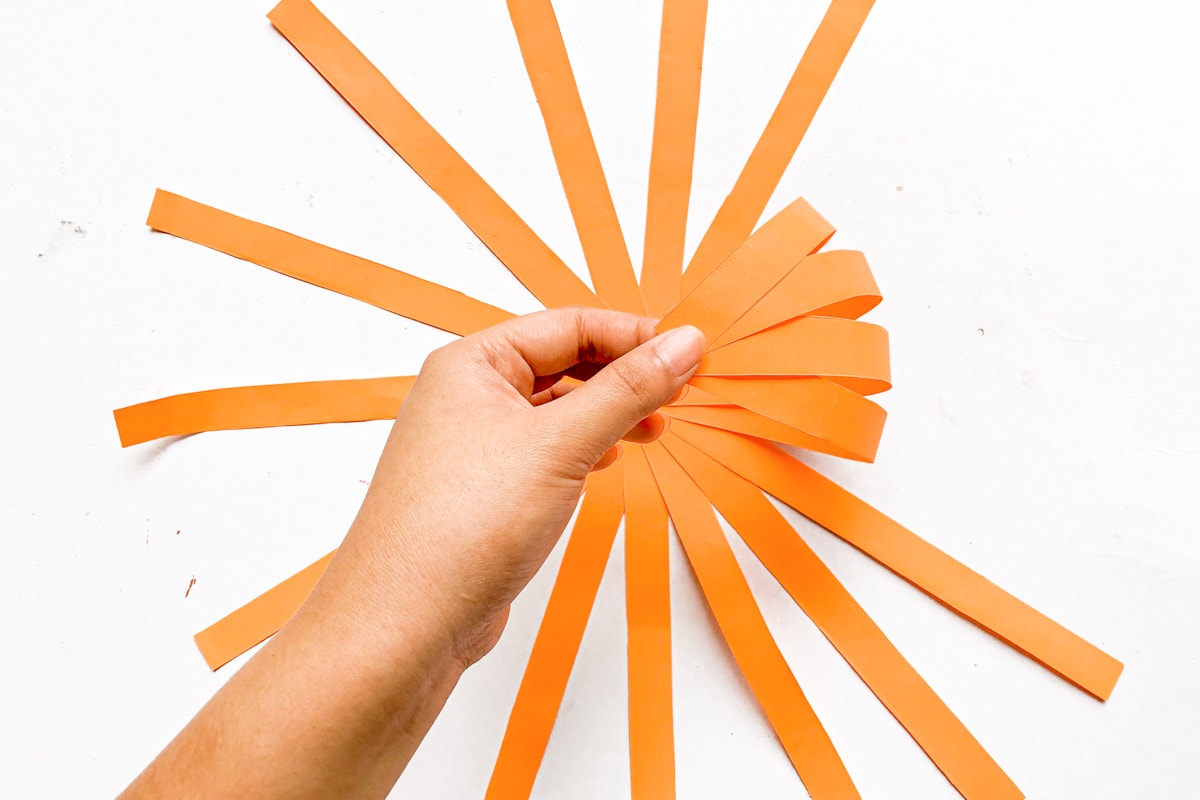
Once you have the paper strip circle shape, you can start creating your pumpkin shape.
To do this start gathering the outside ends of the strips and bringing them to the center of the pumpkin.
Then start gluing them together in a similar way you glued the bottom of the pumkin.
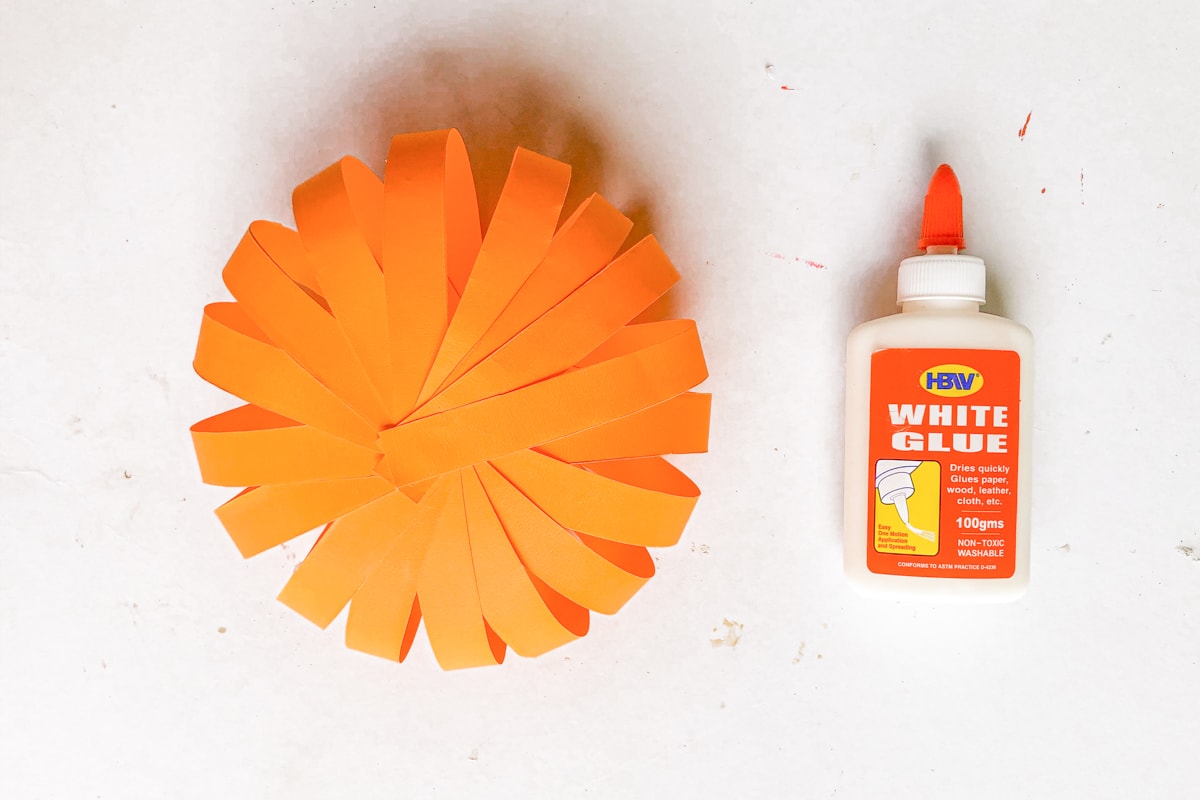
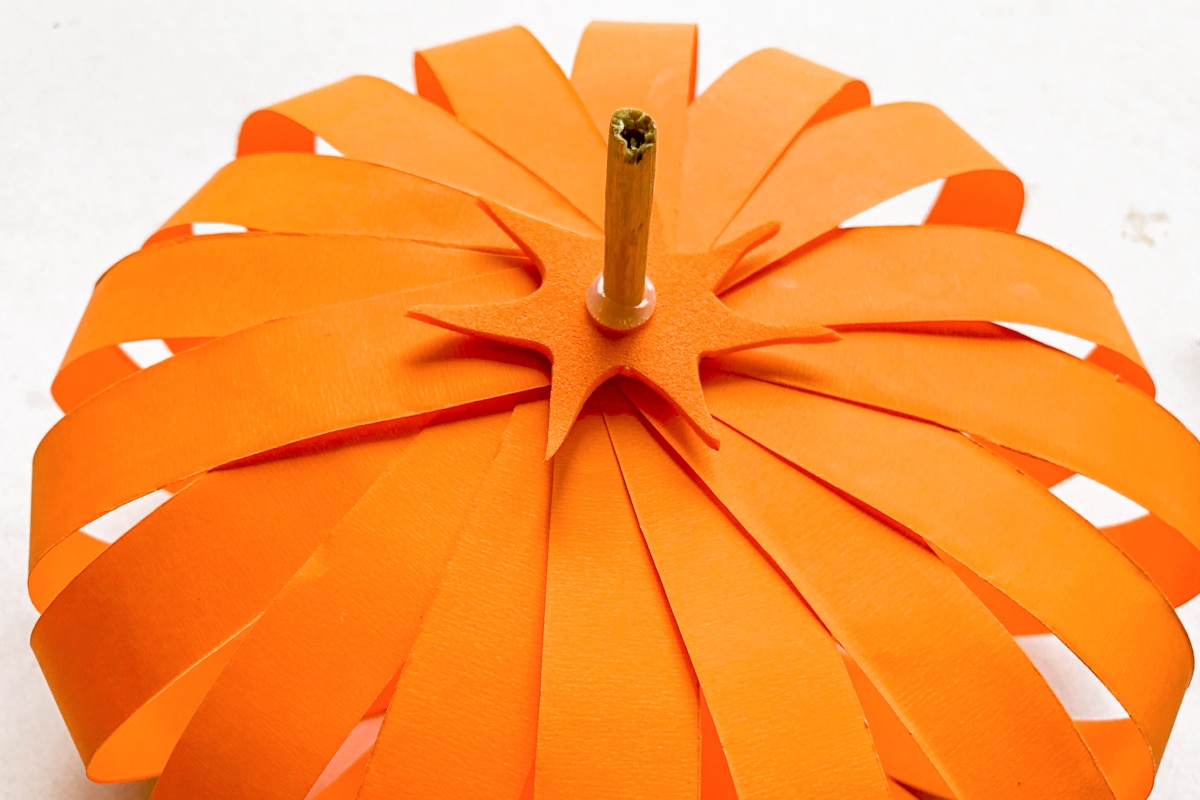
Once it’s all glued together, you should have a round pumpkin shape.
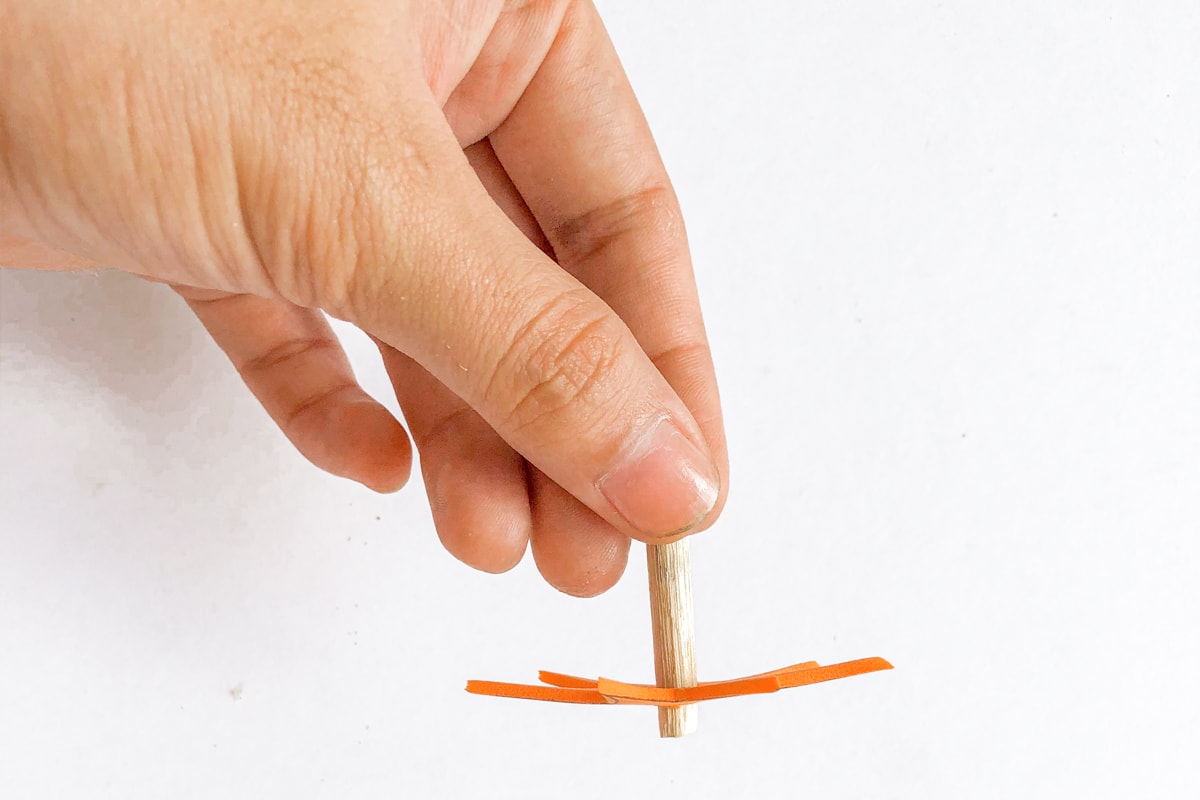
While your paper pumpkin dry’s, you we can work on the stem.
Draw a simple flower shape on your foam sheet of paper and cut it out.
Create a hole in the center of it.
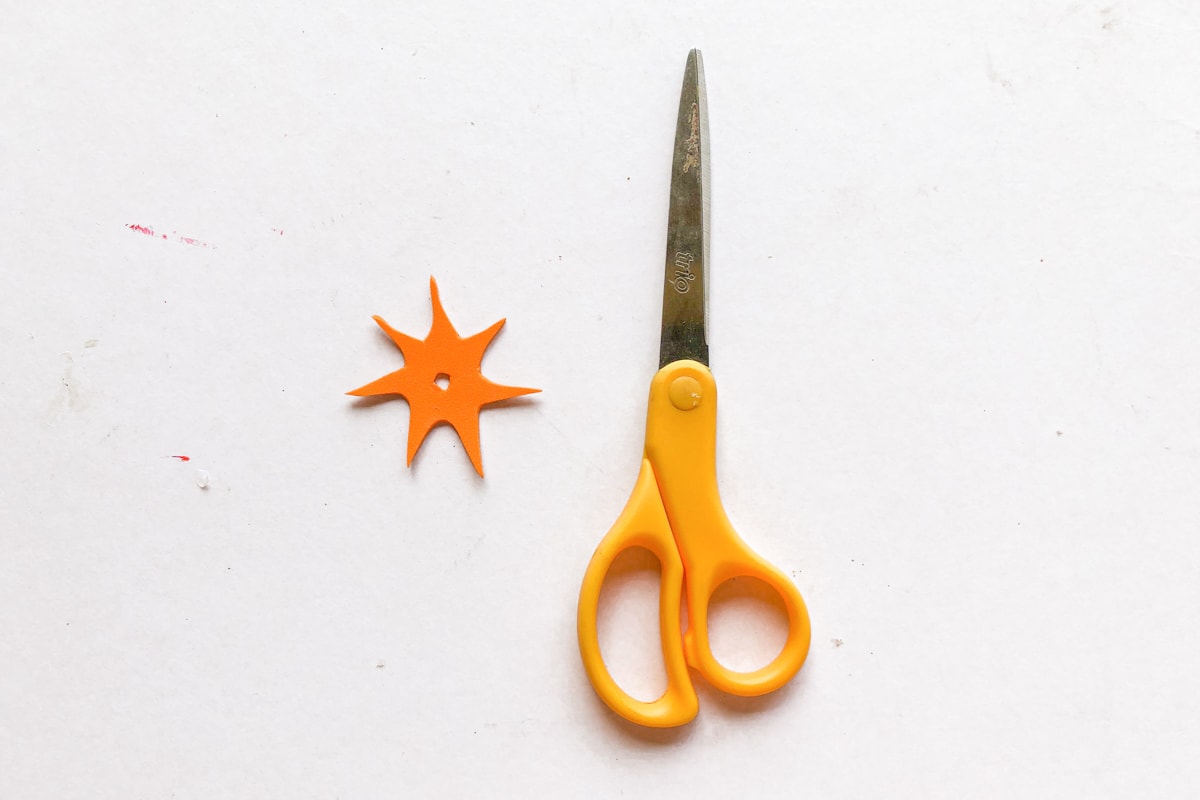
Cut your twig down to about an inch, and insert it into the hole of the foam flower. This will be the pumpkin’s stem.
Now you can use your glue gun to attach the twig and foam cut out to the top of the pumpkin shape.
Next, it’s time to add the leaves! One your green craft paper, draw and cut out two leaf shapes.
You can use one of our printable leaf templates or free hand it.
Glue them to the top of the pumpkin.
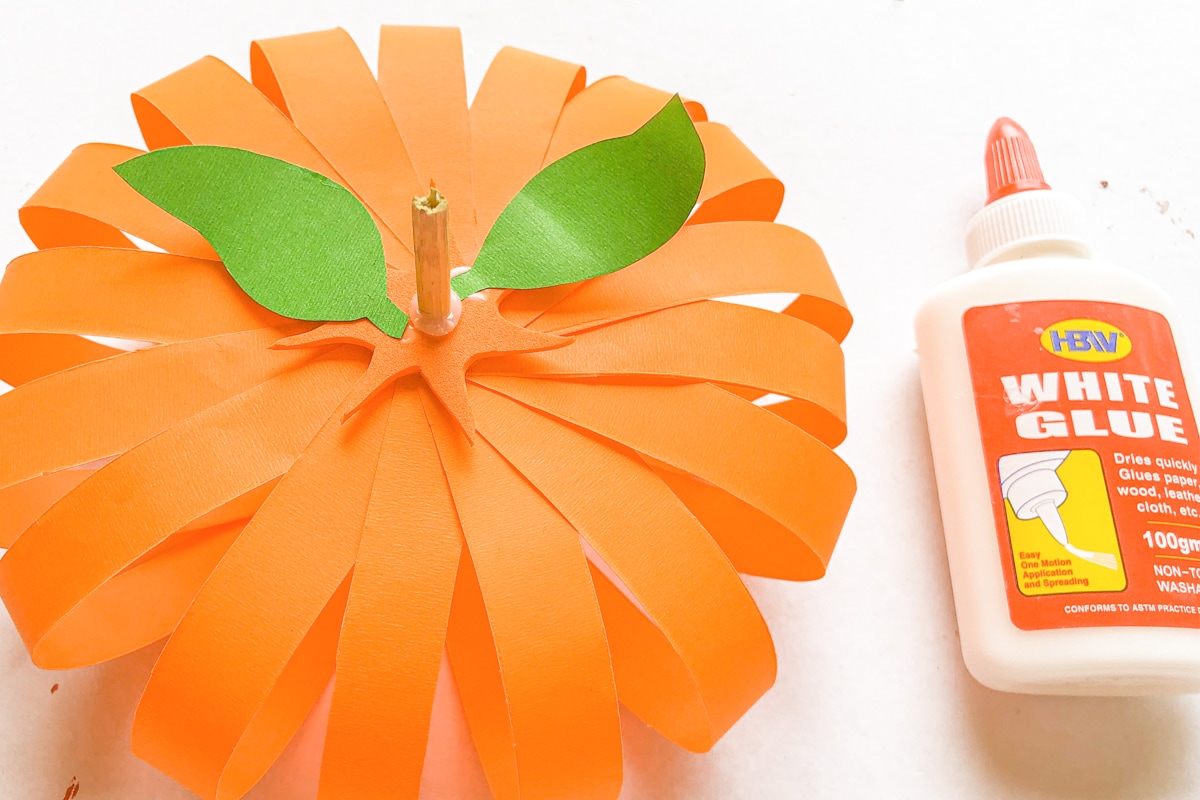
And that’s it! You can repeat this making as many pumpkin shapes as you like.
My kids love making these 3D paper pumpkins. We like to use them to decorate the house. But they’d make great classroom decor for fall as well.
And you can grab the printable instructions below. Make sure to check out more of our Thanksgiving crafts and activities!
Paper Strip 3D Pumpkin
This fun and easy 3D pumpkin craft is made from paper strips! It's a fun and easy pumpkin craft kids and adults will both love.
Materials
- Colored craft paper: Orange and green
- Orange foam paper
- Thin twig
Tools
- Glue gun
- Craft glue
- Scissors