Printable Paper Christmas Village (Free Templates)
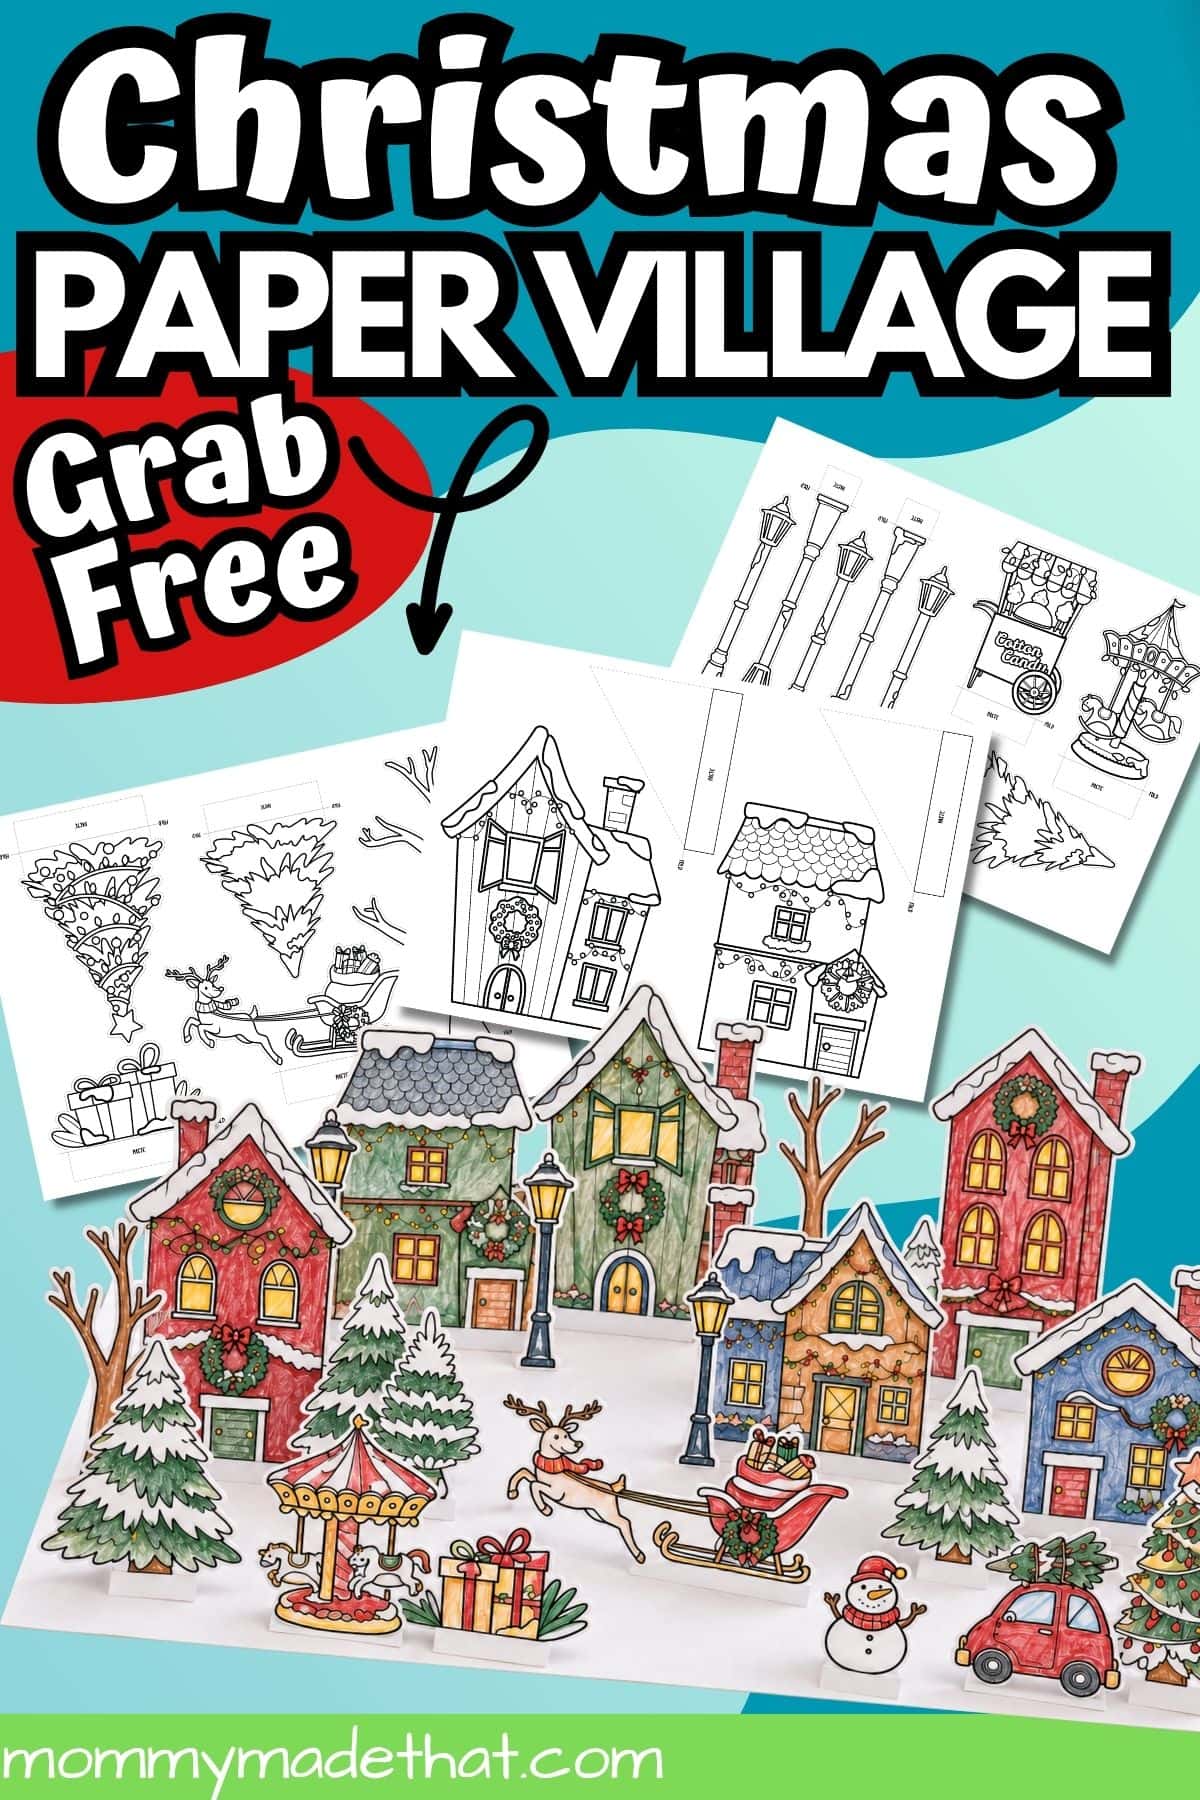
Create a snowy little neighborhood with this printable paper Christmas village! The free nine-page set includes houses, a church, trees, and festive extras for kids to color, cut out, and arrange into their own holiday scene.
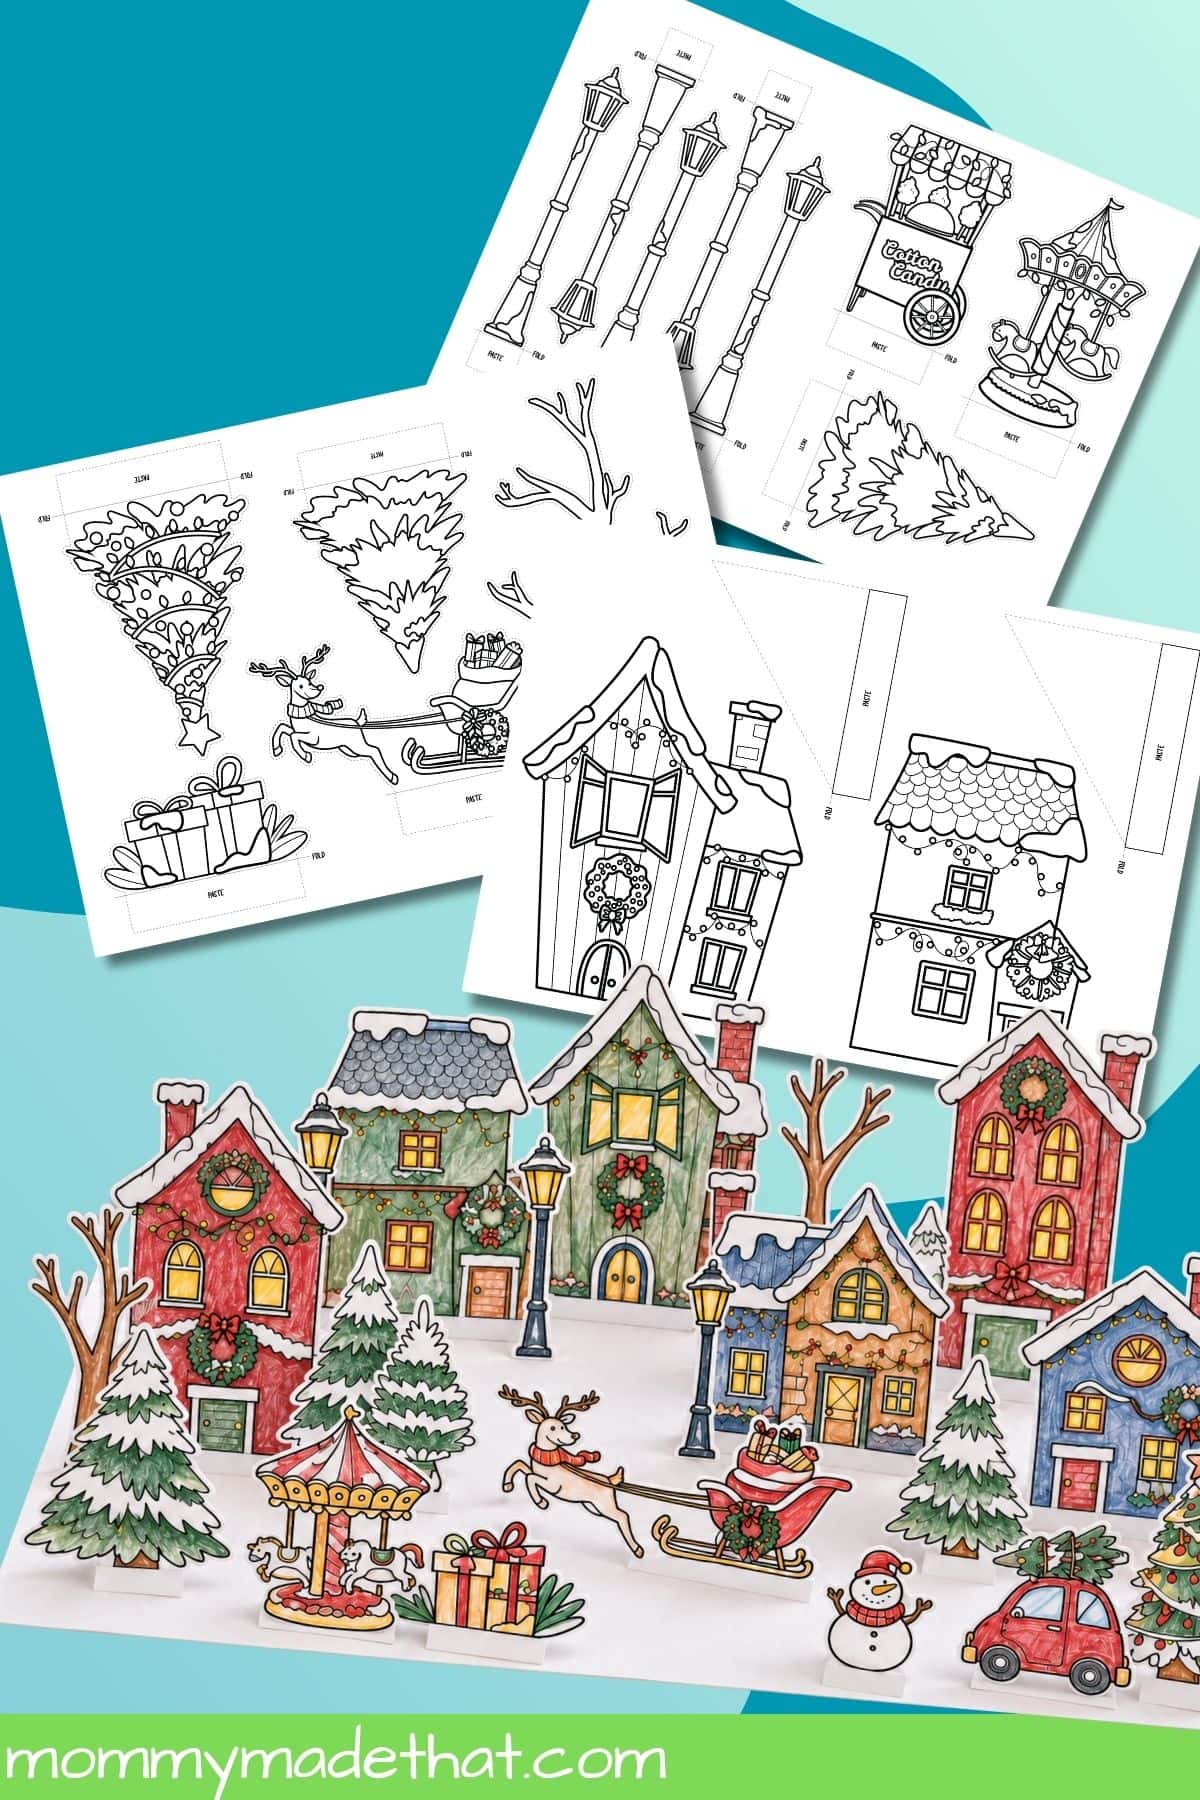
Fill a street with colorful houses, park a Christmas tree-topped car outside, or give the carousel its own spot in the town square. These stand-up paper pieces make a lovely shelf display or a setting for pretend play. Find more activities to pair with it in our Christmas printables collection.
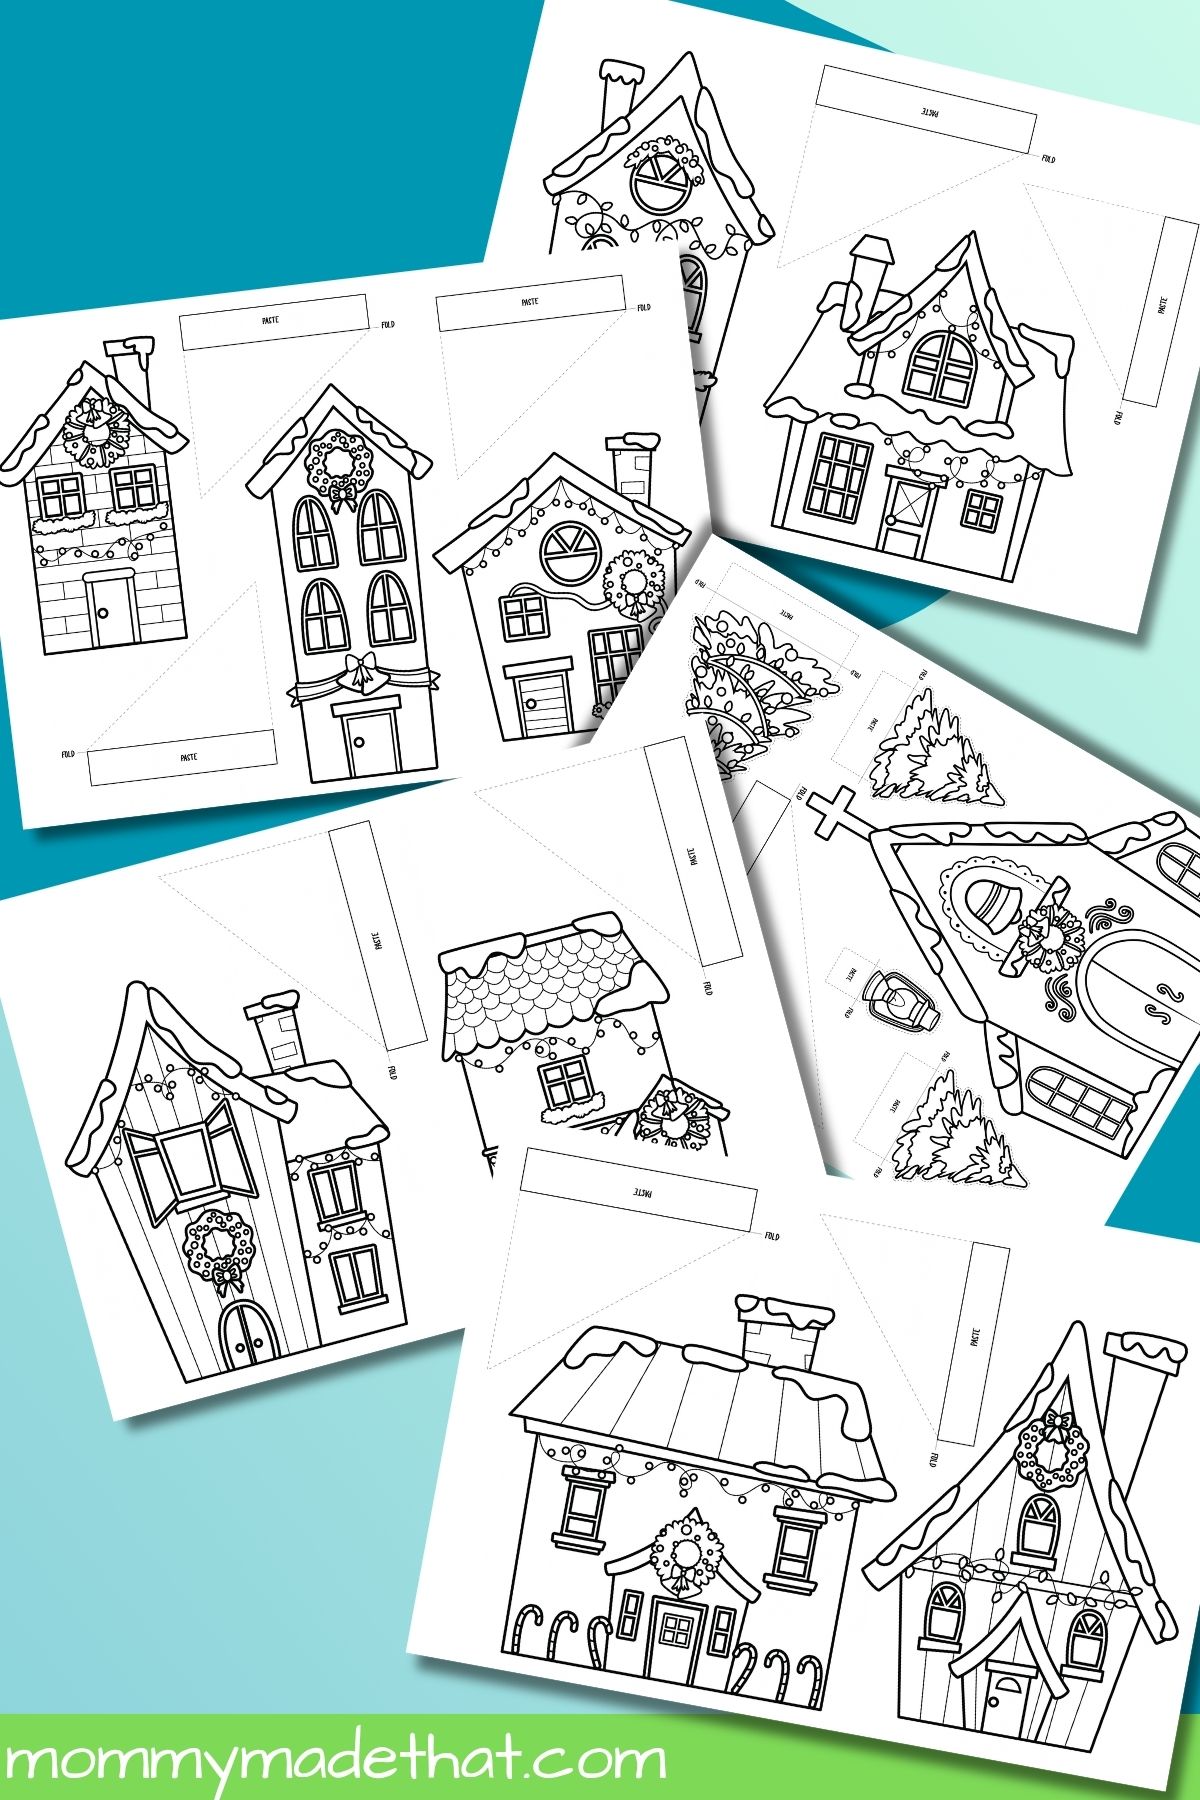
The buildings in this set are flat illustrated fronts with attached folding supports. If you’re looking for houses with walls and roofs that fold into enclosed shapes, try our winter paper house templates or 3D paper house templates.
Why You’ll Love This Christmas Village
- Color it your way: All nine pages are black and white, so you can choose traditional Christmas colors, soft pastels, or a snowy white village.
- Make a little or a lot: Start with a favorite house and a tree, then add more pieces over several craft sessions.
- Share the project: Let each child decorate a building and bring the finished pieces together for a group display.
- Keep playing: Rearrange the streets and tell stories about the people who might live there.
Materials
- The printable paper Christmas village PDF, available through the signup section below
- White paper or lightweight cardstock
- Crayons, colored pencils, or markers
- Scissors
- Glue or double-sided tape
- A ruler to help with folds
- A large sheet of cardstock or a piece of cardboard for a village base
Lightweight cardstock gives the tall houses and trees more support. The smaller details take a little patience to cut, so younger children may enjoy coloring while an adult helps with cutting and folding.
What’s Included in the Printable
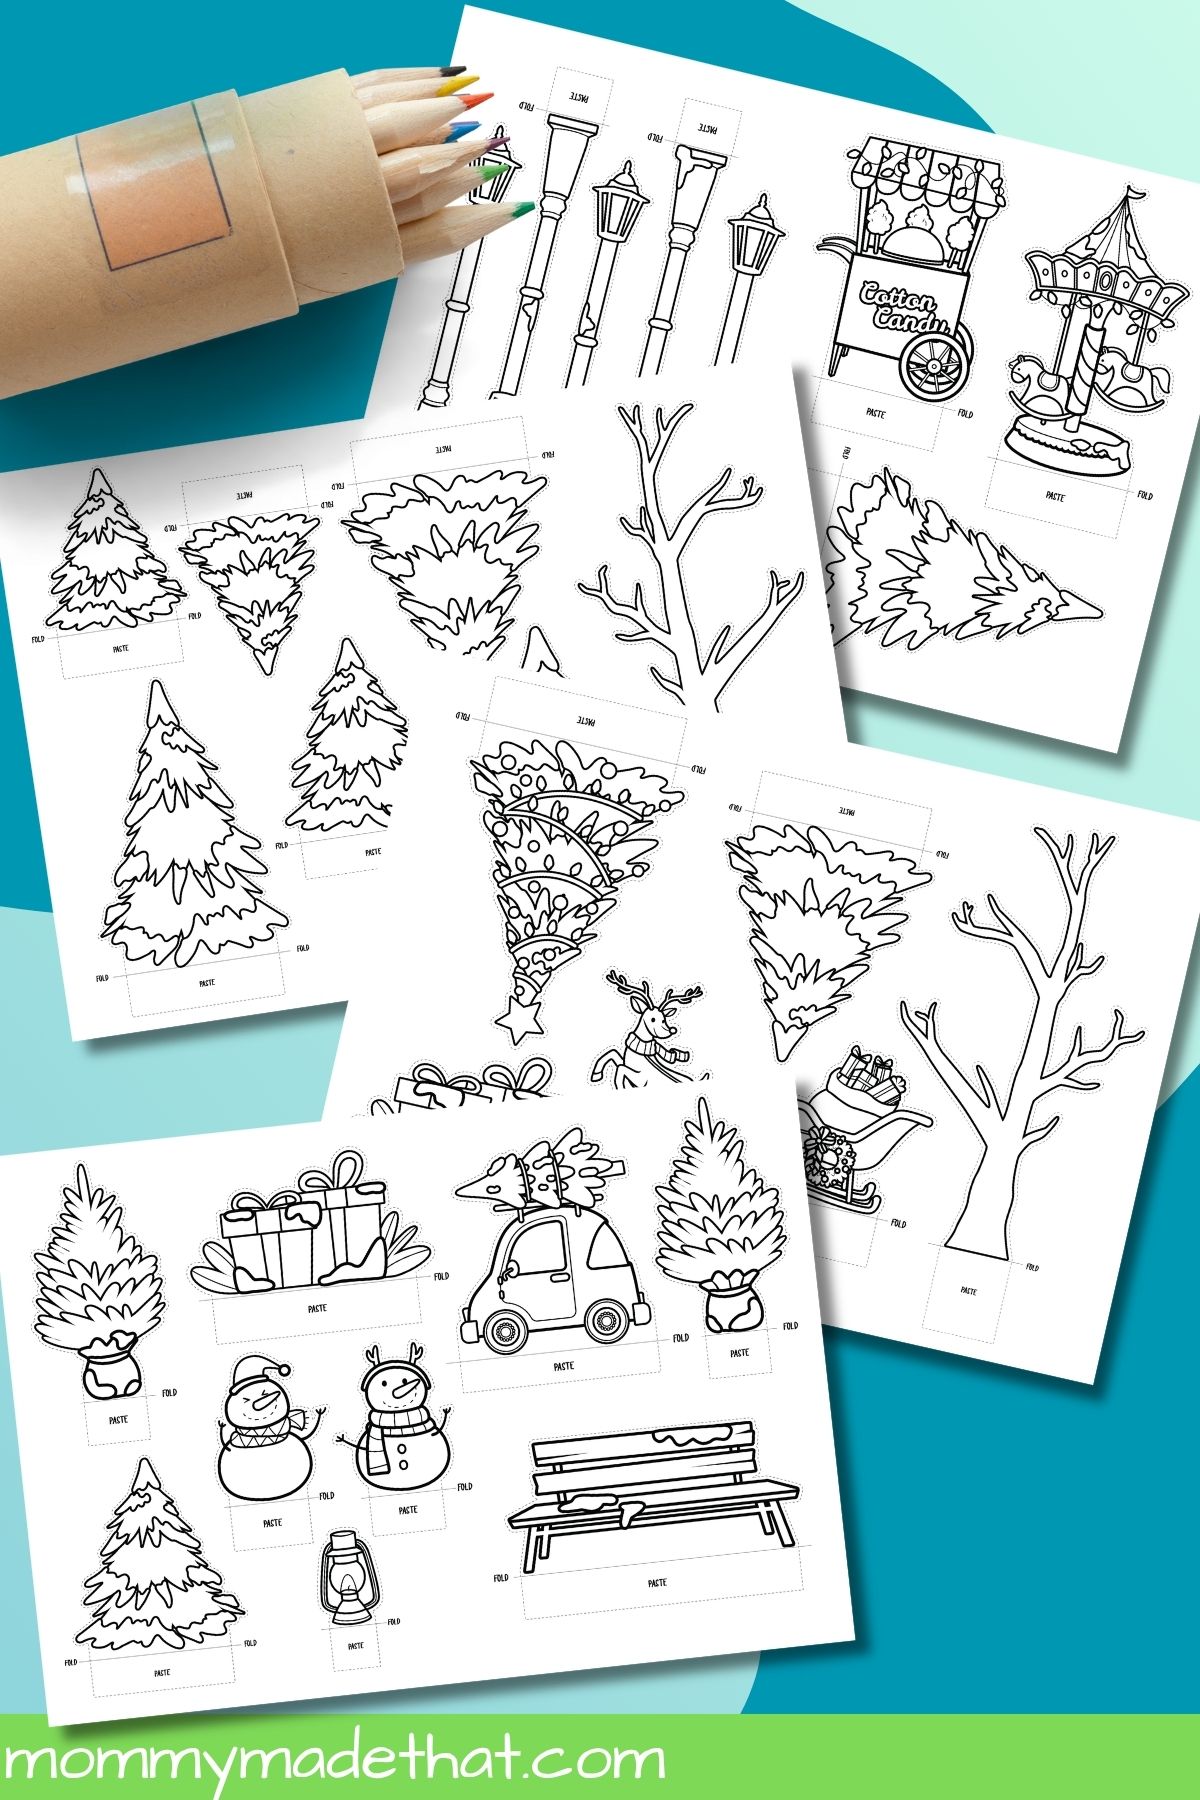
This free printable Christmas village template set has nine landscape pages. You’ll get nine house fronts and one church front, along with a collection of smaller decorations to fill the spaces between the buildings.
- Snowy evergreen trees, decorated Christmas trees, and bare winter trees
- A reindeer pulling a sleigh filled with presents
- Gift piles and two snowmen
- A car carrying a Christmas tree
- A bench, small lanterns, and streetlamps
- A cotton candy cart and a carousel
The houses have different rooflines, windows, doors, wreaths, and strings of lights. The pieces include marked fold lines and paste tabs. There’s no precolored version in this PDF; the outlines are ready for you to decorate.
How to Make Your Paper Christmas Village
1. Print the pages you want. Open the PDF and choose a few pieces to begin with, or print all nine pages for the full village. Use the same print scale for every page so the pieces keep their intended sizes relative to one another.
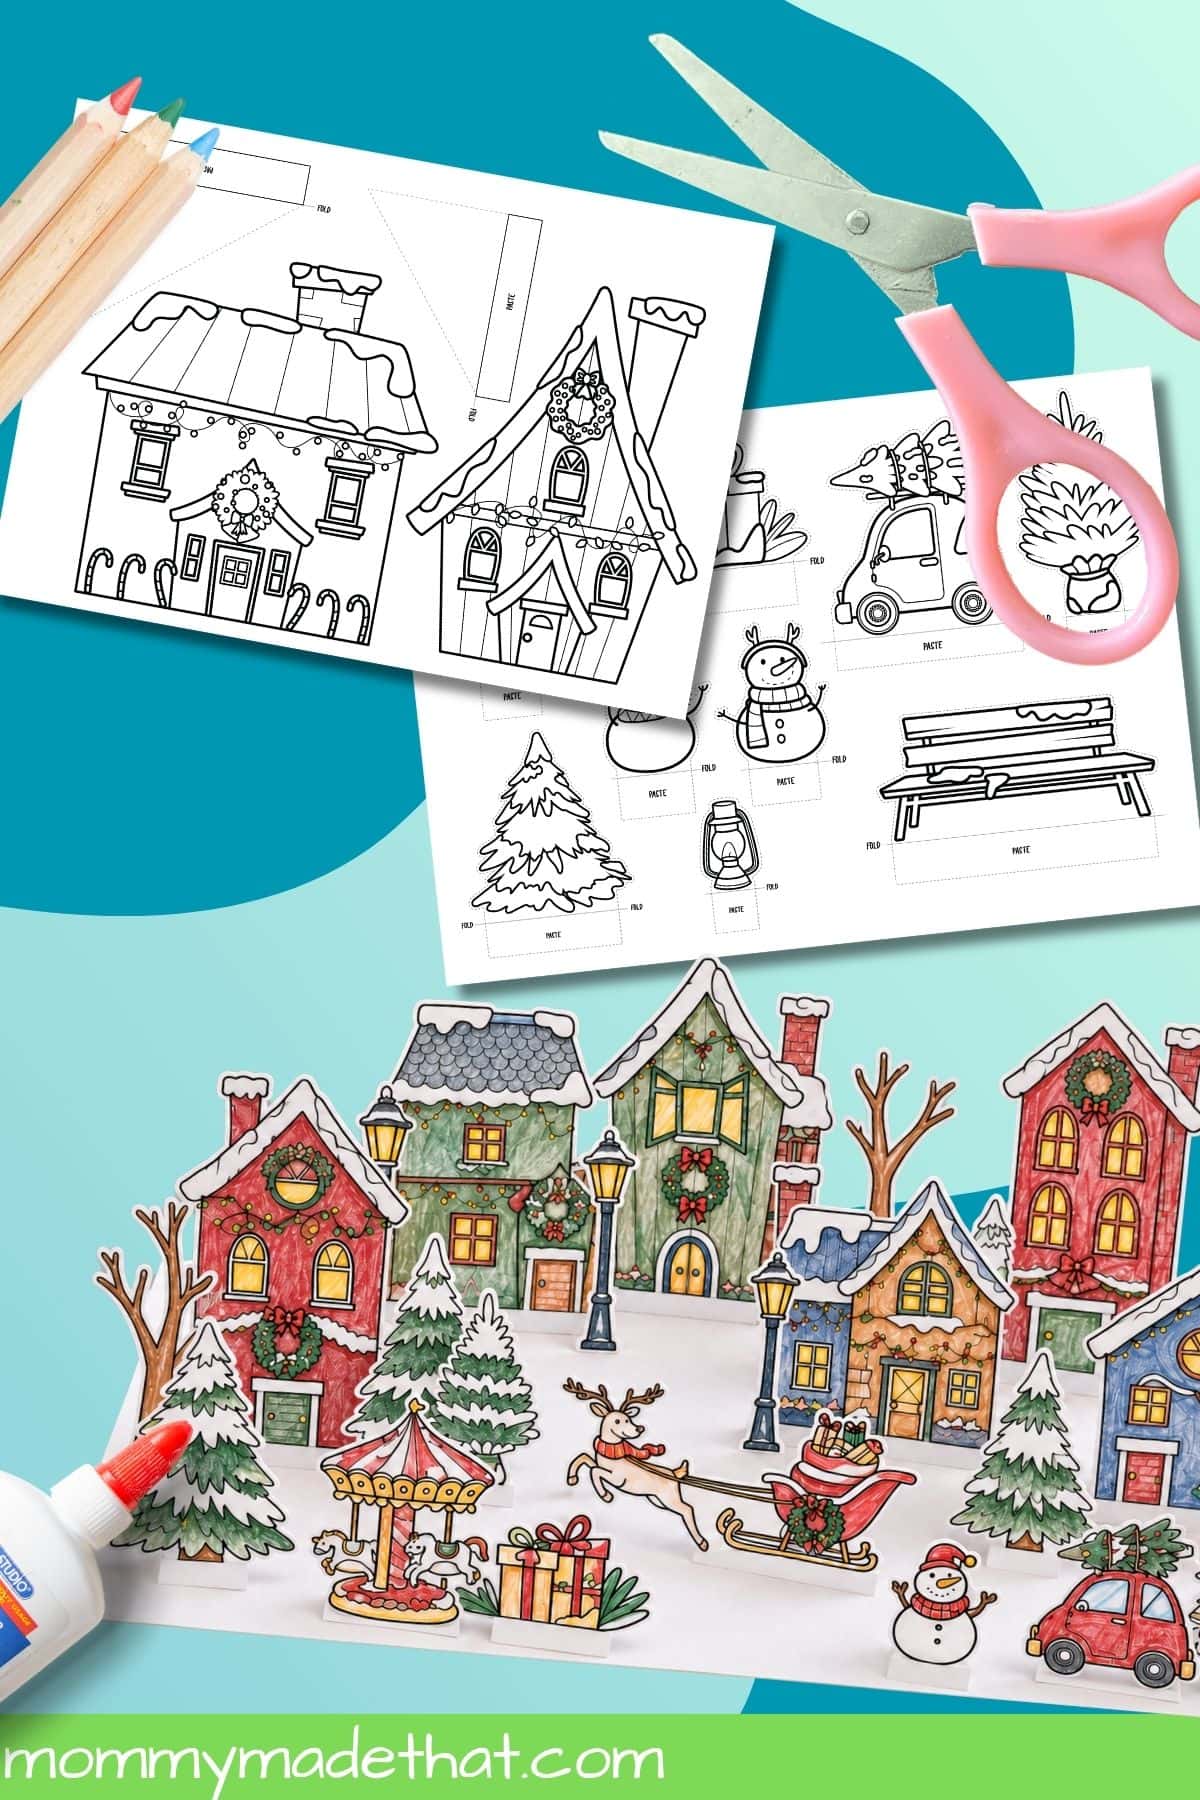
2. Color before cutting. It’s much easier to color the windows, wreaths, and little roof details while the designs are still on a full sheet of paper. Leave the snow white or add a little pale blue shading around its edges.
3. Cut out the pieces. Follow the outside cutting outlines and keep the attached support sections and paste tabs. Don’t cut away a tab just because it sits outside the illustrated shape, and leave the marked fold lines intact.
4. Fold the supports and tabs. Use a ruler to help crease the lines labeled “Fold.” Fold the building support sections behind the illustrated fronts. Fold the smaller scenery tabs back so they can sit against your display base.
5. Secure and arrange. Use the labeled paste tabs to secure the folded supports. Position the houses on a flat surface, then arrange the trees, streetlamps, and other scenery around them. Glue the scenery tabs to your base once you’re happy with the layout. Let the glue dry before moving the display.
Tips for Building and Decorating
Start with one building. Work through coloring, cutting, and folding a single house before tackling the whole village. You can add another house whenever you have time.
Plan your layout before gluing. Put taller buildings toward the back and shorter decorations near the front. Leave little gaps so the snowmen, bench, and sleigh can still be seen.
Use small amounts of glue. Too much can soften the paper and make the supports harder to hold in place. Press each join gently and give it time to dry.
Give the village a setting. Draw paths and a town square on the base, or add a blue paper pond. Our printable Christmas trees are another option if you’d like folded trees around the edge of your scene.
Ways to Use Your Christmas Village
Create a classroom town. Give each child a building or a few decorations to color. Decide together where the homes, trees, and town square should go, then assemble one shared display.
Tell a Christmas story. Who is arriving in the car? Where is the sleigh headed? Who is waiting at the cotton candy cart? Let kids move the pieces and use them to tell a story, or write a few sentences about their favorite house.
Practice planning and describing. Ask children to place a tree beside a house, a streetlamp between two buildings, or the carousel behind the bench. The scene gives them a hands-on way to explore position words.
For another activity to enjoy alongside your village, browse our printable Christmas crafts.
Printing Tips
- Print in landscape orientation, matching the PDF pages.
- Check the print preview so the outer pieces and tabs aren’t clipped. Use “Fit” if your printer needs to shrink the page to its printable area.
- Use the same settings for all nine pages.
- Choose lightweight cardstock if your printer supports it. Regular paper works too, though the larger pieces may need extra support.
- Print an extra copy of a favorite page if you want more houses or trees.
Grab the Free Printable
Grab the printable paper Christmas village here!
Put your name and email in the pink box below, and we’ll send the free printable straight to your inbox.
Subscribe to our newsletter and get these printables sent straight to your inbox! Already a subscriber? Don’t worry you won’t be subscribed twice but it will send this printable straight to your inbox!
(We will never share or sell your personal information. Read more on our privacy policy.) We will use the information below to send you our newsletter with latest posts and special offers.