Gingerbread Village Printable (Free 13-Page Christmas Craft)
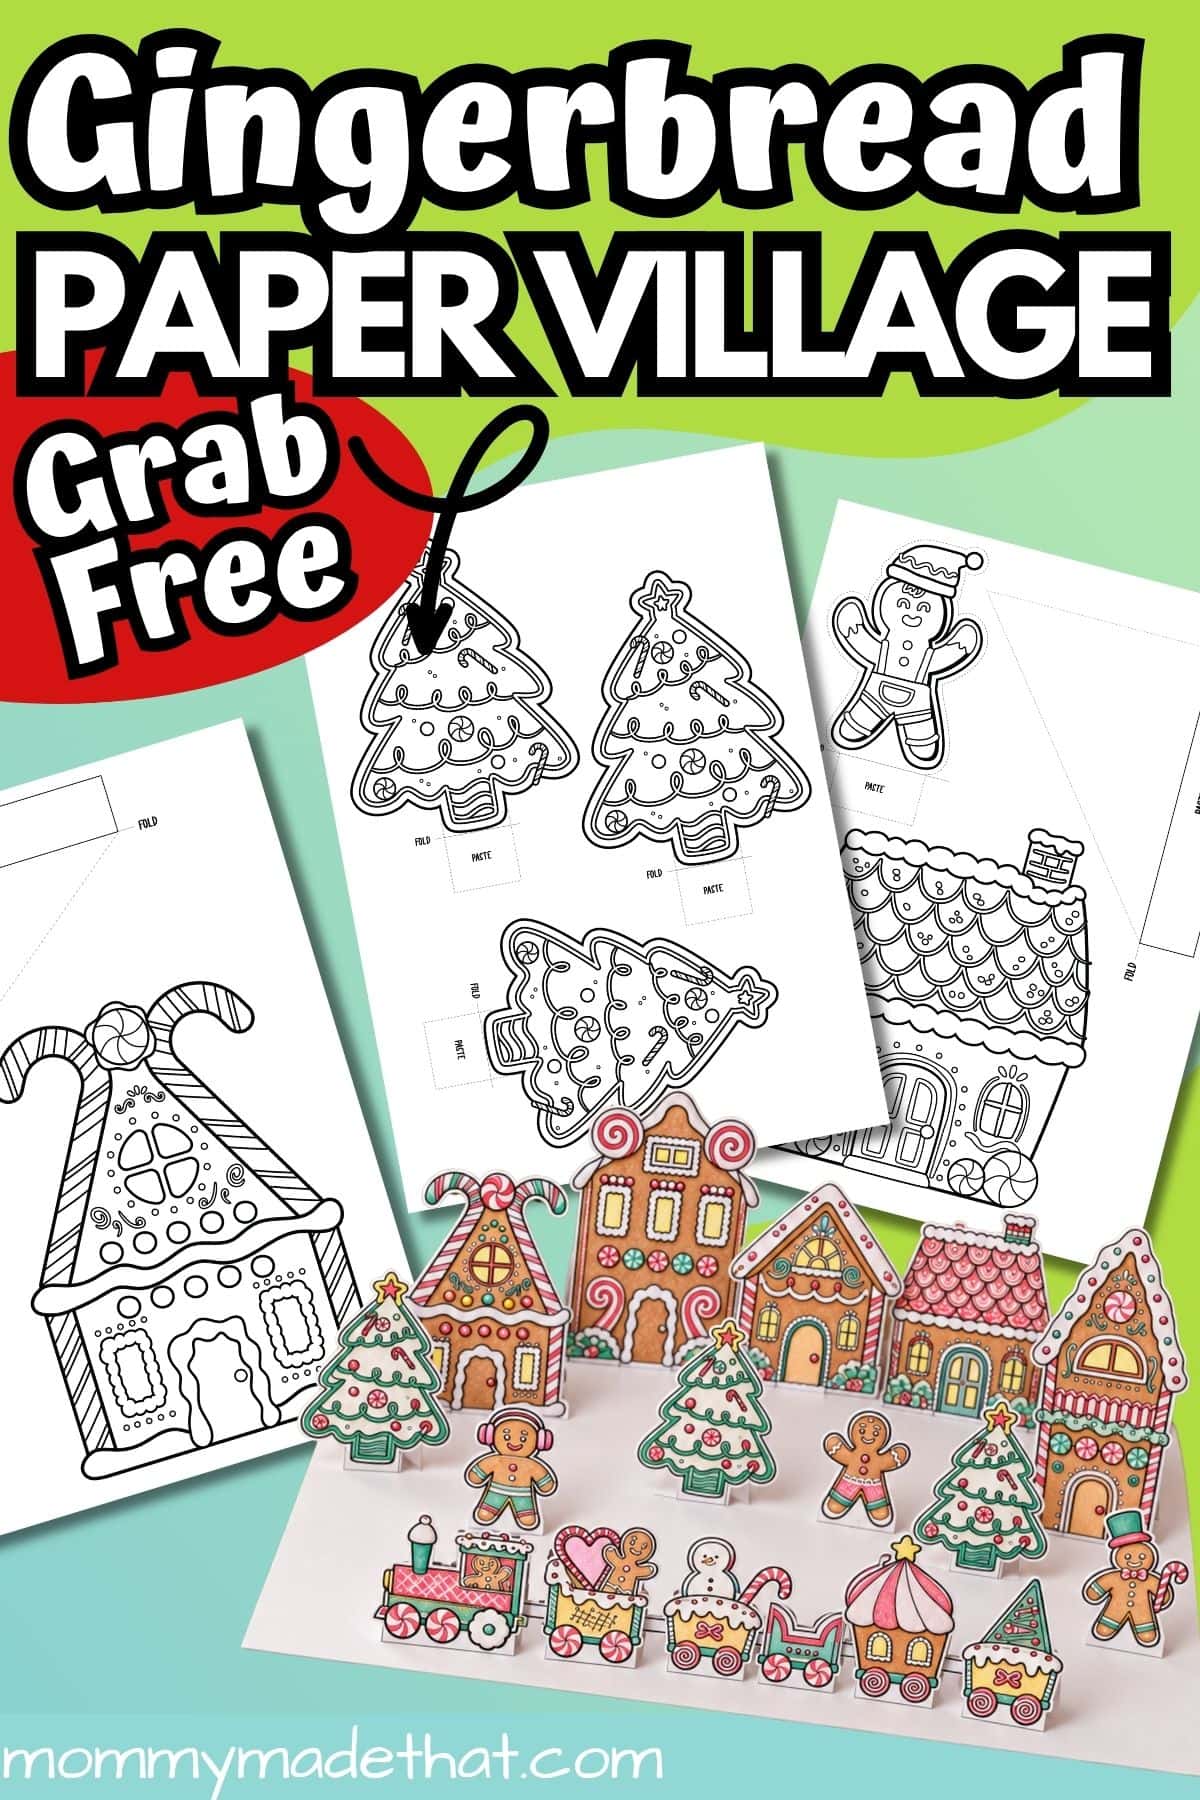
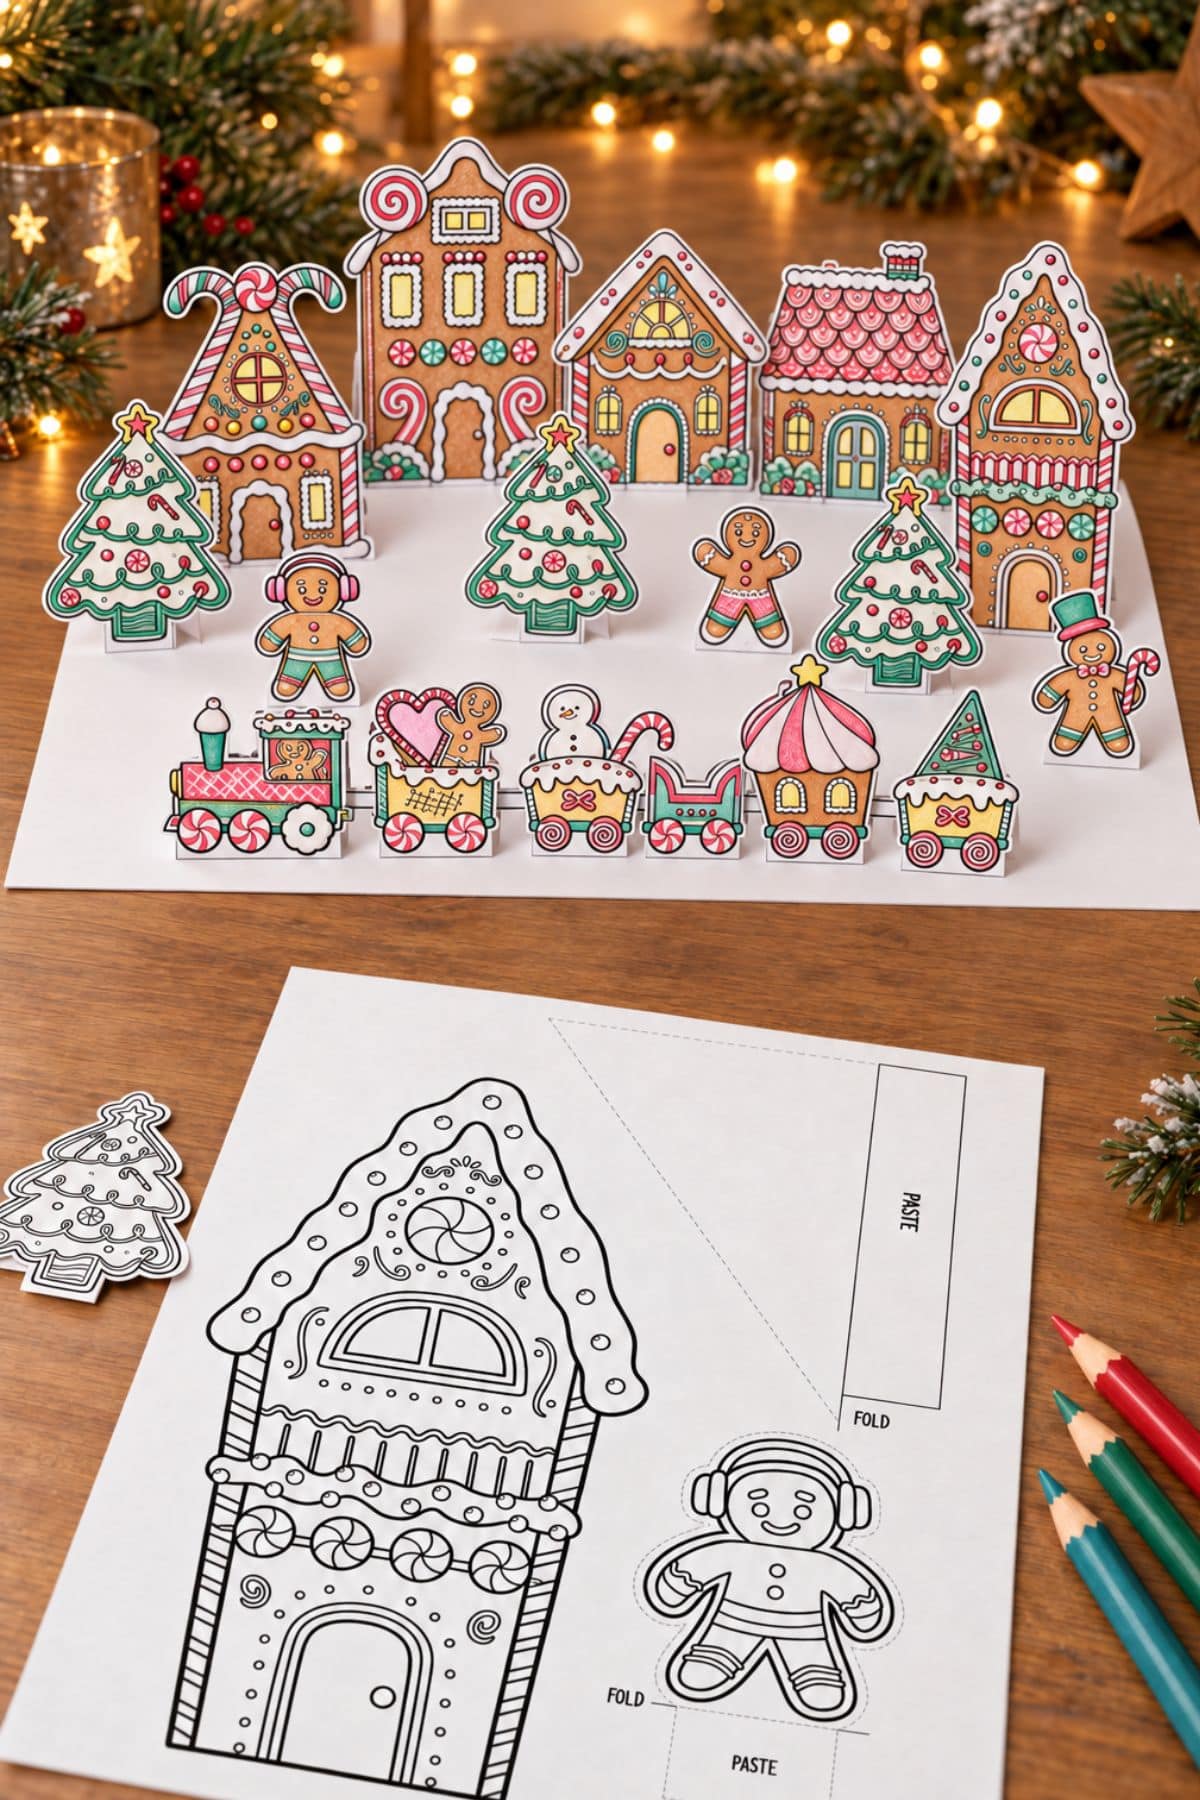
Make a little candy-covered town with this free gingerbread village printable! The 13-page PDF includes five gingerbread house fronts, cheerful characters, Christmas trees, and a candy train for kids to color, cut out, and arrange.
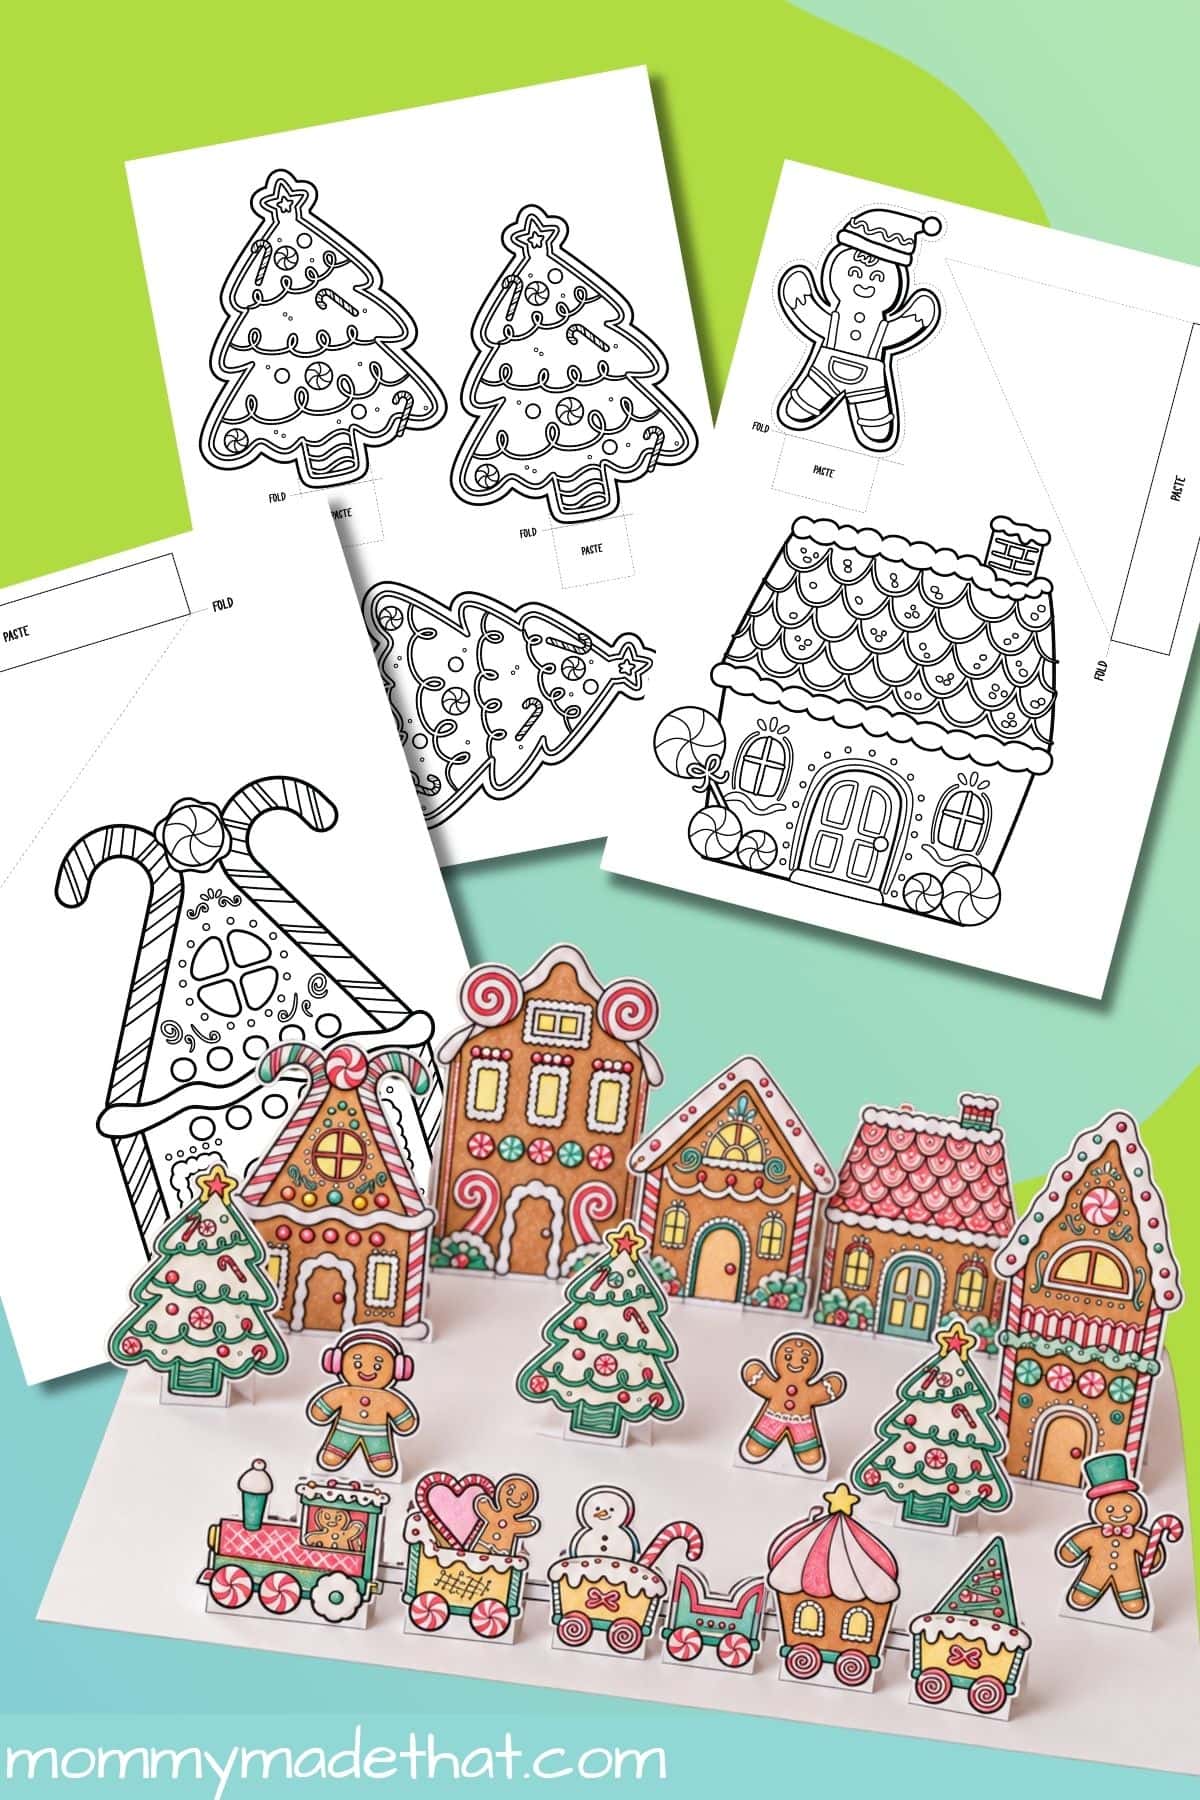
Choose one house for an afternoon craft or build a whole Christmas scene together. The templates are black and white, so every peppermint swirl, icing border, and gumdrop can be a different color. Get the PDF through the email signup section below.
These are stand-up paper pieces with folding supports and tabs. The houses are illustrated fronts, rather than enclosed buildings with four walls. For more projects to build, browse our printable paper houses and villages.
What’s Included in the Gingerbread Village Printable
The set contains 13 black-and-white printable pages. The PDF is sized for A4, but it also prints nicely on standard US Letter paper (8.5 × 11 inches)—just choose Letter paper, portrait orientation, and “Fit” or “Fit to printable area” in your print settings. Here’s where to find the pieces so you can print just what you need:
- Pages 1–5: Five different gingerbread house fronts with attached support sections. Three of these pages also include gingerbread characters.
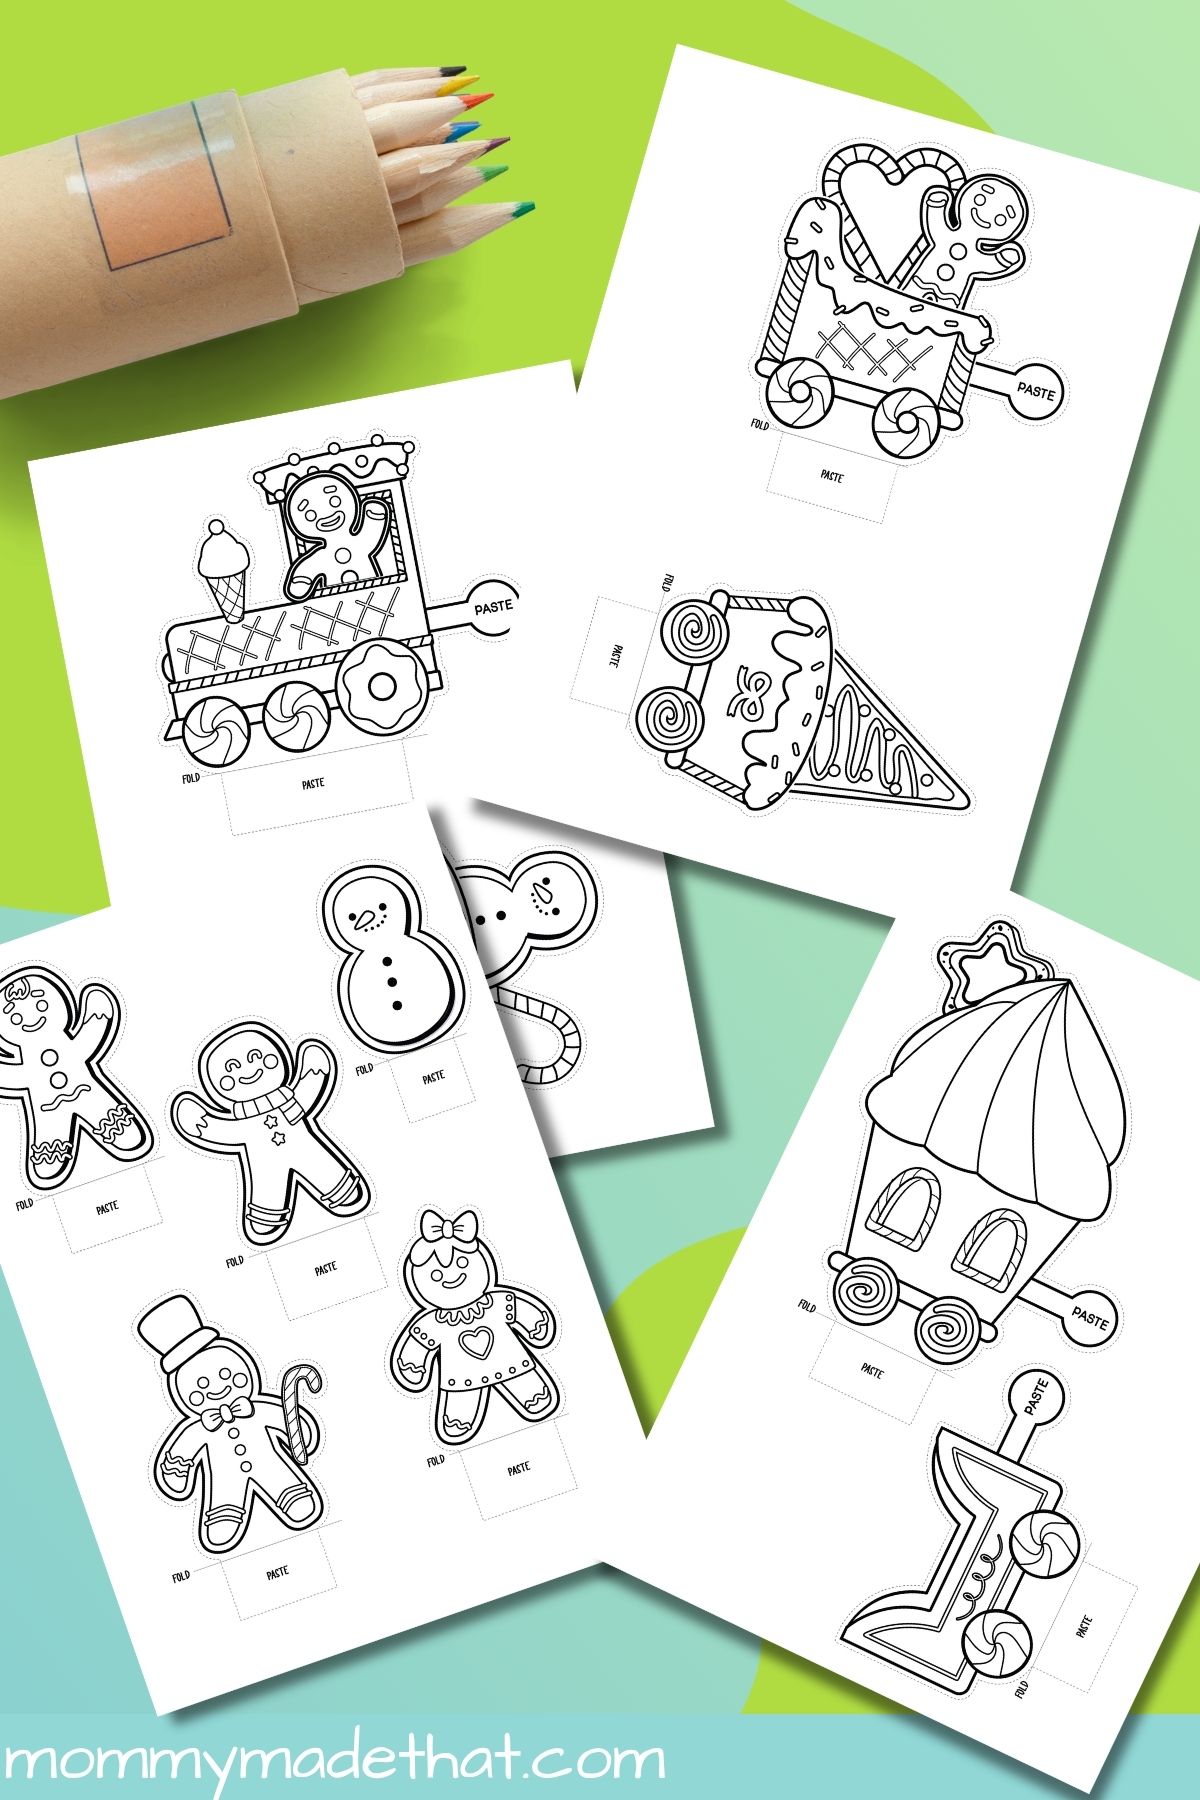
- Page 6: Four more gingerbread characters and a snowman.
- Pages 7–10: Eight Christmas tree cutouts across several sizes. Some designs repeat, giving you extra trees for your scene.
- Pages 11–13: Six candy train sections, including an engine and decorated cars.
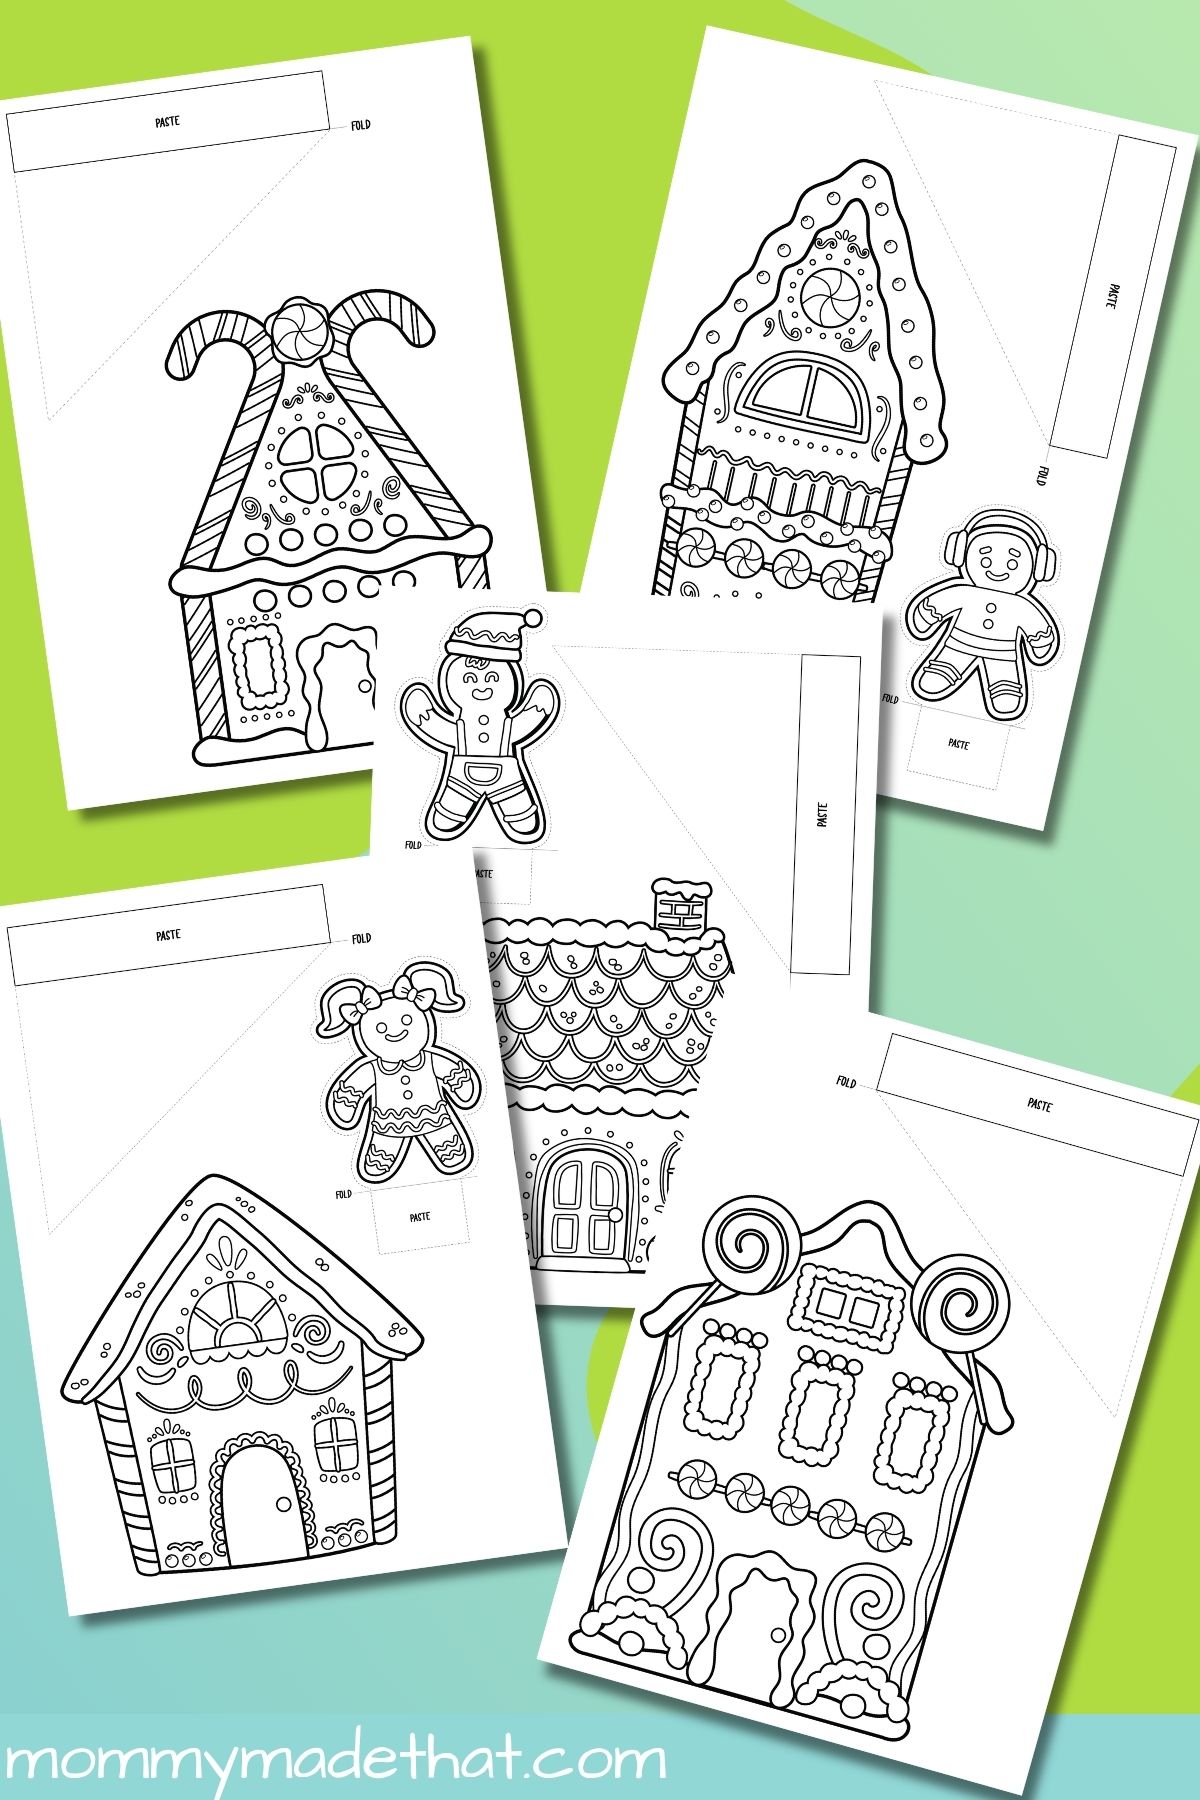
You’ll find seven separate gingerbread characters in total, plus the snowman. The train has its own illustrated passengers and sweet details. Fold guides and areas marked “PASTE” help you identify the support and attachment tabs.
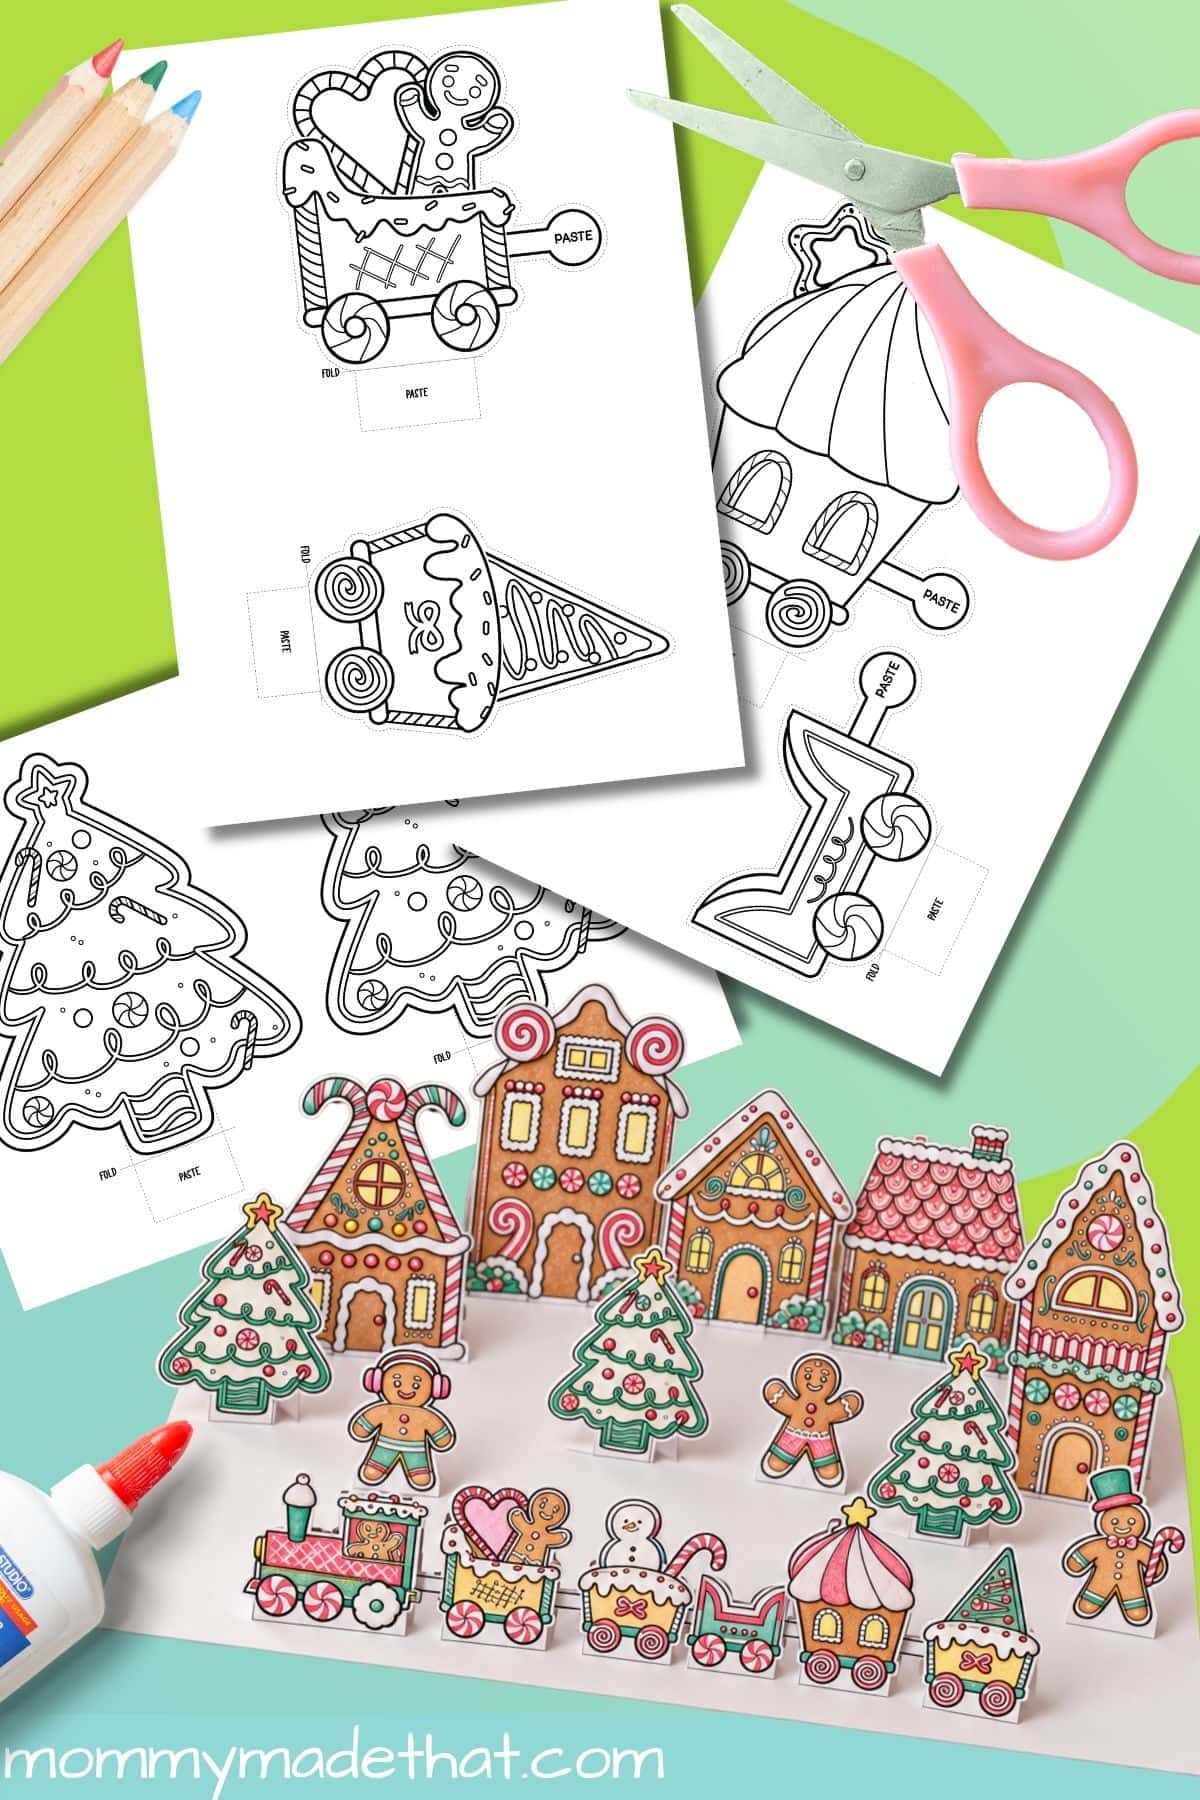
The PDF is a color-your-own set; it does not include precolored pages. Try warm brown houses with white icing and red-and-green candy, or make a pastel village with pink roofs and mint-colored trees.
Materials
- The gingerbread village printable PDF
- White paper or printer-compatible lightweight cardstock
- Crayons, colored pencils, or markers
- Scissors
- Glue or double-sided tape
- A ruler for making neat folds
- A piece of cardboard or sturdy cardstock for the display base
Lightweight cardstock gives the tall fronts more support. Younger children can help color and plan the village while an adult handles detailed cutting and the support folds. For another activity at the same craft table, explore our gingerbread crafts and activities.
How to Make Your Paper Gingerbread Village
1. Choose and print your pages. Start with a house, a character, and a tree if you want a smaller project. Print all 13 pages when you’re ready for the full scene. Keep the same print scale across the pages.
2. Color while the pieces are still on the sheet. A full page is easier to hold than a small cutout. Colored pencils work well for the little icing details. If you use markers, let the ink dry before folding.
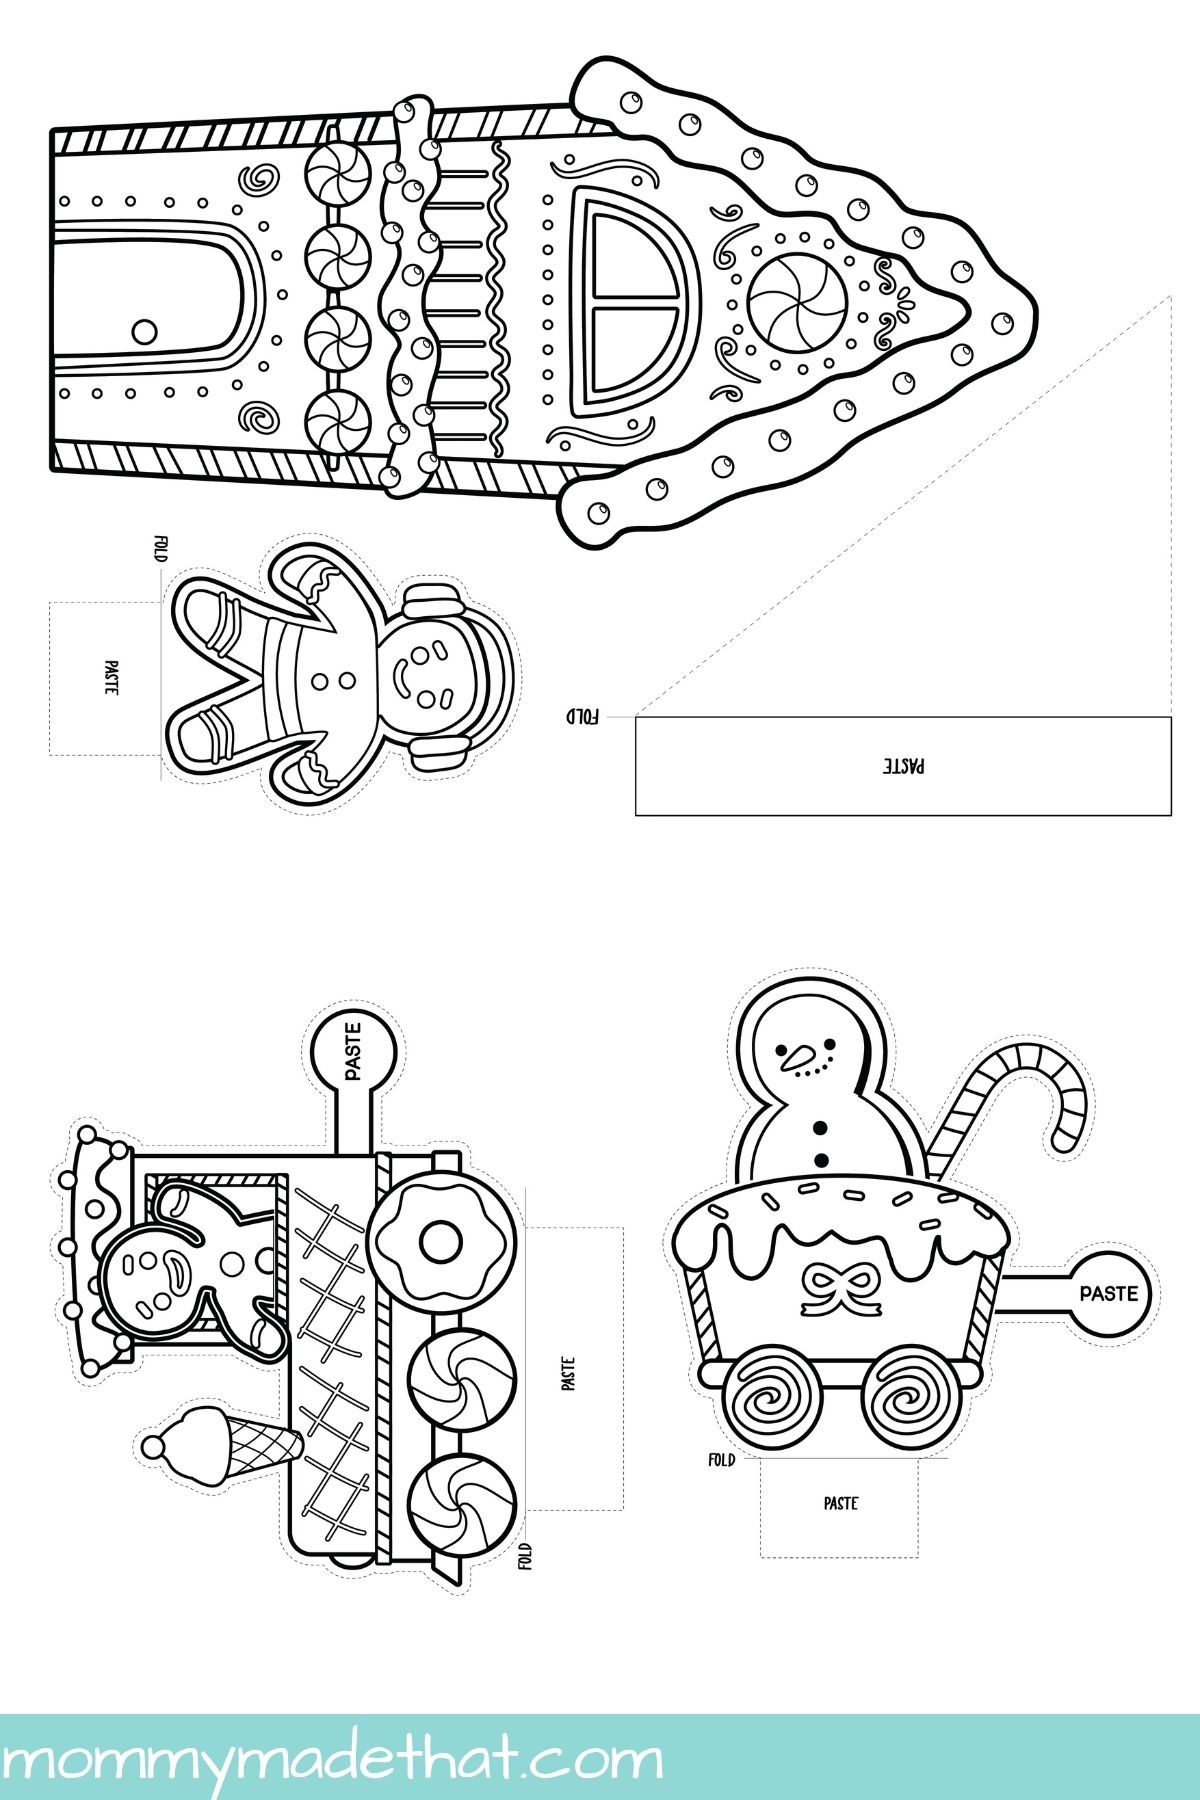
3. Cut around the outside outlines. Keep the attached house support sections and the tabs beneath the characters, trees, and train. Do not trim a piece down to the colored picture alone: the plain paper sections help it stand or attach. Leave lines marked “FOLD” intact.
4. Fold the house supports. Crease the marked fold lines, using a ruler to help keep them straight. Bring each support behind its house front and check how the labeled paste area meets the back before adding glue. Work on one house at a time and let the join set before standing it up.
5. Prepare the smaller pieces and train. Fold the bottom tabs backward so they can rest on the base. Arrange the engine and train cars in a row, keeping the side paste tabs where provided. Check their order and position before securing the connections.
6. Arrange your village. Place taller houses toward the back, then add trees and characters where they can still be seen. Leave a clear space along the front for the candy train. When you like the layout, secure the bottom tabs to your base and let the glue dry.
Tips for a Sturdy Christmas Village Craft
Try one house first. Finish a single front and support before cutting every page. It gives you a chance to check the paper weight and understand where the folds go.
Save every tab. The white areas may look like spare paper, but cutting off a support or bottom tab makes assembly harder. Point these out before children begin cutting.
Keep glue light. A thin layer is usually easier to manage than a large wet blob. Hold the joined surfaces together while they set, and avoid moving the display until the tabs are secure.
Plan before attaching. Set out the whole scene without glue first. A large tree can hide a smaller character, so look at the display from the front and move pieces until everything has a spot.
For a different neighborhood to color and arrange, try our printable paper Christmas village, which includes snowy buildings and holiday scenery.
Ways to Use Your Gingerbread Village
Make a shared classroom display. Divide the houses, characters, trees, and train among small groups. Ask everyone to finish coloring before you assemble the scene on a shared base. Print only the pages each group needs.
Tell a candy-train story. Who is driving the train? Where is the snowman going? Let children choose a character and describe a trip through the village, or write a short story to display beside it.
Draw a village map. Arrange the houses on your base, then sketch paths and name the streets. Ask children to put a tree beside a house or a character between two buildings to practice describing positions.
If you’d like a game to go with the craft, our roll a gingerbread house game adds a dice activity to your gingerbread afternoon.
Printing Tips
- Open and print the PDF rather than printing a photo from this page.
- A4 or US Letter both work: The PDF’s original page size is A4, but you don’t need special paper. Standard 8.5 × 11-inch Letter paper works too. Choose the paper size you’re using and portrait orientation.
- For Letter-size printing, select “Fit” or “Fit to printable area.” This slightly reduces the design to fit your printer’s margins while keeping the shapes in proportion. Check the preview to make sure the entire design and all tabs are visible.
- Use the same paper size and scaling setting for every page, especially the train pieces.
- Print one test page before making classroom copies. Choose cardstock only if your printer supports it.
Are These 3D Gingerbread Houses?
The village stands upright, but the buildings are flat illustrated fronts with supports behind them. If you want a house that folds into an enclosed shape, try our 3D gingerbread house coloring craft.
Grab the Free Gingerbread Village Printable
Grab the gingerbread village printable here!
Put your name and email in the pink box below, and we’ll send the free printable straight to your inbox.
Subscribe to our newsletter and get these printables sent straight to your inbox! Already a subscriber? Don’t worry you won’t be subscribed twice but it will send this printable straight to your inbox!
(We will never share or sell your personal information. Read more on our privacy policy.) We will use the information below to send you our newsletter with latest posts and special offers.