Origami Apple (Fun How to Tutorail)
Today we have this origami apple tutorial! We’ll show you step by step how to make an easy origami apple.
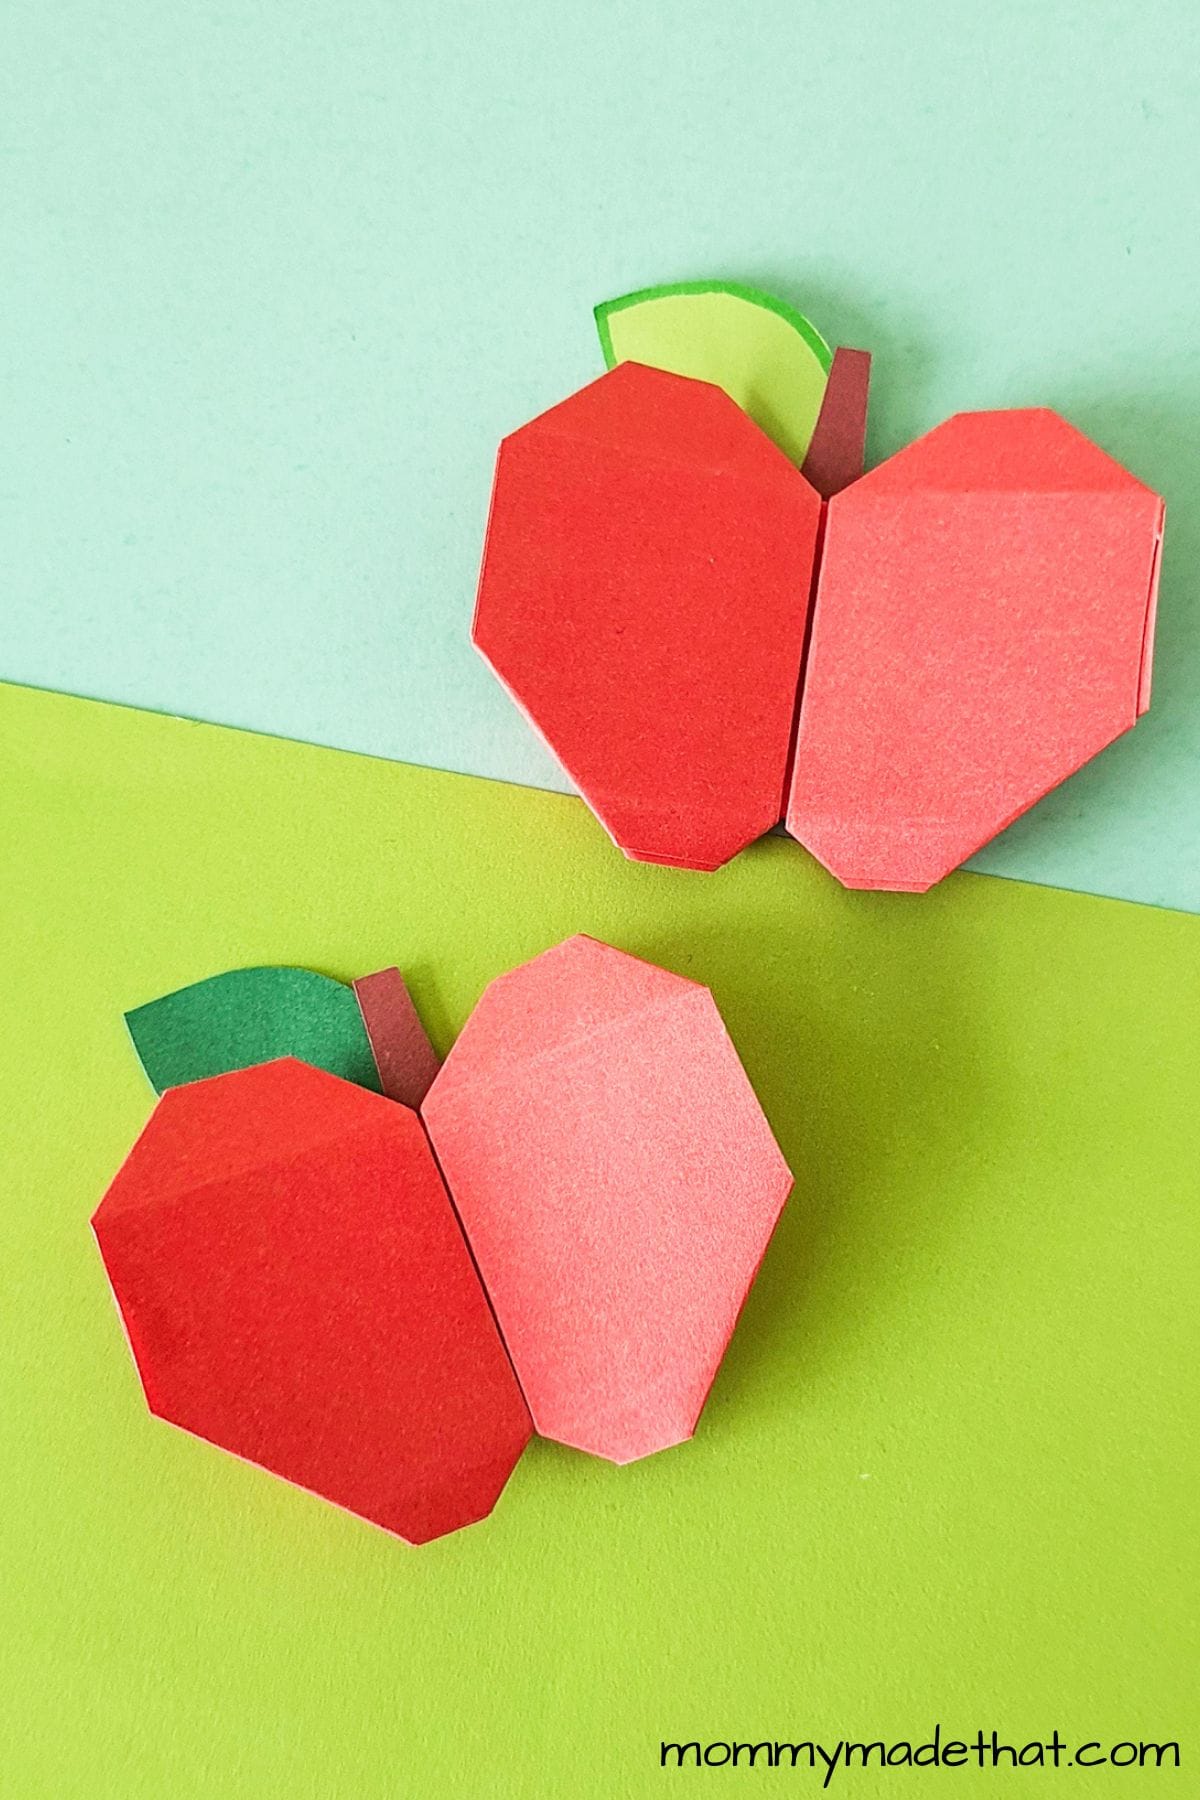
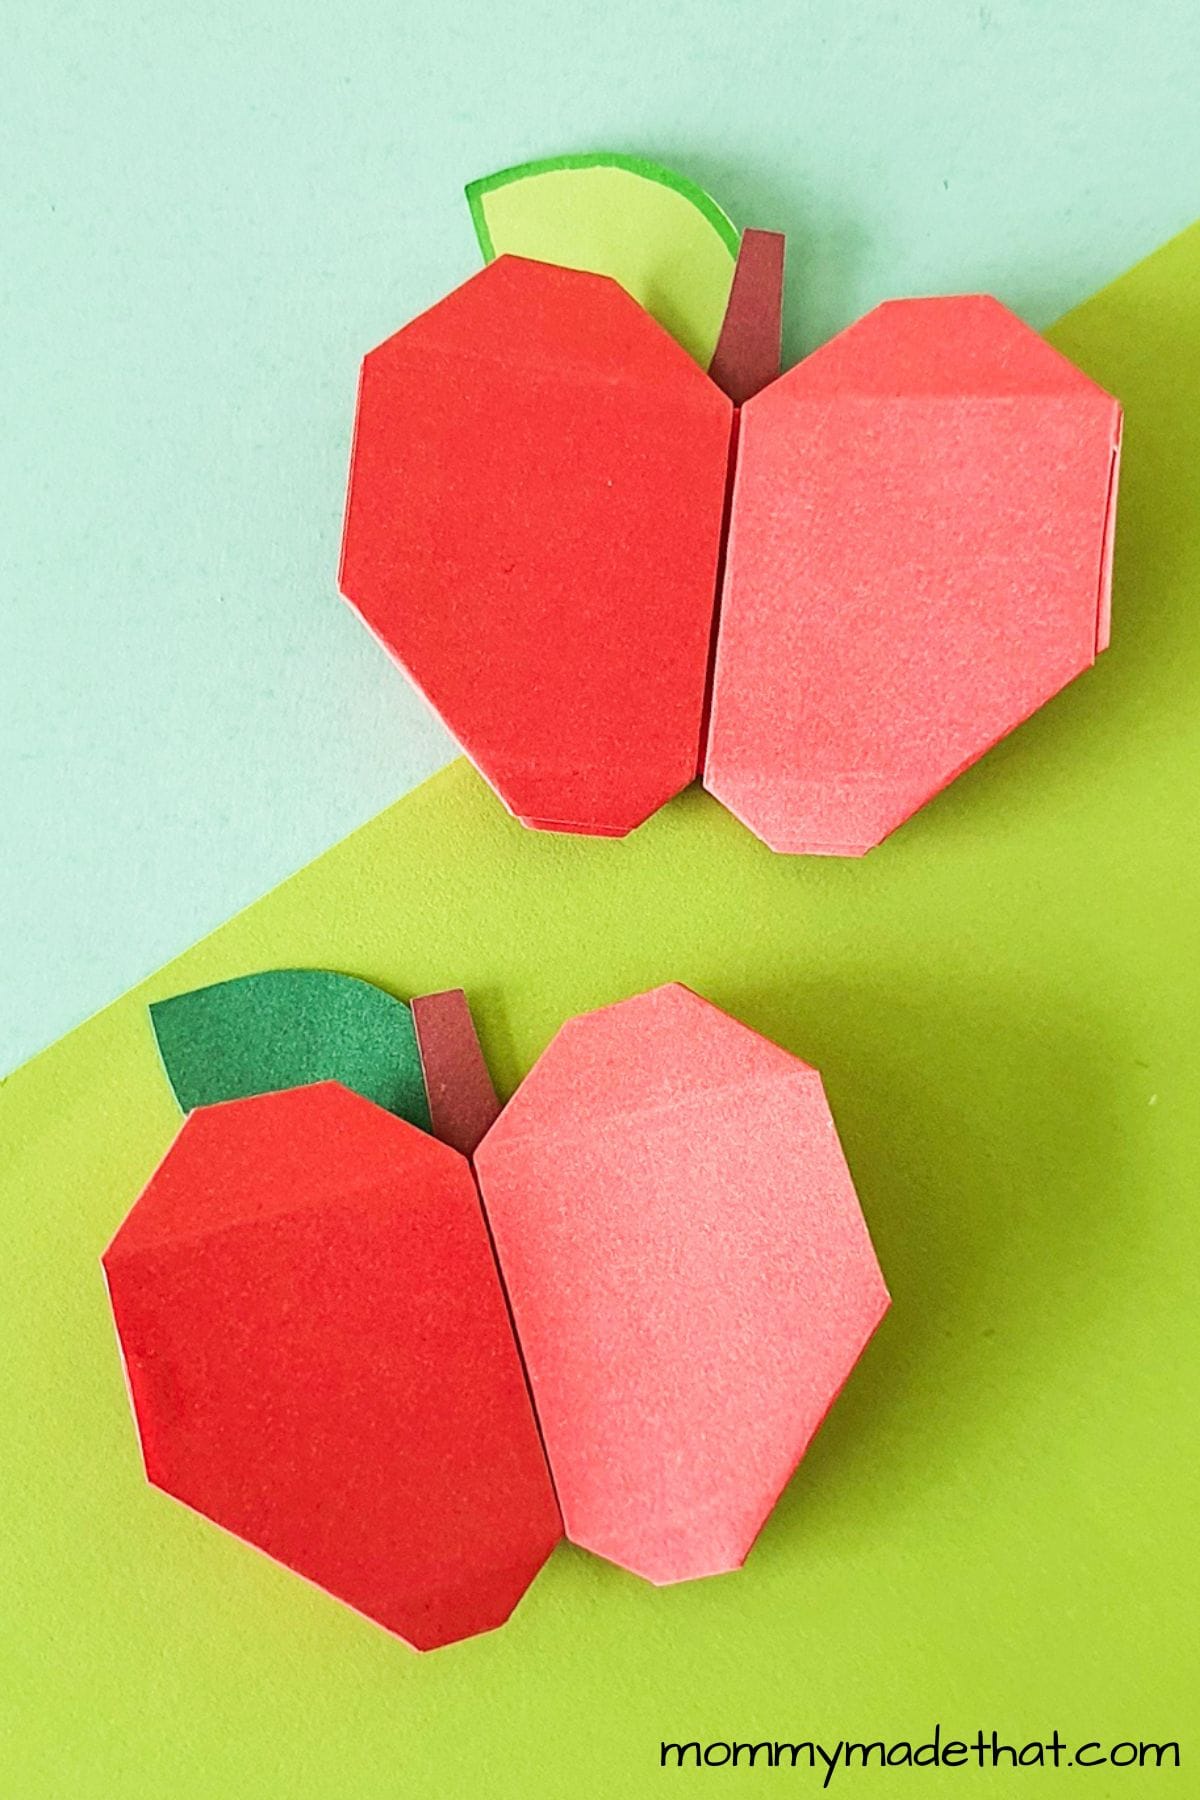
Welcome to our delightful origami apple tutorial! Whether you’re a beginner or an experienced origami enthusiast, this fun and easy craft is perfect for all ages.
Not only will you learn a new skill, but you’ll also have a charming decoration for your home, office, or classroom.
These adorable paper apples make for thoughtful handmade teacher appreciation gifts, too!
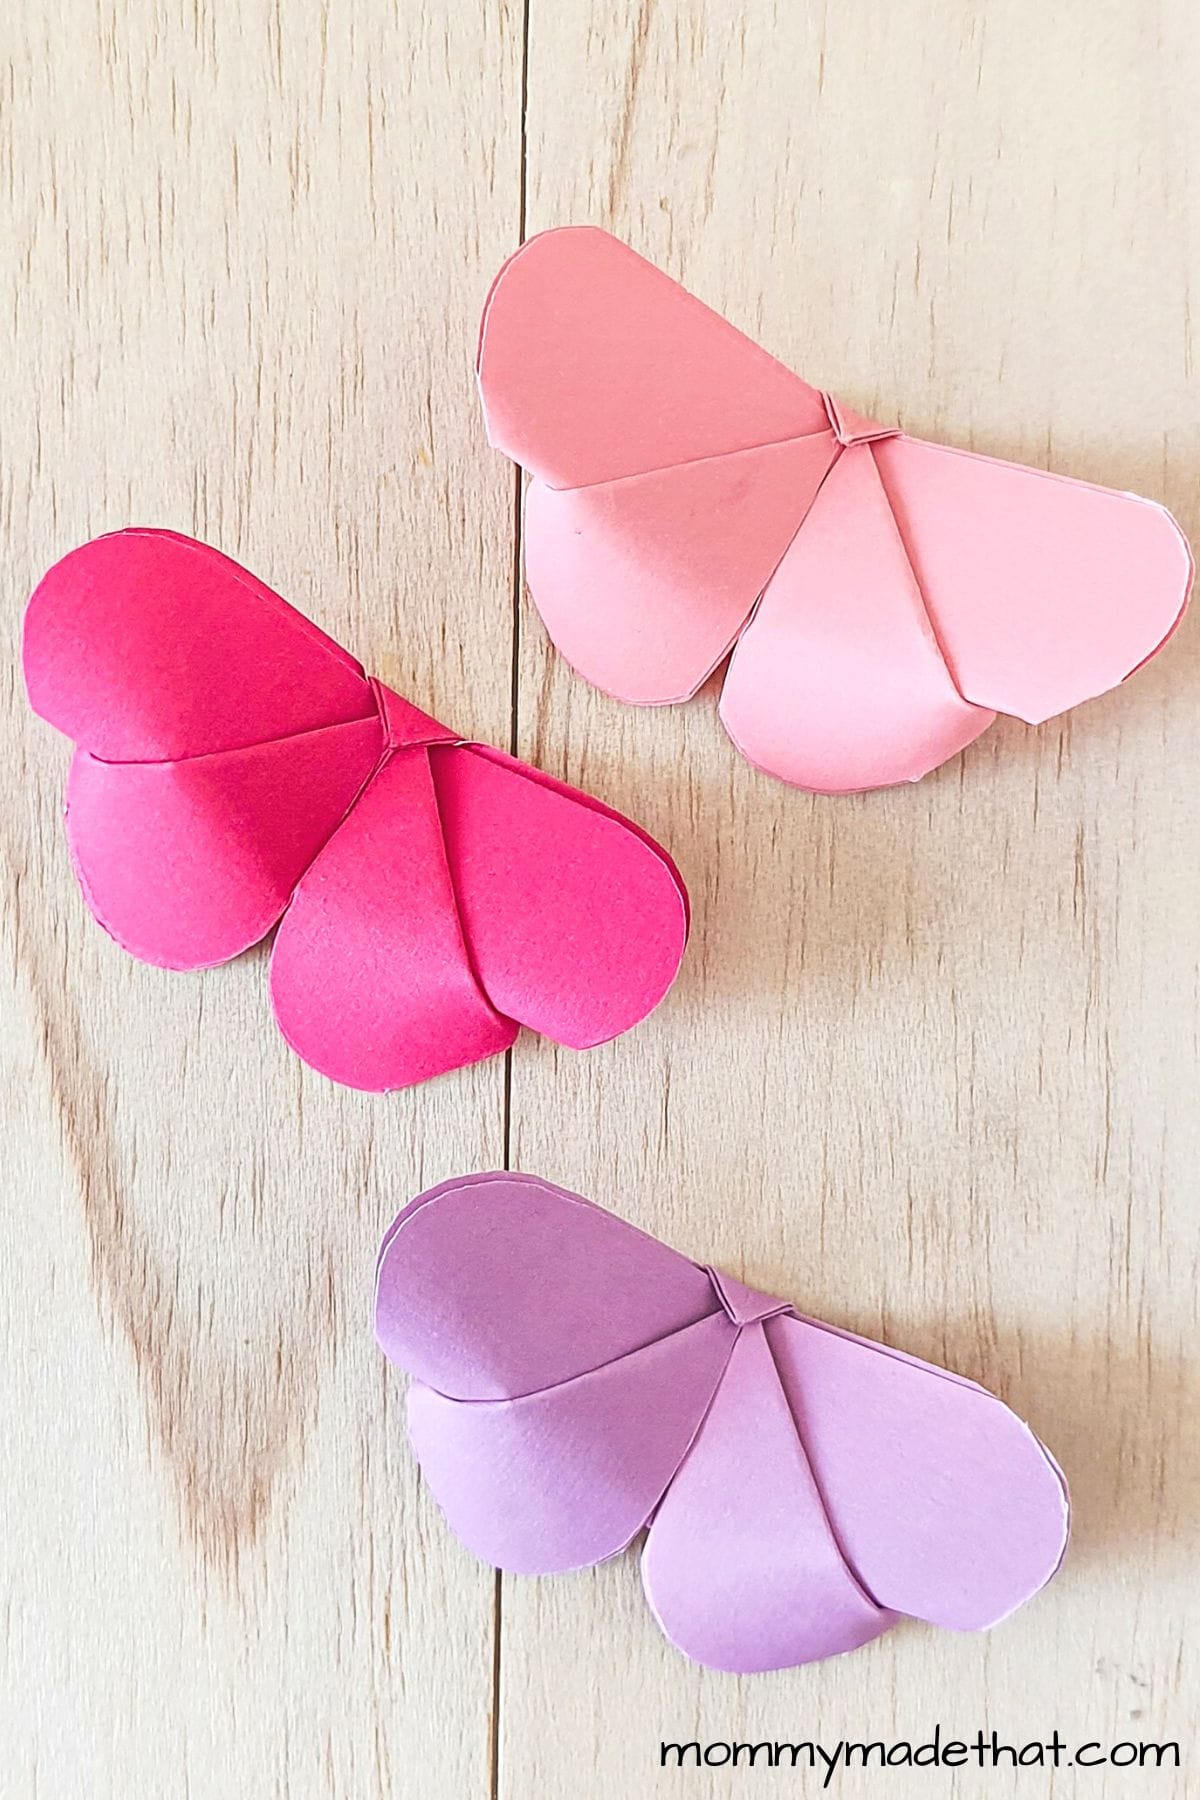
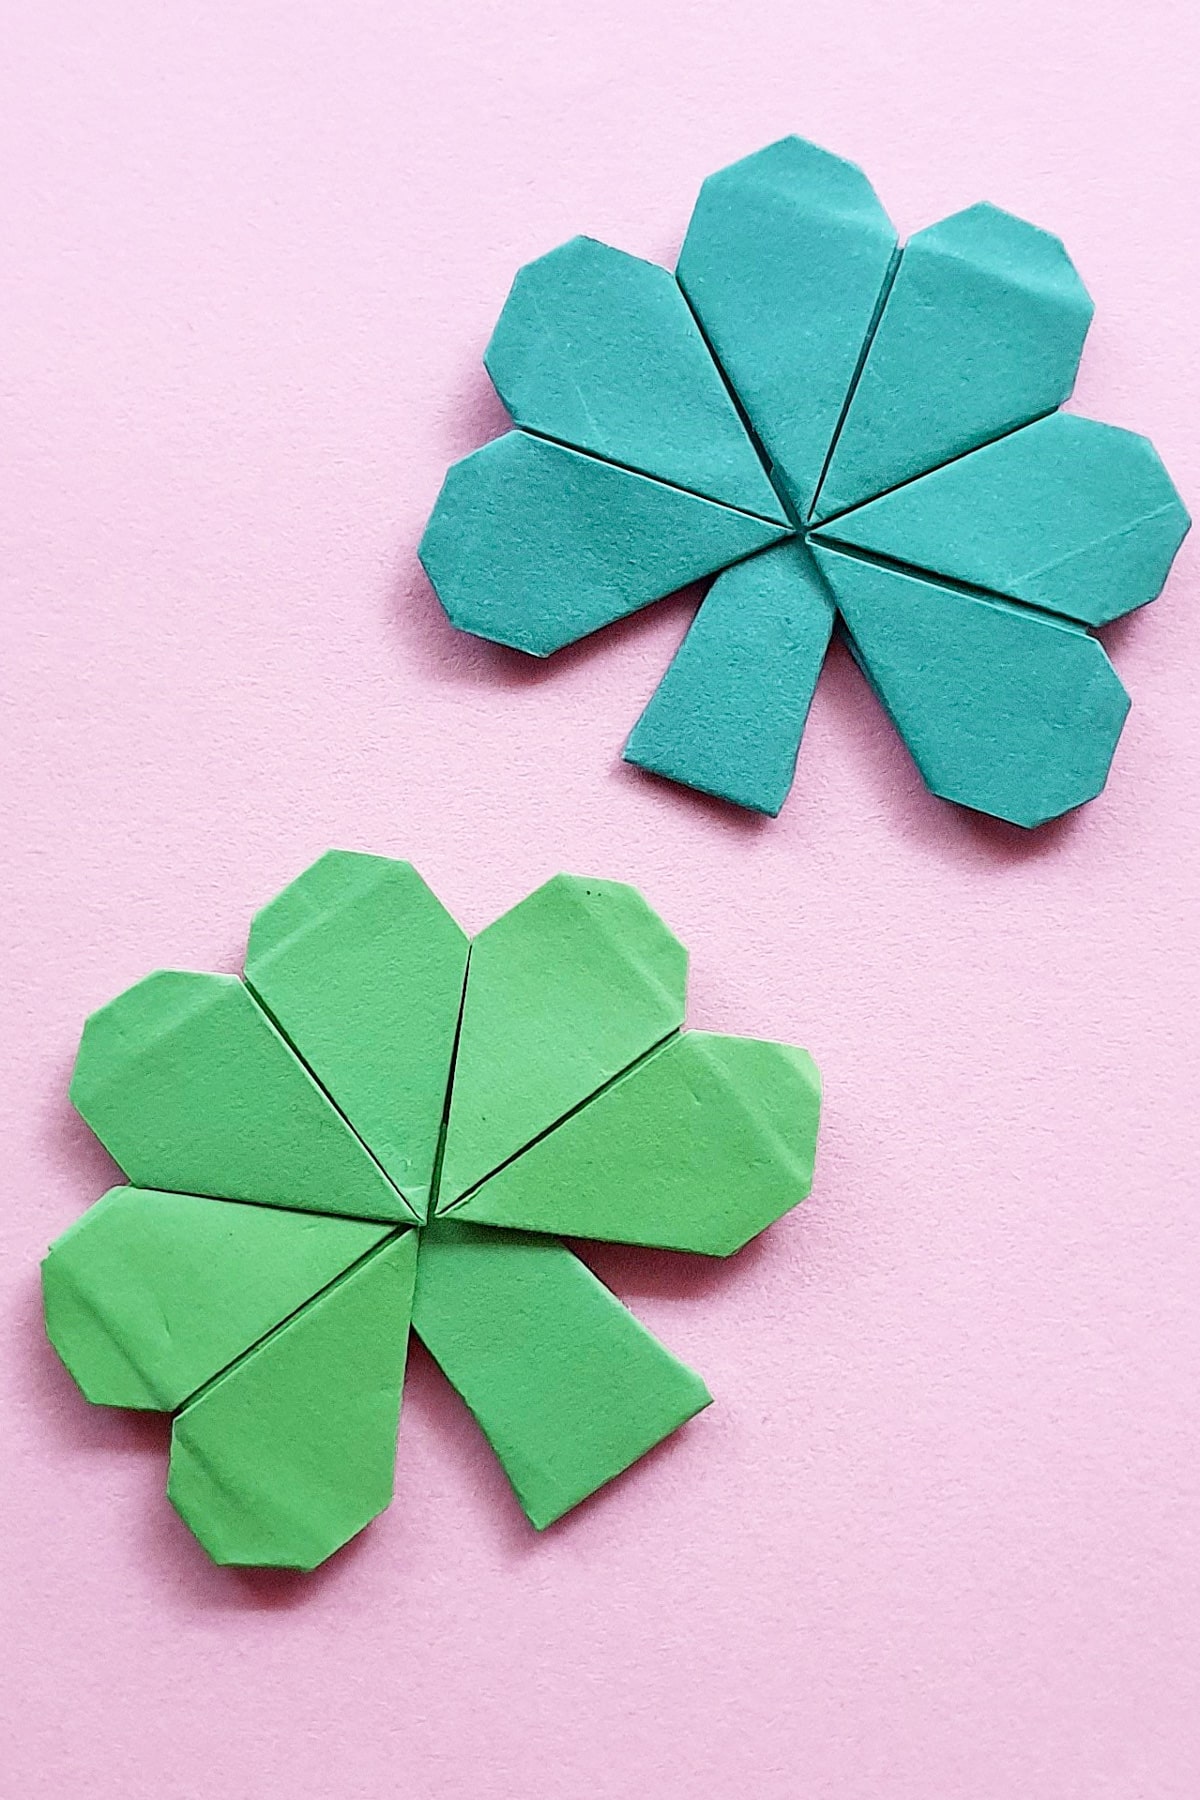
We also have some other fun apple crafts like our paper plate apple craft and our super cute 3D paper apple printable template.
And if you’re doing this activity with kids, be sure to take a look at our apple quotes and jokes which are perfect to add to all apple activities.
So, gather your supplies, clear some space on your table, and let’s dive into the world of paper folding as we create our very own paper apples together. Happy folding!
Table of Contents
Materials Needed
Before we begin folding our origami apples, let’s make sure we have all the necessary materials at hand. Here’s a list of everything you’ll need for this delightful craft project:
Origami paper: You’ll need red, green, and brown origami paper for the apple, leaf, and stem, respectively. Standard 6×6 inch (15×15 cm) sheets are ideal, but feel free to experiment with different sizes if you’d like to create various-sized apples.
Scissors: A pair of scissors will come in handy for cutting out your leaf and trimming any excess paper, if needed.
Glue or tape (optional): While most of the origami apple can be held together by folds alone, you may want to use a bit of glue or tape for added stability when attaching the stem and leaf to the apple body.
With these supplies ready, you’re all set to start folding your very own origami apple!
Let’s move on to the step-by-step instructions to bring your paper fruit to life.
How to Make an Origami Apple
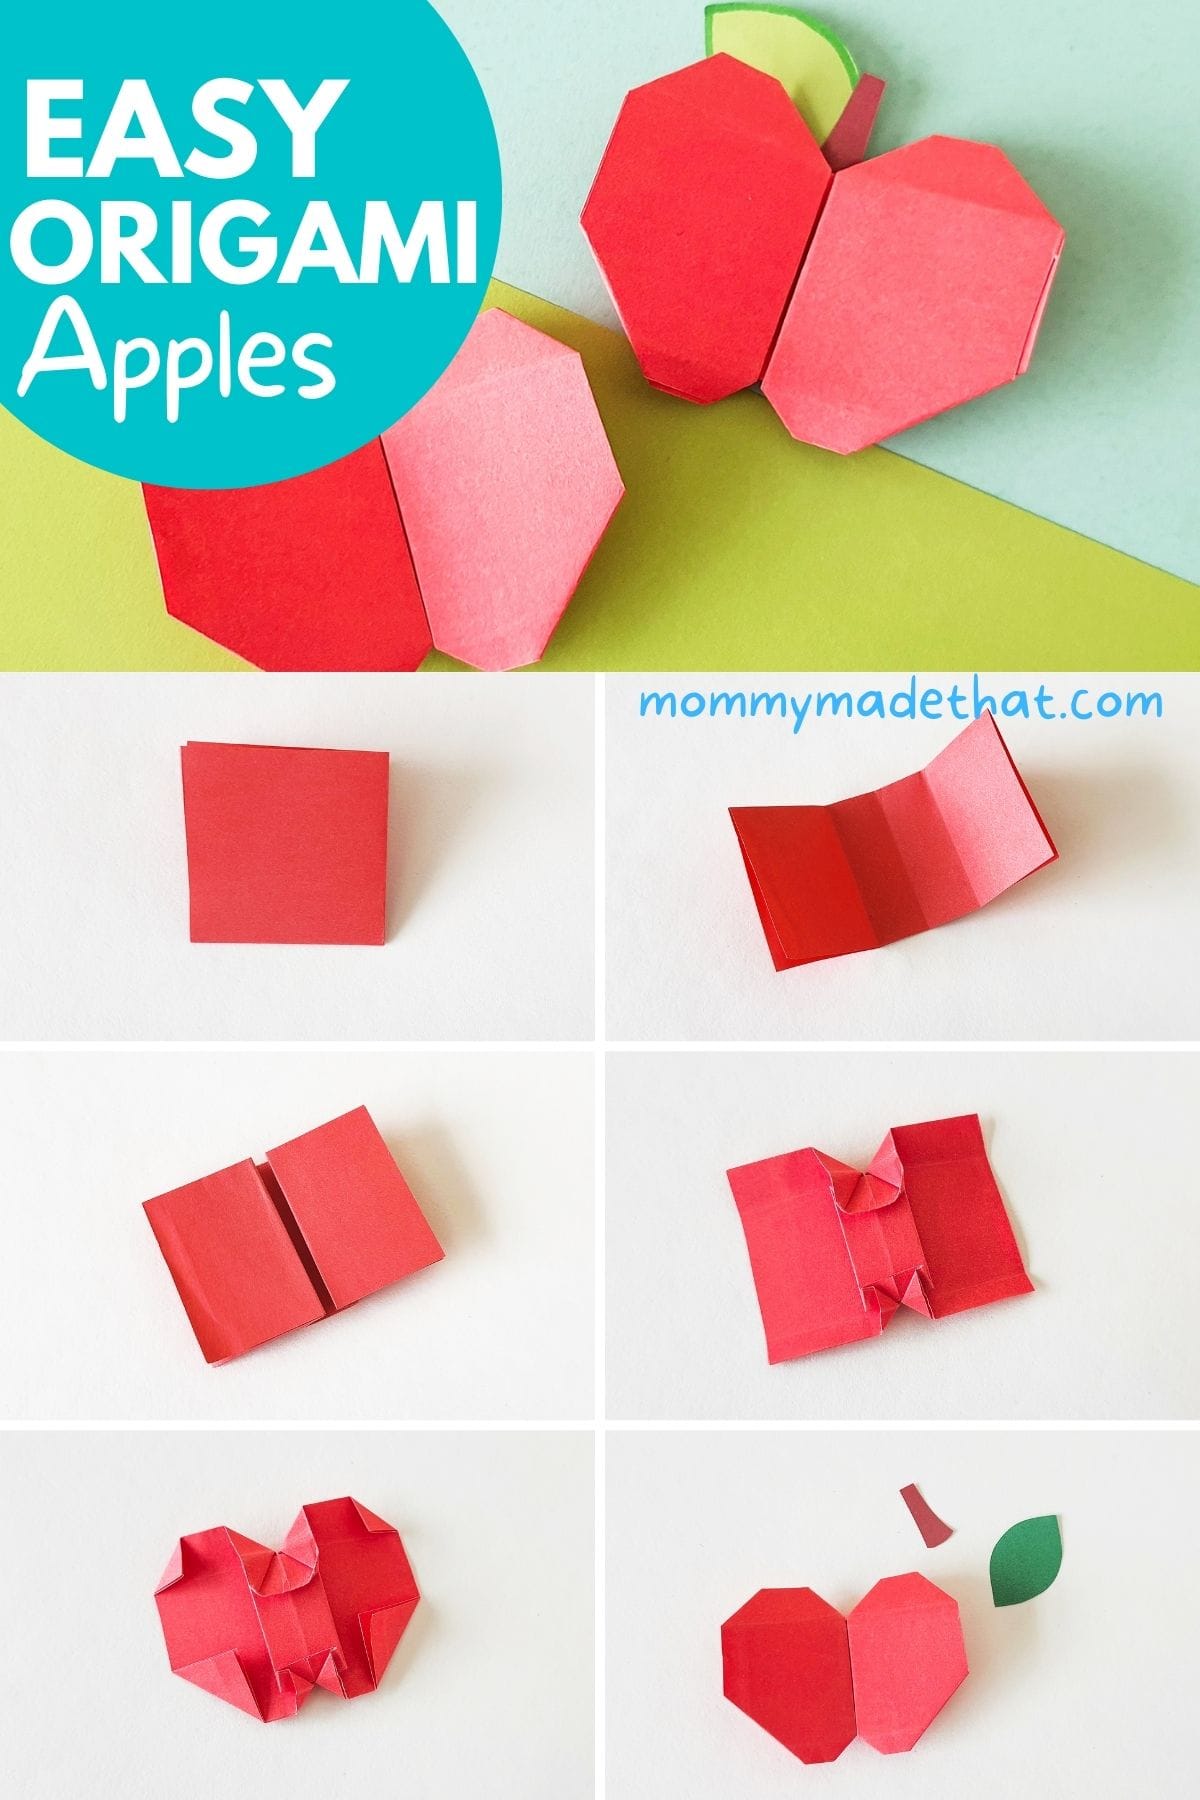
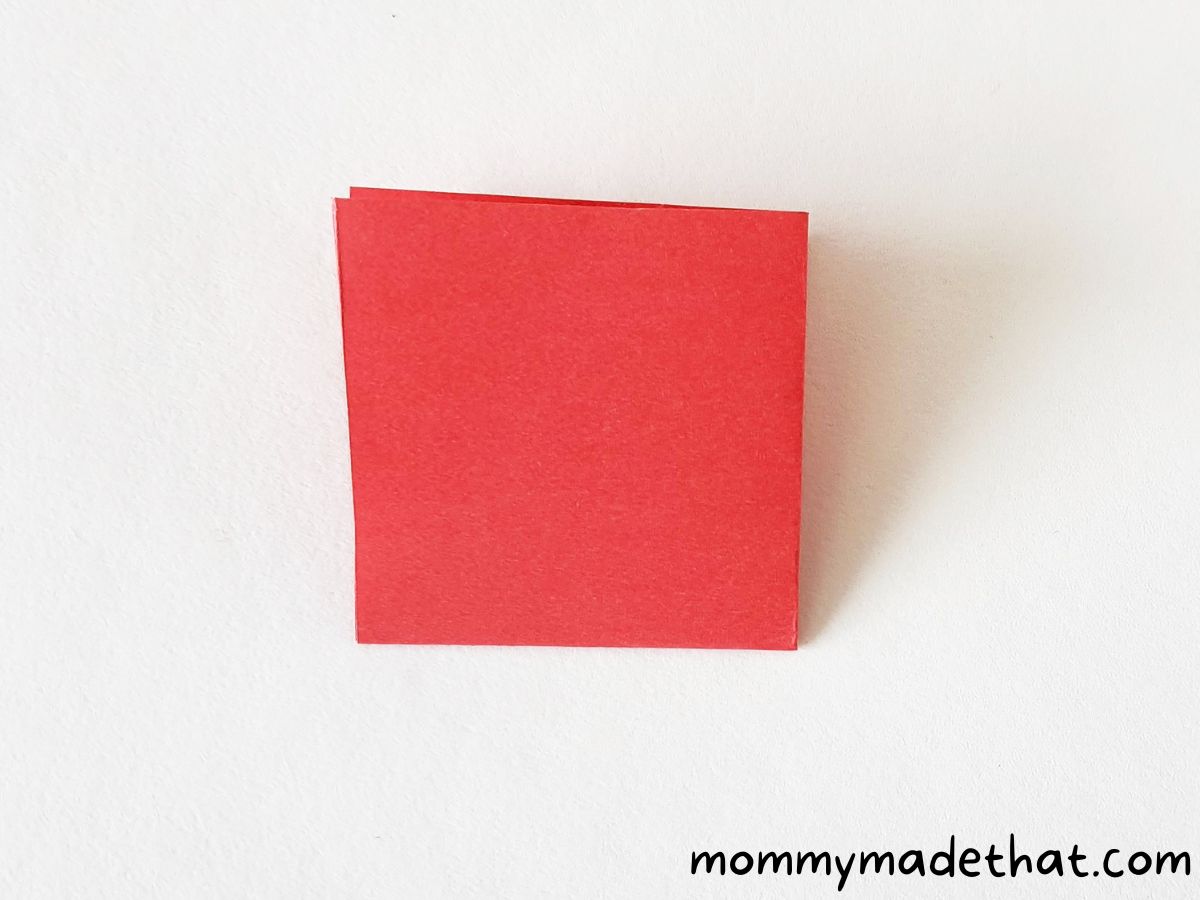
Step 1: Choose Your Paper Color and Prepare a Square
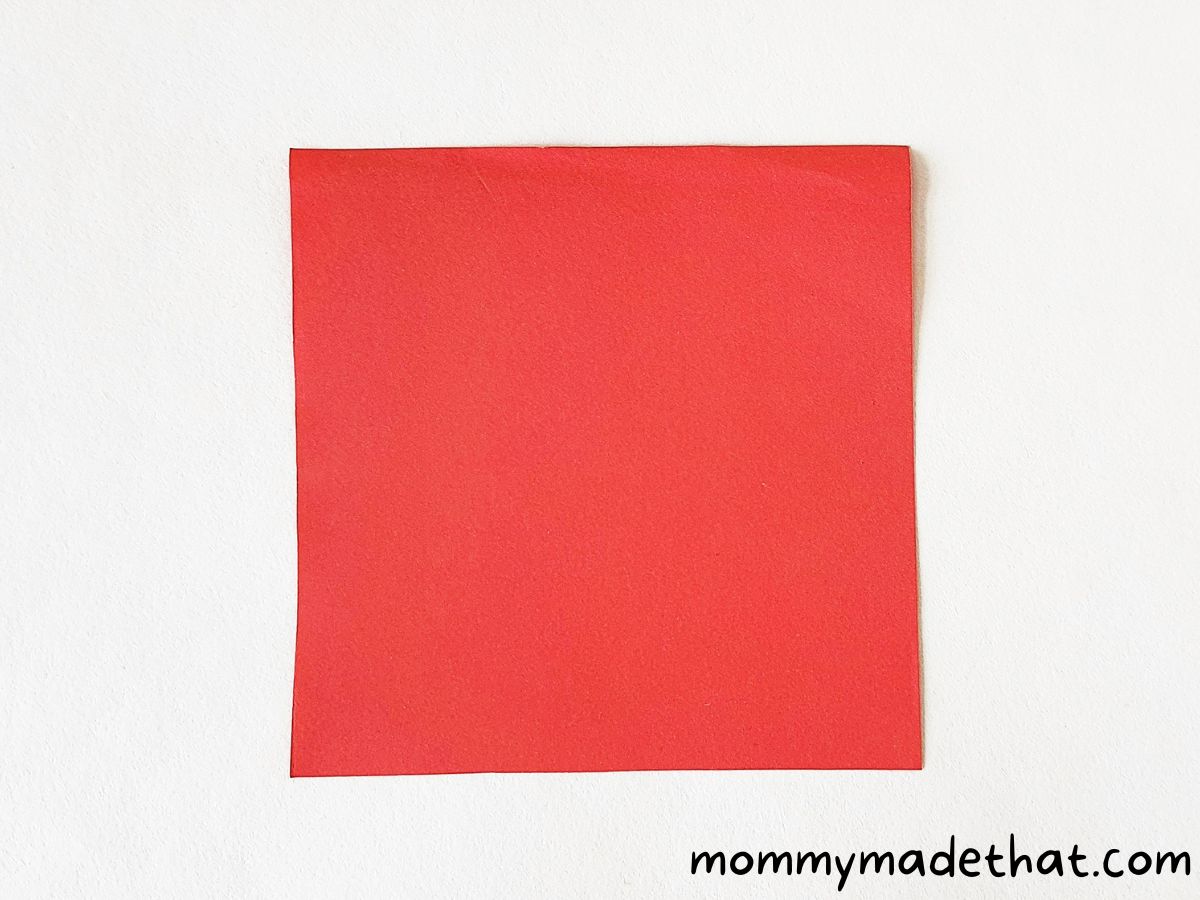
Select a piece of craft paper for the origami apple. Make sure it’s in a square shape. We used red for our apples. But you can make your apples any color you like.
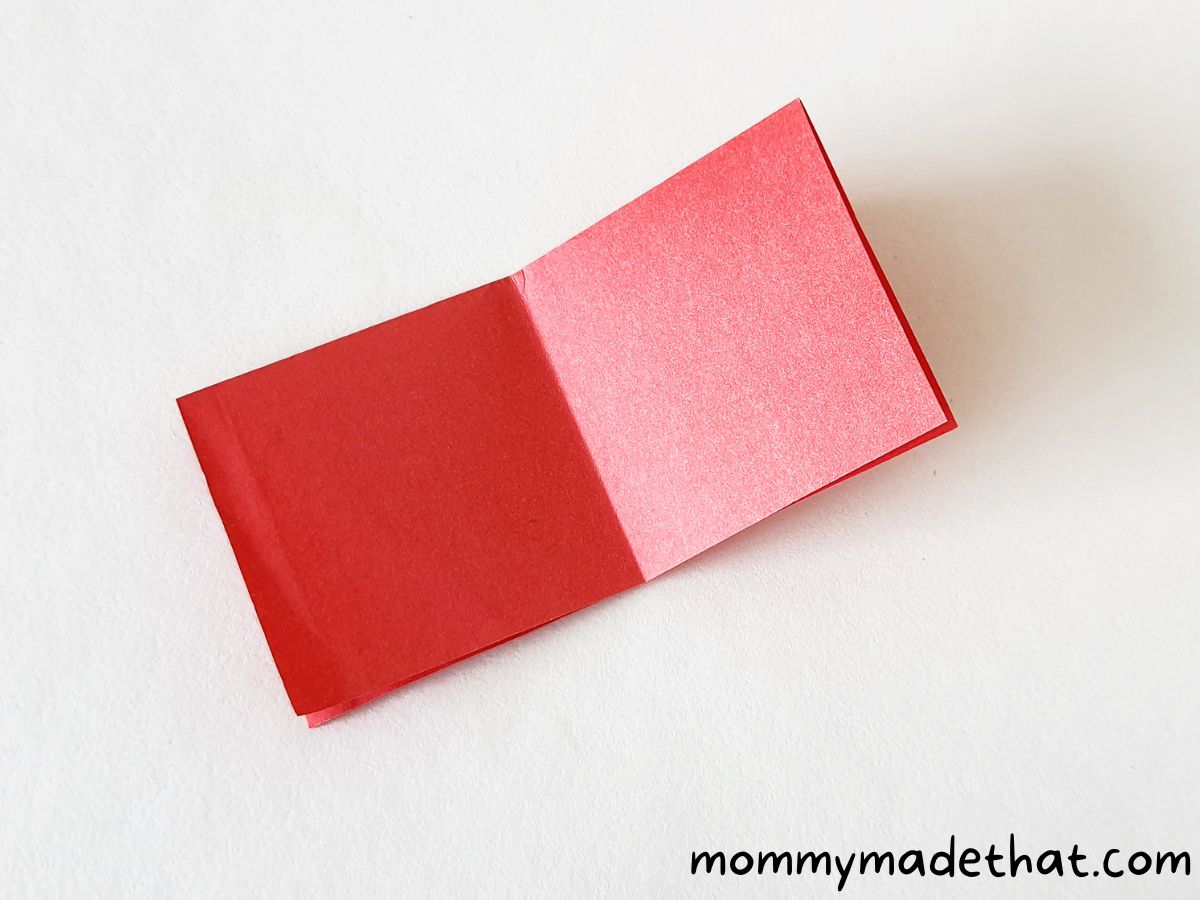
Step 2: Fold Vertically
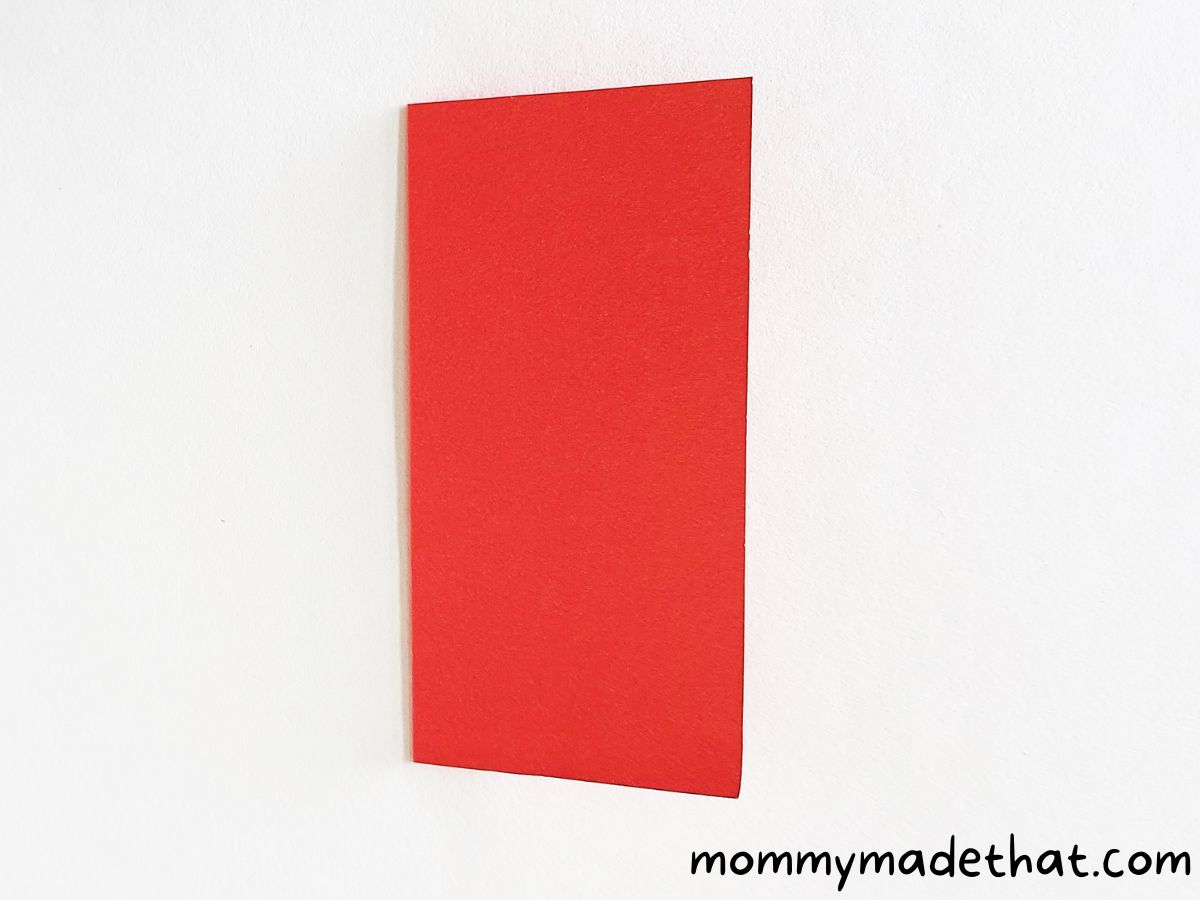
Start by folding the square in half, vertically.
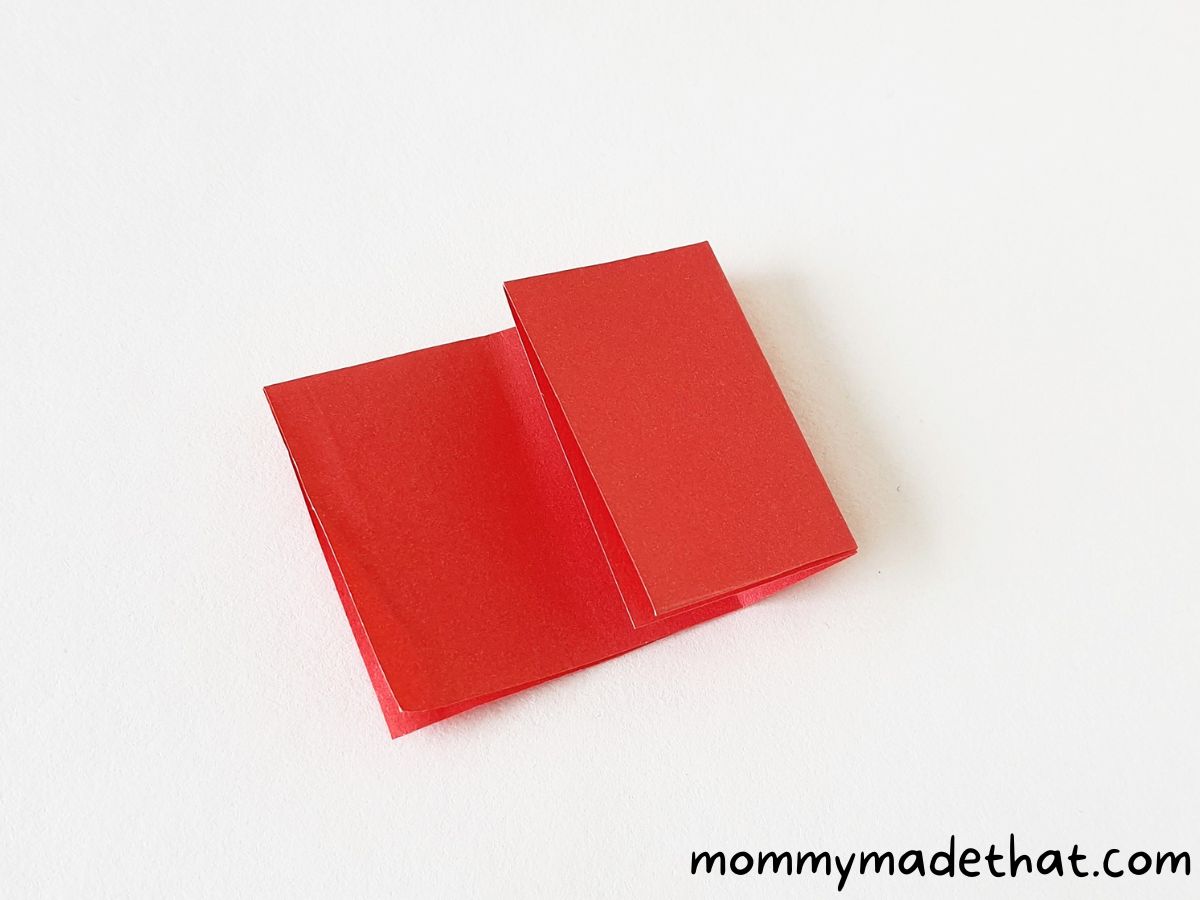
Step 3: Fold Horizontally
Then fold the paper in half again, this time the other way making another smaller square.
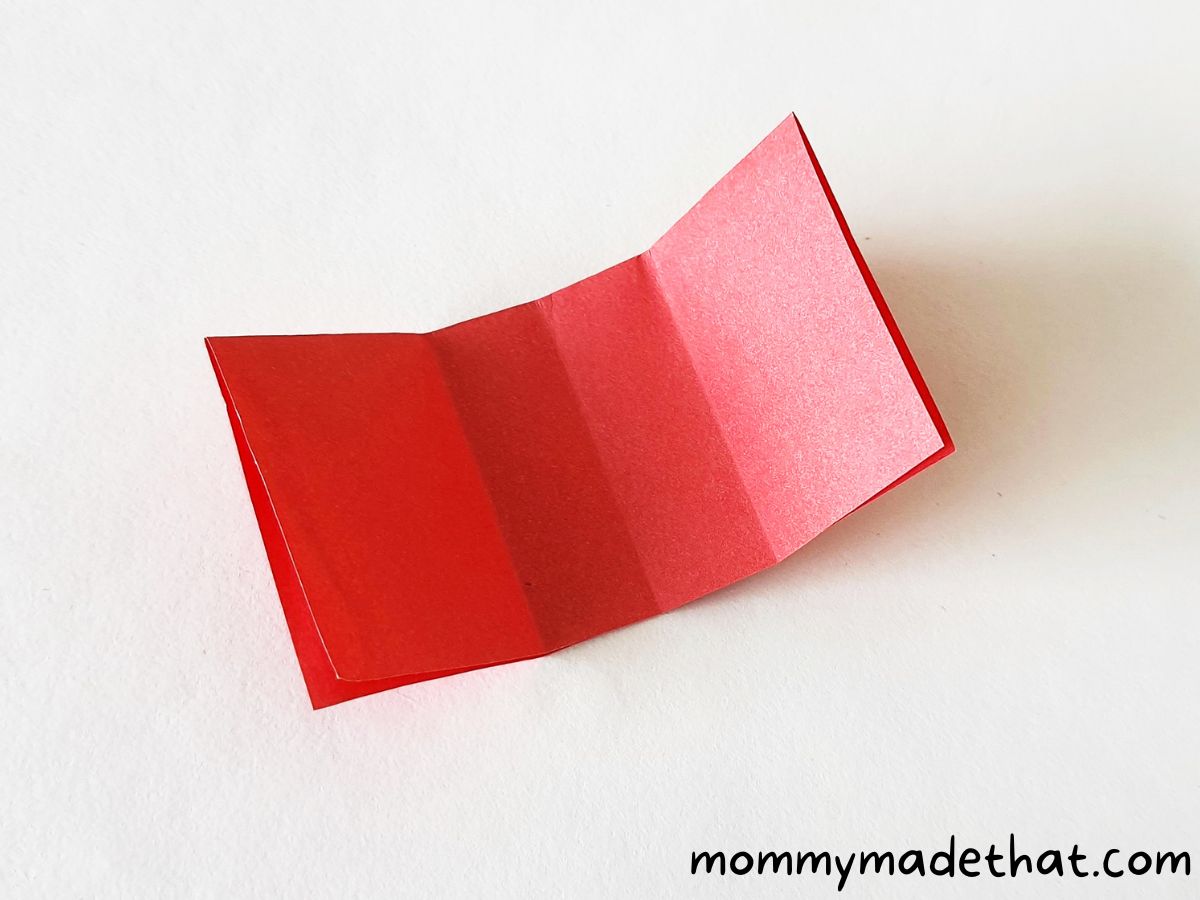
Step 4: Create a Central Crease
Unfold the horizontal fold, leaving a crease along the middle of the half-folded square paper.
Step 5: Fold One-Third of the Paper
Carefully fold one-third of the paper from any one side.
Step 6: Repeat the Fold on the Other Side
Fold the other side of the paper in a similar manner.
Step 7: Align the Right Side’s Crease
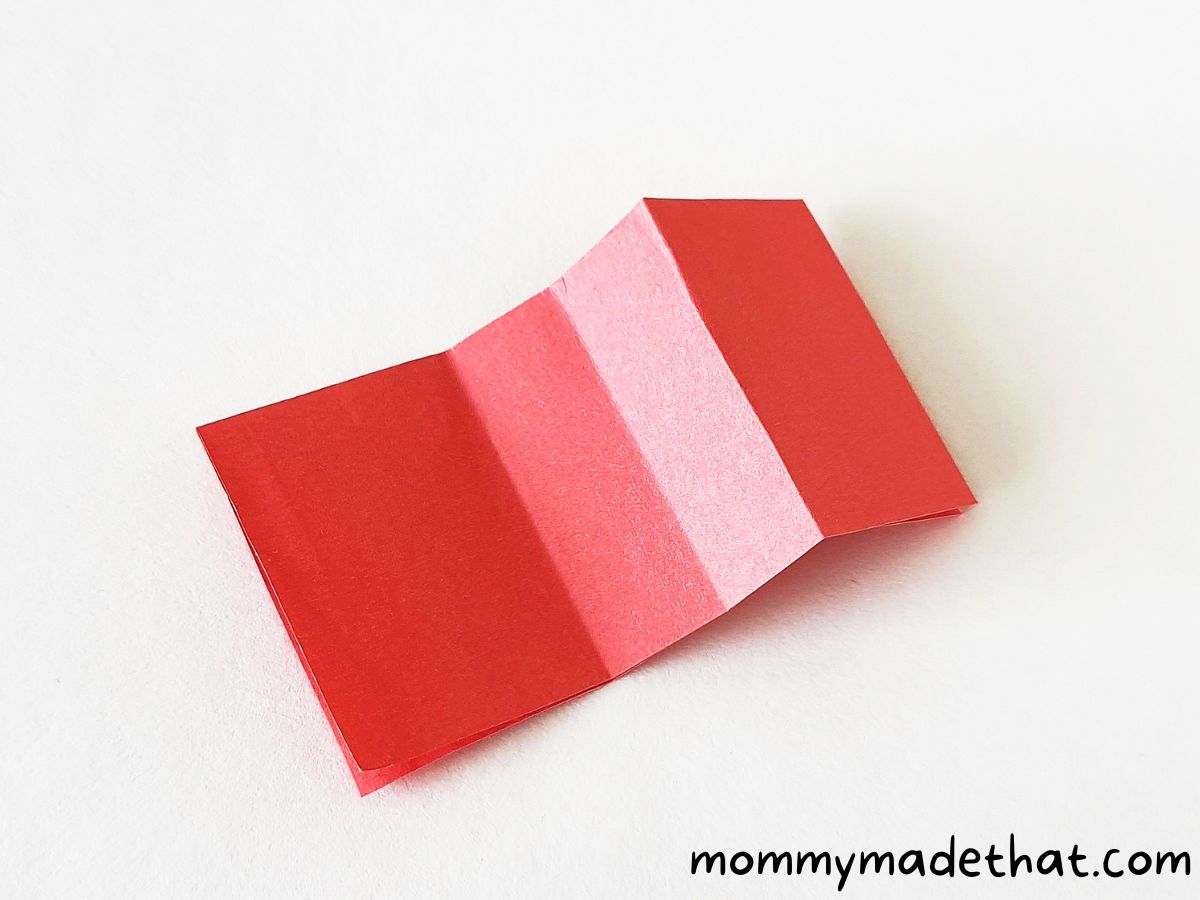
Working from the right side, align the one-third crease with the middle crease of the current pattern.
Step 8: Flatten the Right Side’s Crease
Align and flatten the one-third crease of the right side with the middle crease.
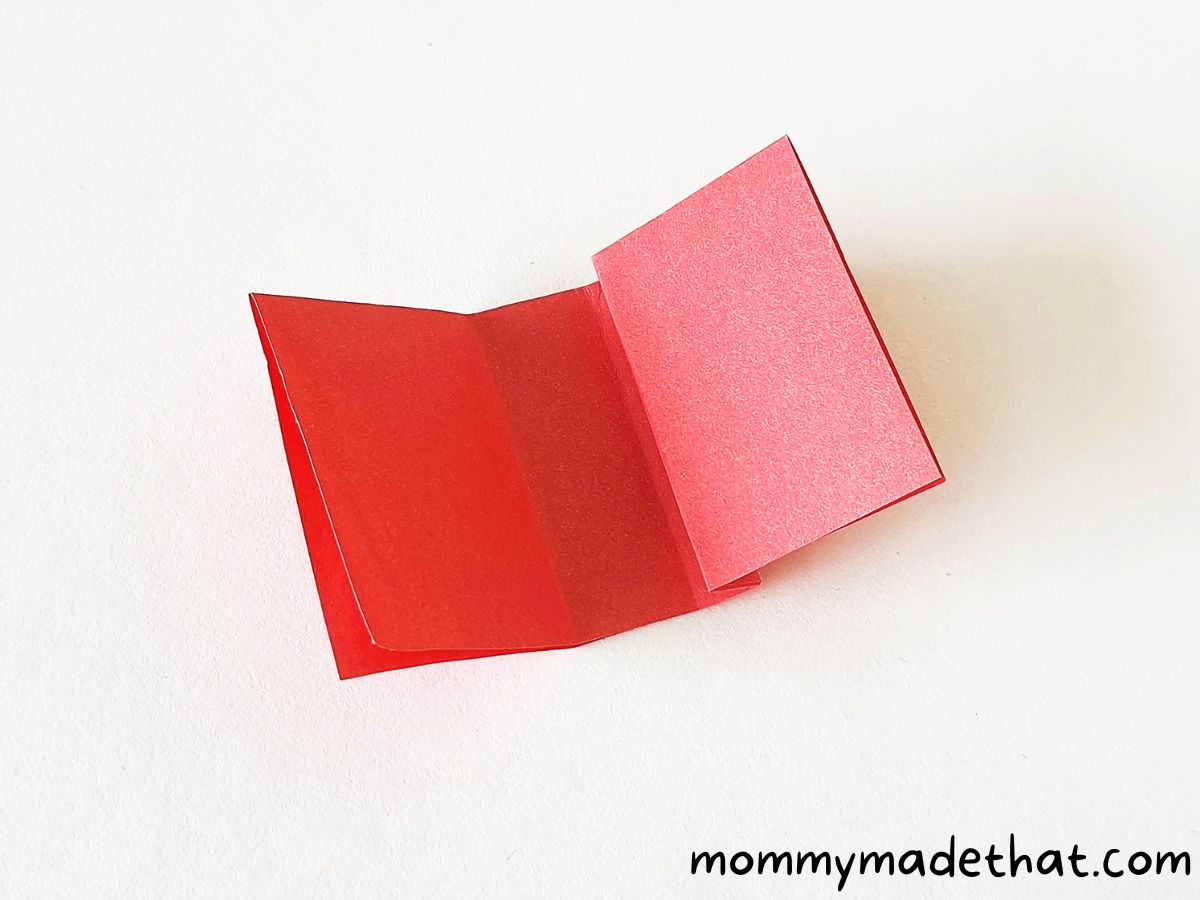
Step 9: Align the Left Side’s Crease
Similarly, align the left side with the middle crease.
Step 10: Flip the Origami Paper
Turn the origami paper pattern to the other side.
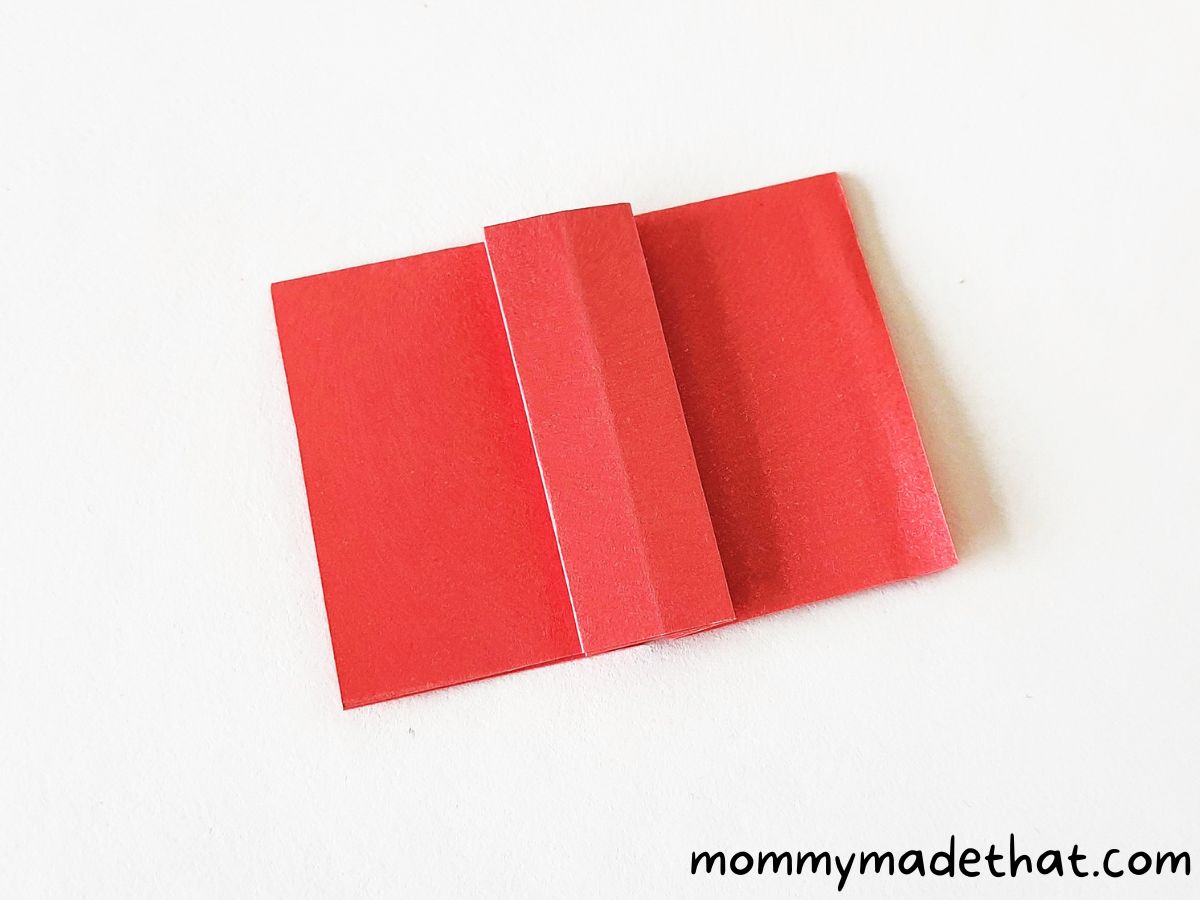
Step 11: Fold the Top Side
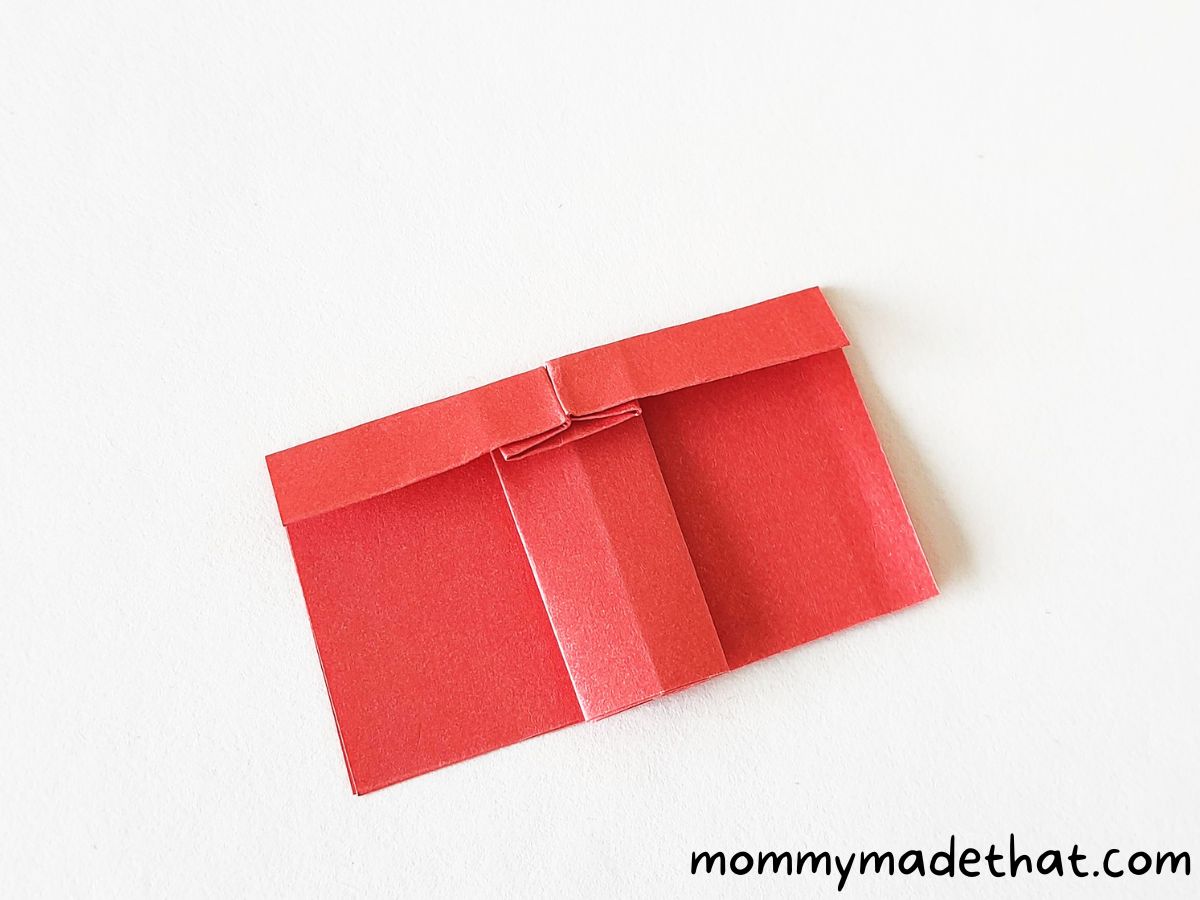
Fold one-fifth of the current pattern along the top side.
Step 12: Open and Flatten the Top Fold
Open the left side of the top fold, keeping the middle part of the fold intact. Carefully fold and flatten the left side of the middle part.
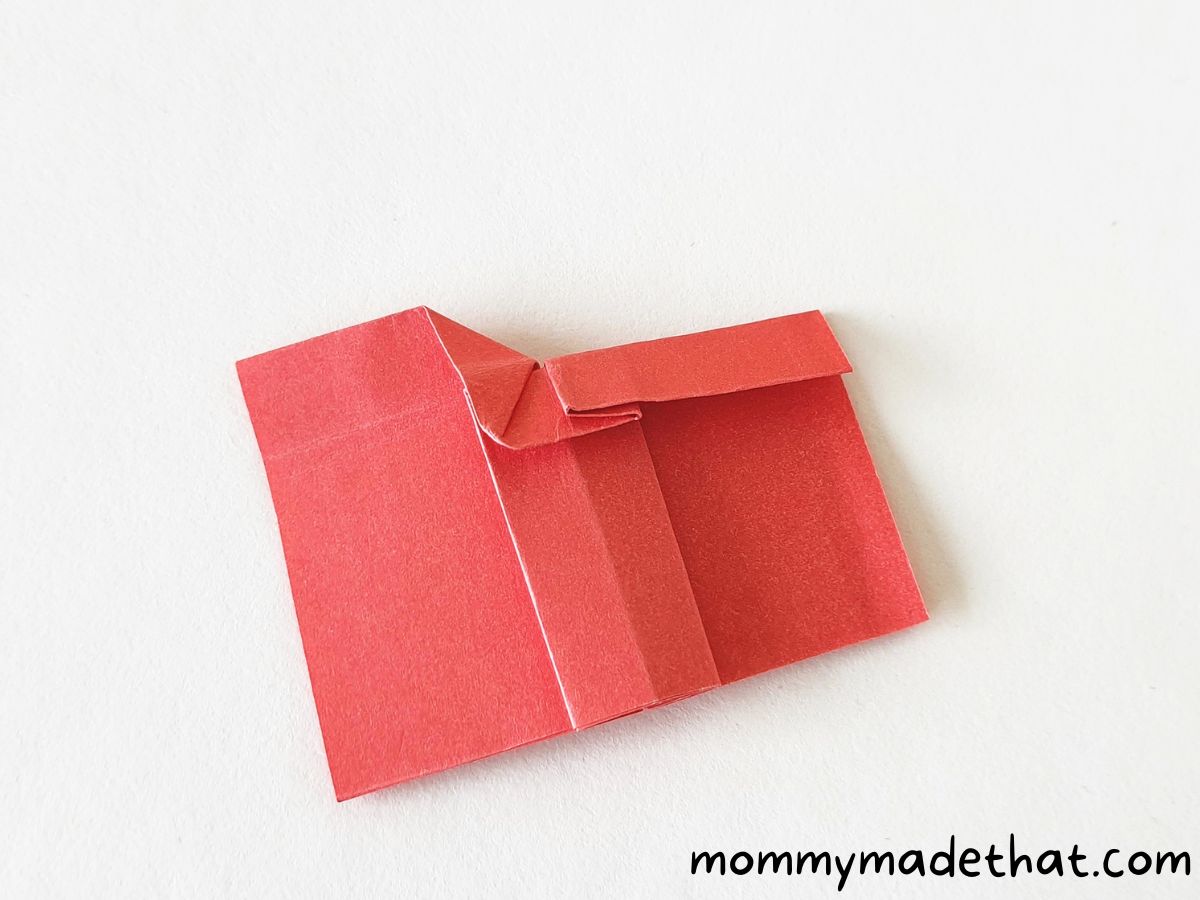
Step 13: Fold the Right Side of the Middle Part
Similarly, fold the right side of the middle part.
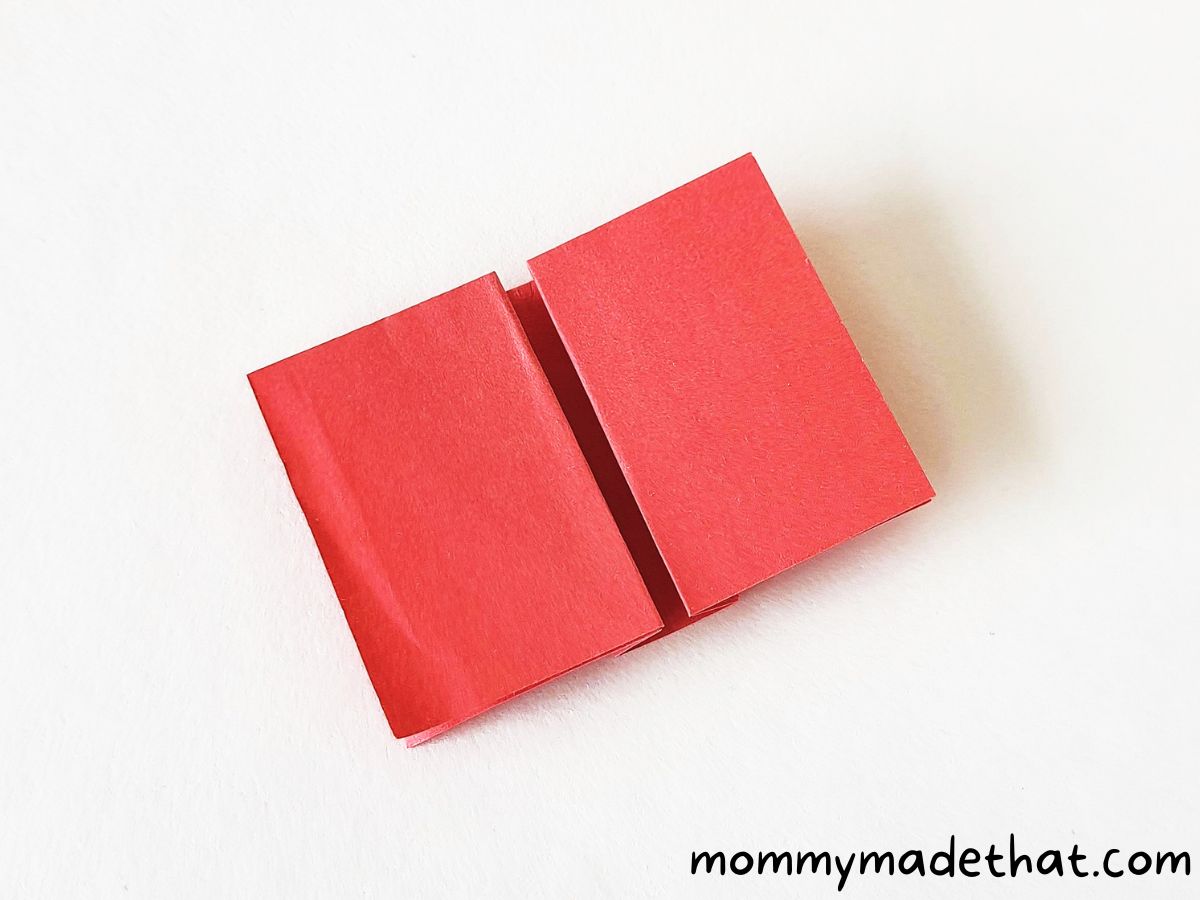
Step 14: Fold the Bottom Side
Fold one-sixth of the current paper along the bottom side.
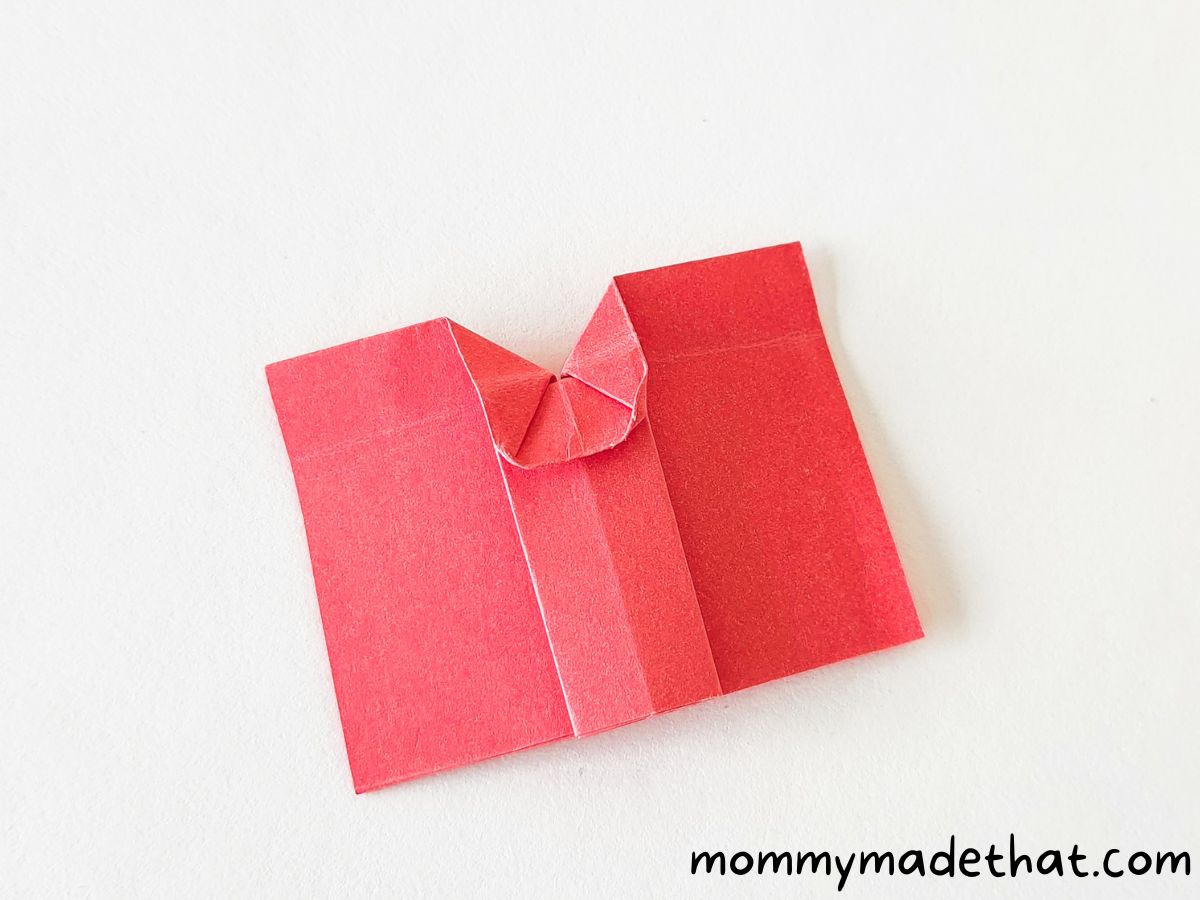
Step 15: Fold the Bottom Part Like the Top Part
Fold the bottom part in the same way you did with the top part.
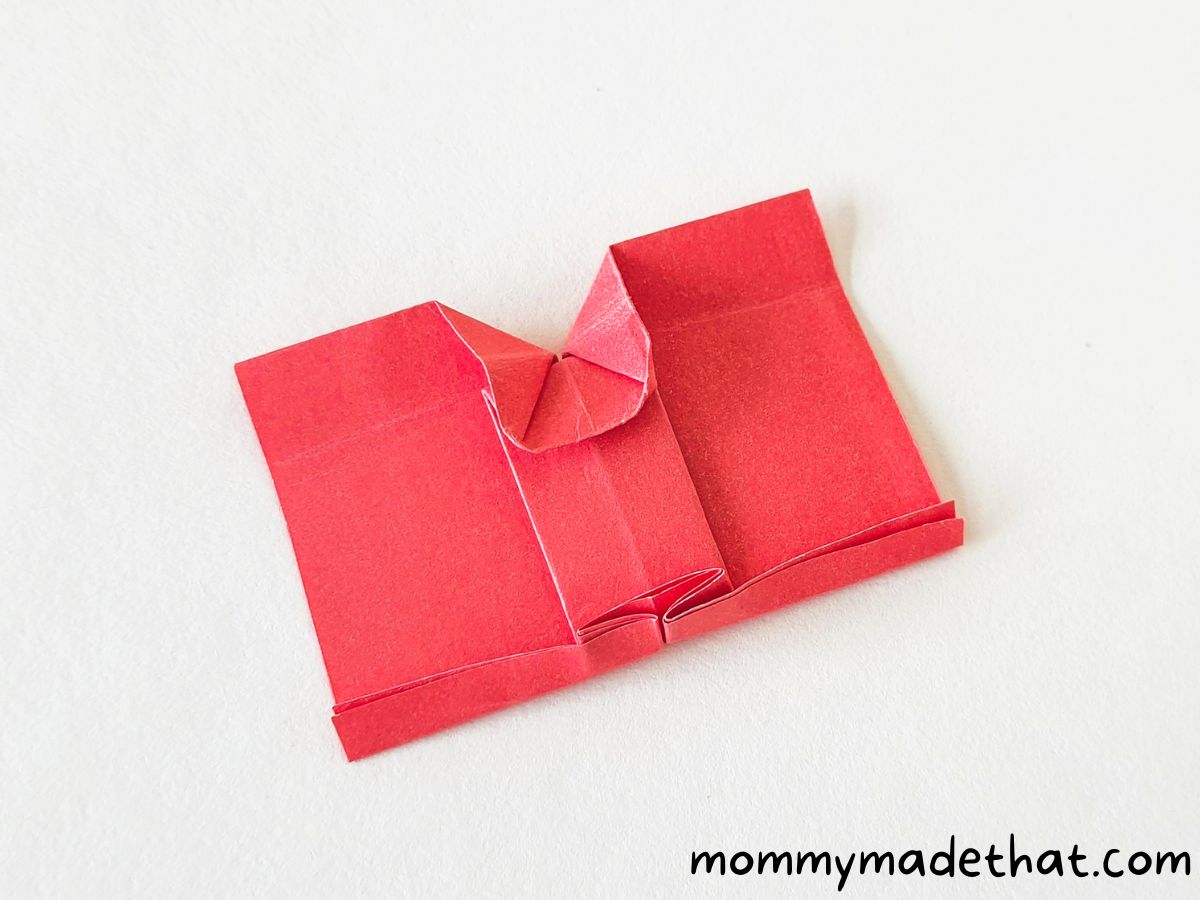
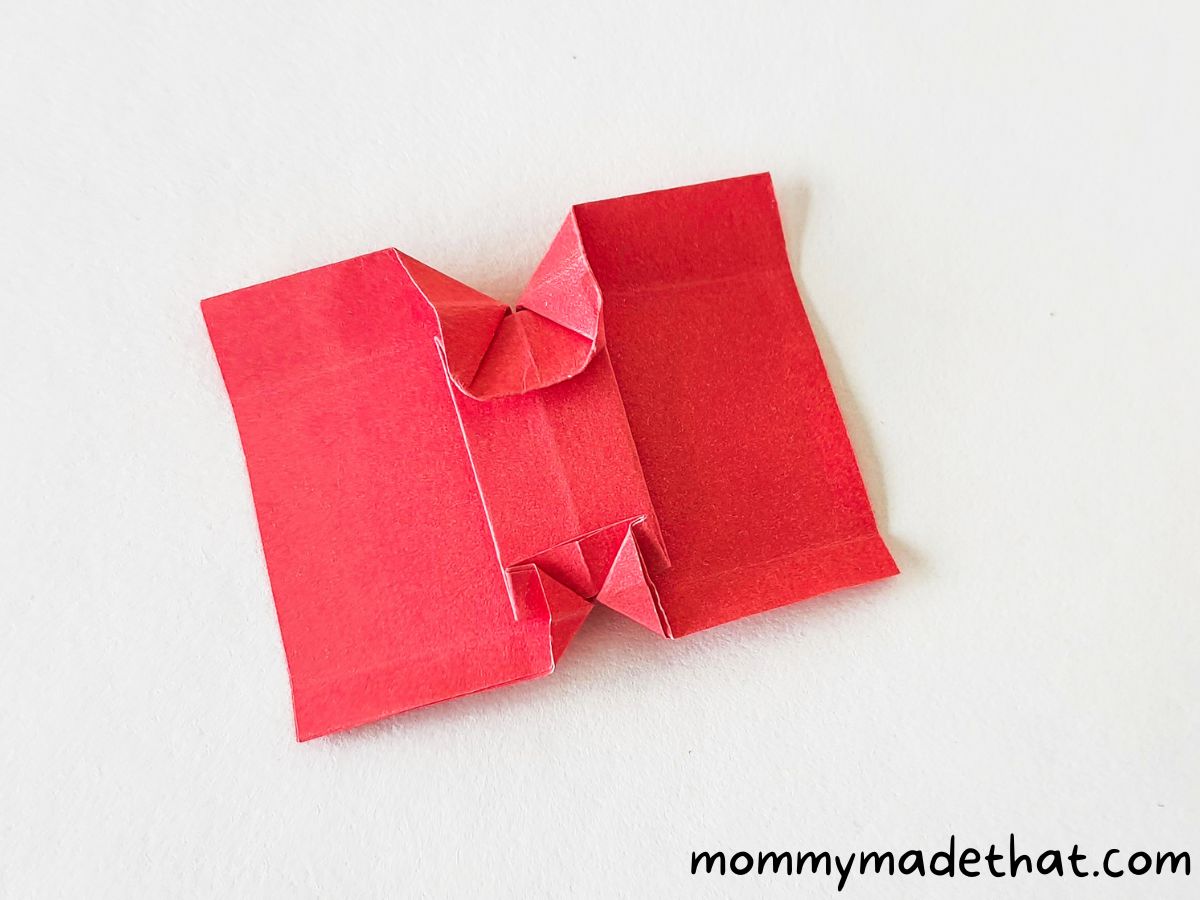
Step 16: Fold the Top Corners Inward

Fold in 1 cm from the corners of the top side.
Step 17: Fold the Bottom Corners Inward

Fold in 1.5 cm of the bottom corners. Your origami apple is now ready!
Step 18: Flip and Add the Stem and Leaf
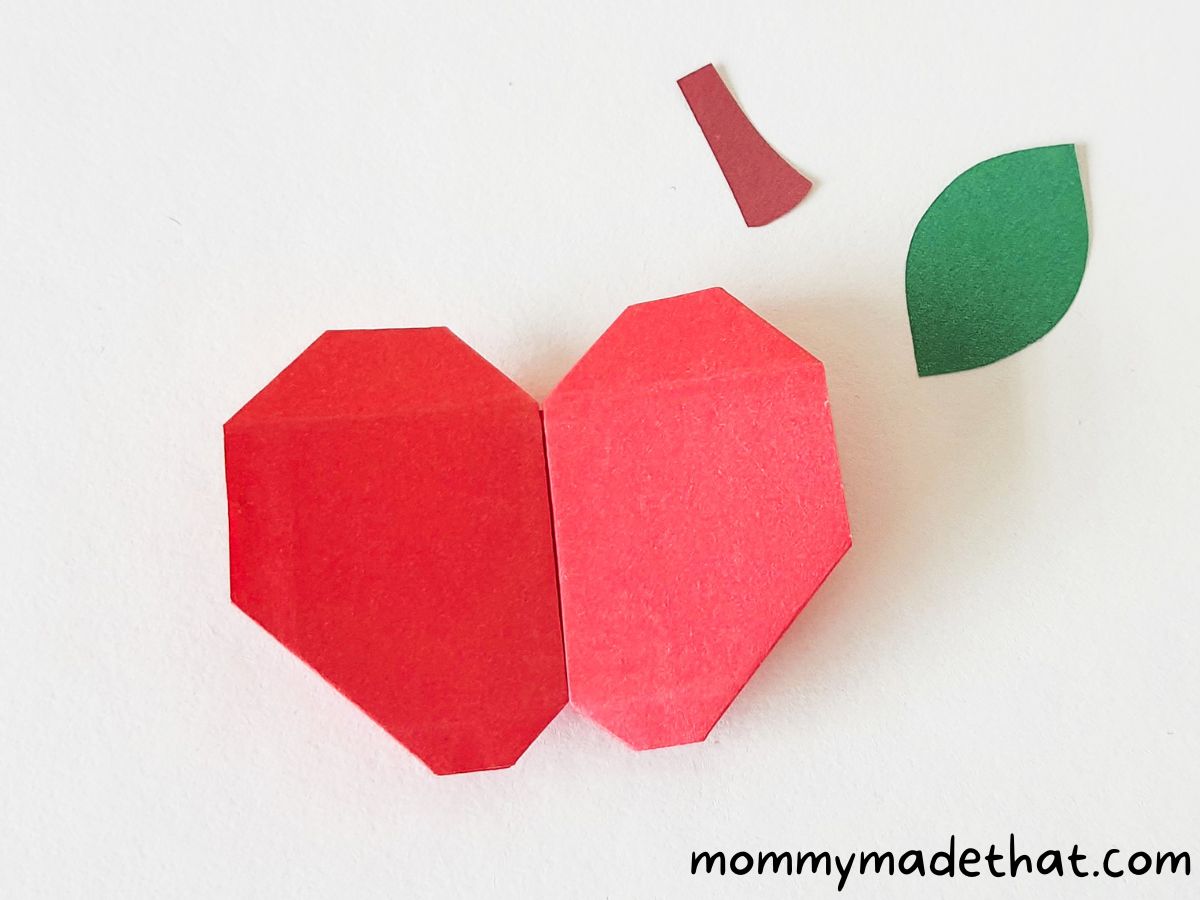
Flip the origami apple over. Trace and cut out a stem and leaf pattern from colored paper.
Step 19: Attach the Stem and Leaf
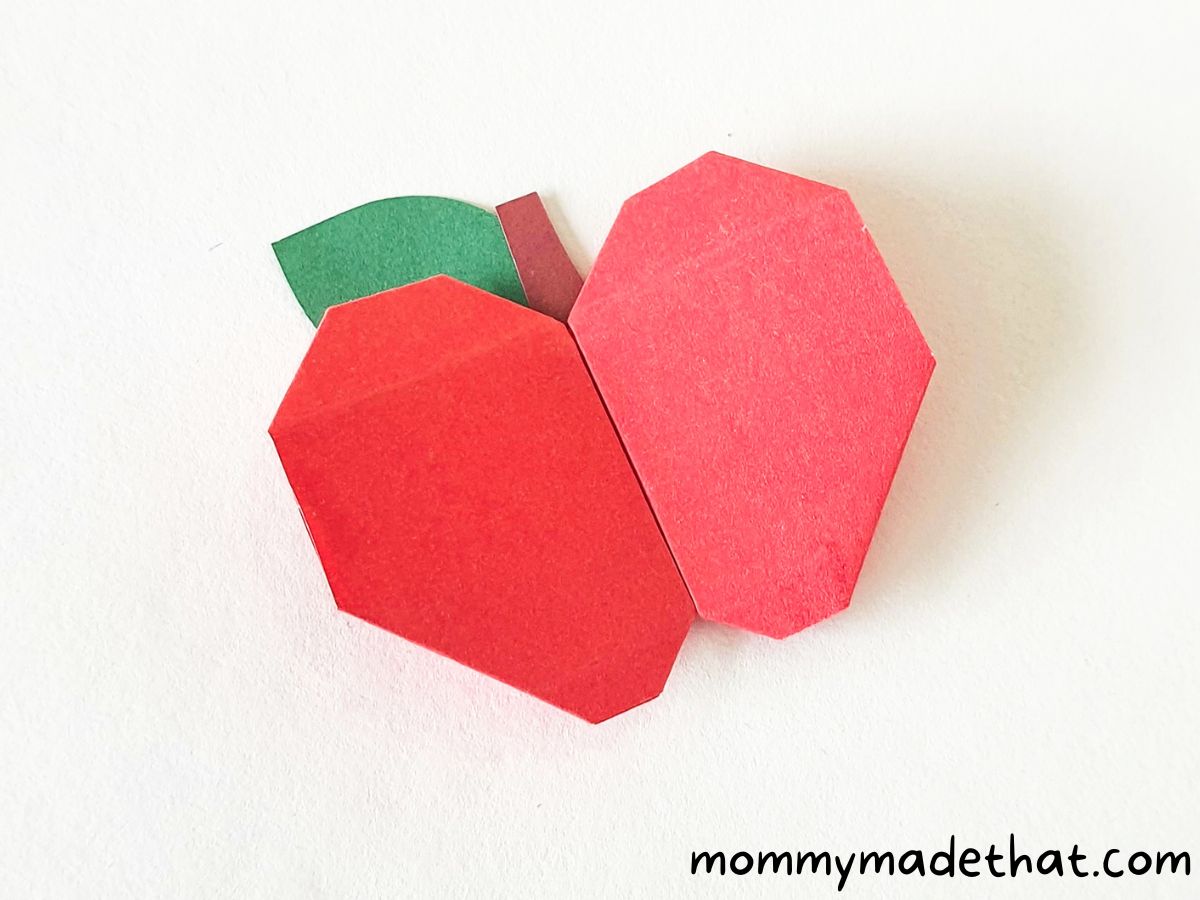
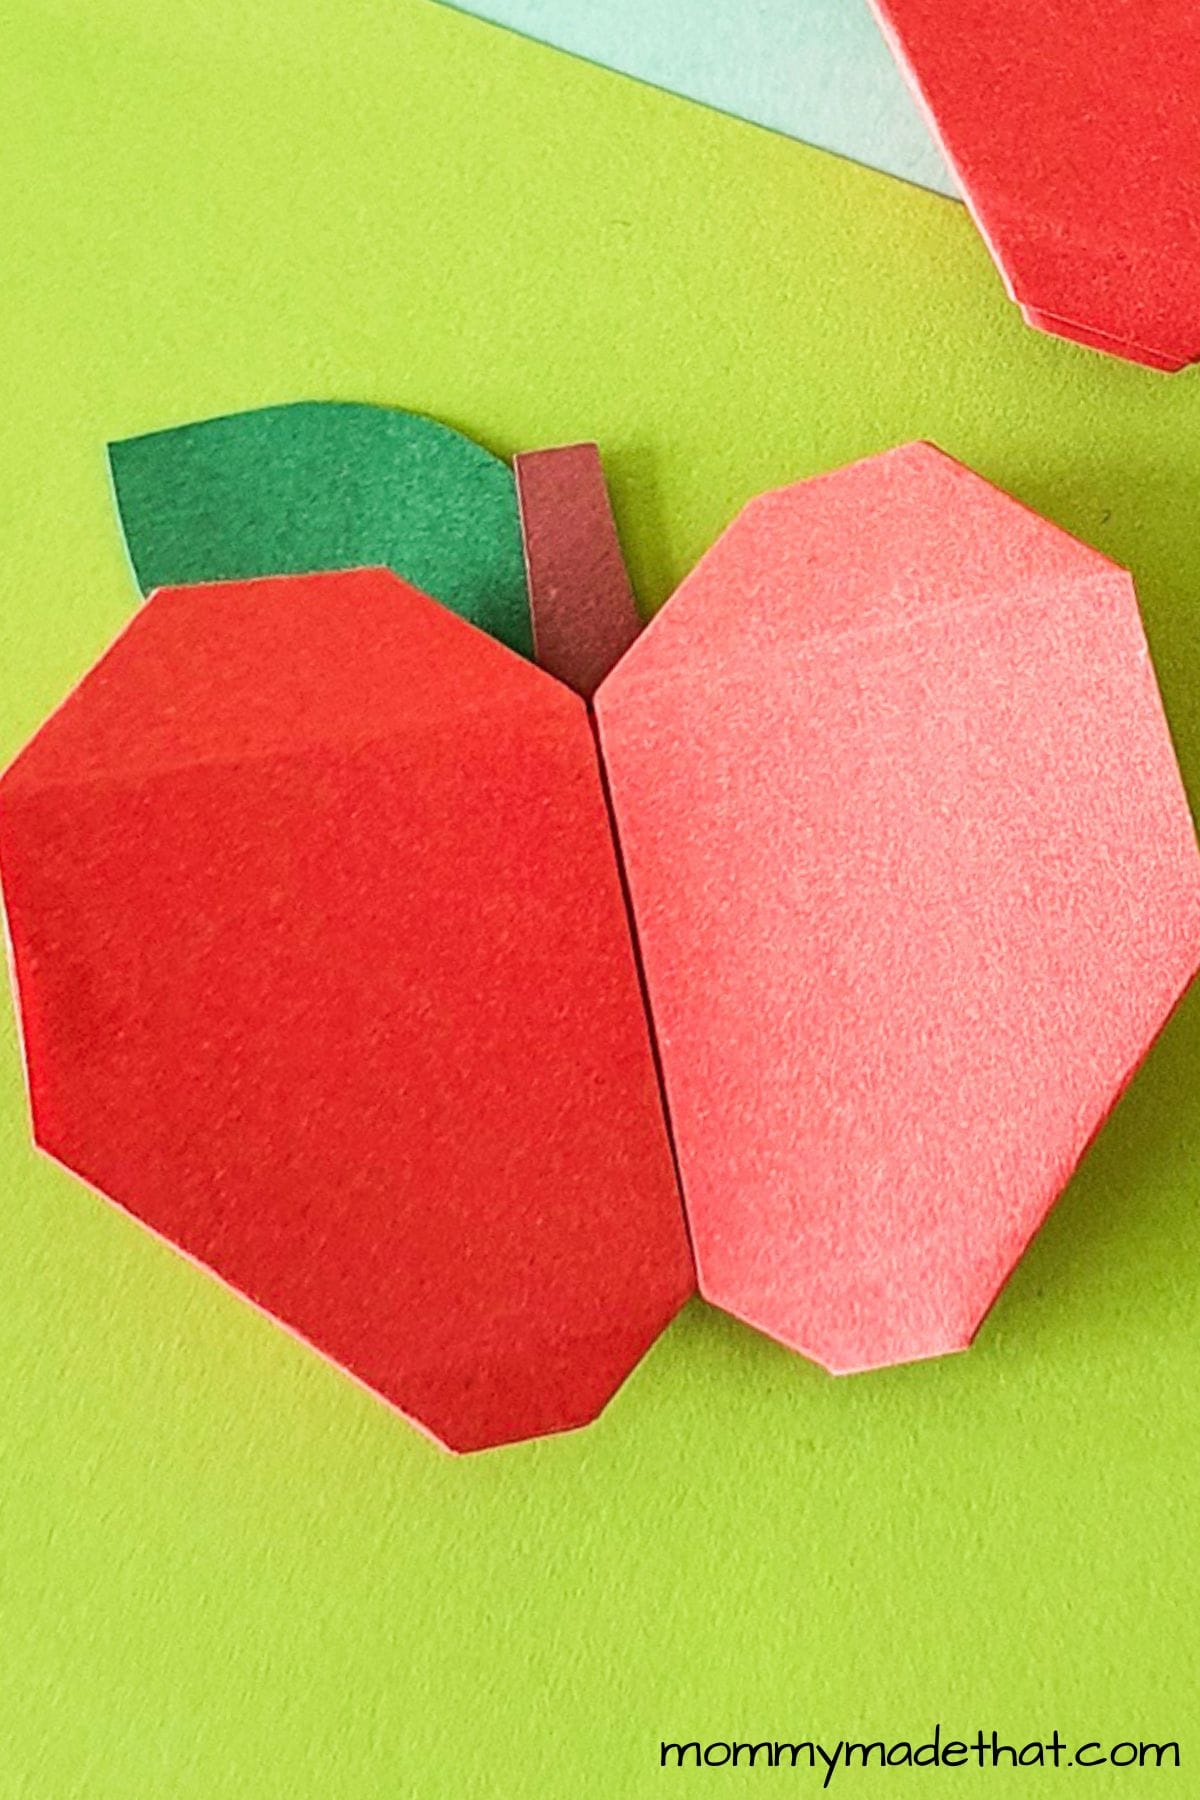
Stick the stem and leaf cutouts to the origami apple pattern, completing your beautiful origami apple!


Origami Apple
Learn how to make an origami apple with this step by step tutorial. Get ready to make some pretty paper apples!
Materials
- Colored craft paper
- Scissors
- Glue or tape
Instructions
- Grab a square piece of colored paper.
- Fold paper in half.
- Fold paper in half again the other way, making a smaller square.
- Unfold the last fold (horizontal fold).
- Carefully try to fold 1/3 of the paper from one side.ld the other side of the paper in the same way.
- Starting from the right side, align the 1/3 crease of the right side with the middle crease of the current pattern.
- Align and flatten the 1/3 crease of the right side with the middle crease.
- Similarly, align the left side with the middle crease.
- Turn over to the other side.
- Fold 1/5 of the current pattern along the top side.
- Open the left side of the top fold, keeping the middle part of the fold intact.
- Carefully fold and flatten the left side of the middle part.
- Similarly, fold the right side of the middle part.
- Fold 1/6 of the current paper along the bottom side.
- Fold the bottom part same like we did with the top part.
- Fold in 1 cm from the corners of the top side.
- Fold in 1.5 cm of the bottom corners. The origami apple pattern is ready.
- Flip the origami pattern to the right side. Trace and cut out a stem and a leaf pattern from colored craft papers.
this origami apple craft is not only a delightful and creative activity for individuals of all ages, but also an excellent way to explore the art of paper folding.
With its simple yet elegant design, the origami apple serves as a perfect gift or decorative piece for various occasions.