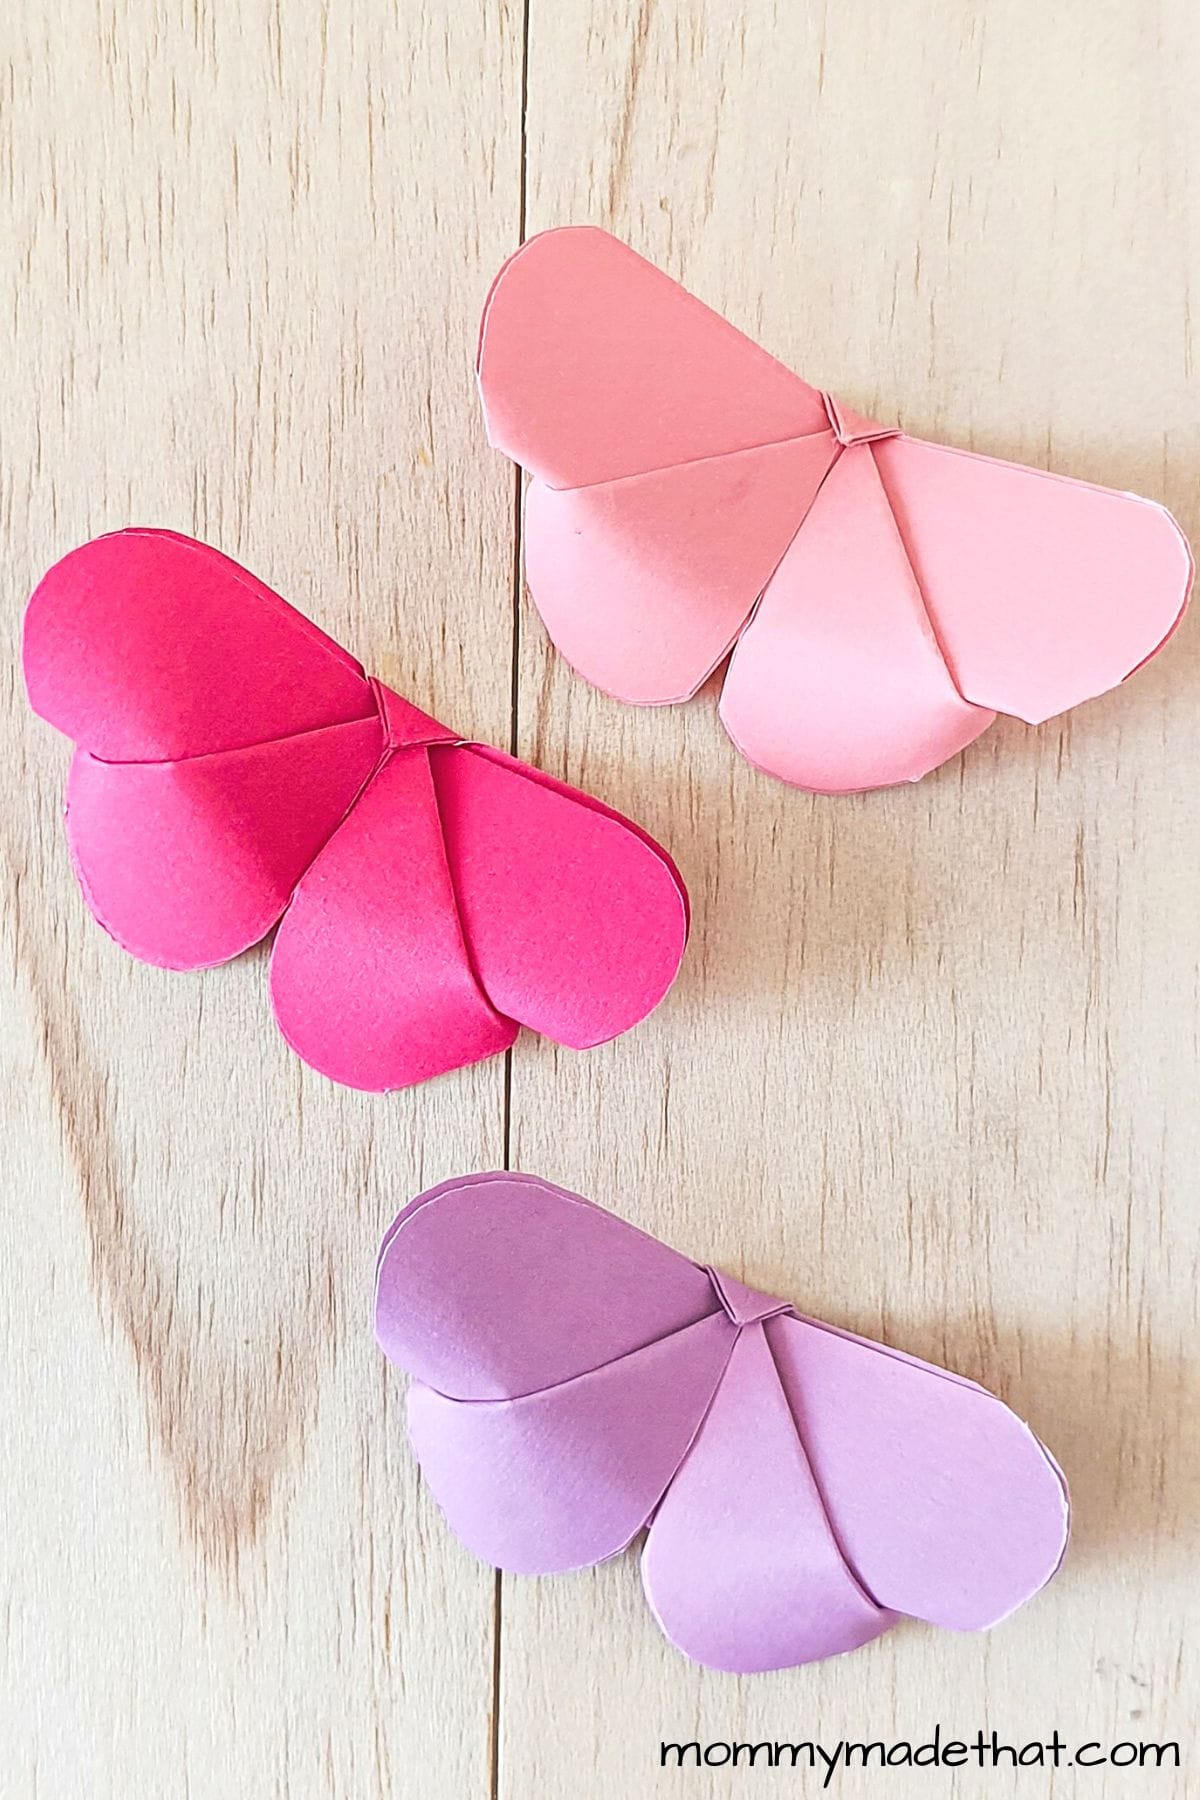
Origami Butterflies (Easy Step by Step Tutorial)
Today we have a step by step tutorial on how to make origami butterflies. A fun paper butterfly made from folding paper.
Hey there, craft lovers and butterfly enthusiasts! Are you ready to spread your wings and dive into a world of creativity and fun?
Today, we’re going to teach you how to create your very own easy origami butterflies with just a few simple folds and a touch of imagination!
These delicate paper wonders are perfect for decorations, gifts, or even as a hands-on learning tool.
Plus, they’re super easy to make, so you’ll be able to fill your home or classroom with fluttering friends in no time!
They make gorgeous wall art, a pretty gift wrapping topper or a gorgeous handmade card.
So grab your favorite paper, gather your excitement, and let’s get started on this fantastic craft adventure!
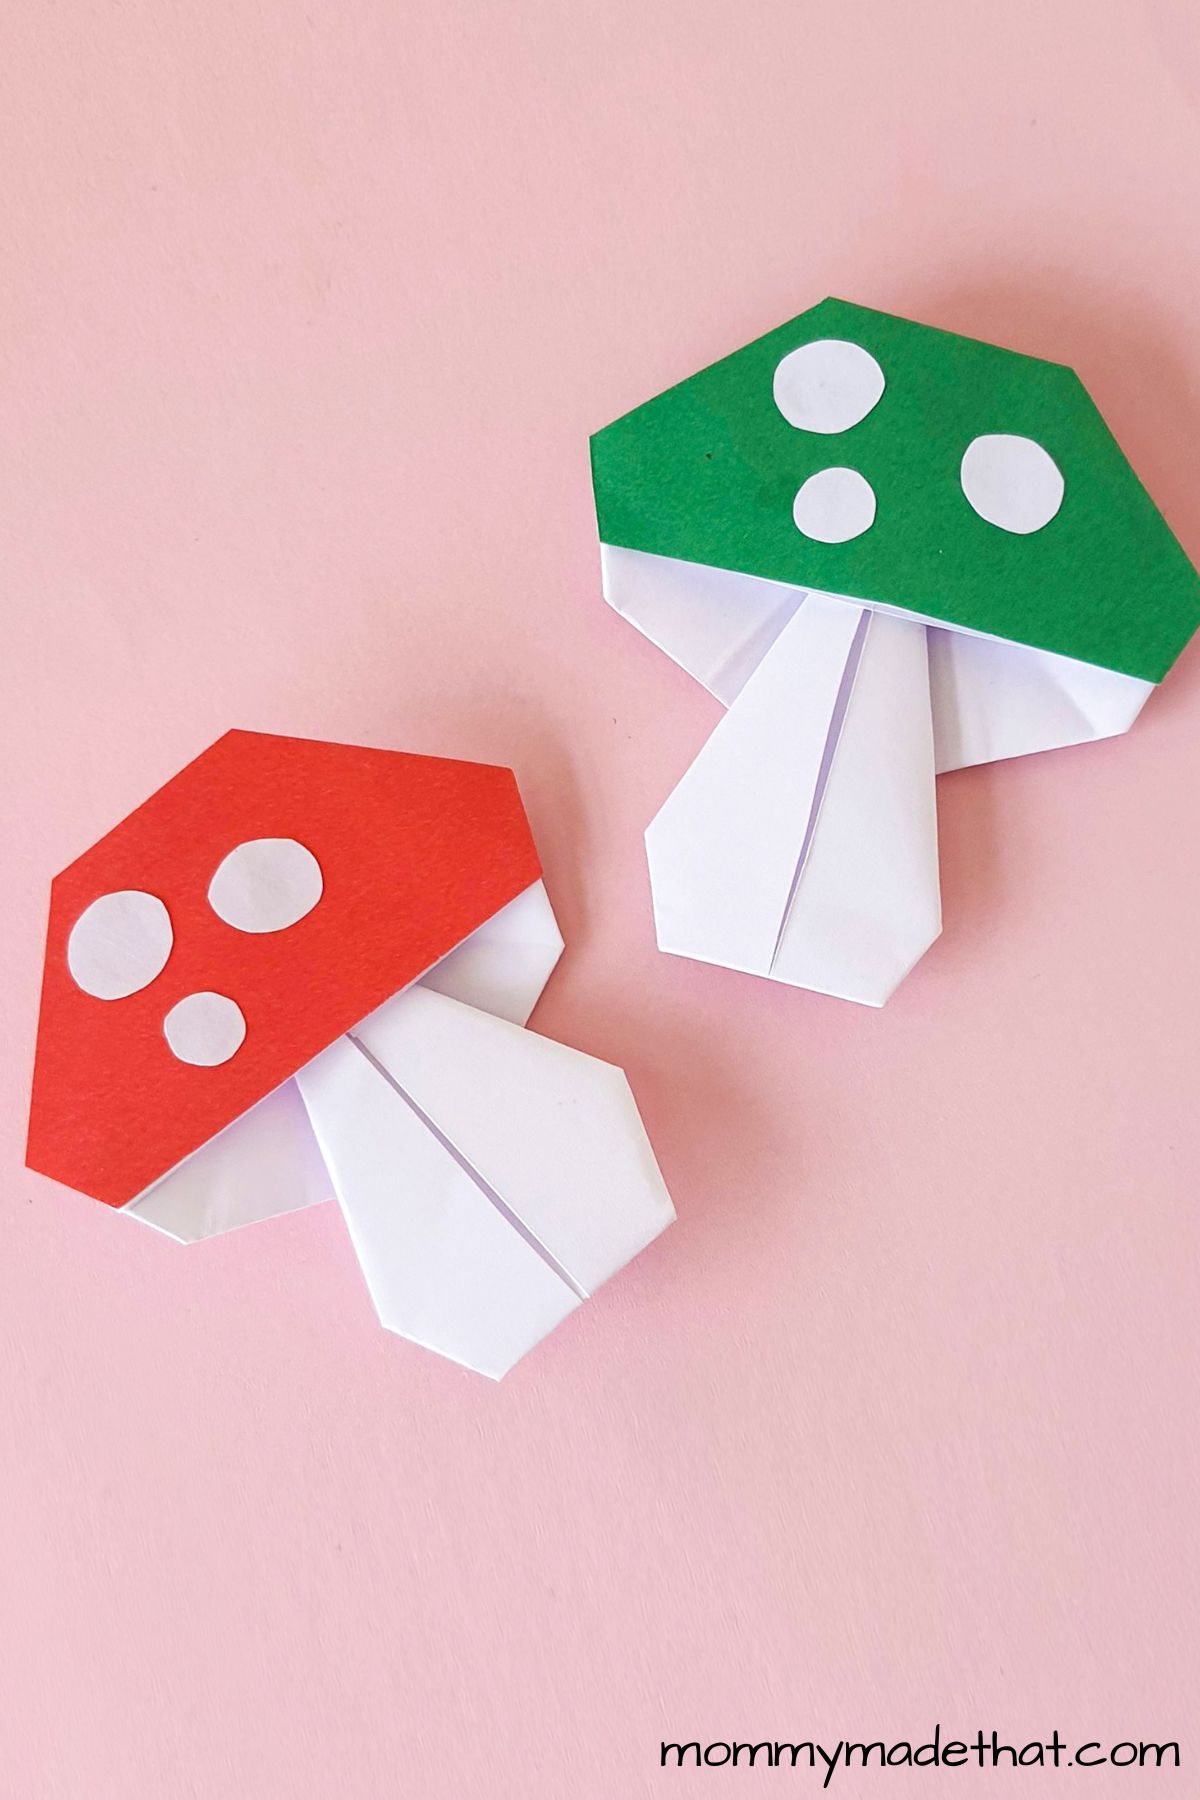
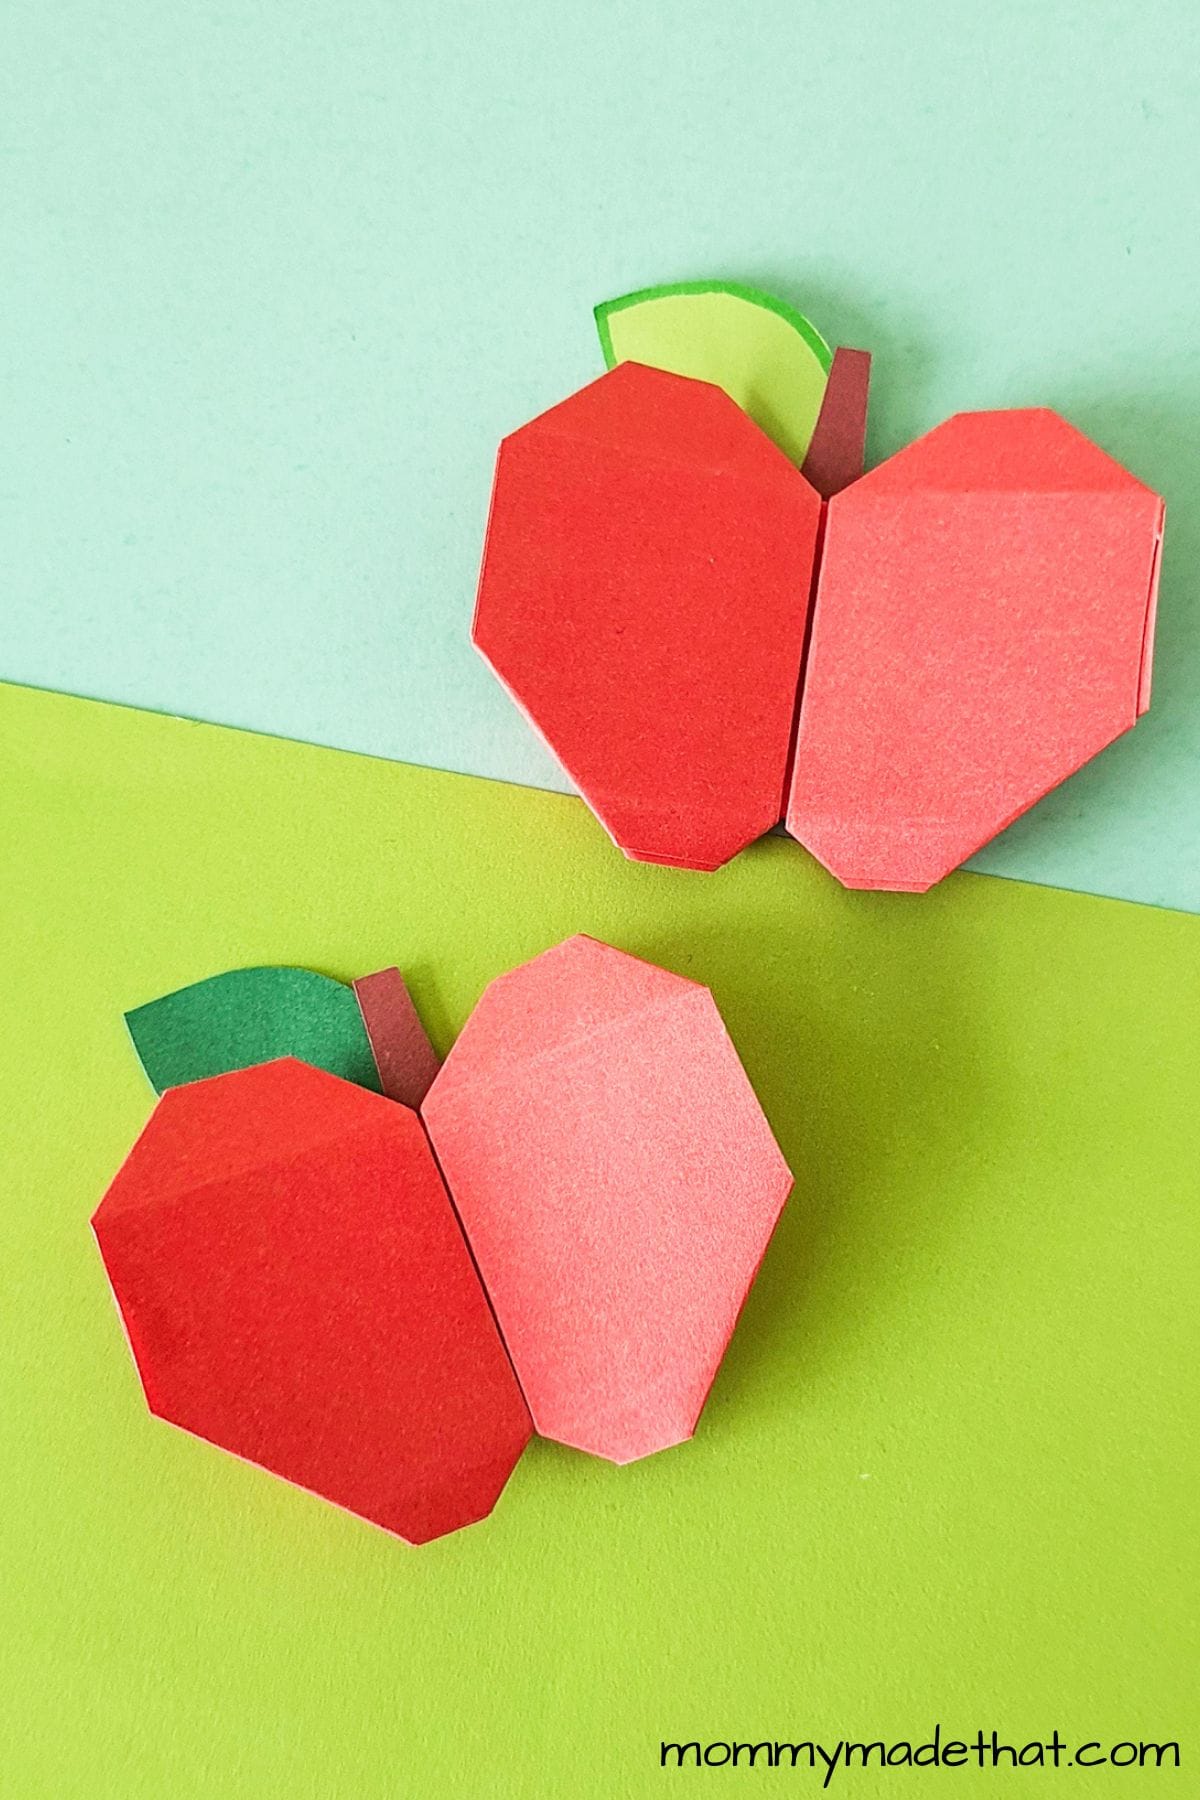
And be sure to check out our other origami crafts like our origami apple and our origami mushrooms.
Table of Contents
Materials
Before we start folding our way to beautiful origami butterflies, let’s make sure you have all the necessary materials on hand. Here’s a list of what you’ll need:
Origami Paper: Choose a square piece of origami paper (usually 6×6 inches or 15×15 cm) in your favorite colors and patterns. If you don’t have origami paper, you can also use any thin paper, like printer paper, cut into a square. Just remember, thinner paper will make folding easier.
Other useful supplies:
- Bone folder or something to create sharp edges
- Scissors
- Ruler
- Flat surface
How to Make an Origami Butterfly
Follow these origami butterfly instructions to help you create an easy origami butterfly in no time.
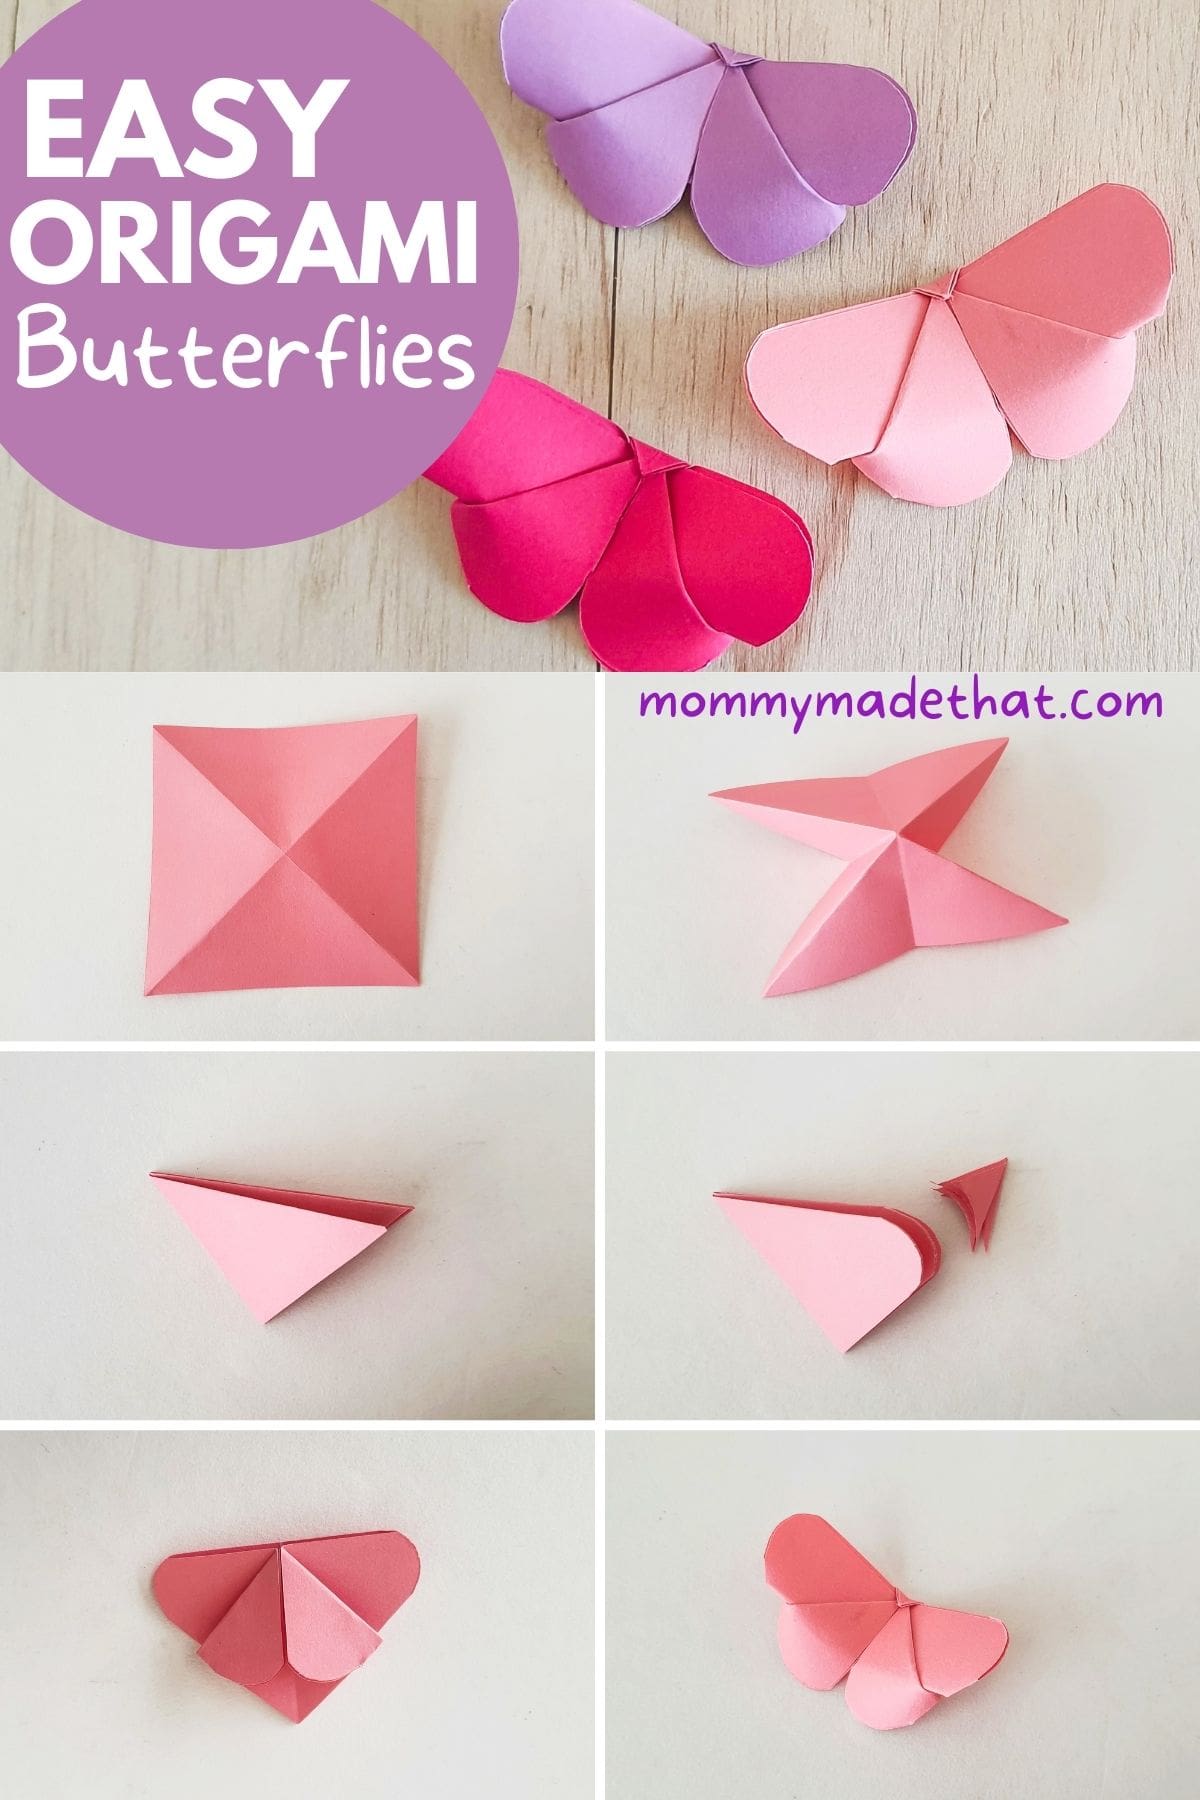
Step 1: Prepare Your Square Paper

Start with a square piece of paper, either origami paper or any thin paper cut into a square. The size of your butterfly will depend on the size of your paper.
A larger piece of paper with create a large butterfly while a smaller square will mean a small butterfly.
Step 2: Create Diagonal Creases
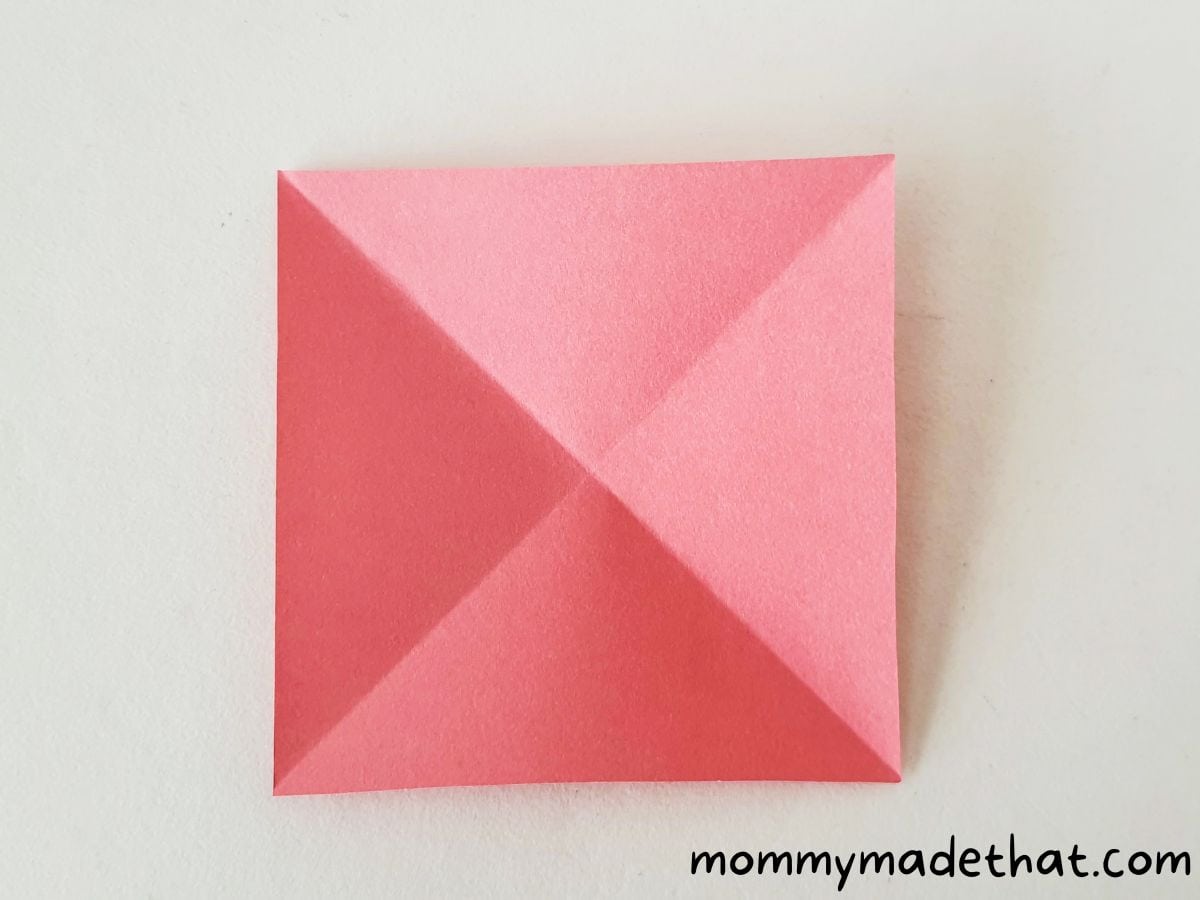
Fold the paper in half diagonally, creating a crease, and then unfold. Repeat this step by folding along the other diagonal and unfolding again. You should now have two diagonal creases on your paper.
Step 3: Flip the Paper
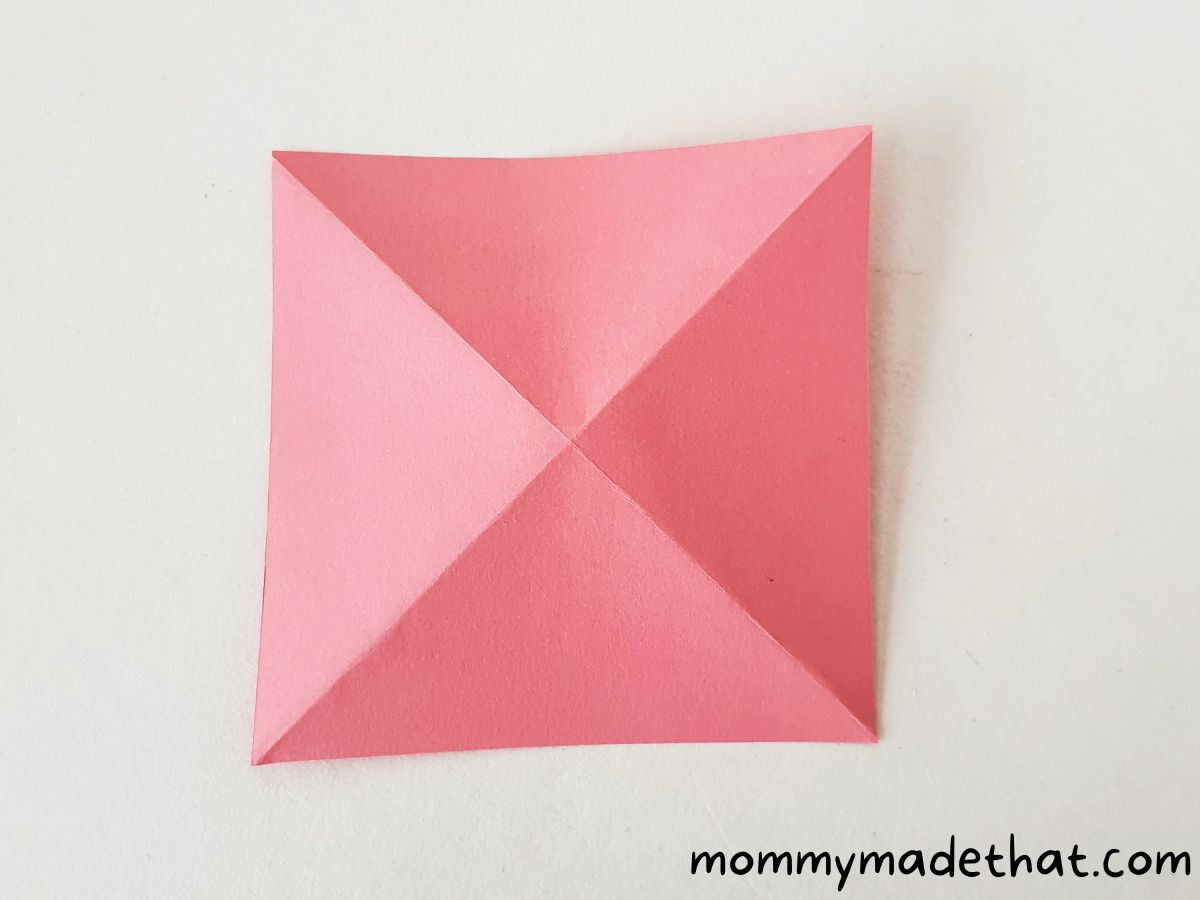
Turn the paper over to the other side so it makes a shallow pyramid.
Step 4: Make Vertical and Horizontal Creases
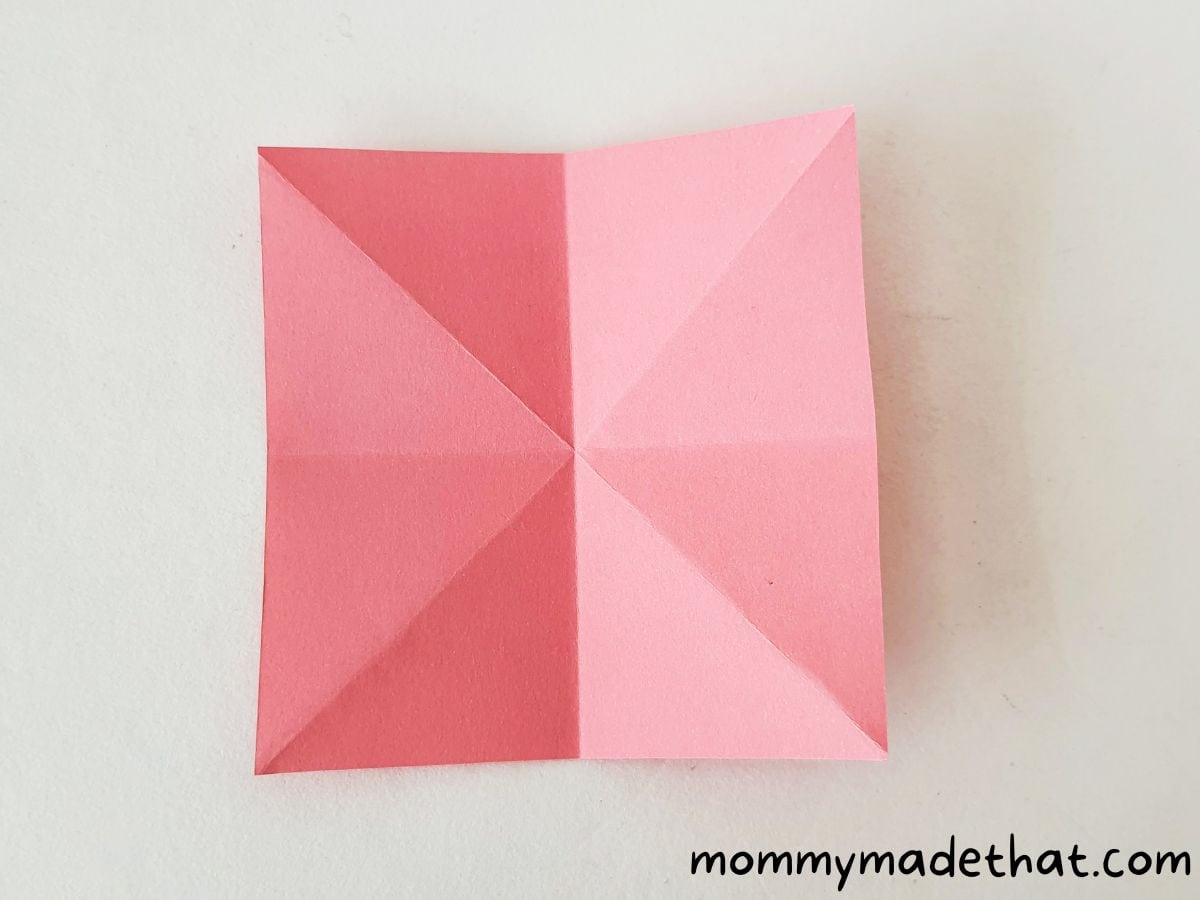
Fold the paper in half vertically and horizontally, creating creases, and then unfold.
Step 5: Form a Four-Point Star
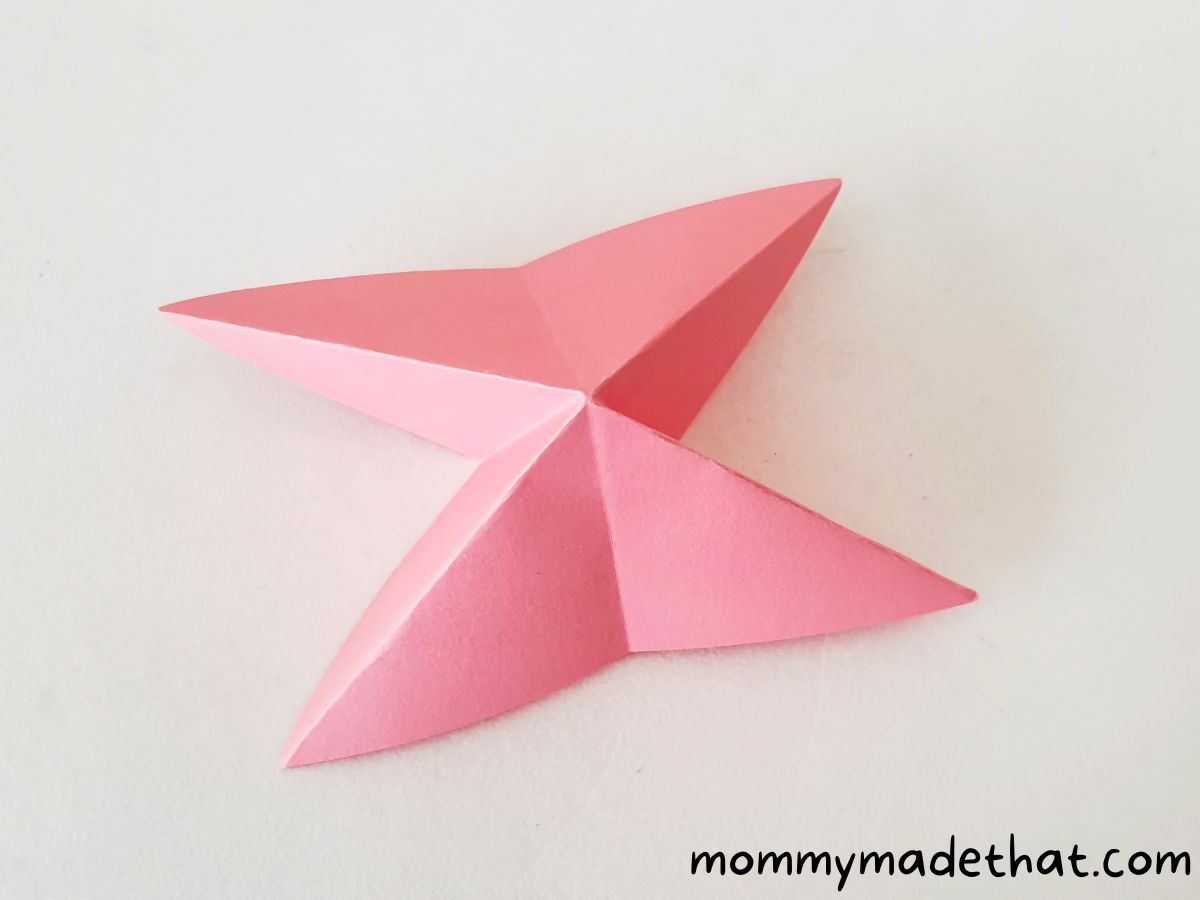
Using the diagonal creases as guides, fold the paper up while pushing the vertical and horizontal creases downward. This will create a four-point star shape.
Step 6: Flatten into a Triangle
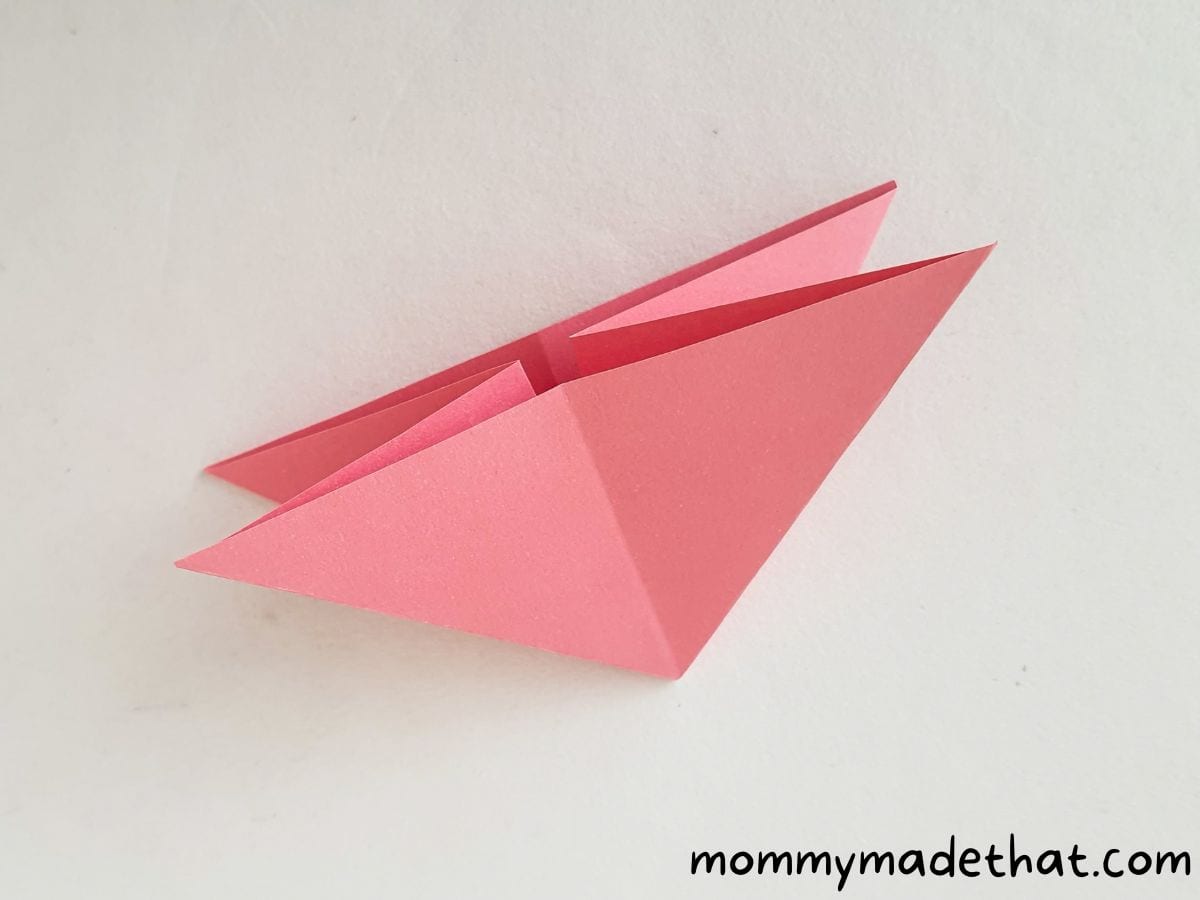
Flatten the origami paper to form a triangle pattern.
Step 7: Gather Triangle Flaps
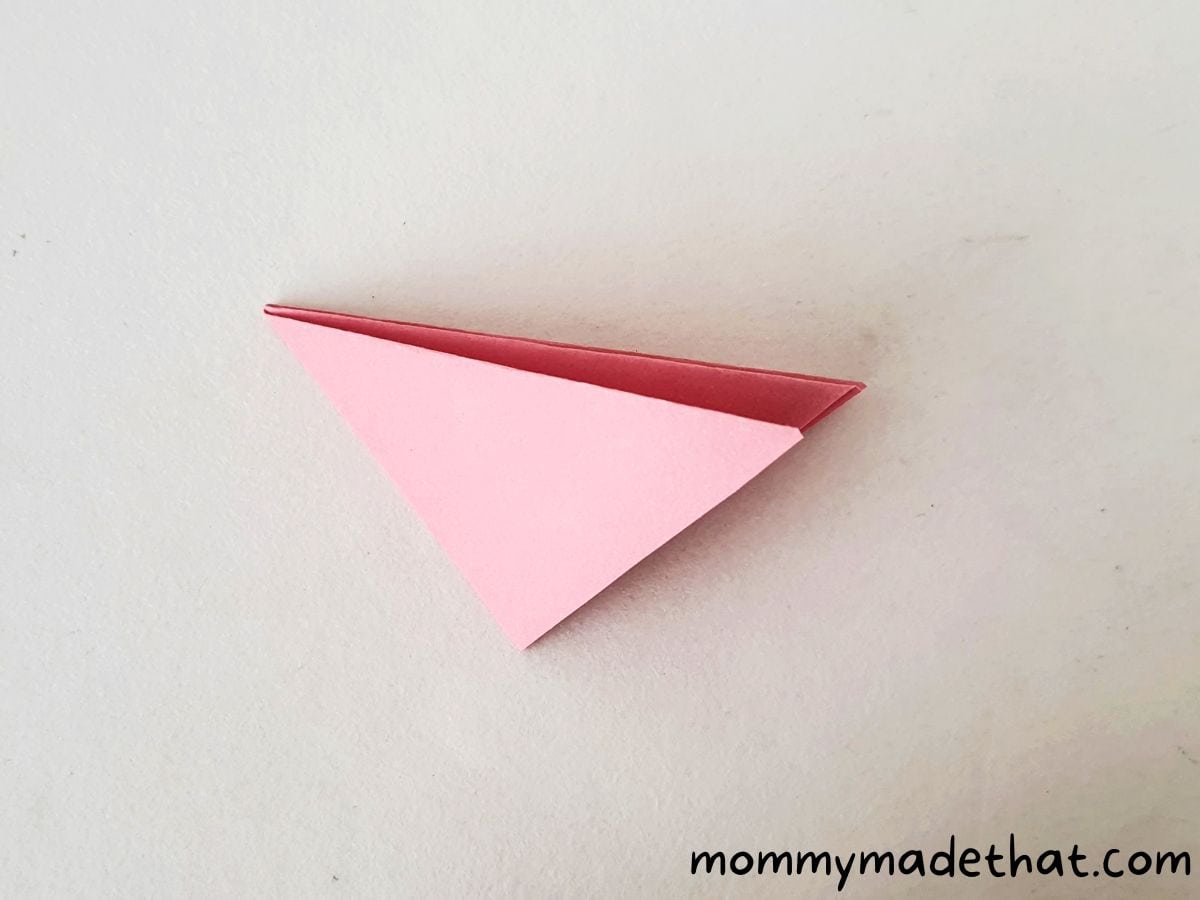
Bring all four triangle flaps together on one side of the paper.
Step 8: Trim Flap Edges
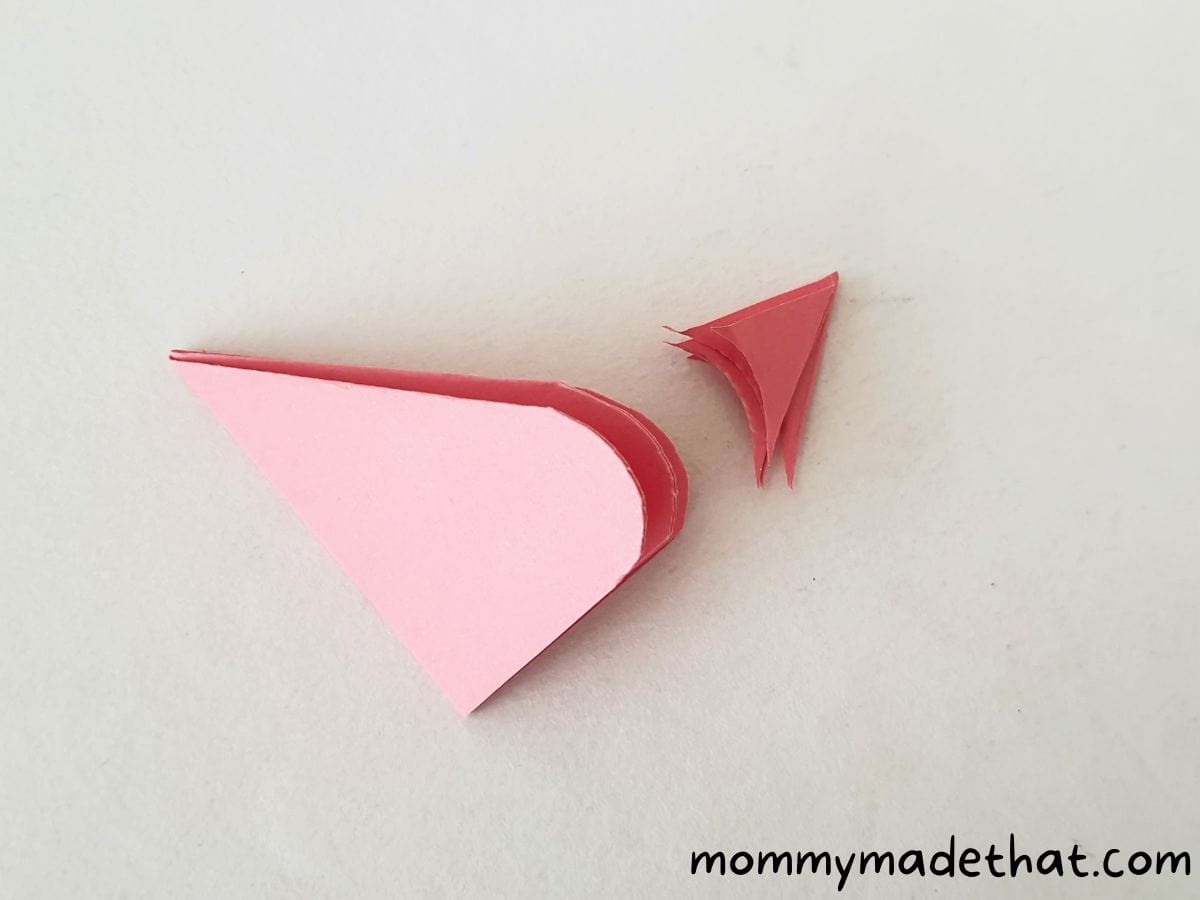
Using your scissors, trim the open corners of the flaps to create rounded edges.
Step 9: Separate Flap Pairs
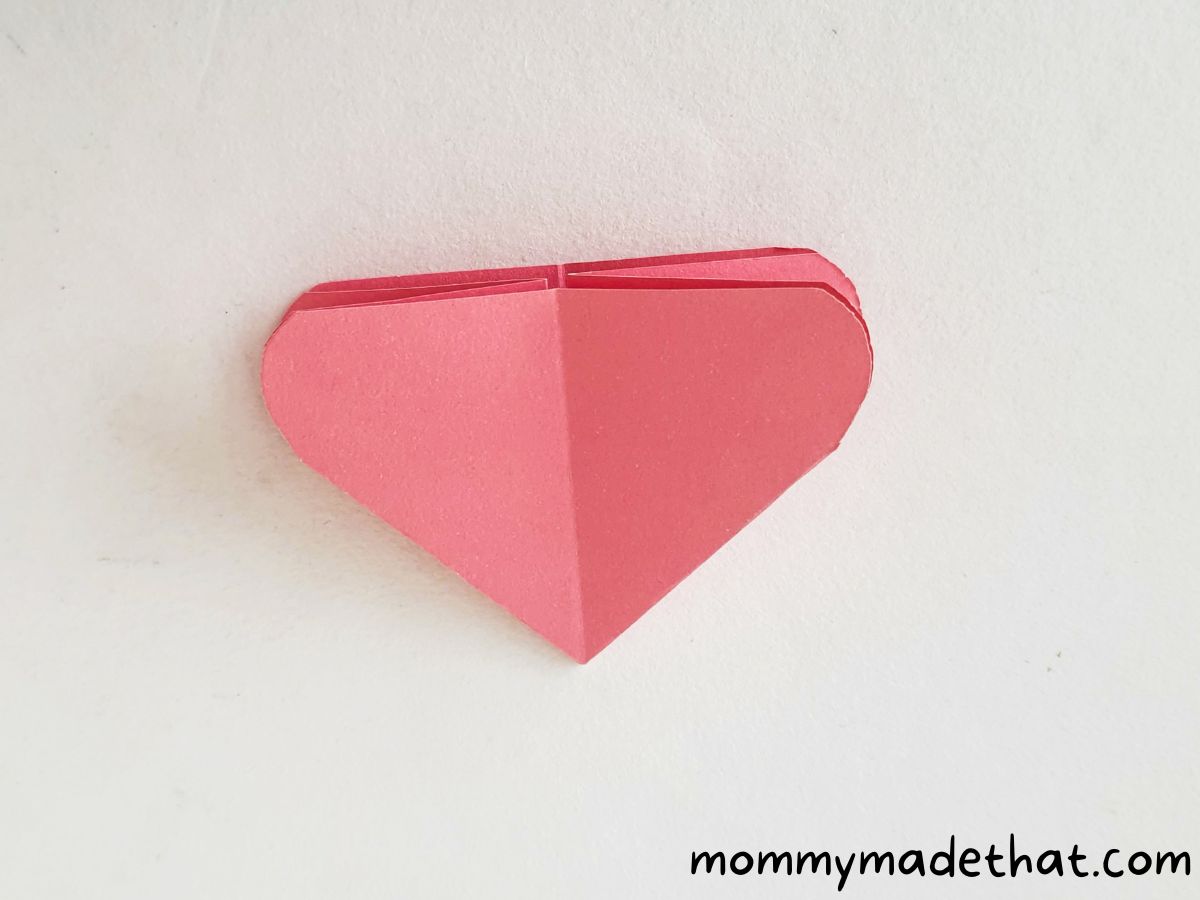
Open the flaps and arrange them into two pairs on each side.
Step 10: Fold Left Edge Inward
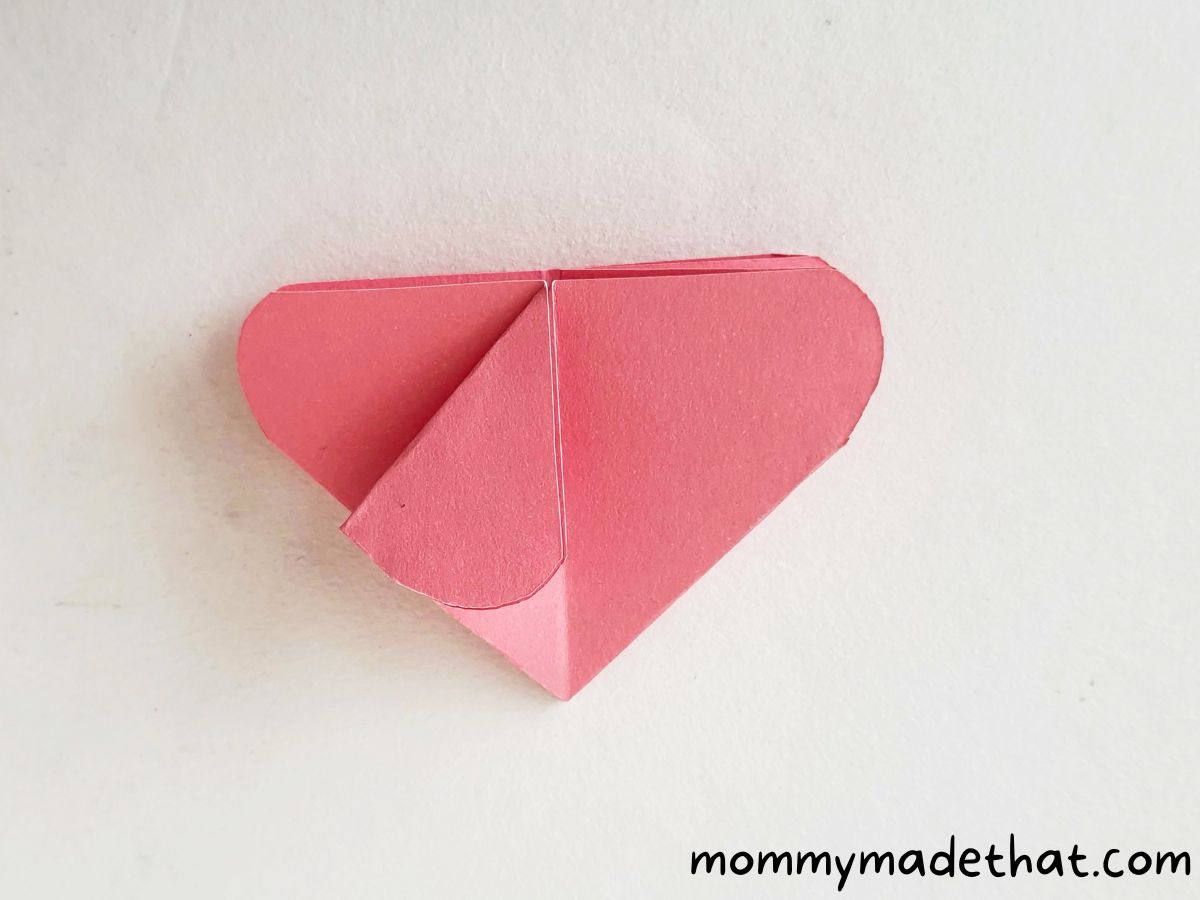
Fold the left open edge inward, aligning it with the middle crease of the pattern.
Step 11: Fold Right Edge Inward
Repeat step 10 with the right open edge, folding it inward along the middle crease.
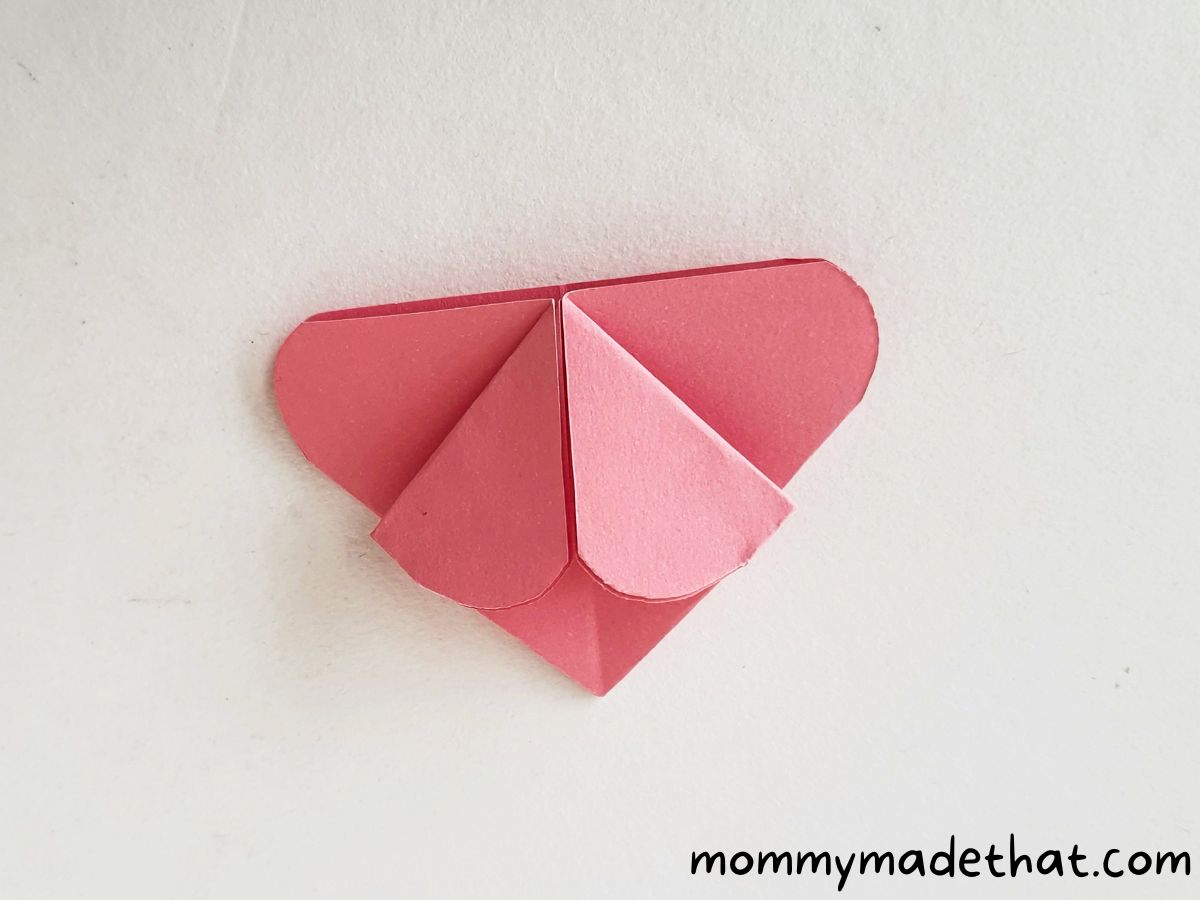
Step 12: Flip the Pattern
Turn the pattern over to the other side.
Step 13: Fold Bottom Corner Upward
Fold the bottom corner upward, bringing it all the way to the top. A small portion (about 1 cm) of the corner should peek out on the other side.
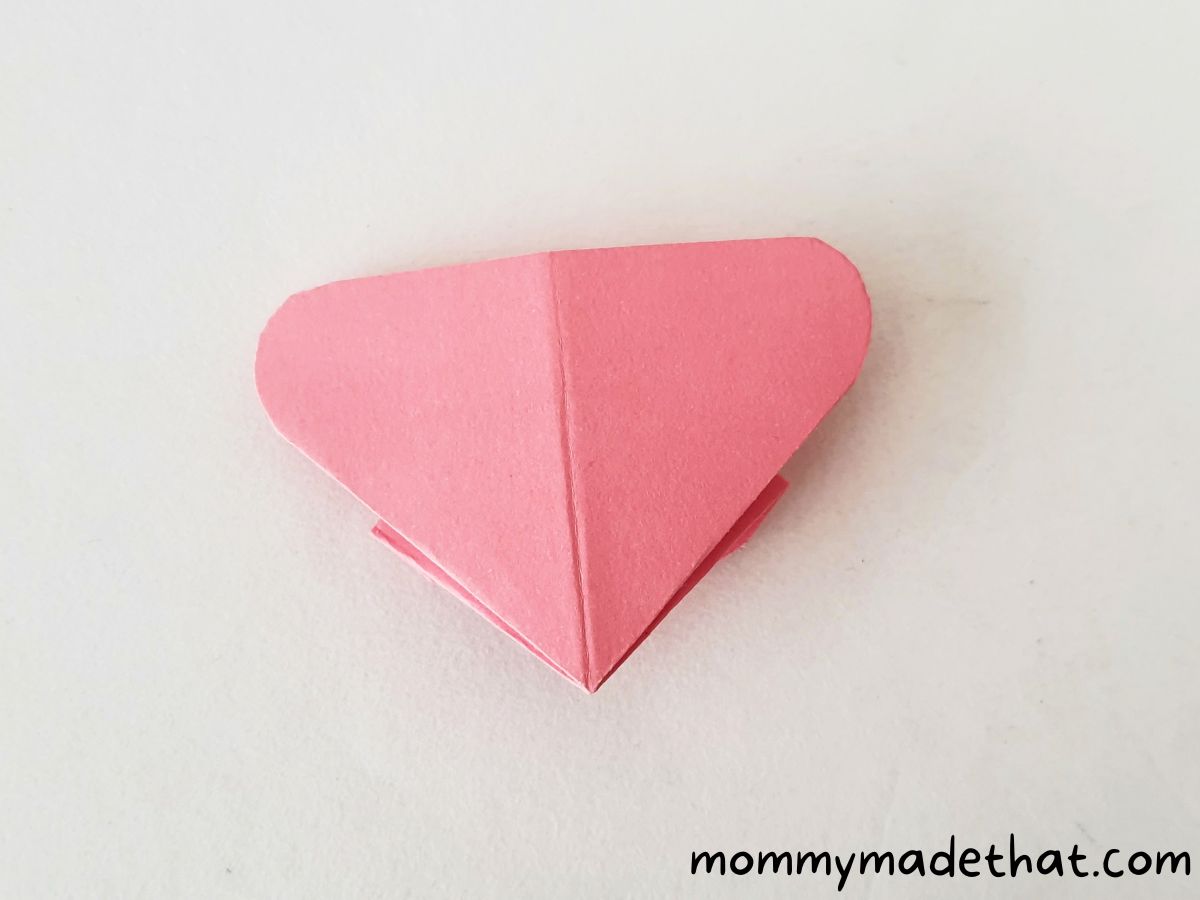
Step 14: Flip the Pattern Again
Turn the pattern over to the other side once more.
Step 15: Secure the Fold with Glue

Fold the extra tip to the front and apply glue to the small (1 cm) section to secure the fold.
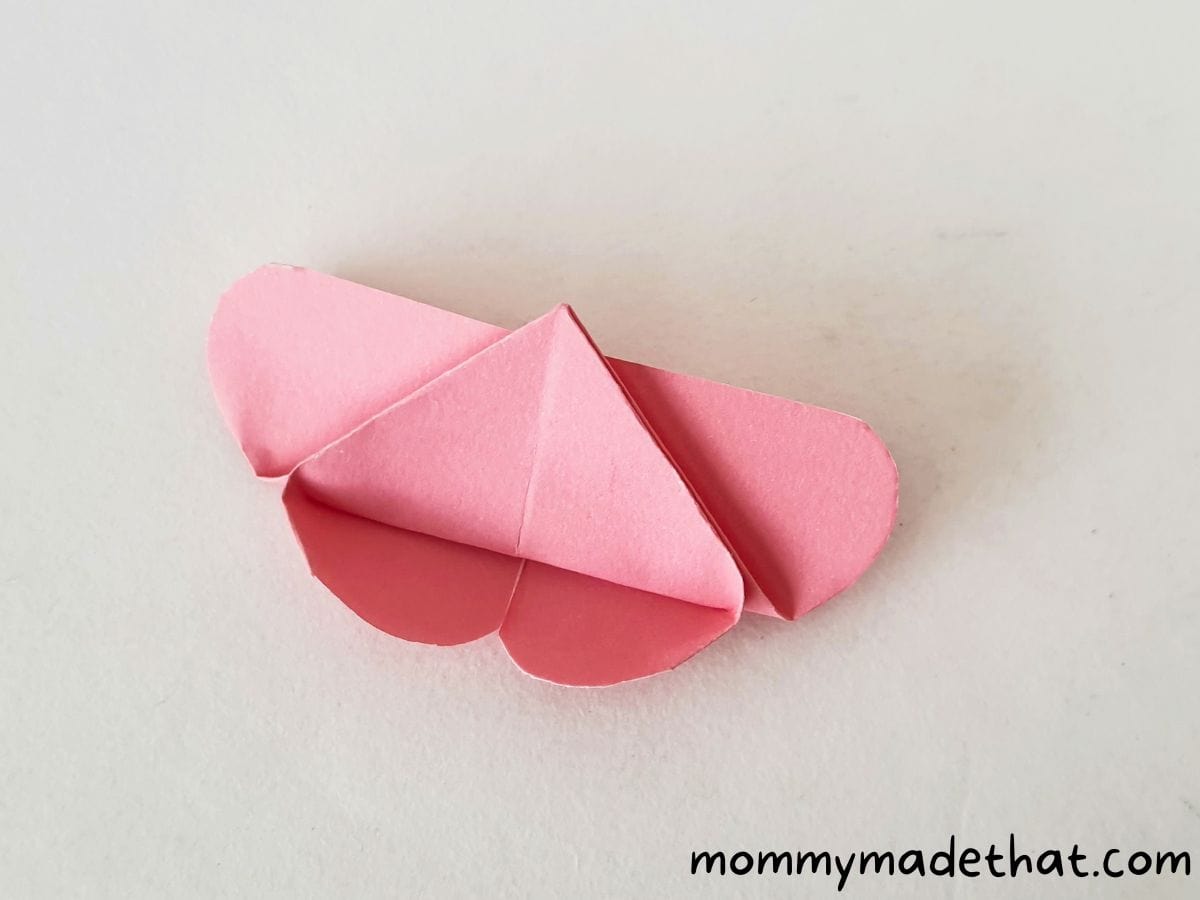
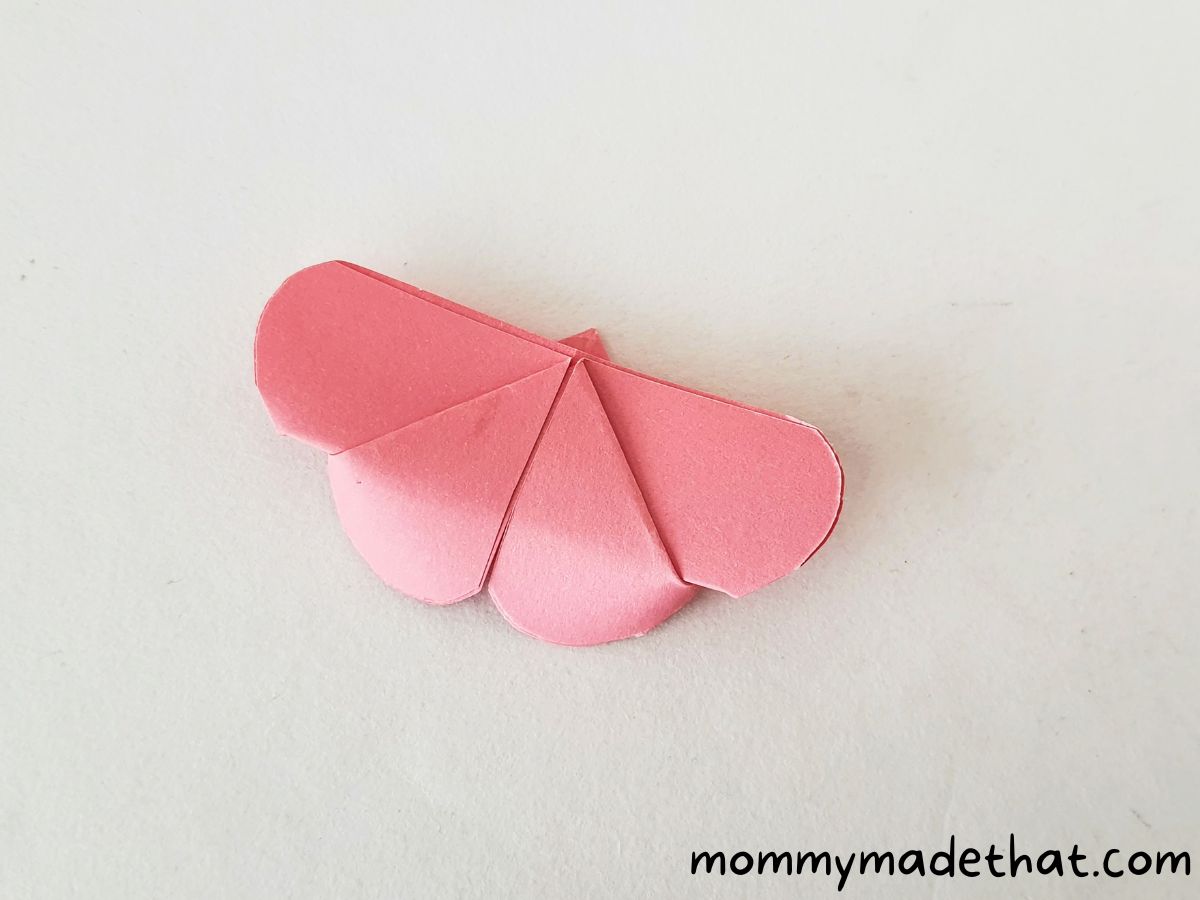
Step 16: Admire Your Origami Butterfly
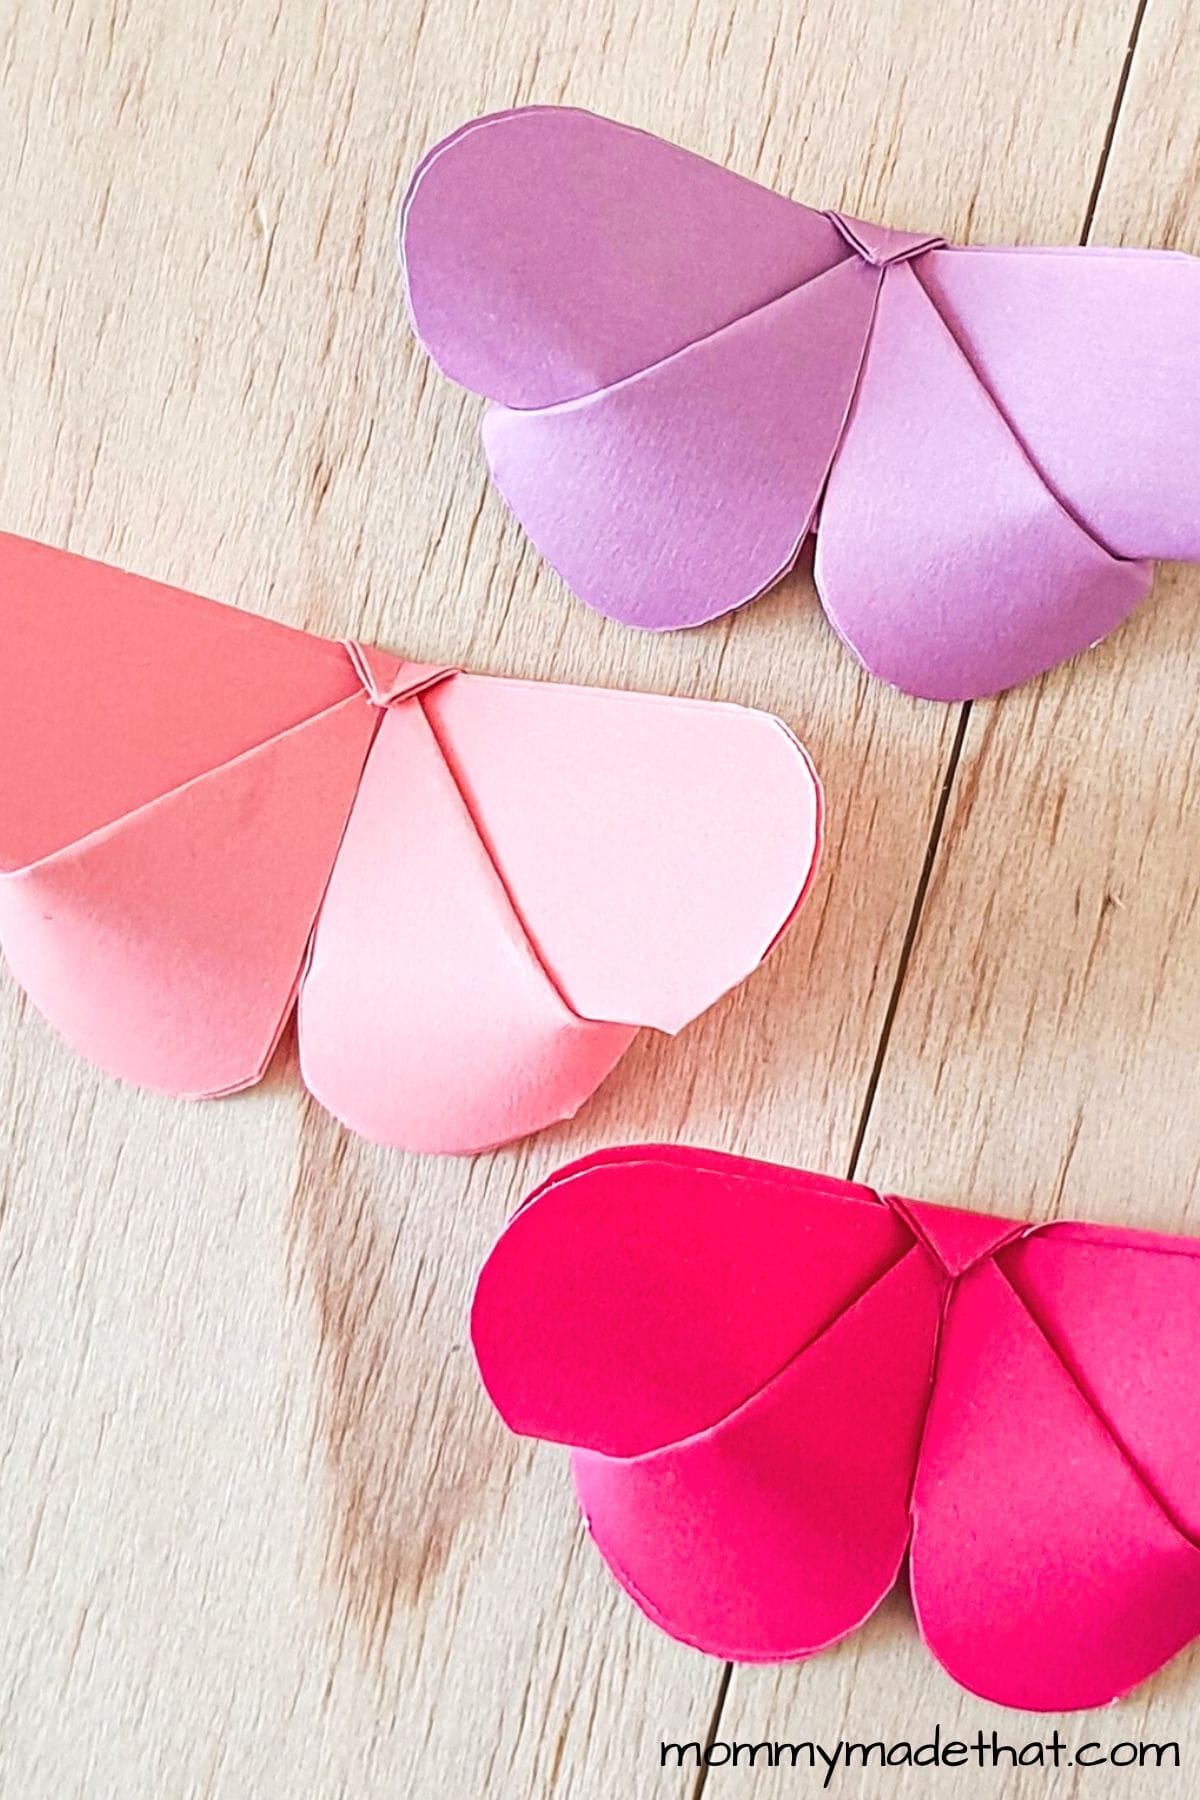
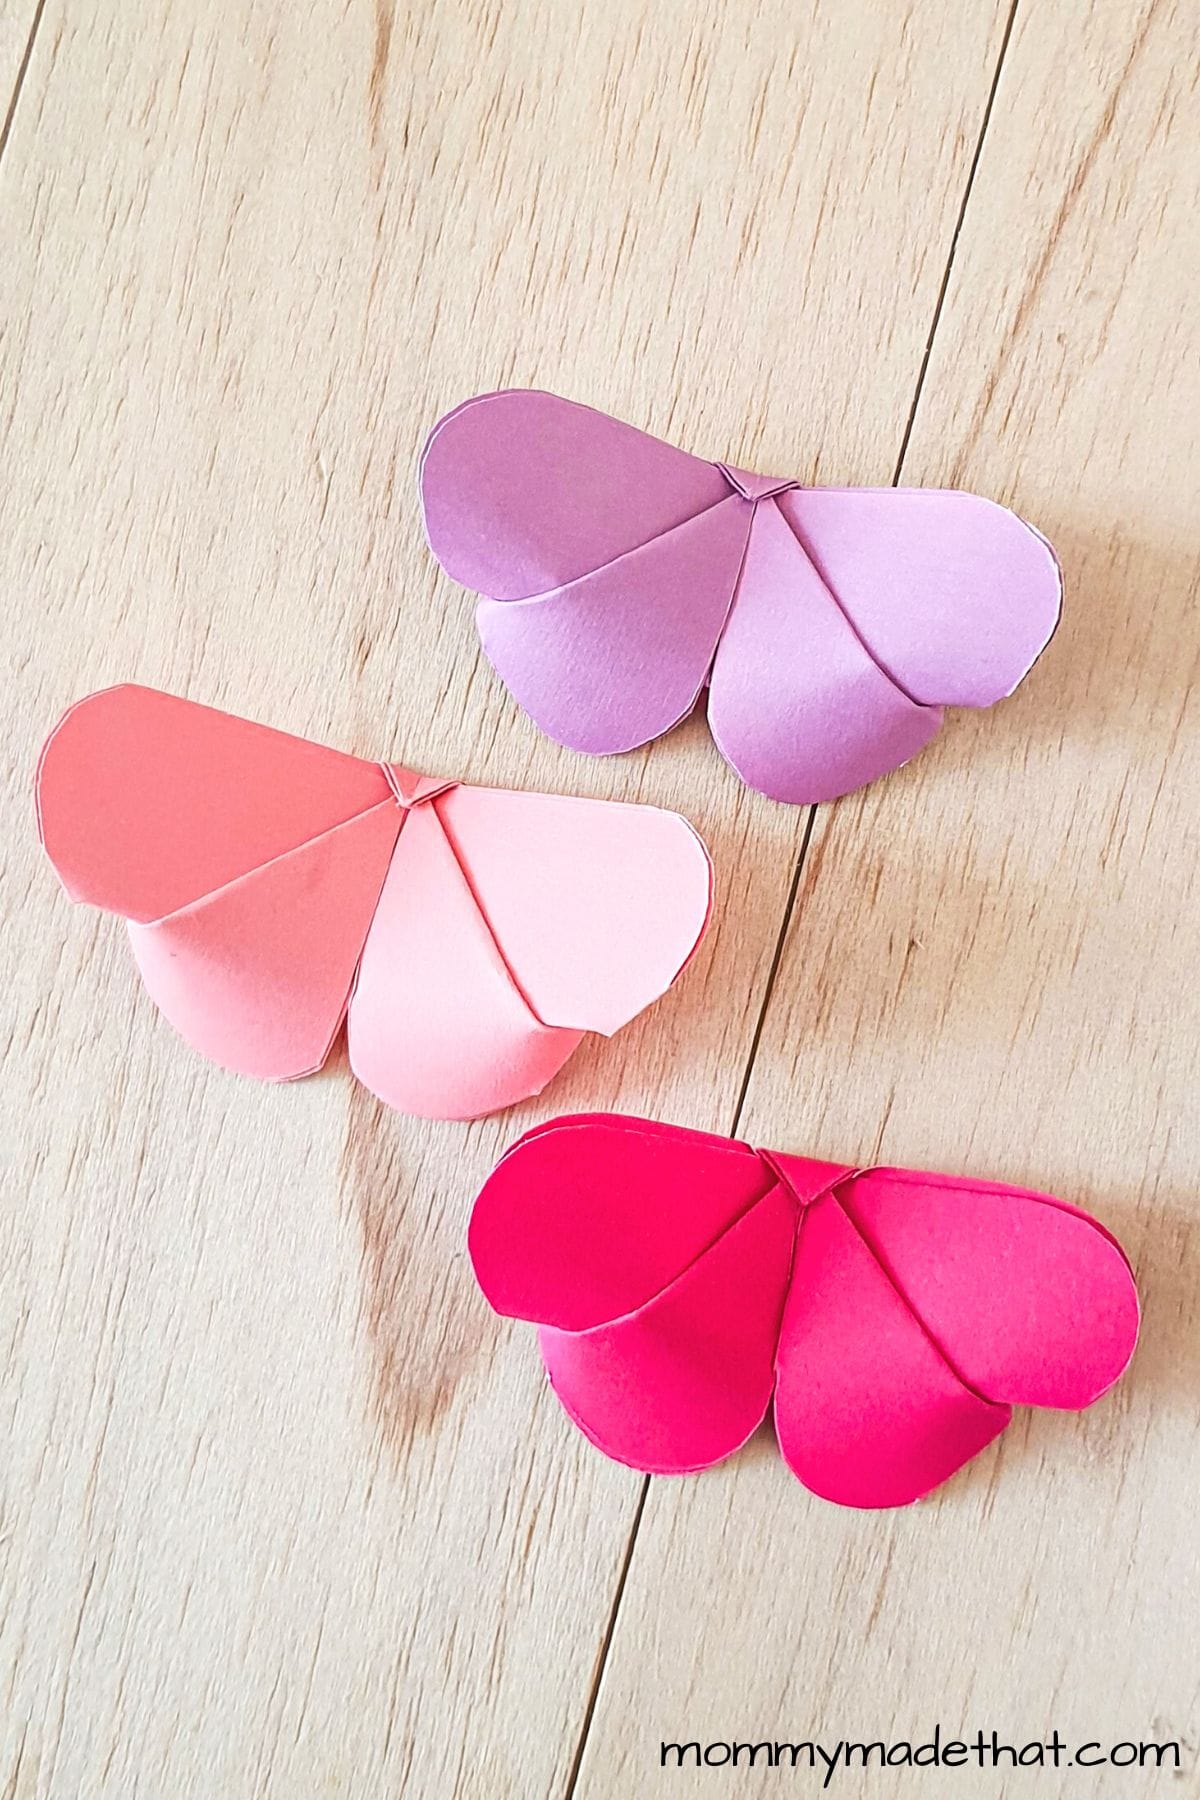
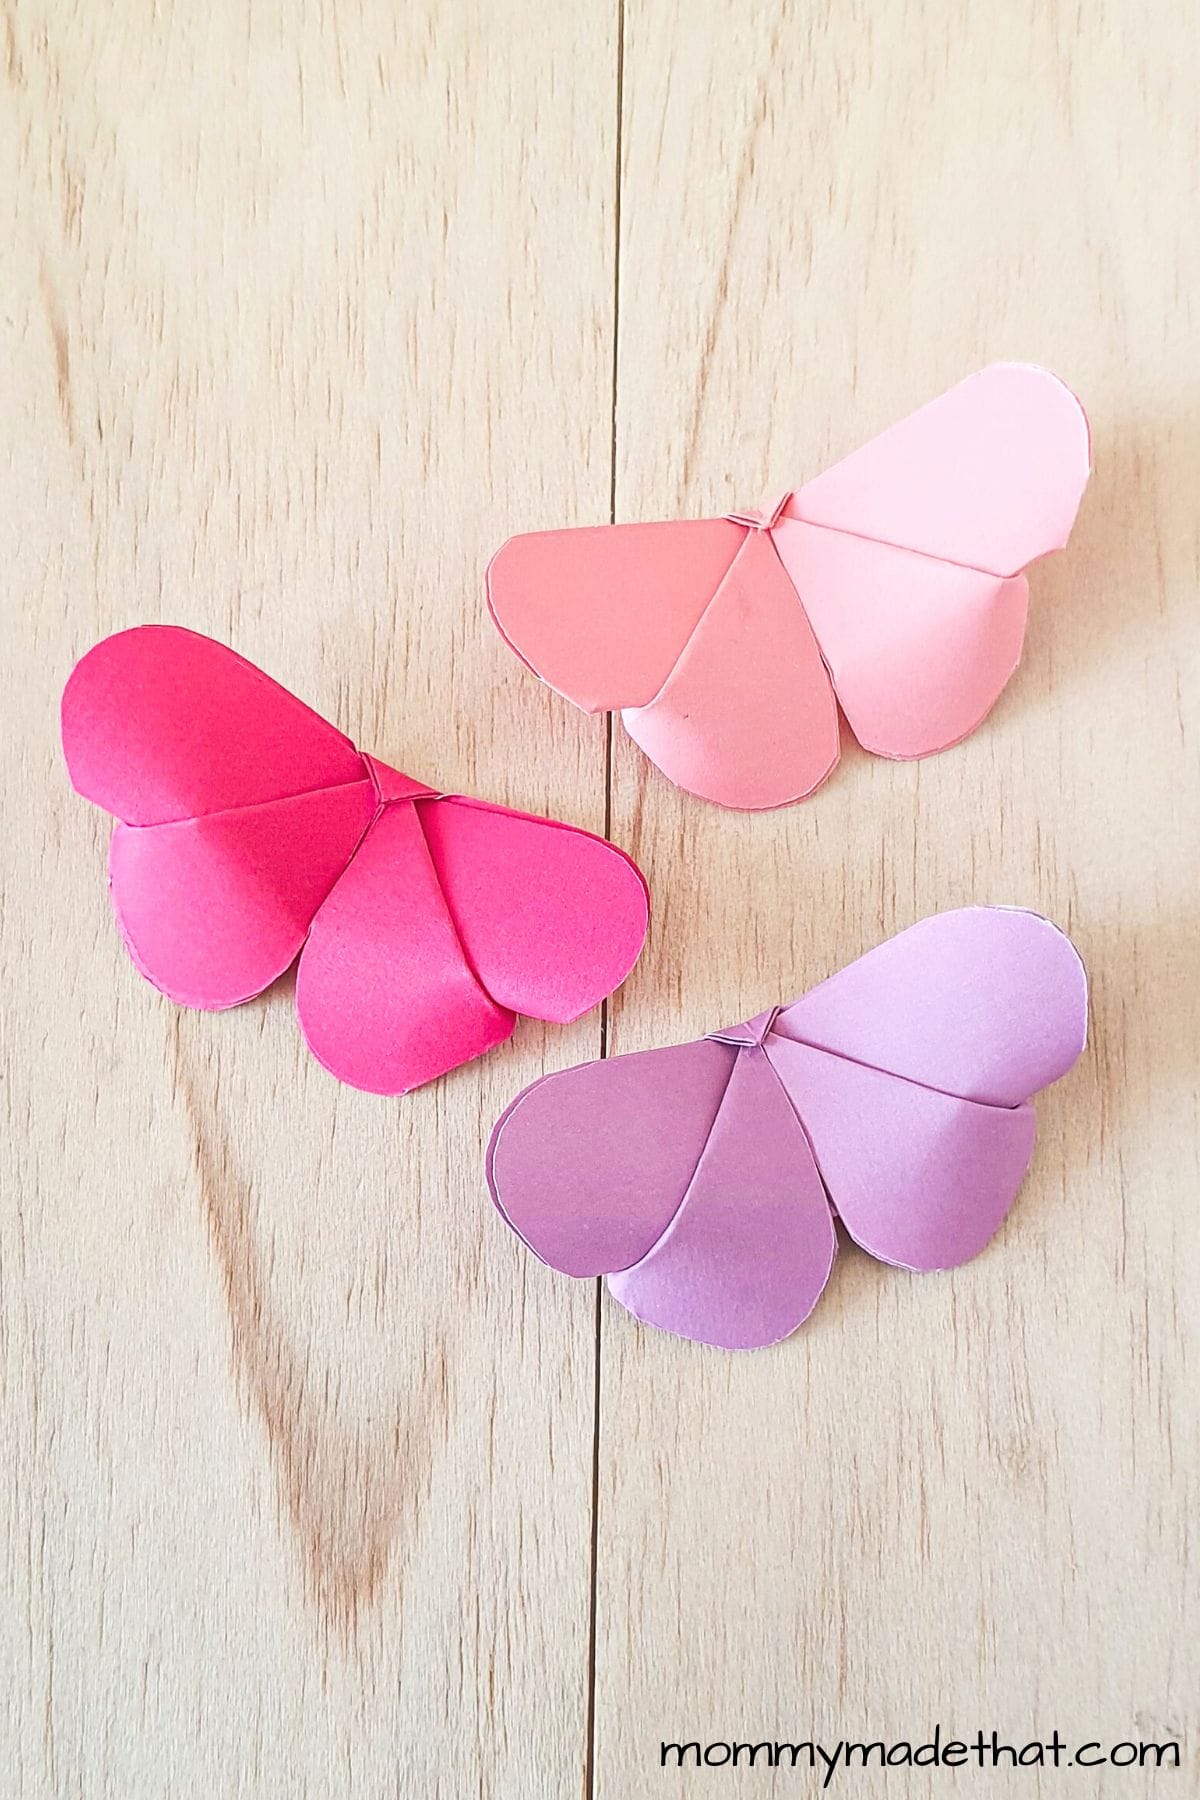
You’ve now completed your origami butterfly pattern! Enjoy your beautiful butterfly creation and experiment with different colors and patterns for a whole swarm of paper butterflies.

Origami Butterfly
These adorable butteflies are made using our favorite folding paper craft, origami. Creating a pretty origami butterfly is easier to make than it looks using this step by step tutorial.
Materials
- Origami paper
- Scissors
- Glue
Tools
- Ruler for crisp edges (optional)
Instructions
- Start with a square piece of paper.
- Fold the paper diagonally, create a crease, and unfold. Repeat for the other diagonal, forming an X shape.
- Flip the paper over.
- Fold the paper vertically and horizontally, creating creases, and then unfold.
- Fold the paper up along the diagonal creases, pushing the vertical and horizontal creases downward to form a four-point star.
- Flatten the paper into a triangle pattern.
- Bring all four triangle flaps together on one side.
- Trim the open corners of the flaps to create rounded edges.
- Open the flaps and arrange them into two pairs on each side.
- Fold the left open edge inward, aligning it with the middle crease.
- Repeat with the right open edge.
- Flip the pattern over.
- Fold the bottom corner upward, bringing it all the way to the top, leaving a small portion (about 1 cm) peeking out on the other side.
- Flip the pattern over again.
- Fold the extra tip to the front and apply glue to the small (1 cm) section to secure the fold.
- Admire your completed origami butterfly.
Notes
Have fun with lots of different colors and sizes of paper to create a variety of paper butterflies.
Beautiful origami crafts like this paper butterfly showcase the elegance and creativity that can be achieved through basic origami folds.
With patience and precision, you can transform a simple piece of paper into a stunning work of art.
So, go ahead and explore the world of origami, create more paper butterflies, and discover the endless possibilities that await in the captivating realm of paper folding. Happy crafting!