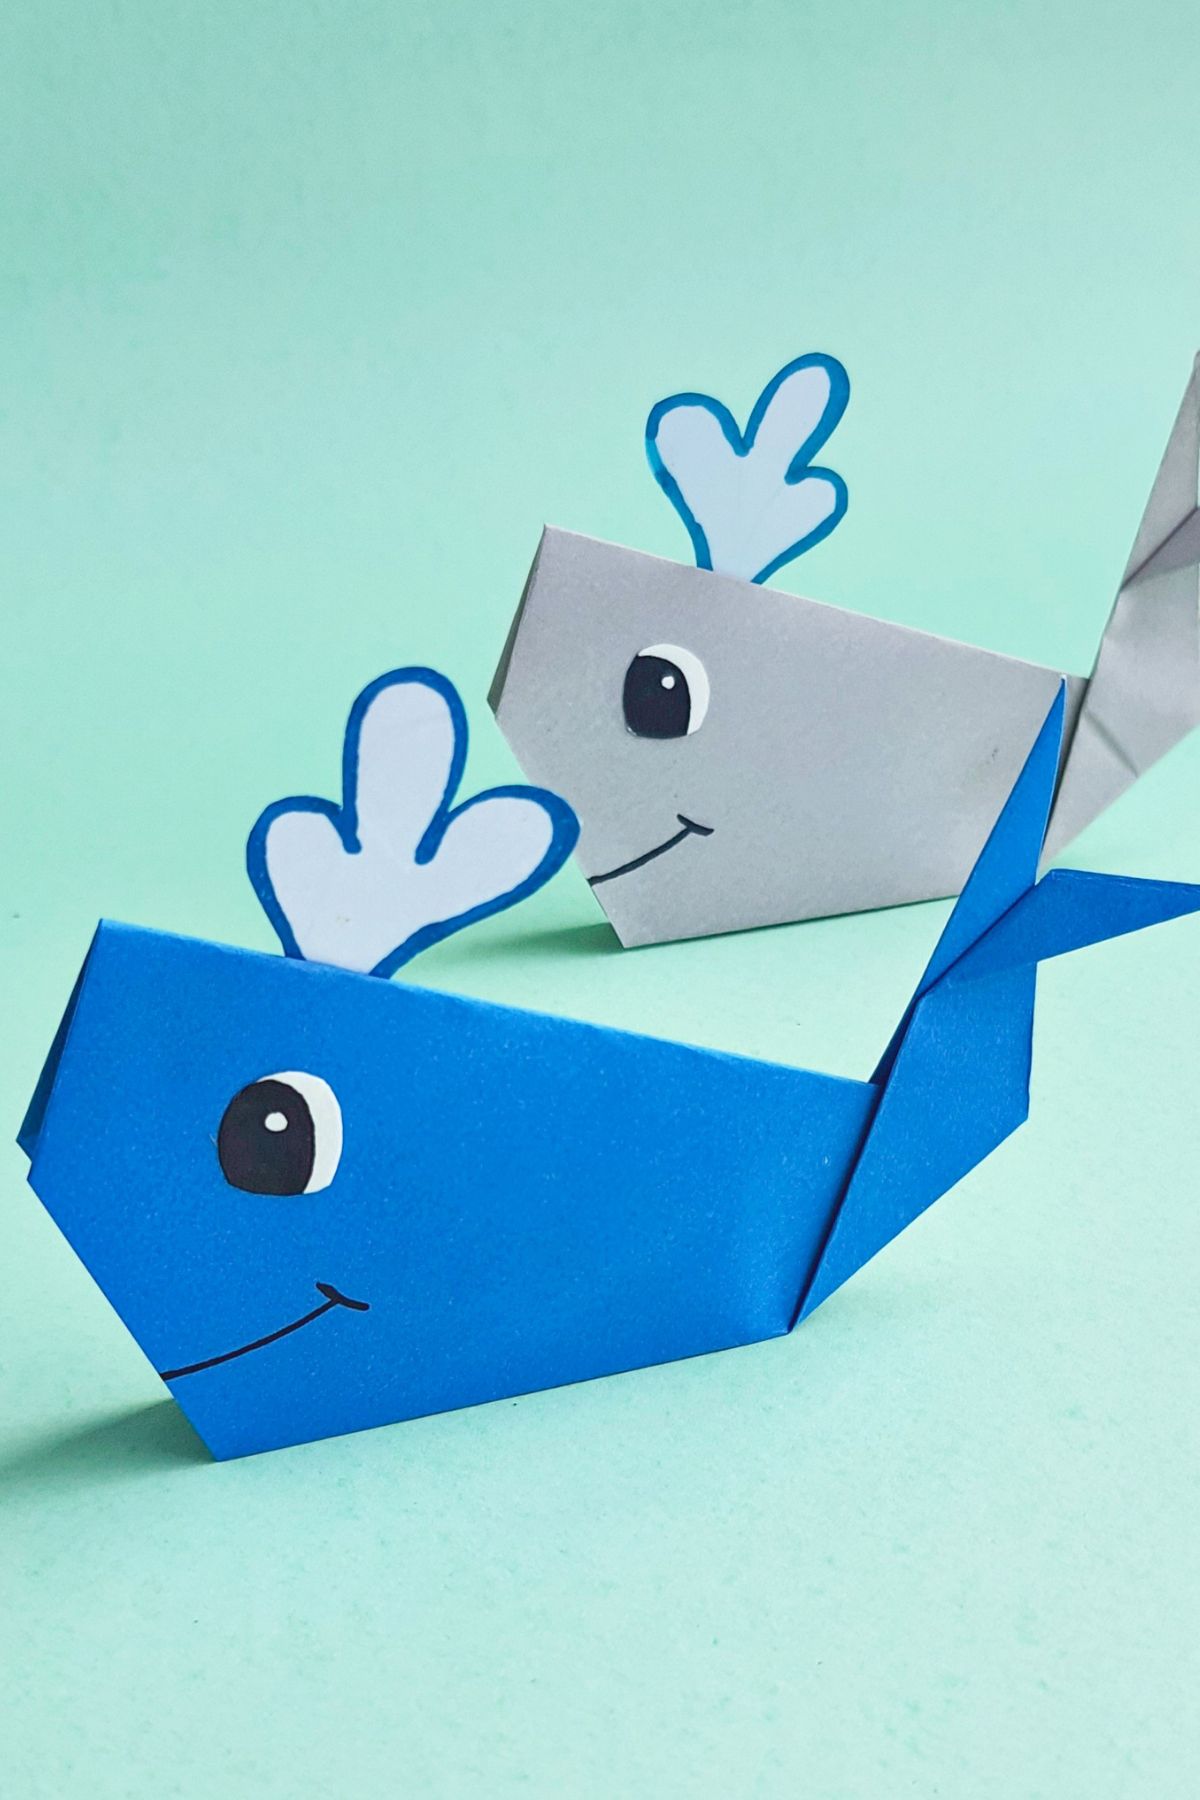
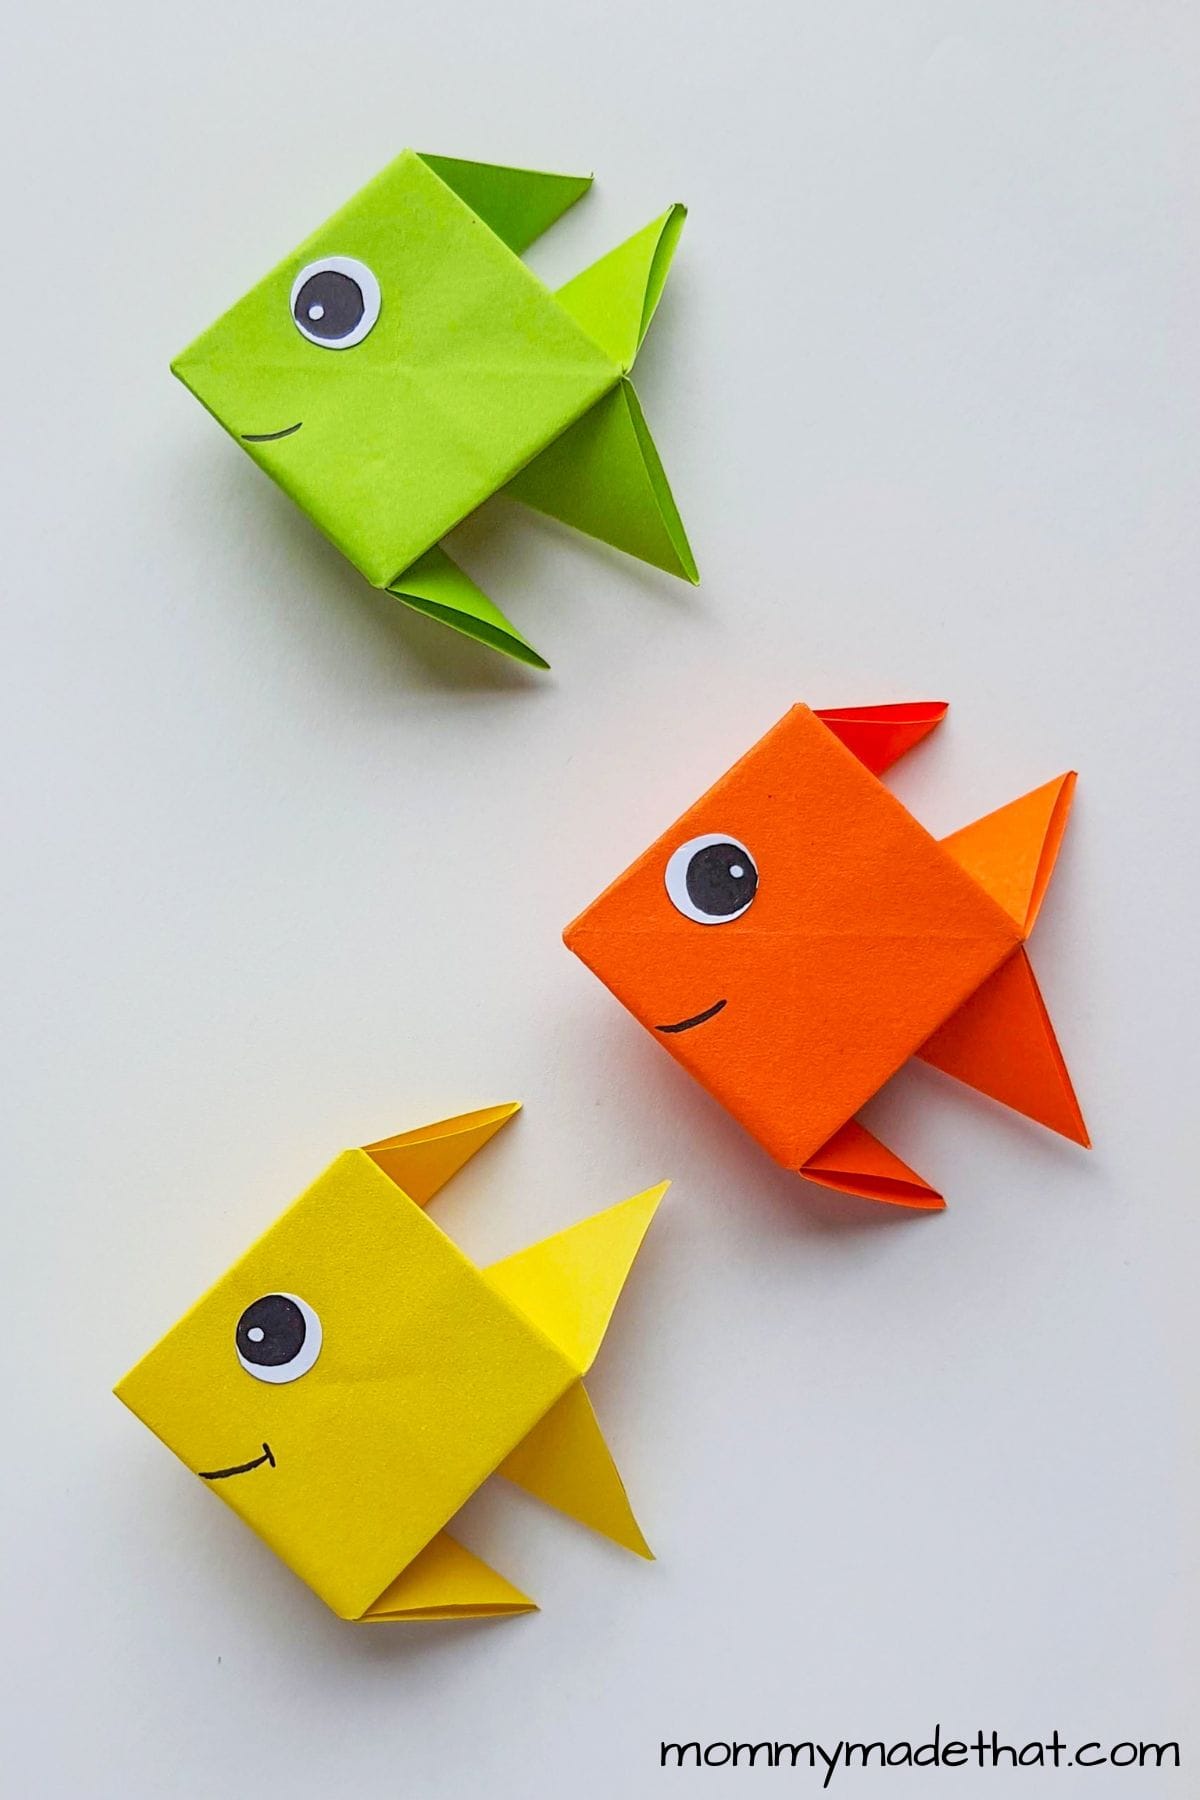
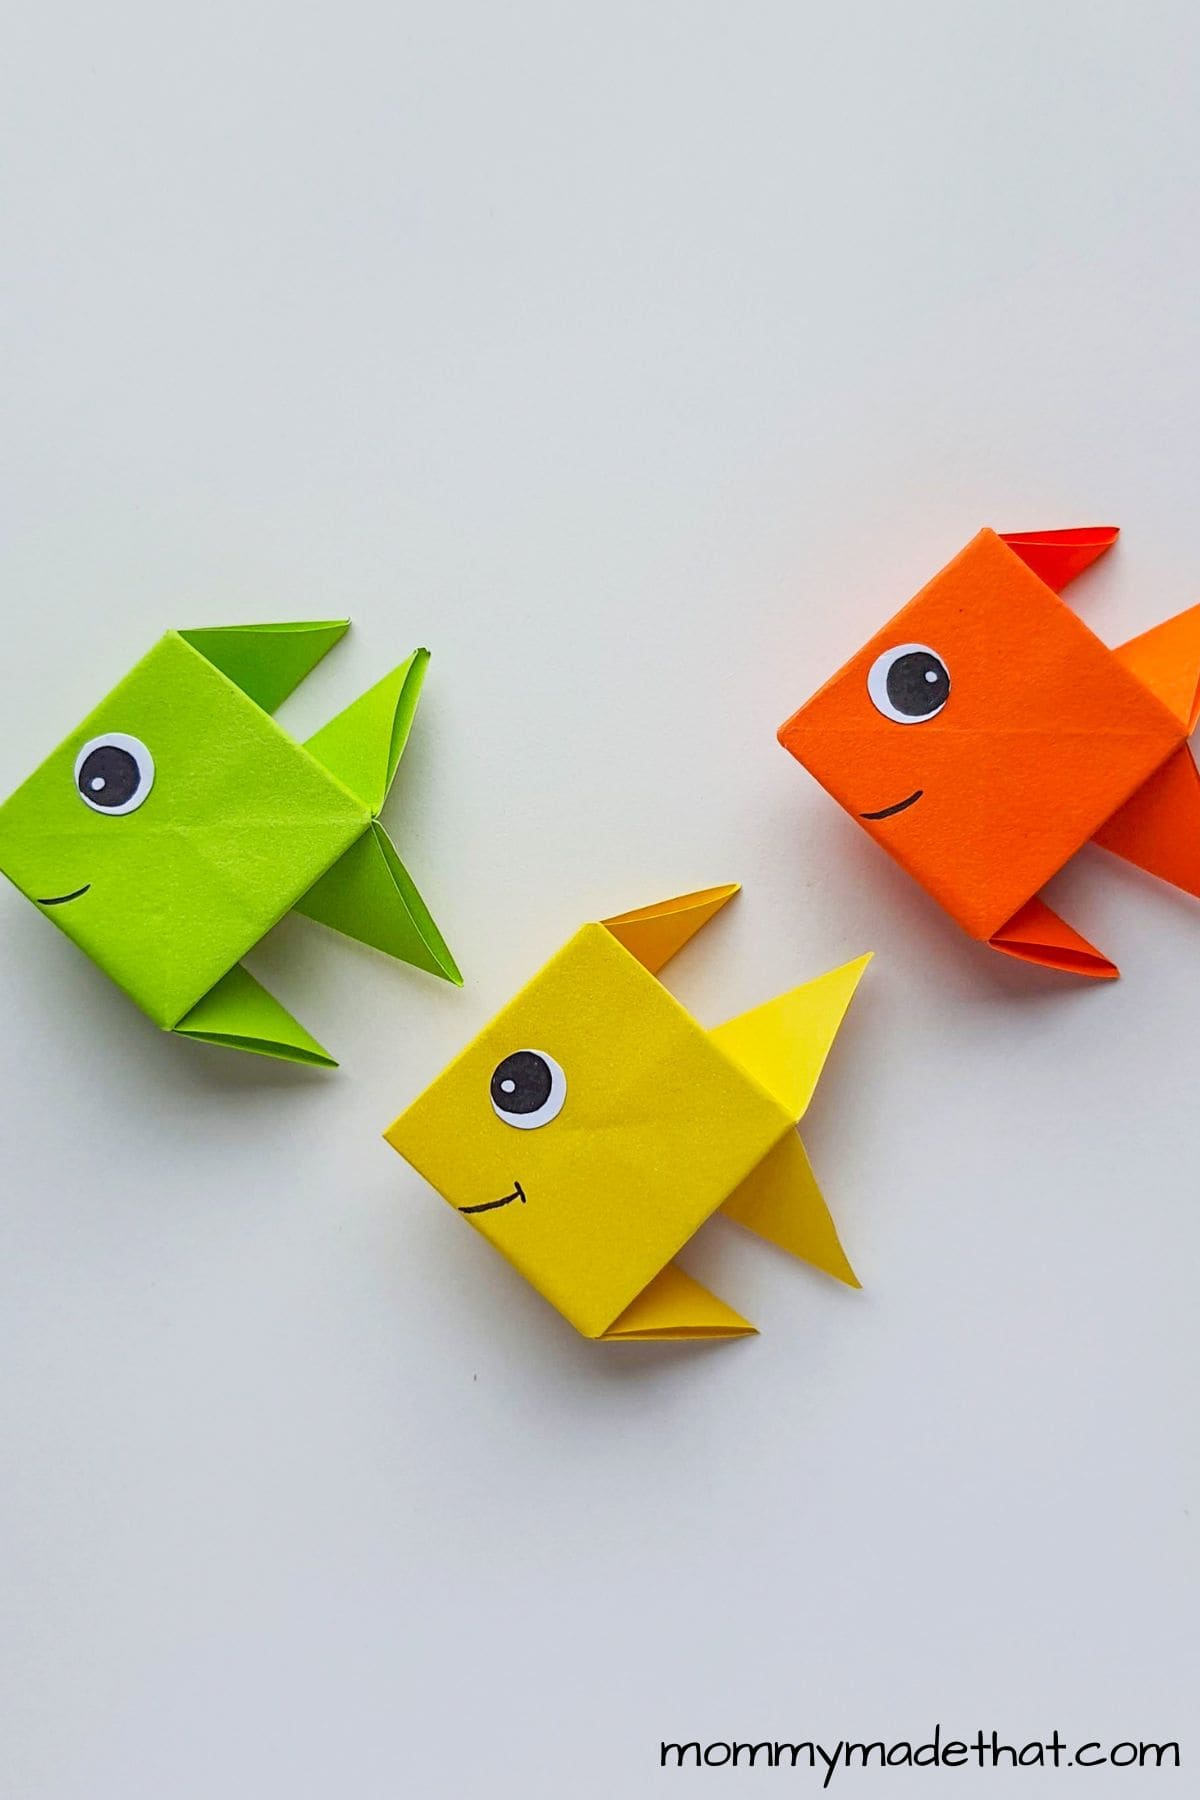
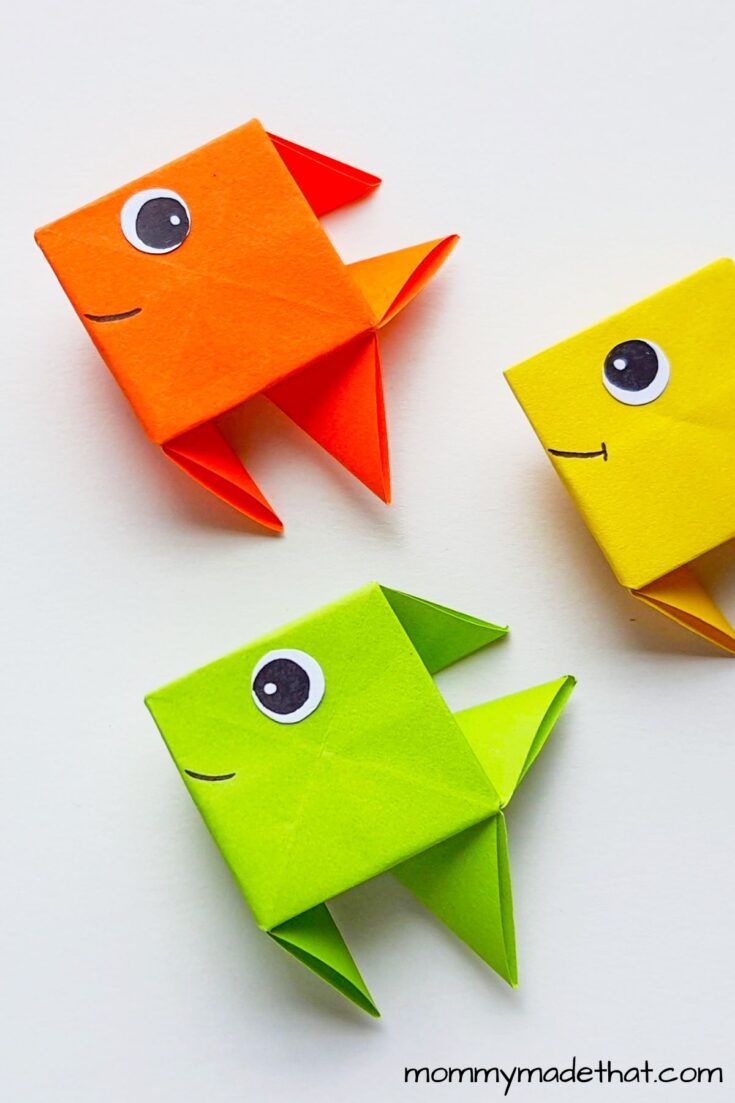
Origami Fish (Easy Step by Step Tutorial)
Today we will show you how to make an origami fish! This step by step tutorial makes it super easy to craft your very own paper fish.

Welcome to the captivating world of origami! Today, we’ll explore the art of folding an origami fish—a charming and eco-friendly project perfect for all ages.
Not only is origami a delightful way to spend your time, but it also sharpens focus, enhances creativity, and teaches patience.
Here we’ll provide easy-to-follow, step-by-step instructions to create your very own easy origami fish.
If you enjoyed making an origami fish, why not try more fun fish crafts? Create a colorful Rainbow Fish paper plate craft, inspired by the beloved children’s book, or make a printable clownfish craft that looks just like Nemo!
You can also try a printable angelfish craft or an adorable printable pufferfish craft to build your own underwater world. These crafts are perfect for pairing with ocean-themed learning or storytime fun!
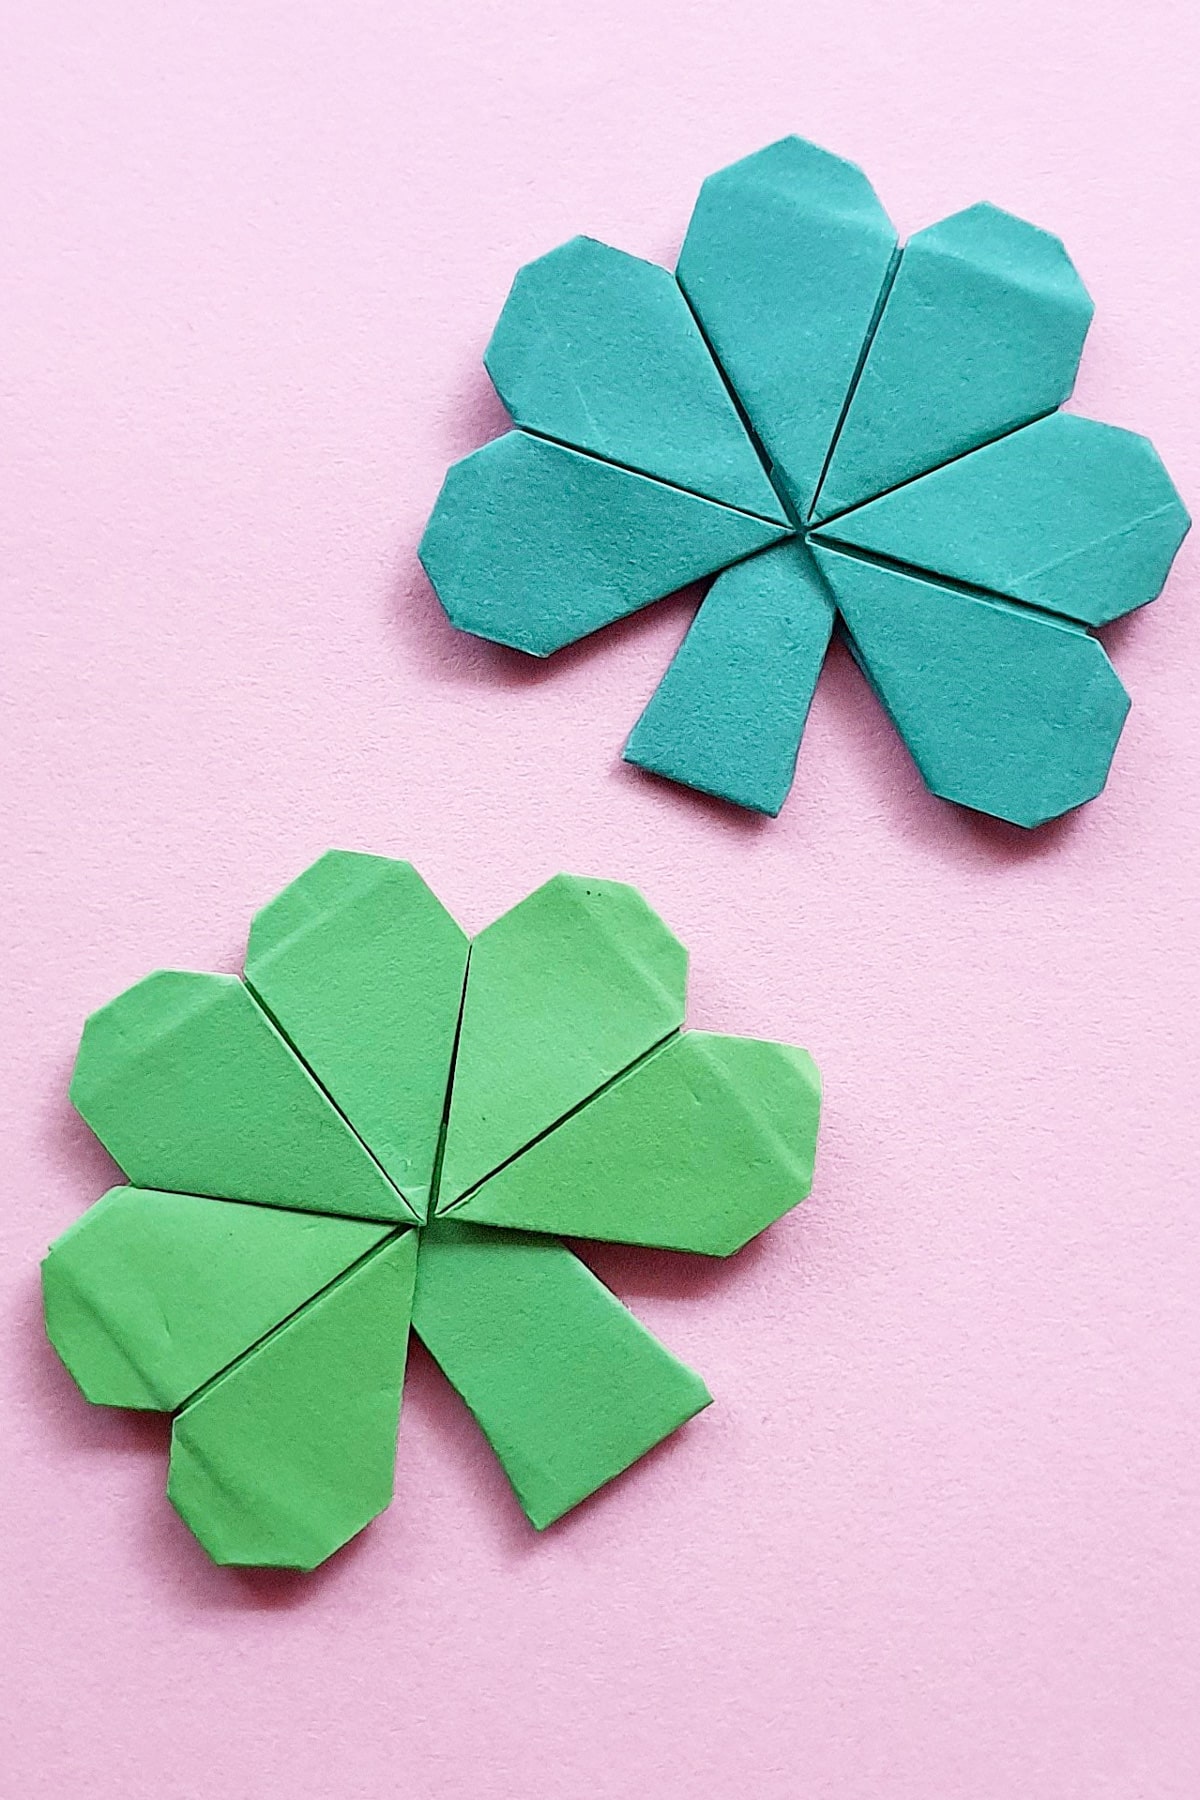
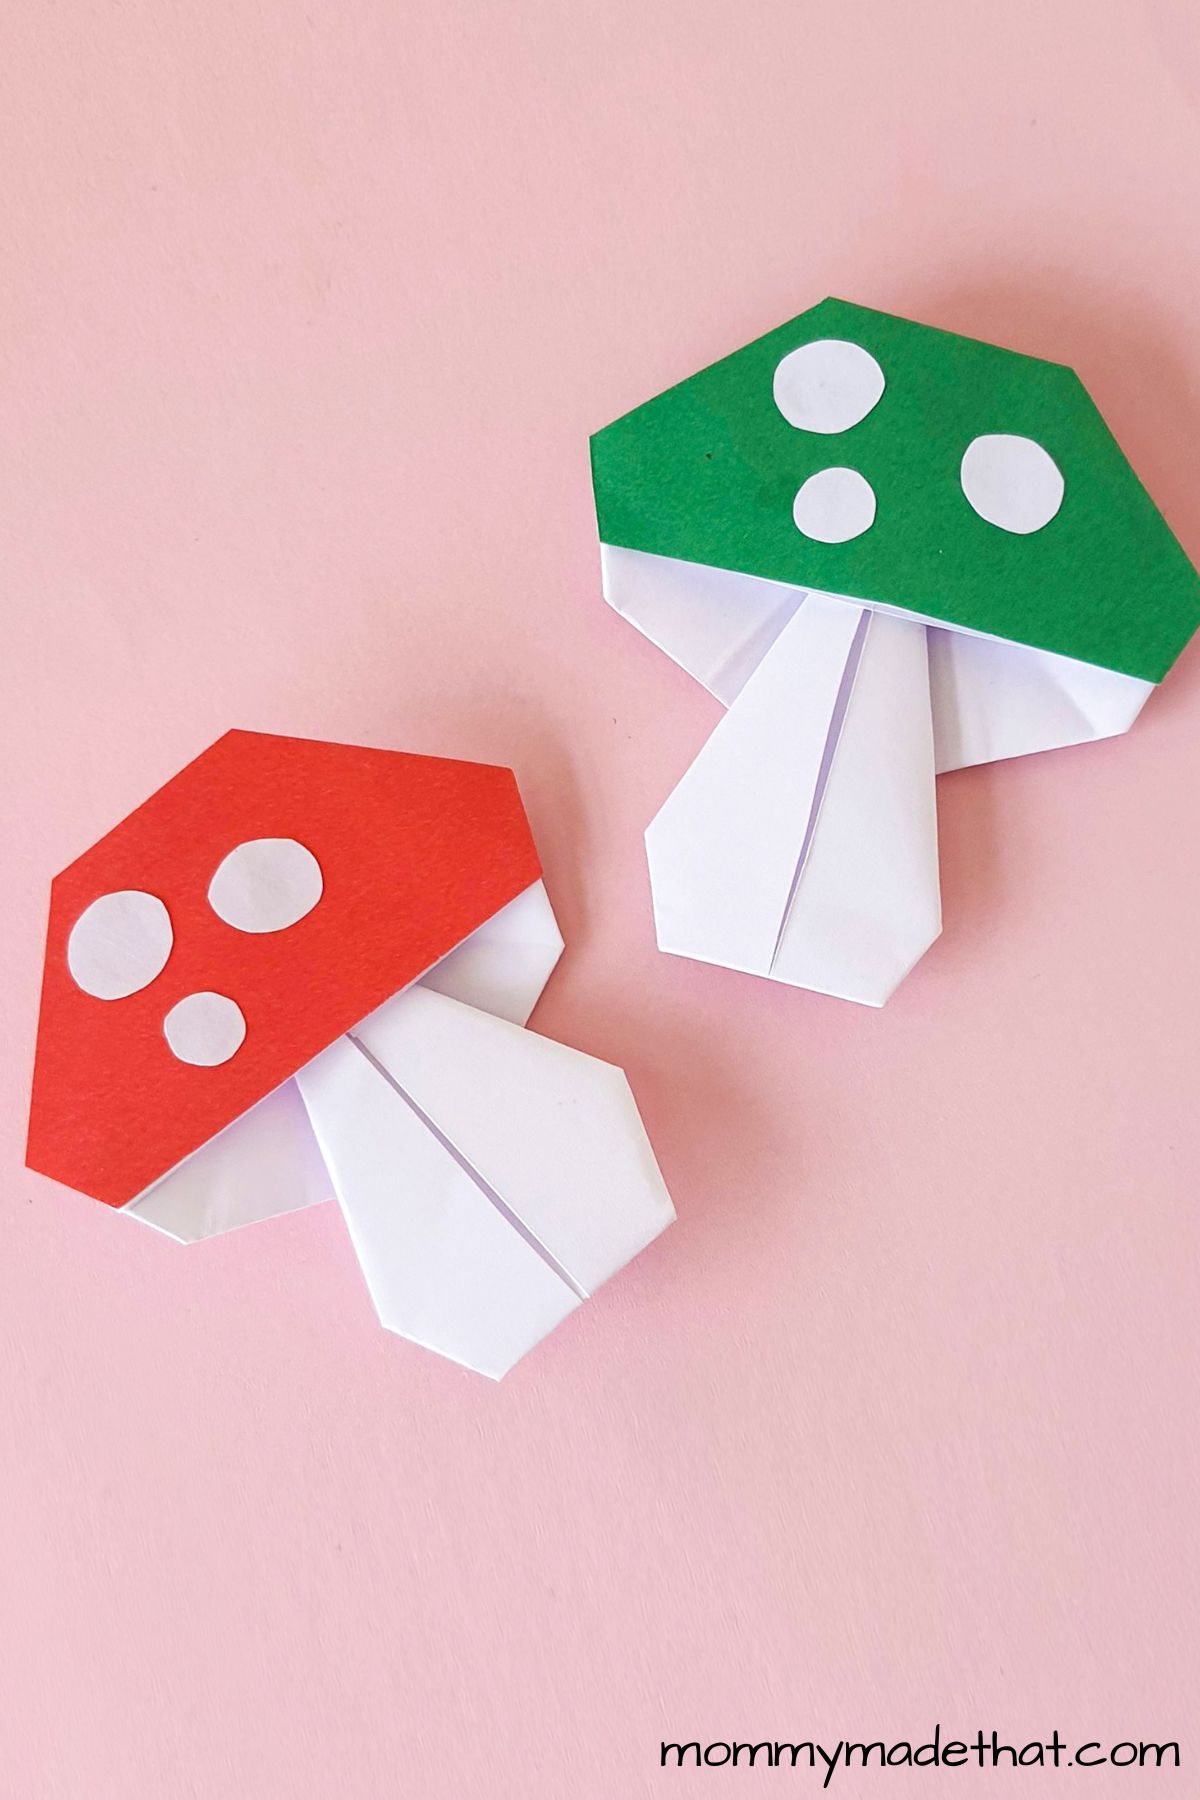
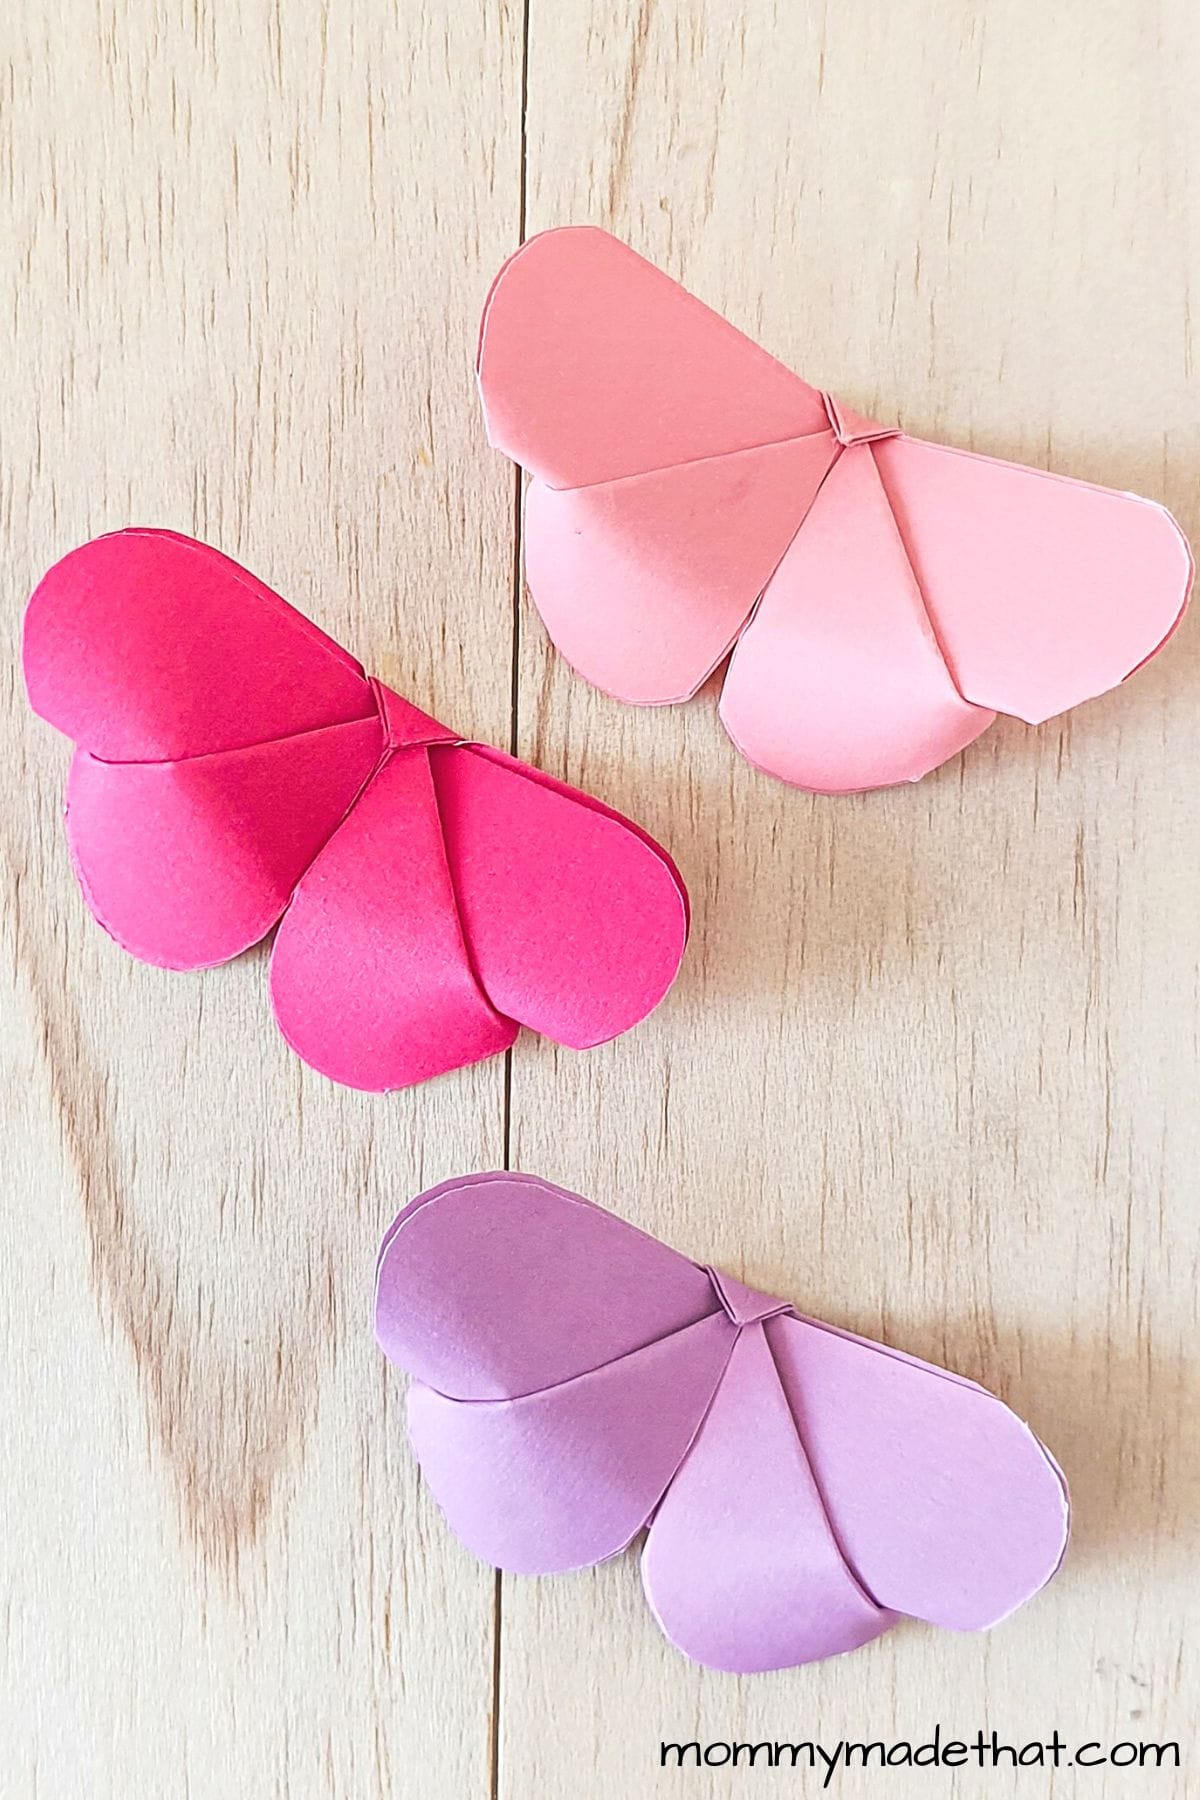
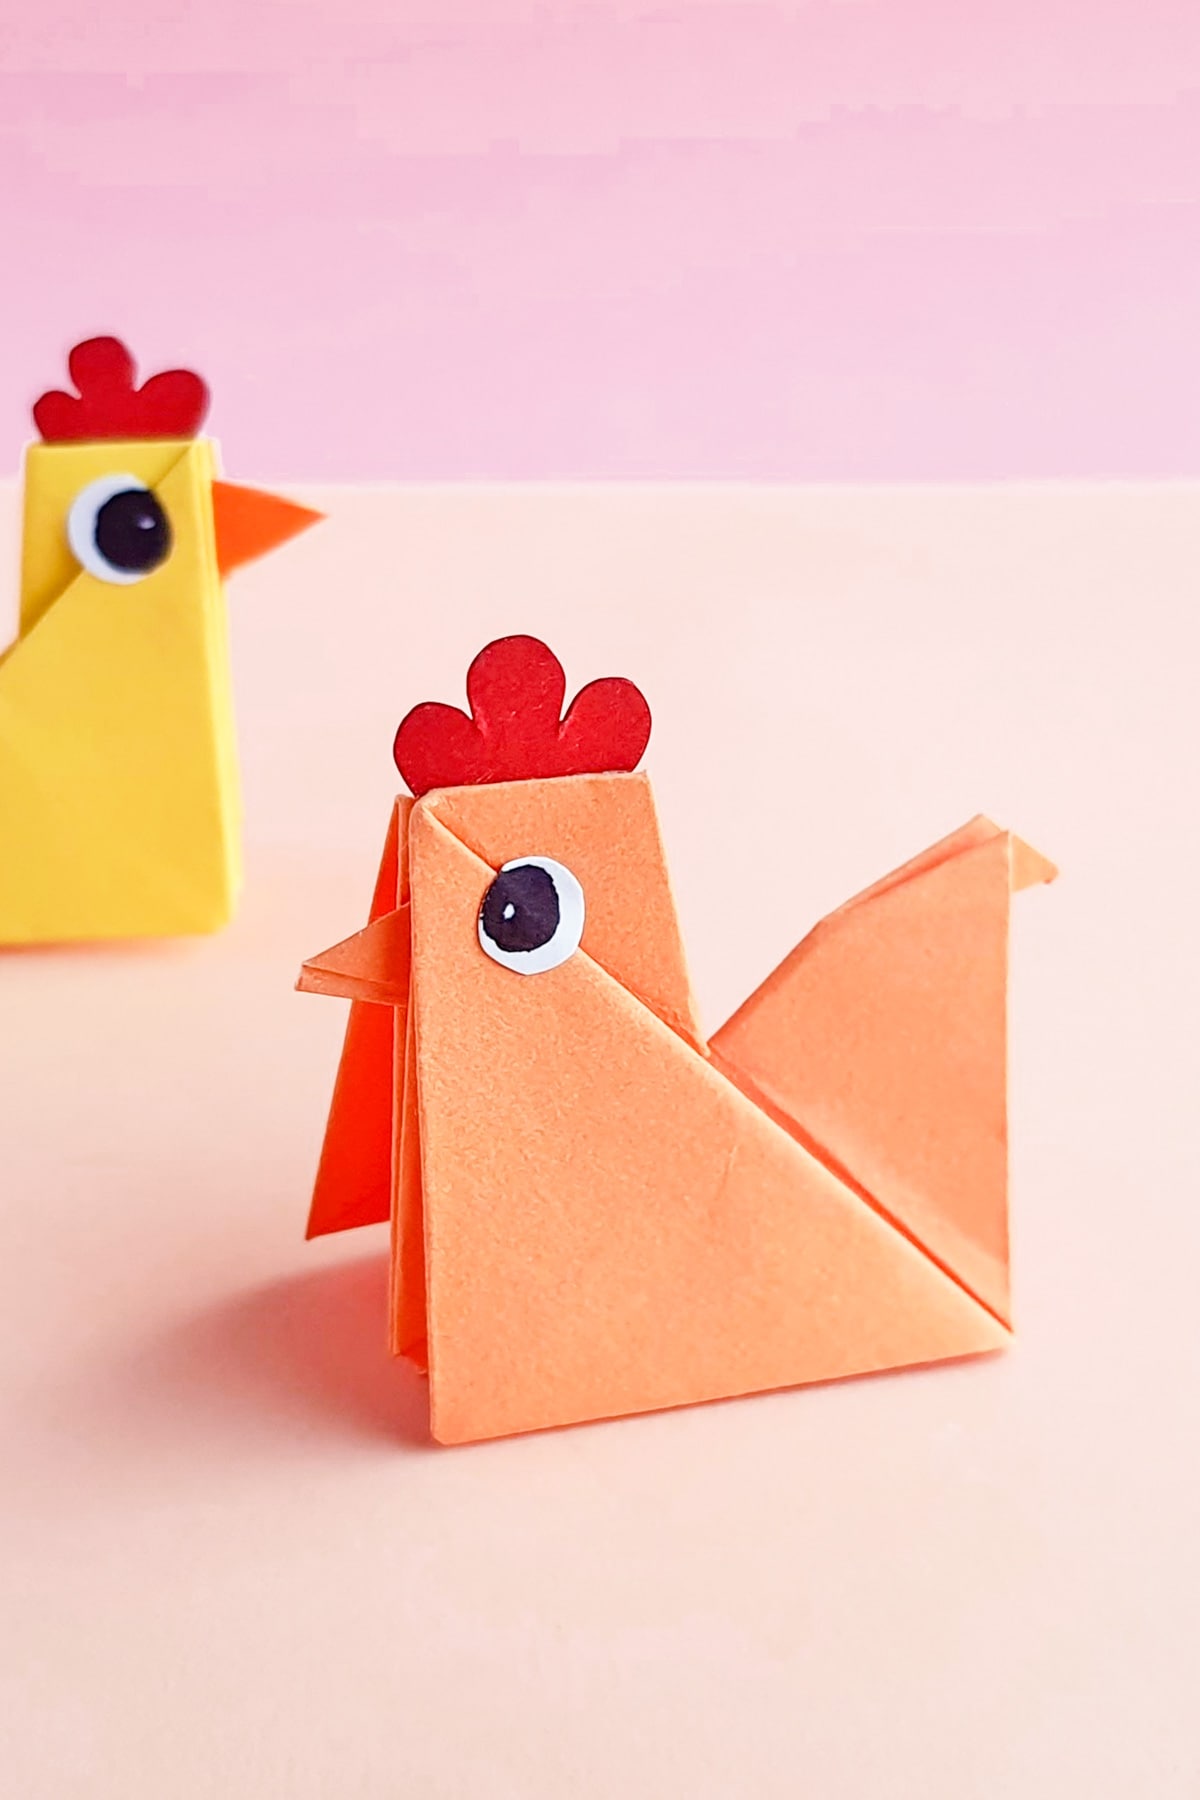
And make sure to check out some of our other awesome origami crafts like our origami butterflies and origami mushrooms.
Table of Contents
Materials Needed
Before we begin folding our origami fish, let’s gather the necessary materials.
The beauty of origami lies in its simplicity, requiring only a few basic items to create stunning masterpieces. For this project, you’ll need:
Origami paper: A square piece of paper is essential for this project. You can use traditional origami paper or any other square paper, such as construction paper or even a page from a magazine. Aim for a size of at least 6 x 6 inches (15 x 15 cm) to ensure ease of folding.
Flat surface: A clean, flat surface is important for achieving precise folds. A table, desk, or even a hardcover book will work perfectly.
Optional: Bone folder or similar tool: While not required, a bone folder or a similar tool, like the edge of a credit card, can help create crisp, clean folds for a polished final product.
Now that we have our materials ready, let’s dive into the step-by-step instructions for crafting our beautiful origami fish!
How to Make an Origami Fish
Here you’ll find our step by step tutorial to make these colorful origami fish.
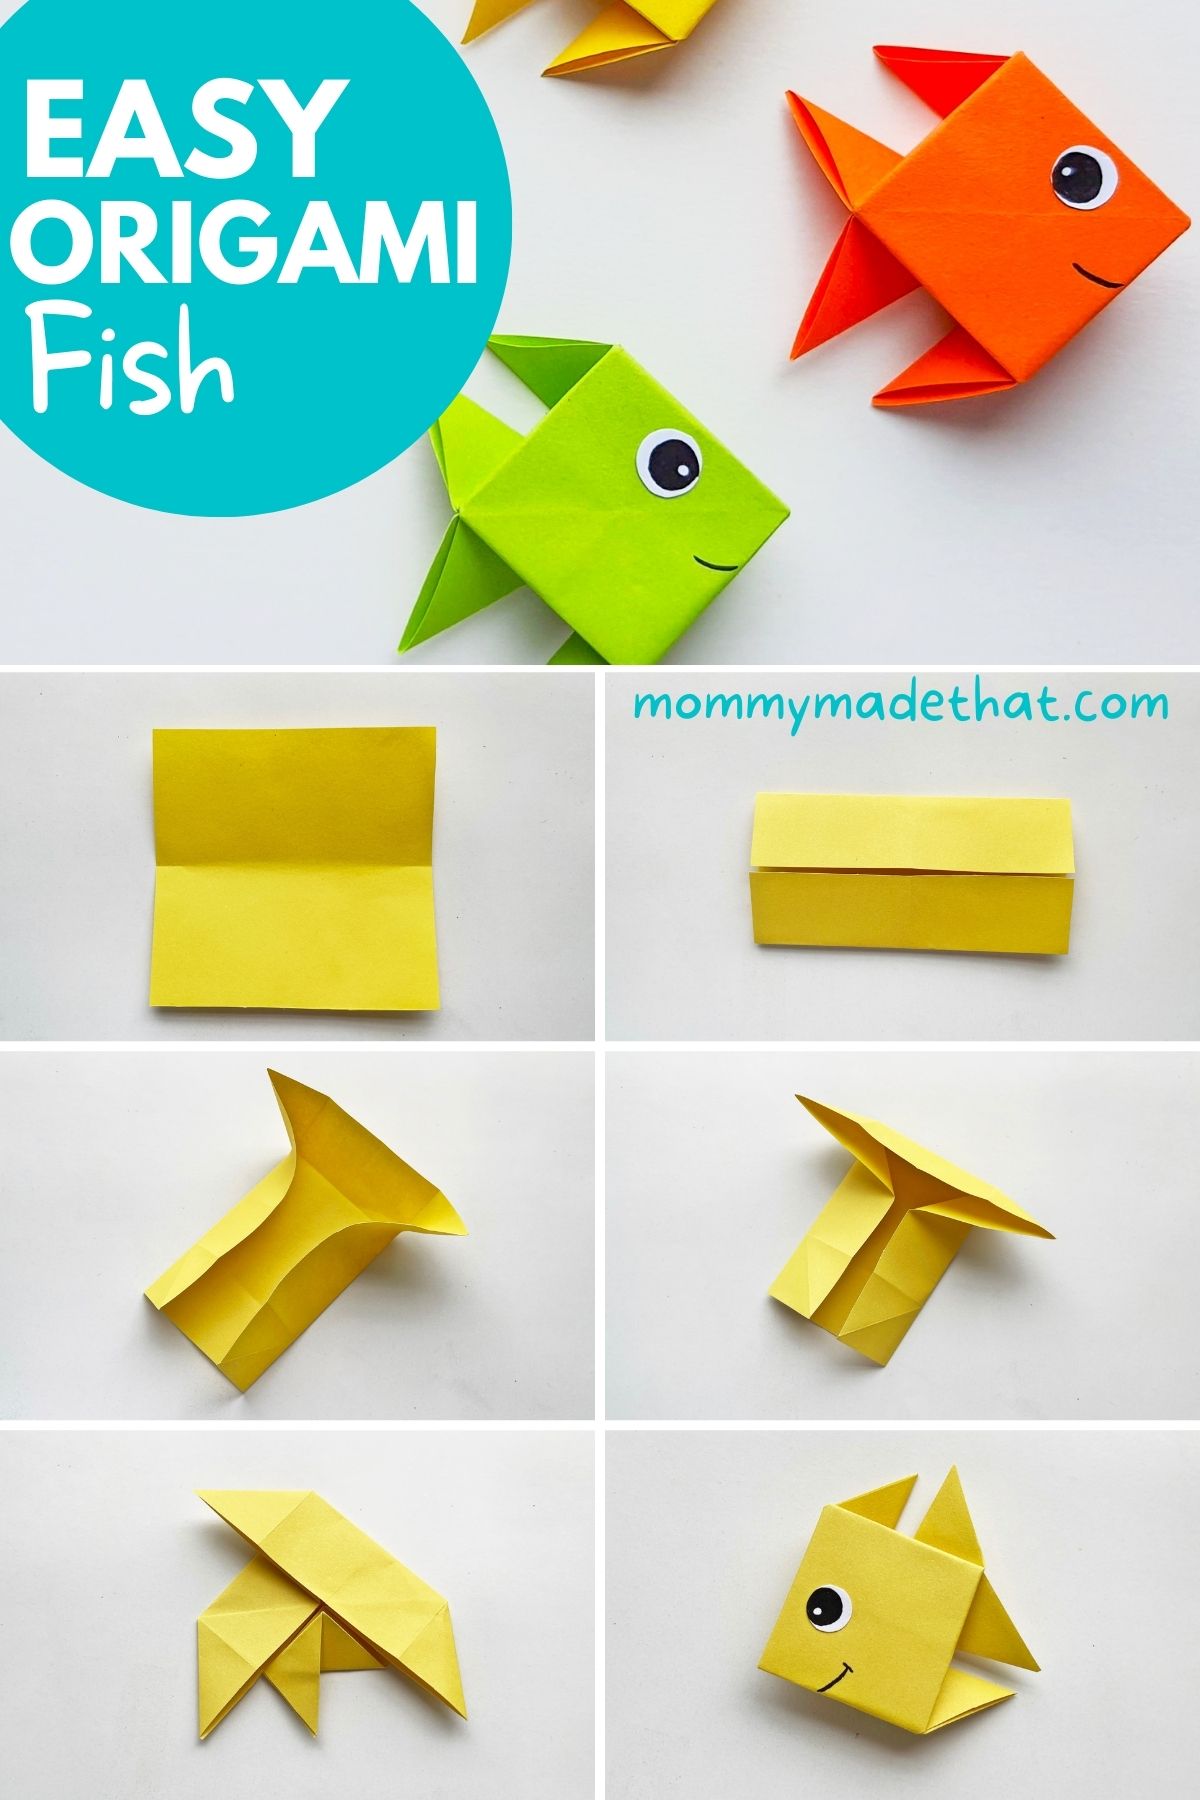
Step 1: Choose Your Square Paper
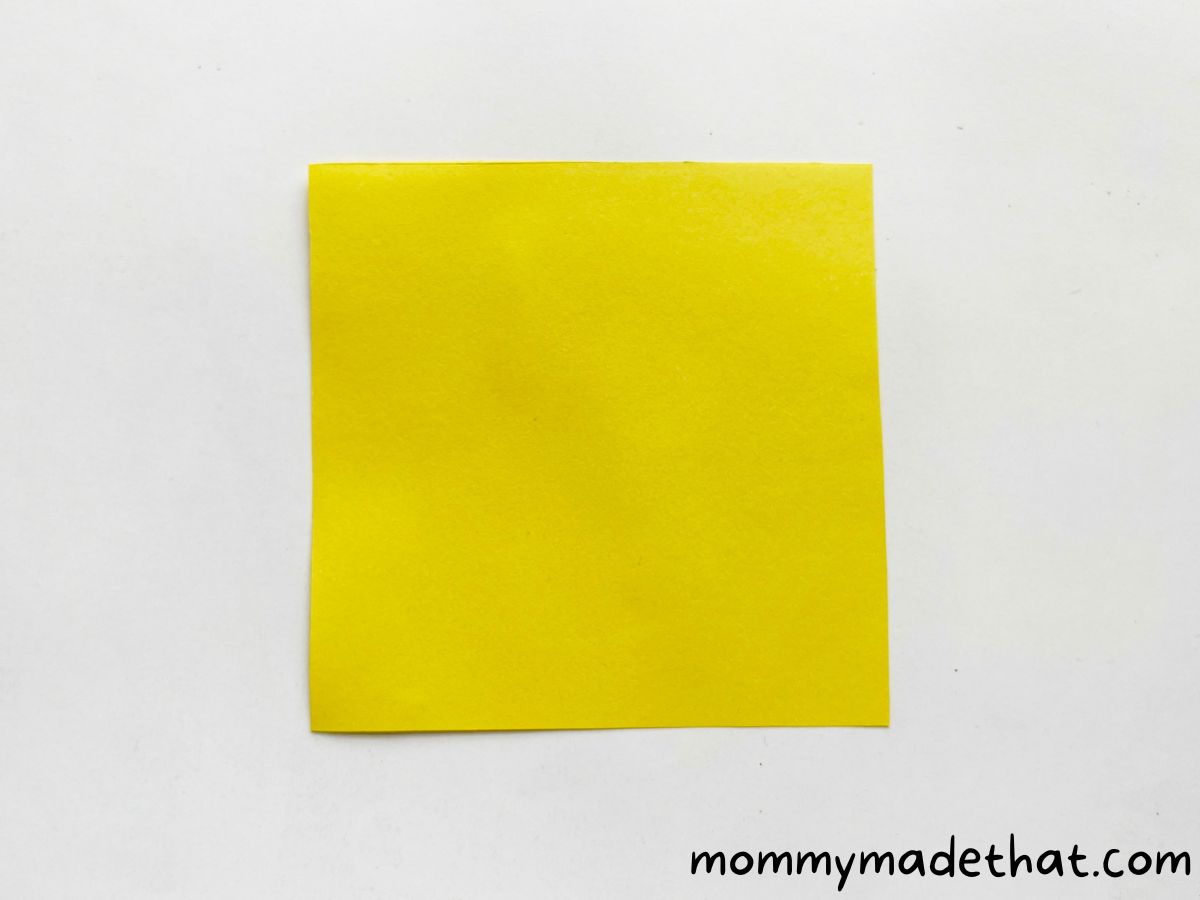
Our first step is to select a square piece of paper that will become your fabulous origami fish. Feel free to get creative with colors and patterns!
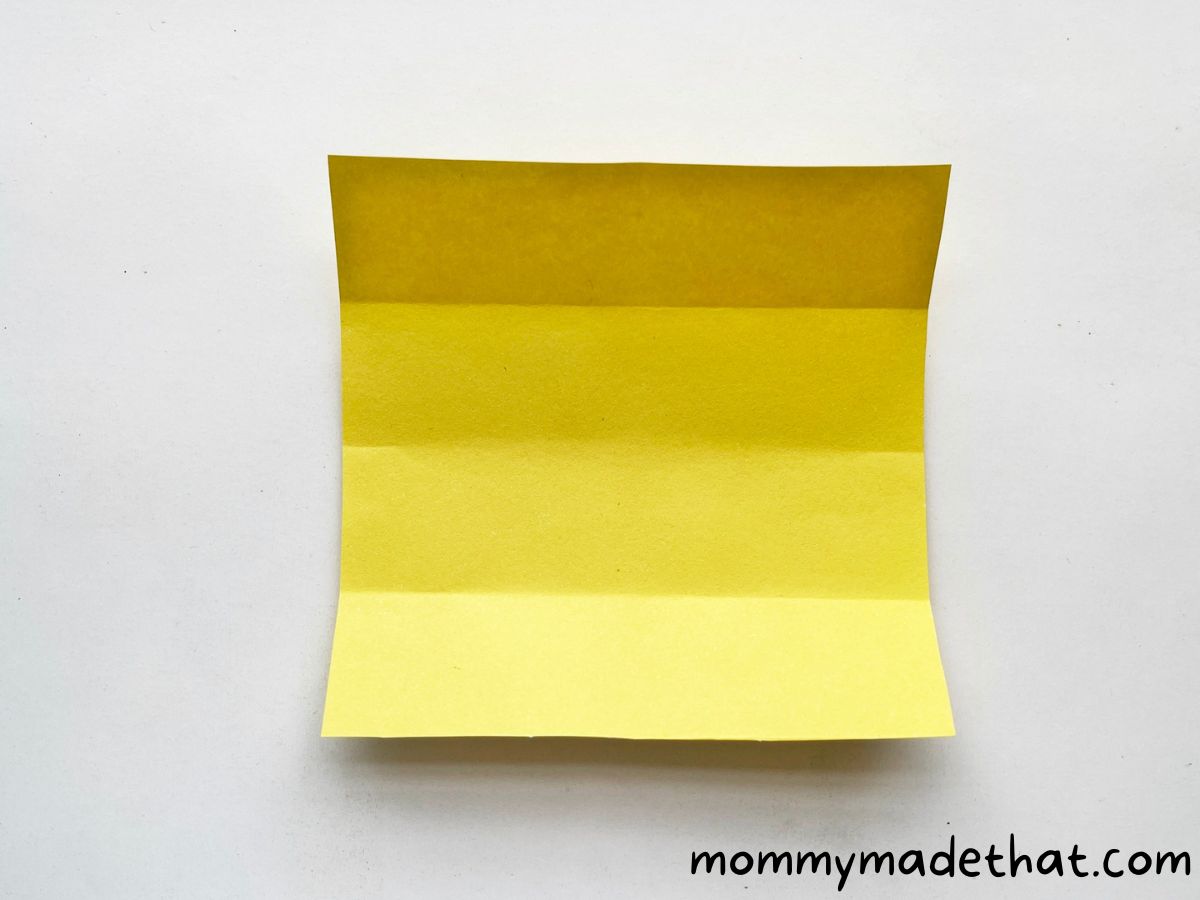
Step 2: Crease the Open Sides Horizontally
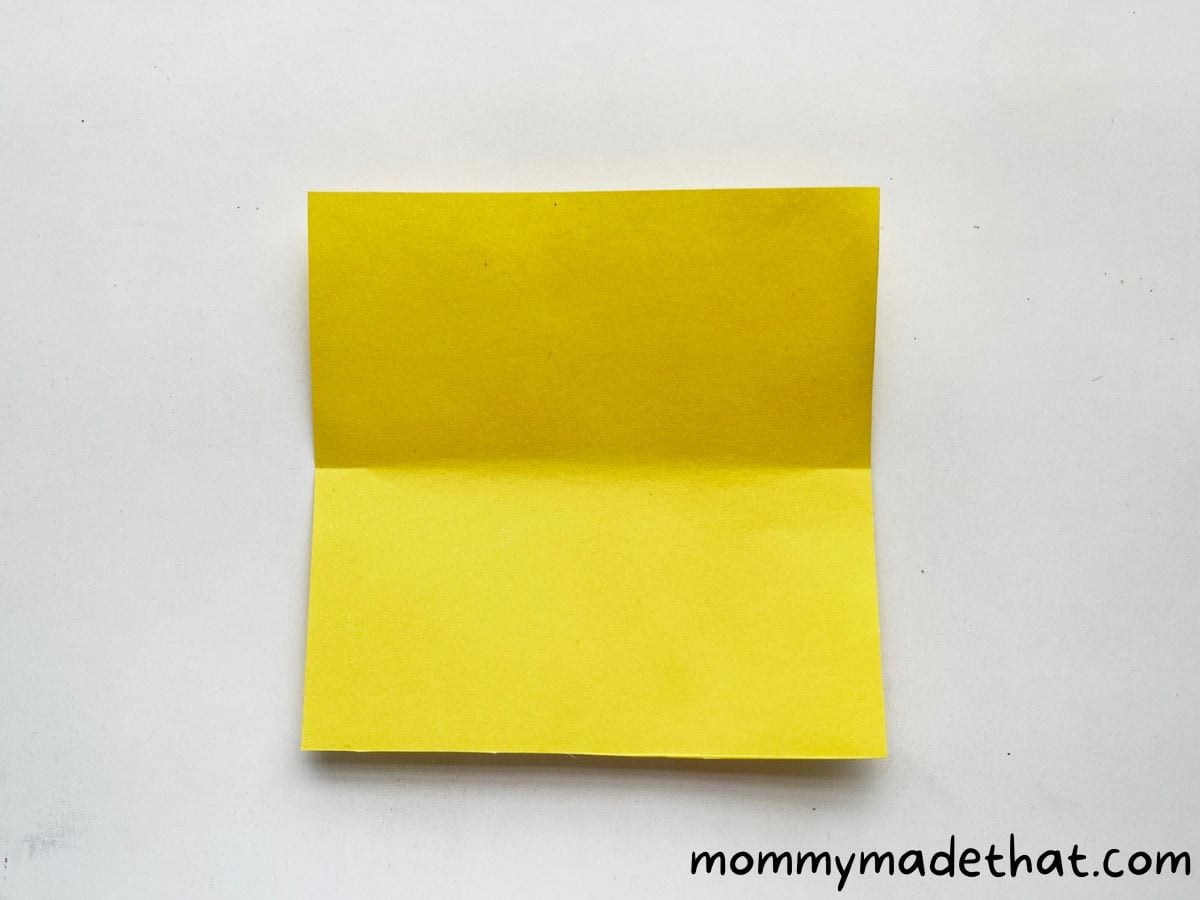
Without actually folding the paper in half, gently mark creases on the outside edges of the square in the center, horizontally, like shown above. This will be our guide for future folds.
Step 3: Make Vertical Half-Fold Crease Points
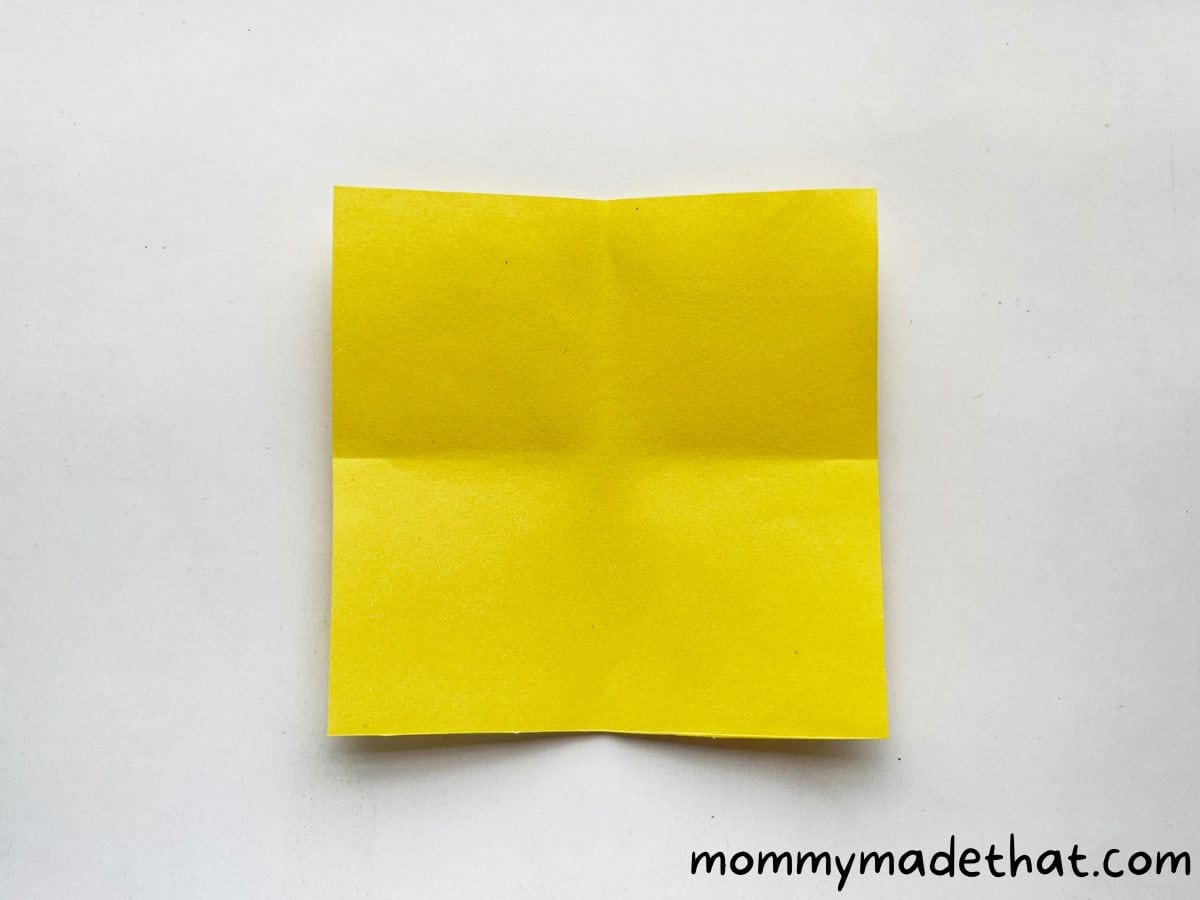
Then it’s time to go vertical! Turn the paper 90 degrees and make the same creases so that every edge has a crease in the center of it like shown above.
Step 4: Fold One Side Along the Half Crease
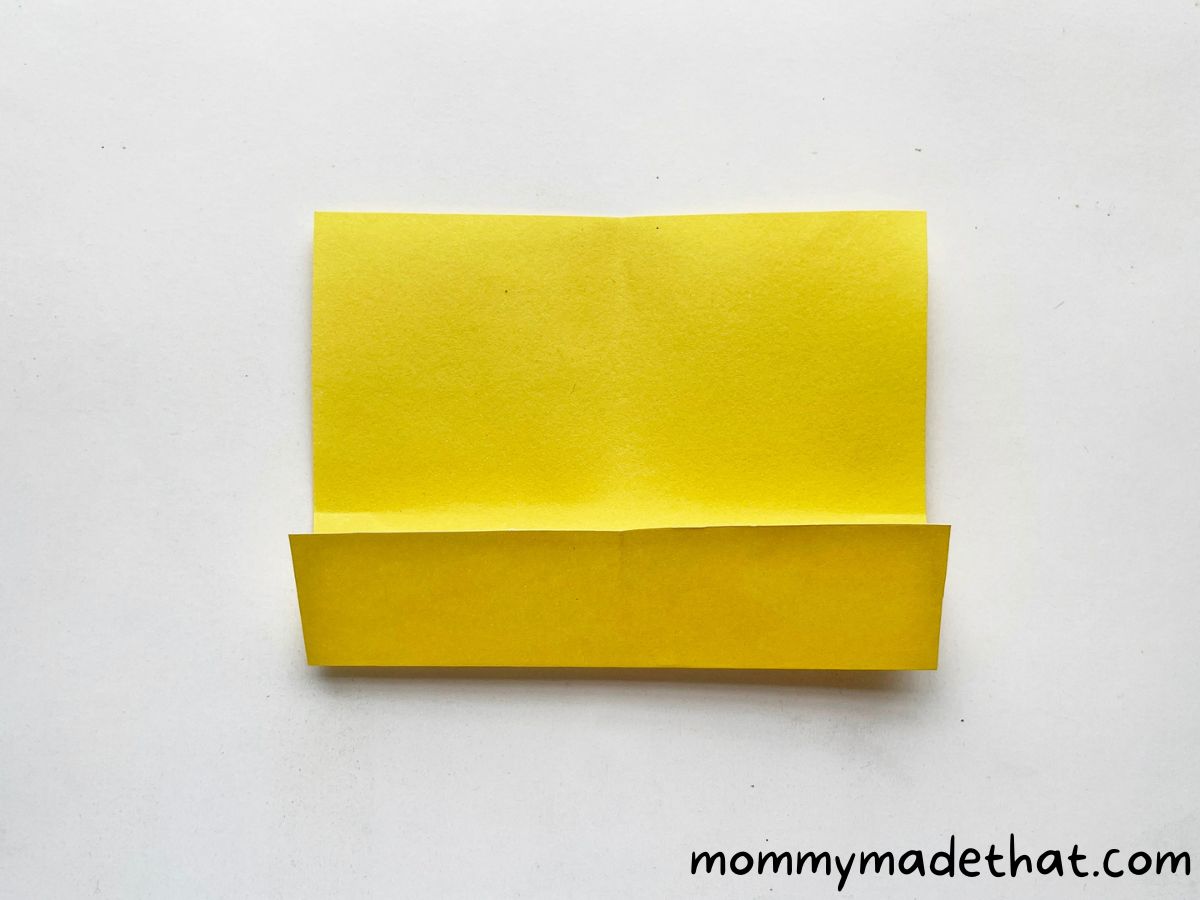
Next, fold up the bottom along the creases, using the crease points as your guide.
Step 5: Align the Other Side with the Folded Edge
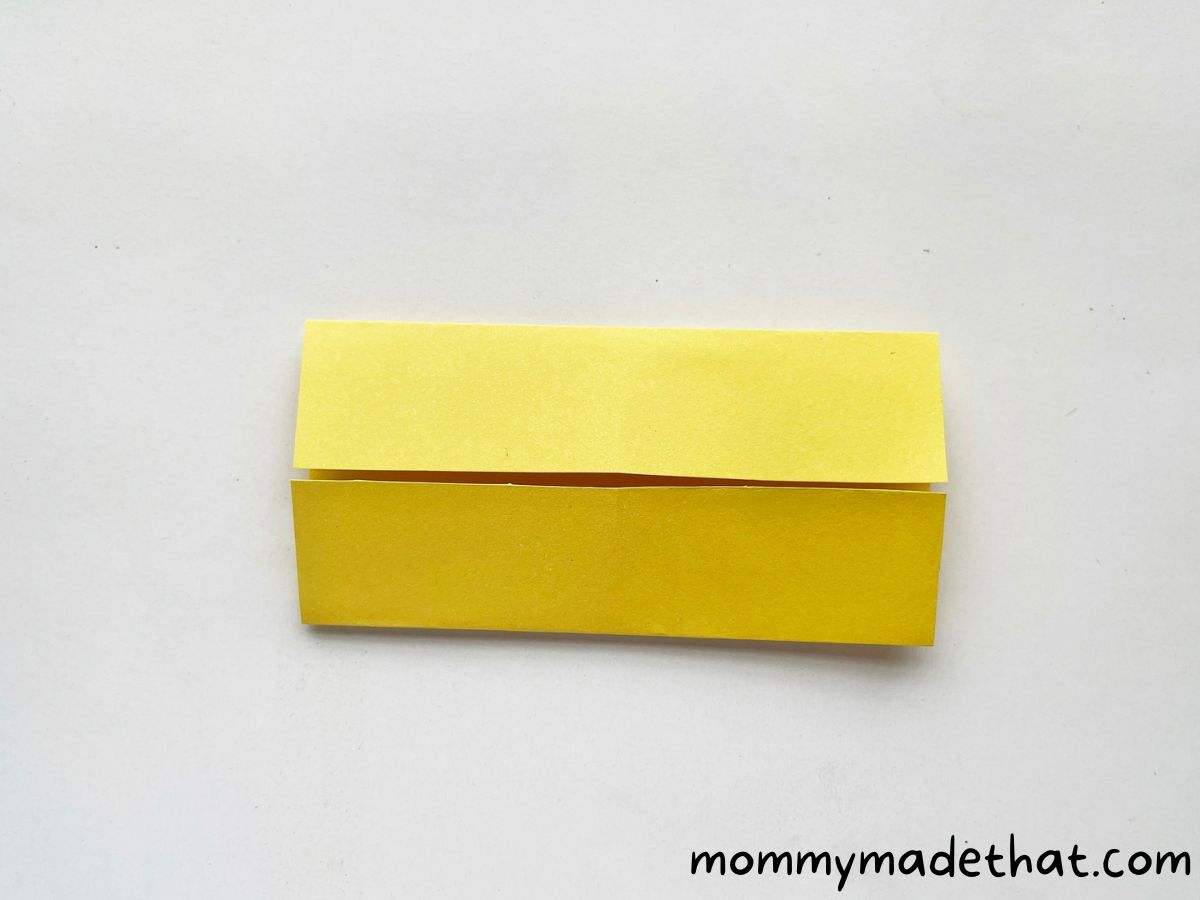
Then fold the other side along the half crease, or simply align its edge with the edge of the folded part.
Step 6: Unfold the Last Two Folds
Now you can unfold the last two fold you made, creating an paper with the above folds.
Step 7: Fold and Unfold the Intact Sides
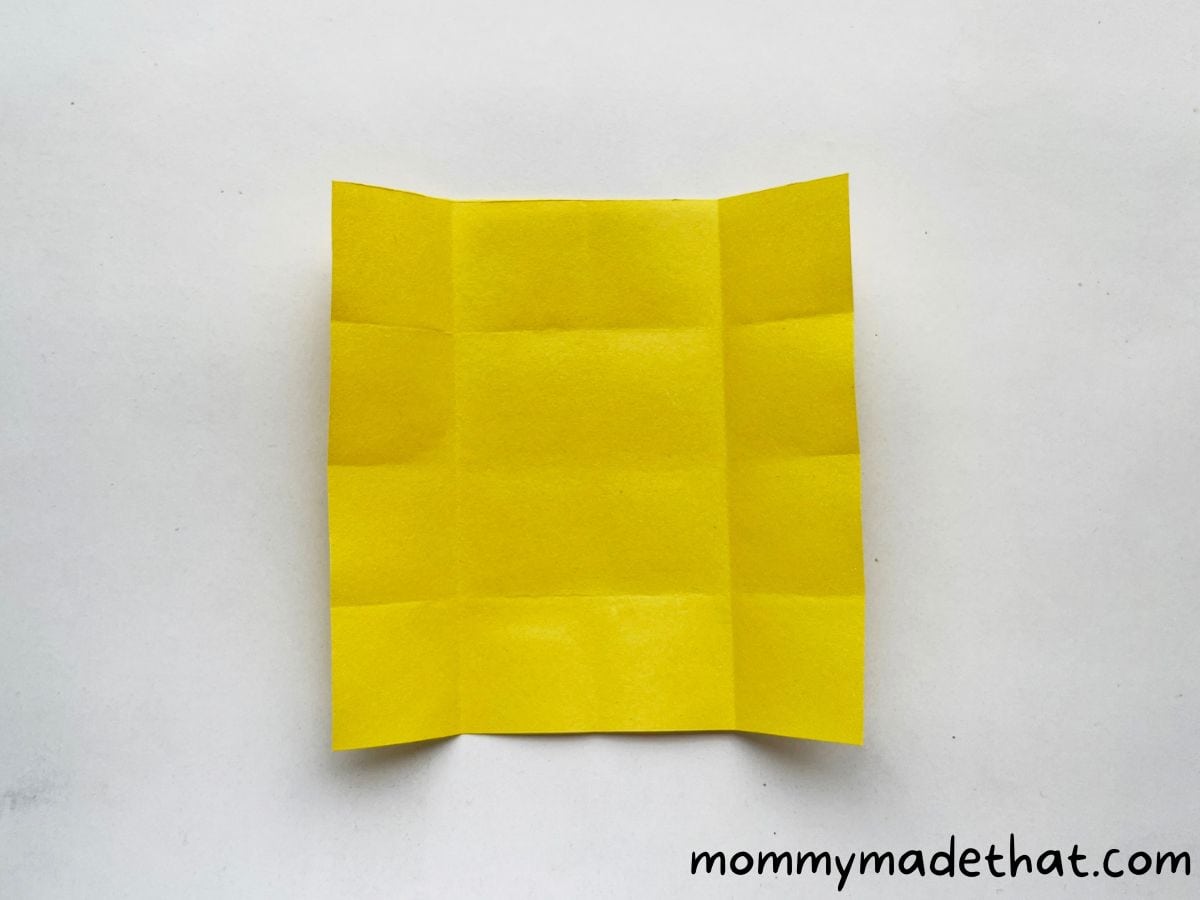
Turn your paper 90 degrees and repeat the folding and unfolding process with the other two sides. This will create a 12 square grid around the border of your square sheet.
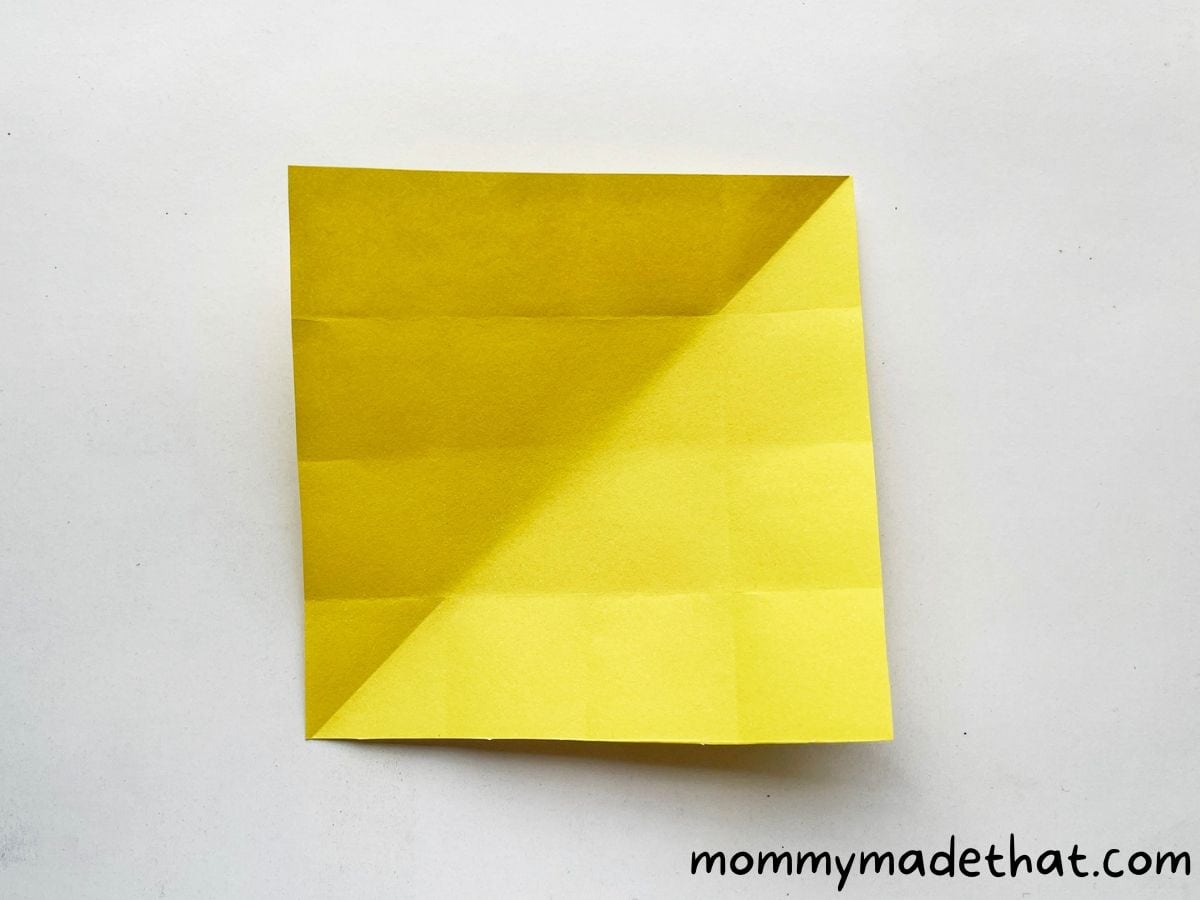
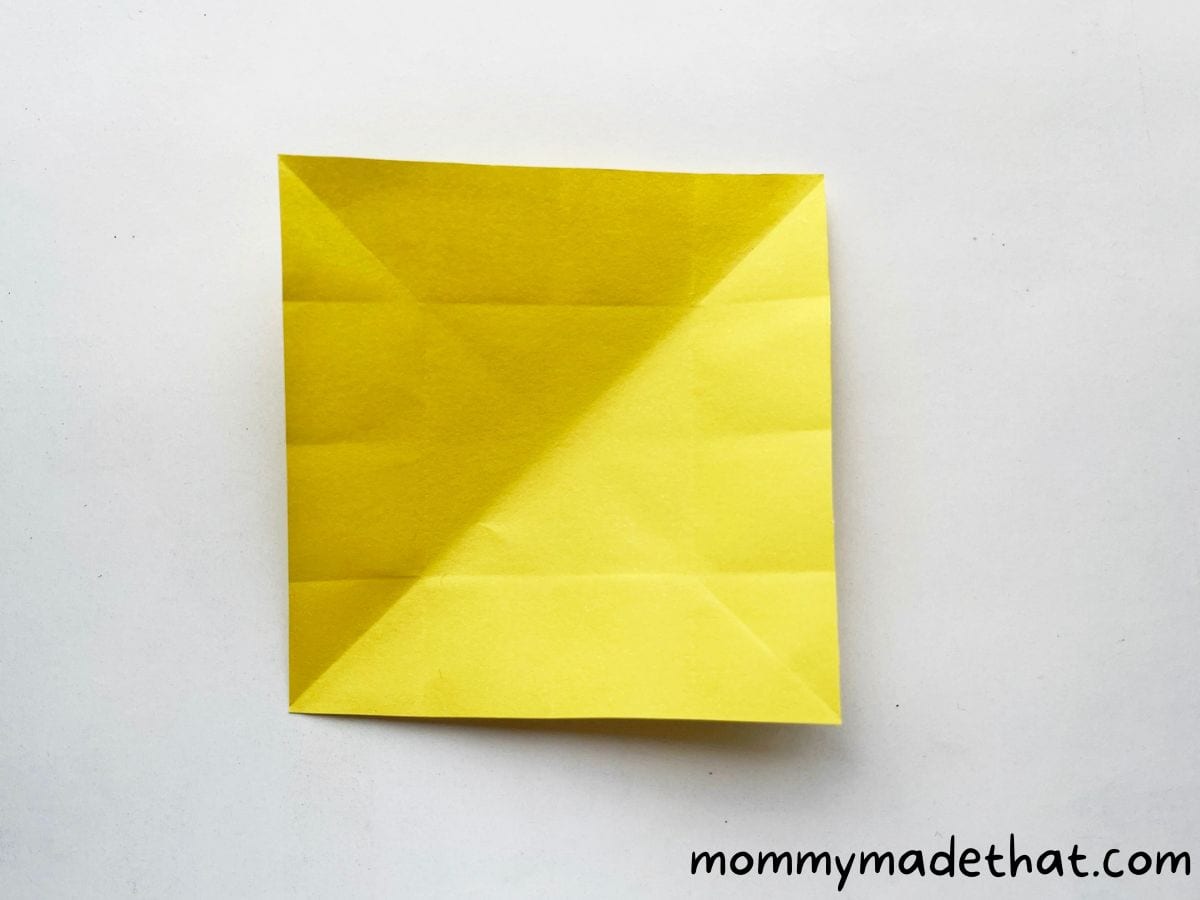
Step 8: Crease the Diagonal Corner Grids
Join any two diagonally opposite corners of the square sheet, without making a fine folding line. Create creases inside the corner grids only.
Step 9: Unfold the Paper
Unfold your paper and admire the creases you’ve created.
Step 10: Crease the Remaining Corner Grids
Repeat the process with the two remaining corner grids.
Step 11: Align Two Sides with the Half Crease
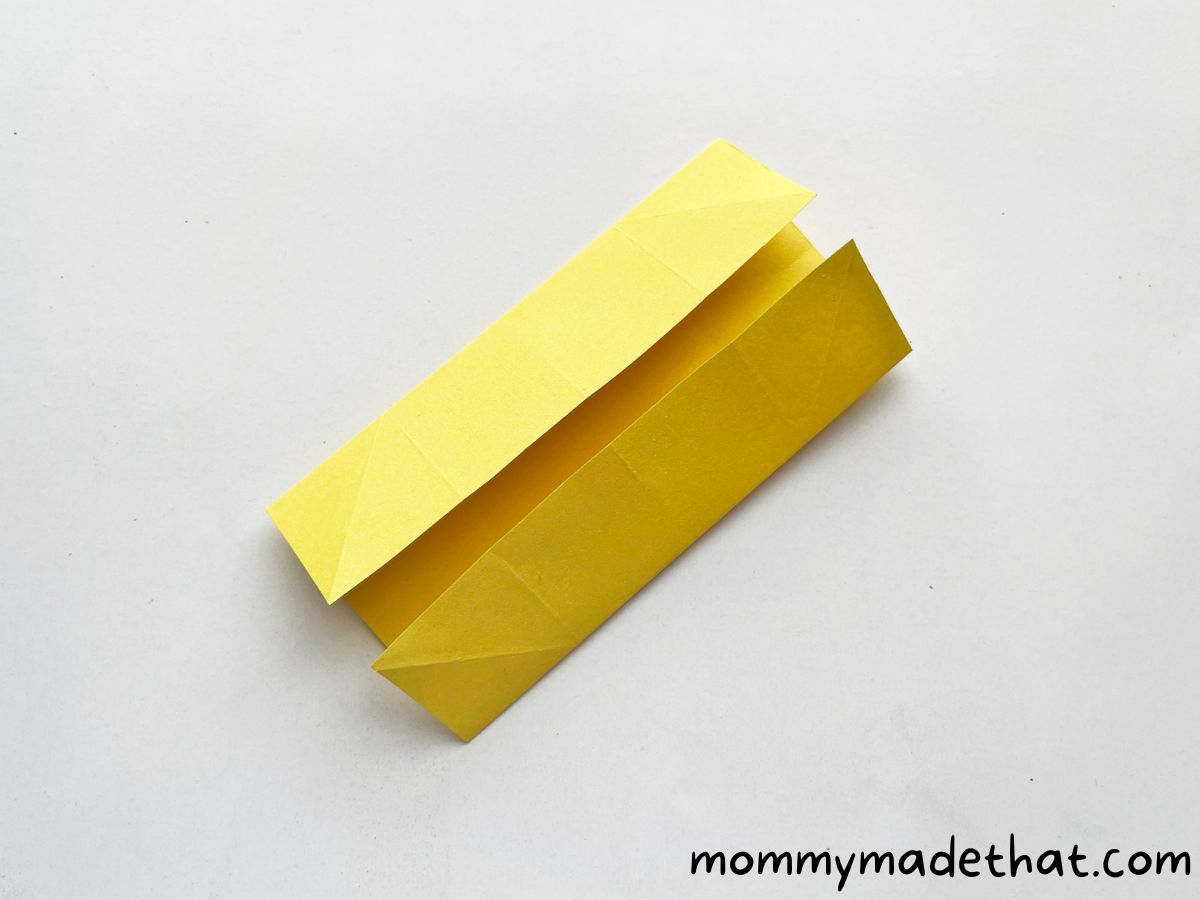
Fold two sides of the paper and align them along the half crease of the square sheet like shown above.
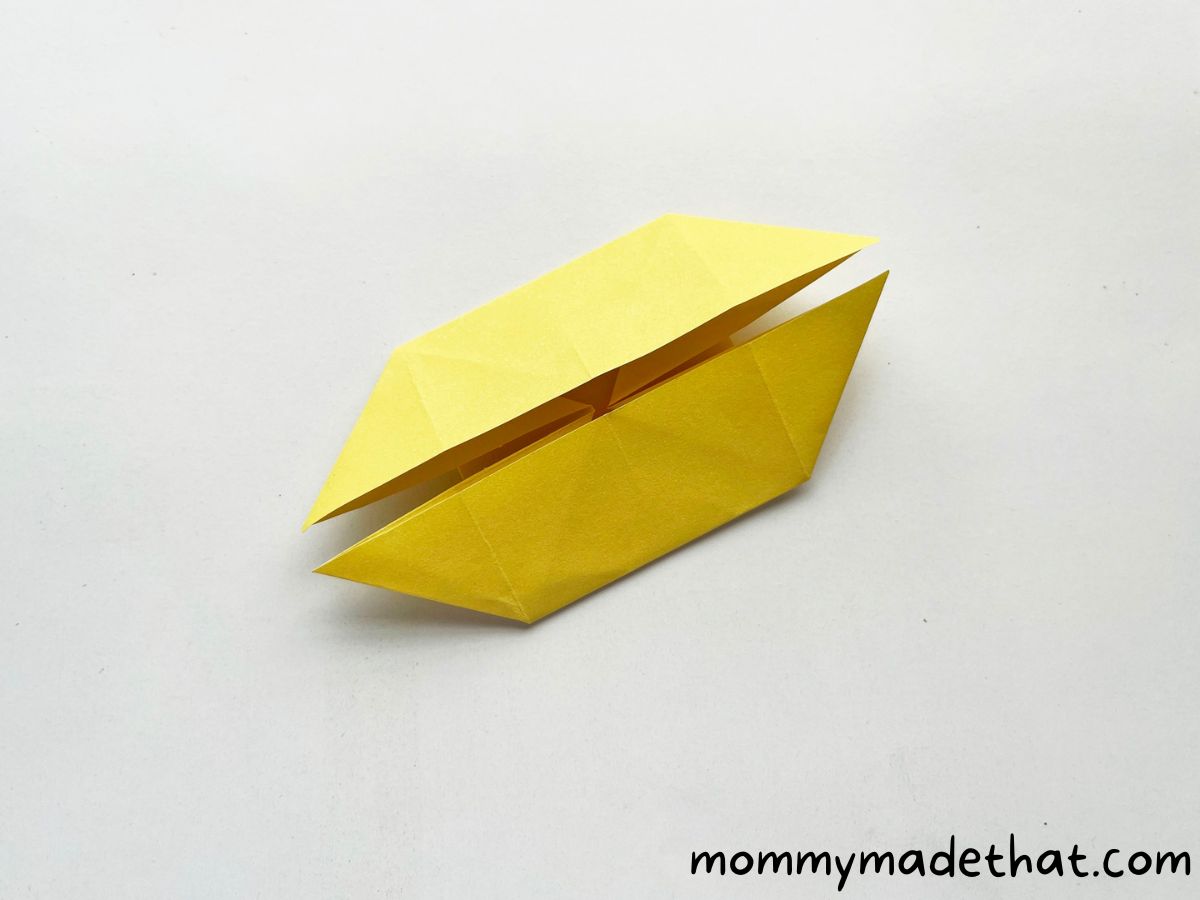
Step 12: Open One Side (Outer Grid Parts Only)
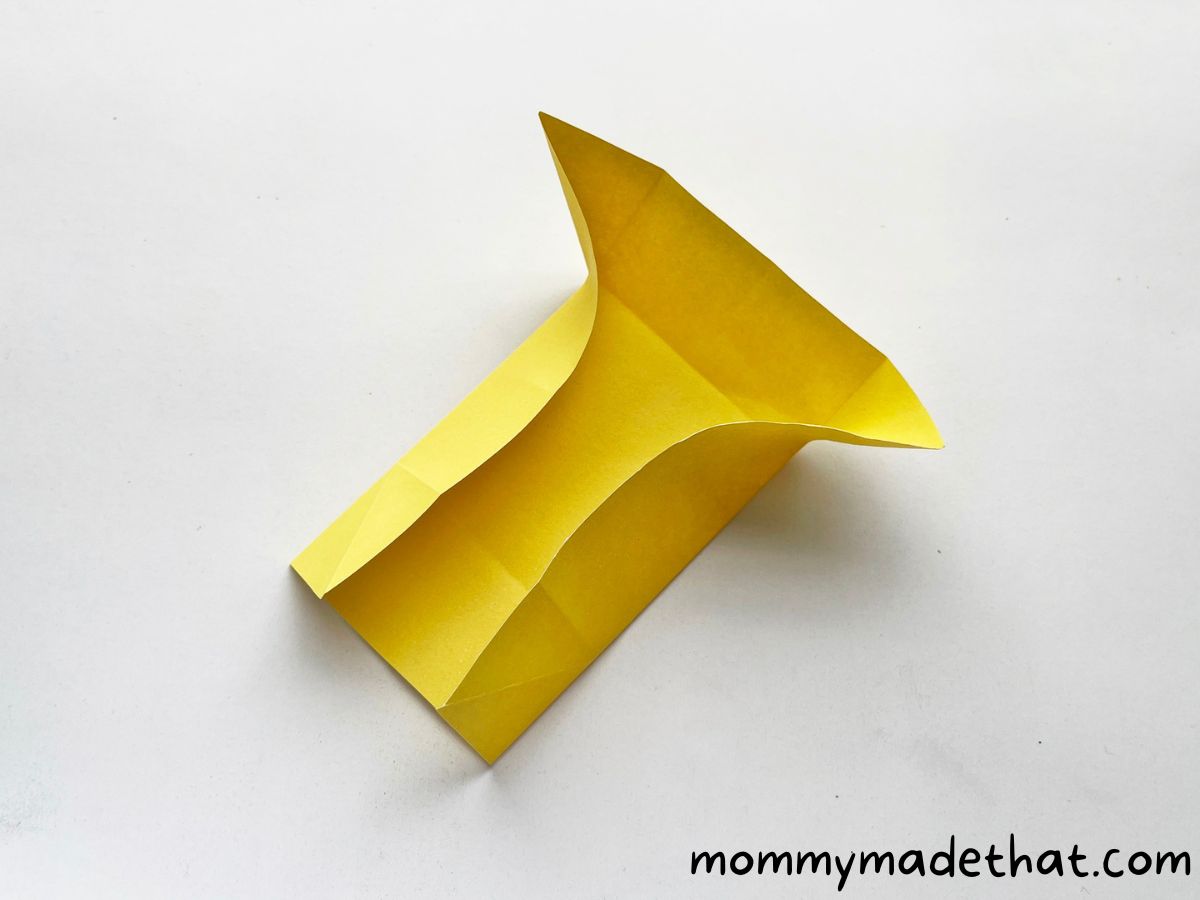
Keep ¾ of the folded paper flattened. Open one side, but only the outer grid parts.
Step 13: Fold Along the Corner Grids’ Diagonal Creases
Time to fold along the diagonal creases of the corner grids.
Step 14: Flatten the Corner Grids
Flatten the corner grids with the rest of the pattern by folding them along the diagonal creases.
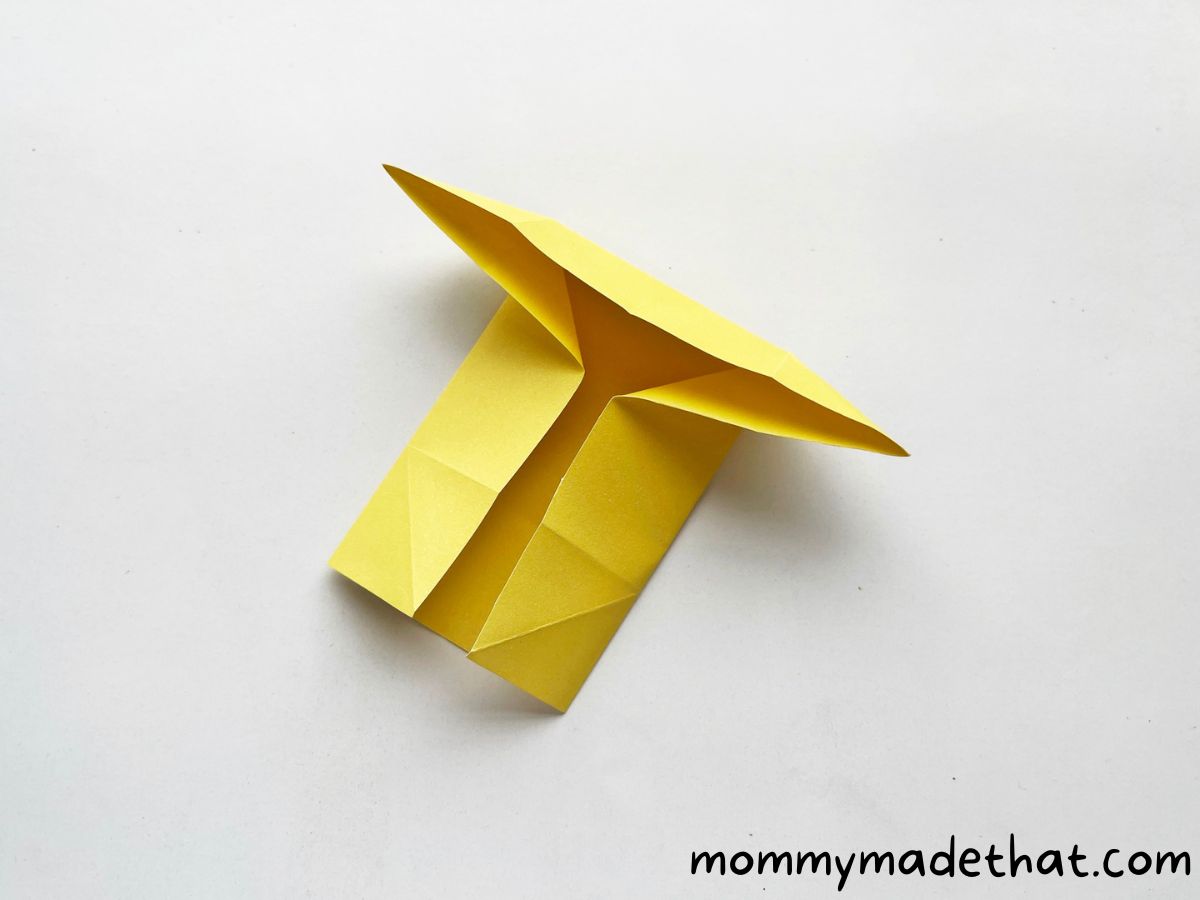
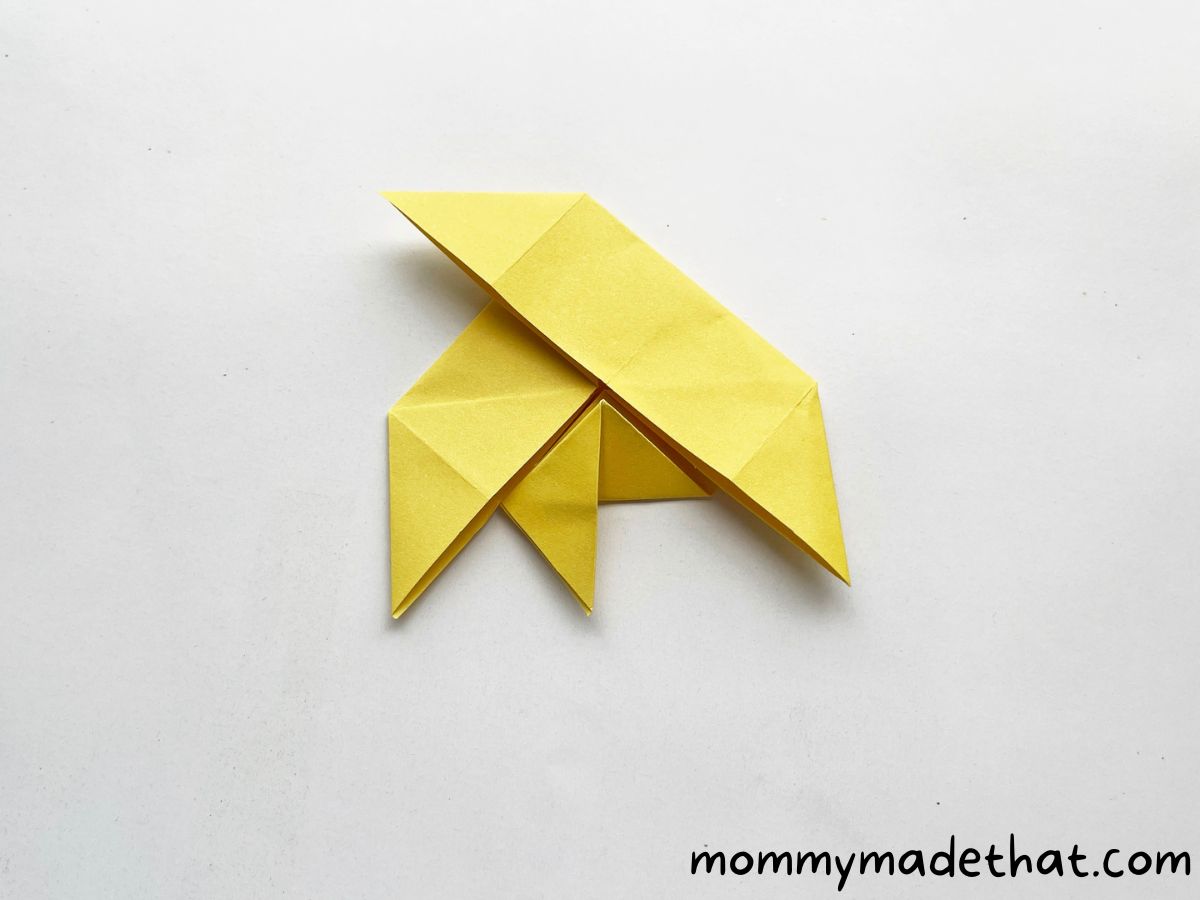
Step 15: Fold the Other Side of the Pattern
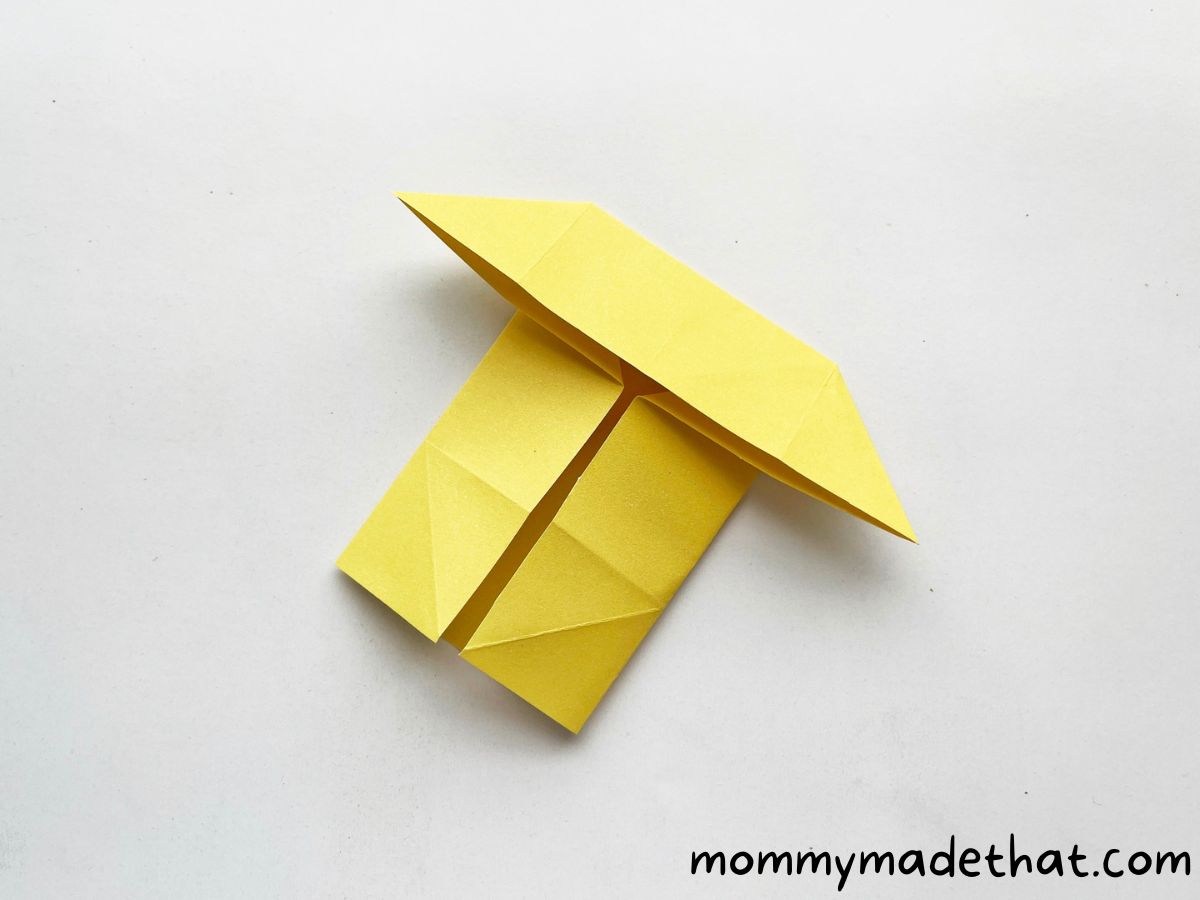
Repeat the process with the other side of the pattern. You should now have four flaps, separated into groups along the middle.
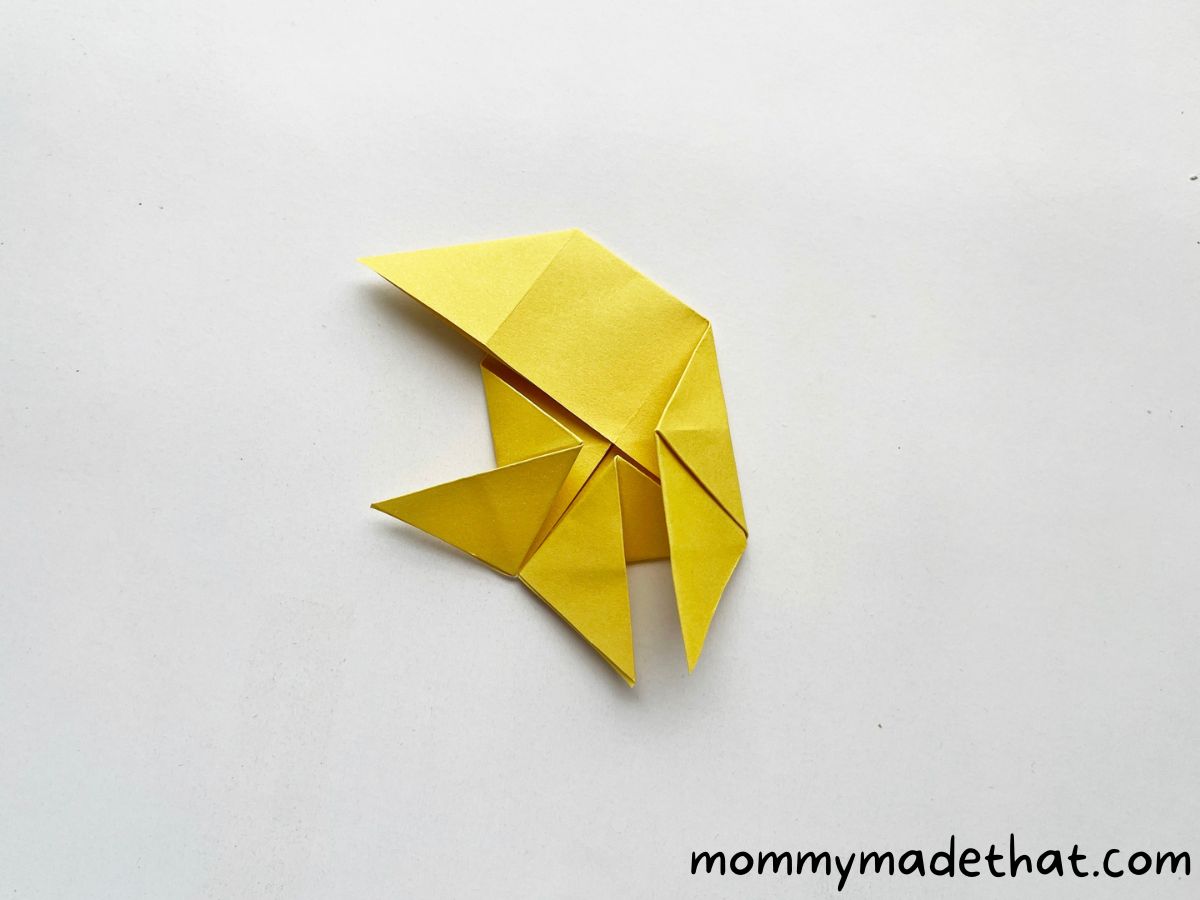
Step 16: Fold Out Two Flaps
Choose two flaps and fold them outward.
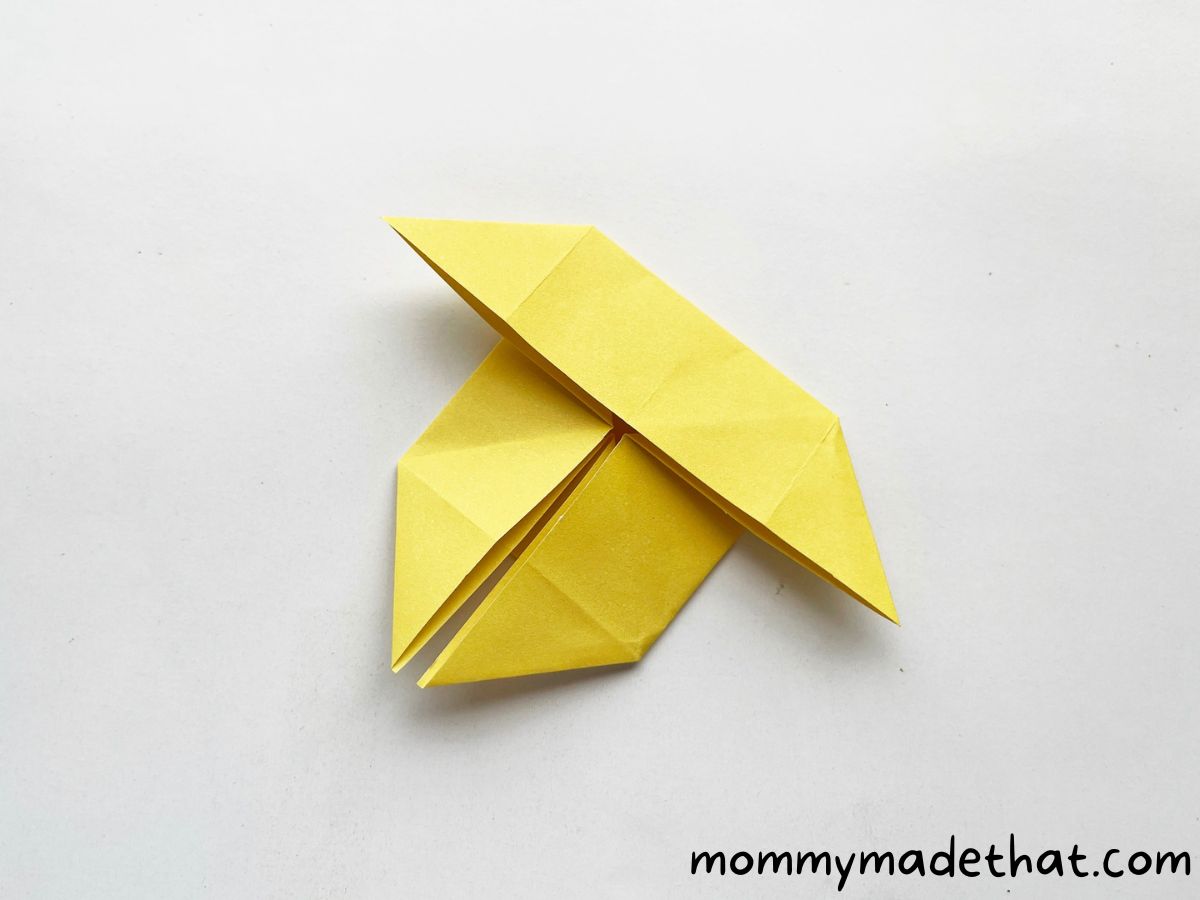
Step 17: Align the Right Flap
Align the right side of the remaining right flap along the inner edge of the top right flap (the previously folded out flap).
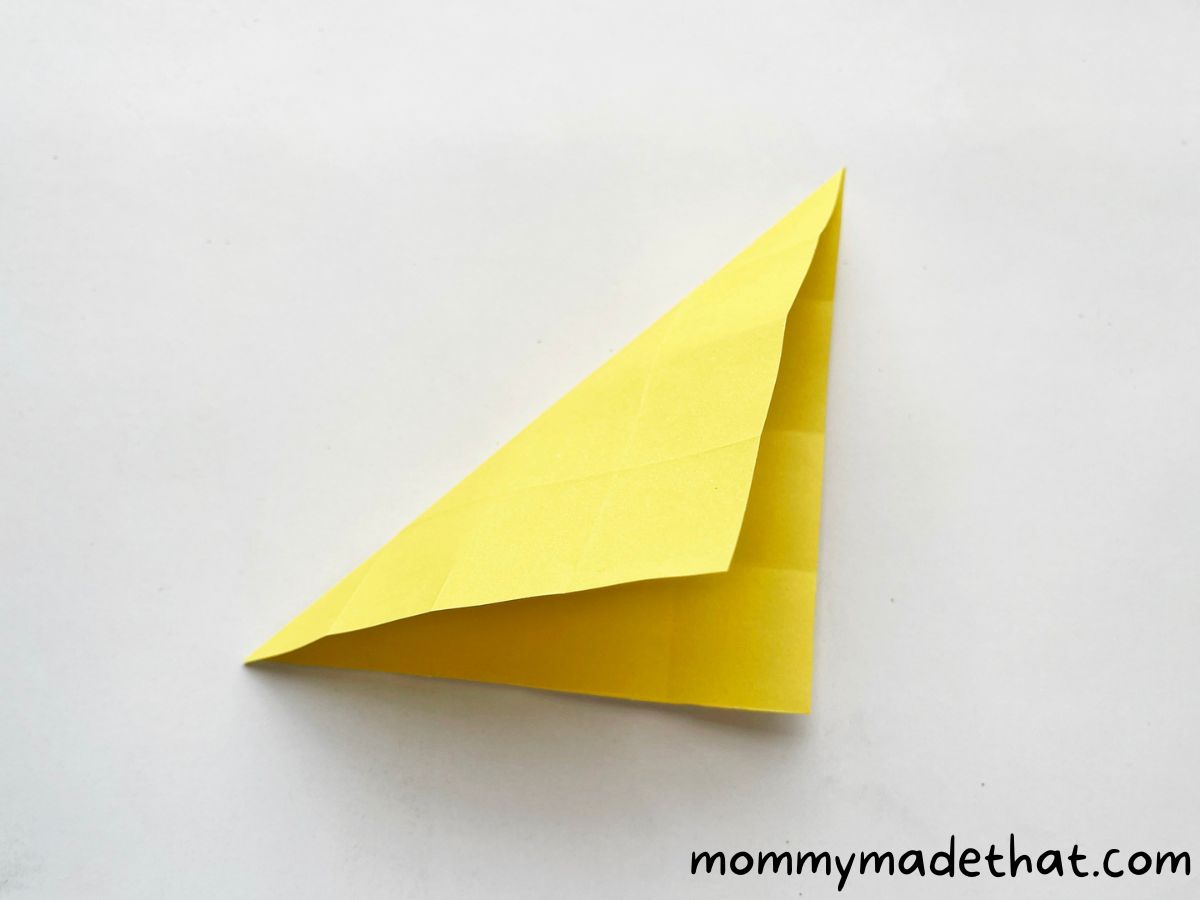
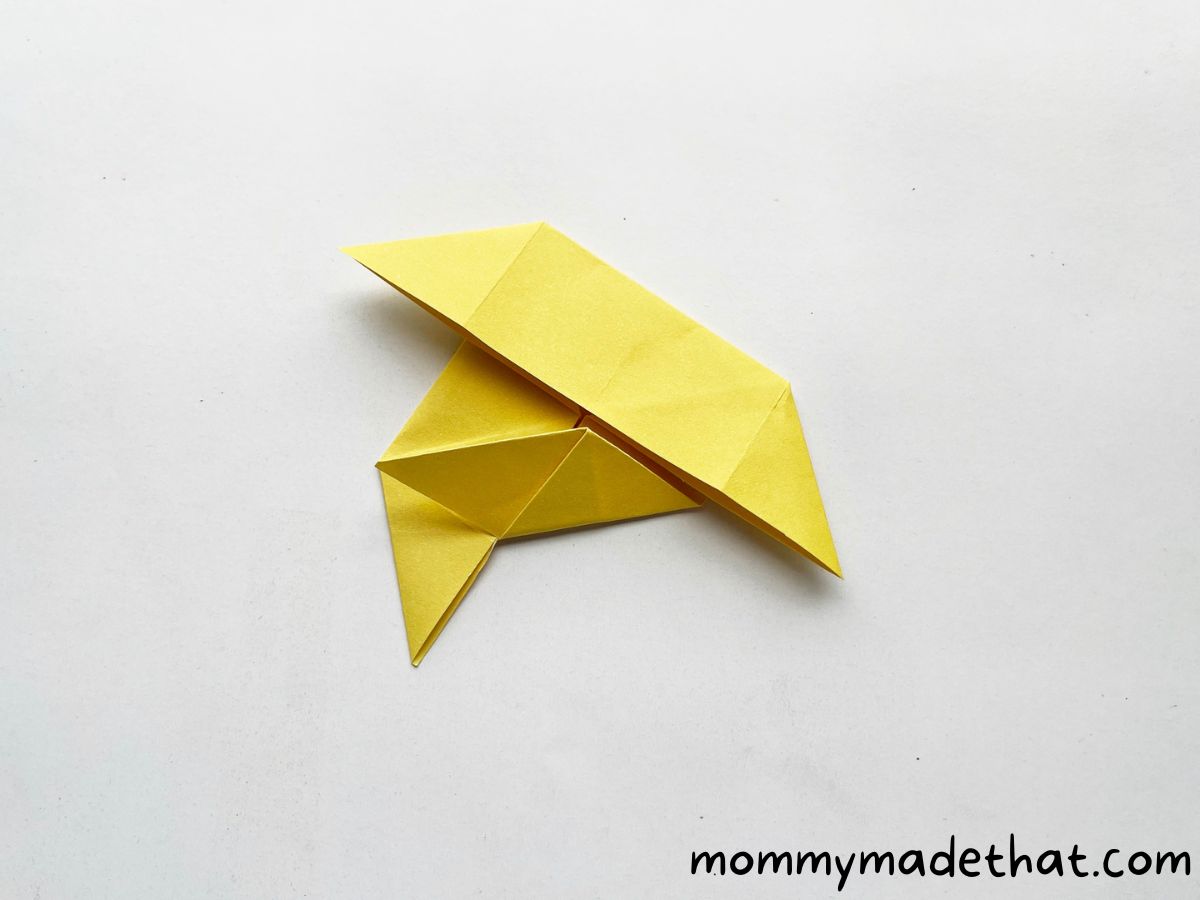
Step 18: Fold the Right Flap in Half
Fold the right flap in half and fold it outside. You’ve just created one half of the tail fin!
Step 19: Fold the Left Flap

Repeat the process with the left flap to complete the tail fin.
Step 20: Fold the Top-Right Side at a 45-degree Angle
Fold the top-right side to a 45-degree angle and align it along the middle of the pattern.
Step 21: Fold and Align the Left Side
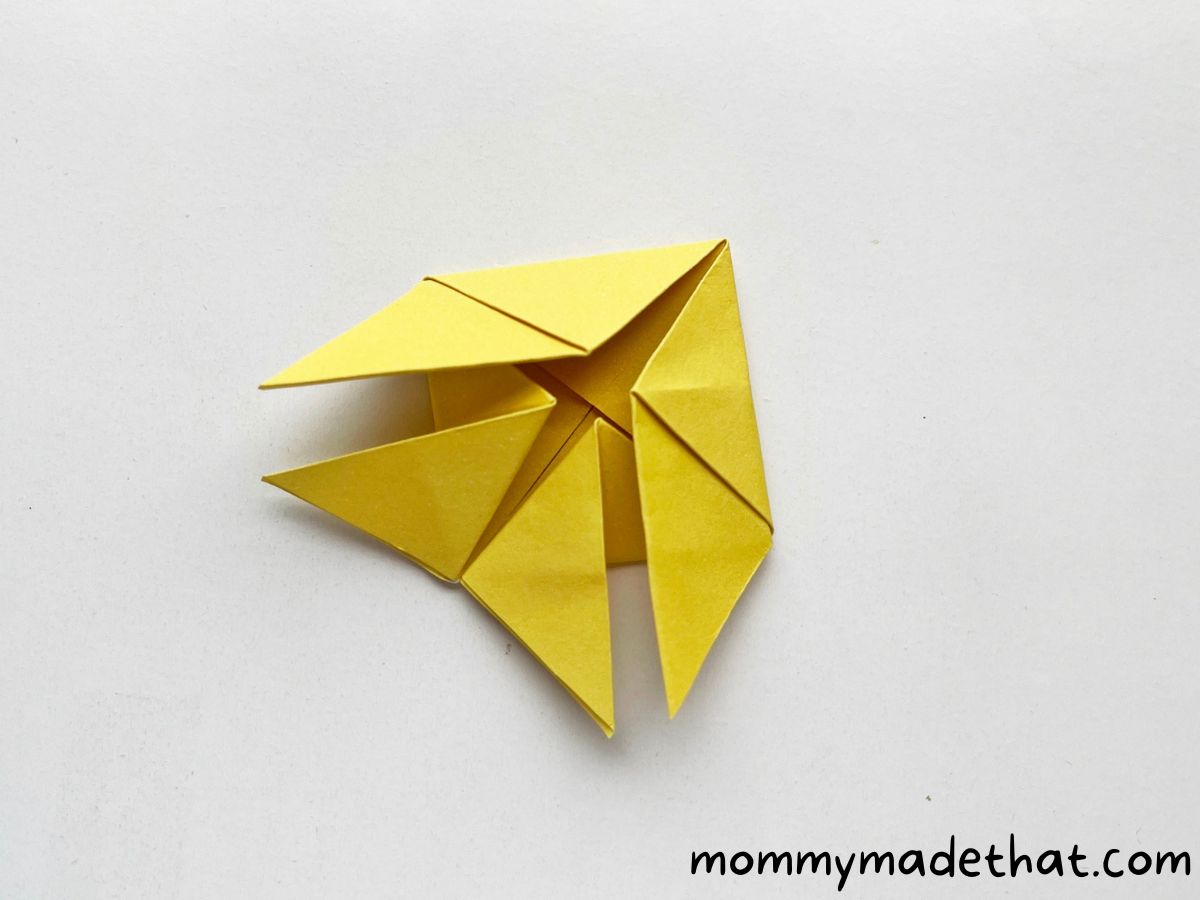
Follow the same process for the left side. Now you have the back of the fish, including the fish tail and the fins.
Step 22: Add the Finishing Touch – the Eye!
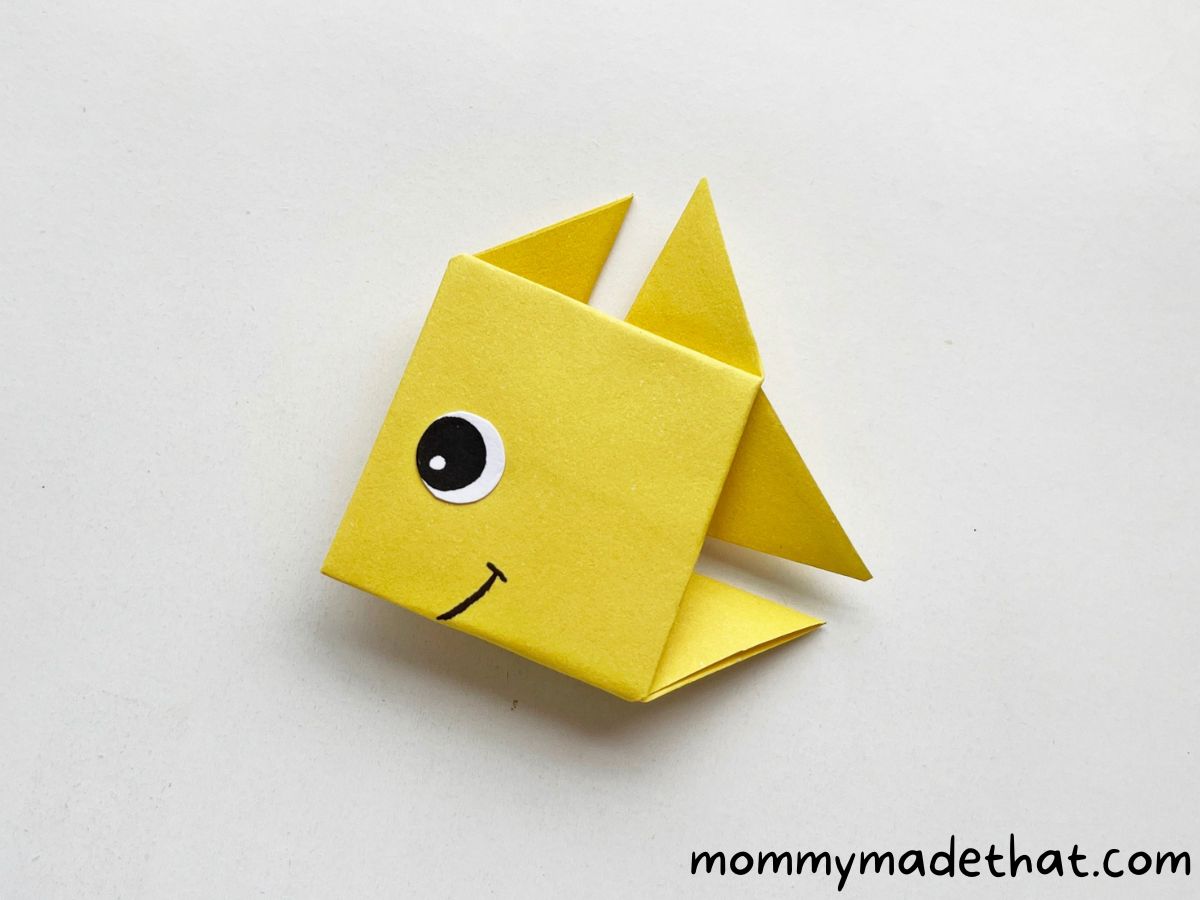
Turn the fish over. Cut out an eye from a piece of white paper and attach it to the square part of your origami fish pattern to complete your craft.
Congratulations, you’ve just made an adorable origami fish!
Once you’ve made your adorable fish craft, don’t forget to give it the perfect name! Check out this list of fish names for fun, creative, and unique ideas.
Origami Fish
This easy origami fish is a fun way to make a super cute folded paper fish.
Materials
- Origami paper or craft paper
Instructions
- Select a square paper.
- Gently mark horizontal creases on the open sides.
- Create vertical half-fold crease points.
- Fold one side along the half crease and align the other side with the folded edge.
- Unfold the last two folds and repeat the process with the intact sides to create 12 square grids.
- Crease diagonal corner grids, unfold the paper, and crease the remaining corners.
- Align two sides with the half crease and open one outer grid part.
- Fold along the corner grids' diagonal creases and flatten them.
- Fold the other side of the pattern and fold out two flaps.
- Align the right flap, fold it in half for the tail fin, and repeat with the left flap.
- Fold the top-right side at a 45-degree angle and align the left side.
- Add an eye to complete your origami fish.