Origami Chicken (Step by Step Tutorial)
Today’s craft is an adorable Origami Chicken that kids and adults will love to make! This fun and cute paper craft will delight children as they create their own little feathered friend.

Welcome to an exciting step by step origami tutorial, where we’ll learn how to make an Origami Chicken!
Origami is a fantastic activity for kids as it promotes fine motor skills, spatial awareness, and patience.
This craft is perfect for any season or occasion, whether it’s a rainy day at home or a festive Easter craft for kids.
Why You’ll Love This Craft:
- Engaging and Fun: Kids will have a blast creating their own origami chicken.
- Boosts Creativity: Personalize your chicken with colors and unique details.
- Develops Fine Motor Skills: Enhance hand-eye coordination and dexterity through precise folding.
- Encourages Patience and Concentration: Follow step-by-step instructions to promote focus and patience.
Materials
- Colored origami paper or light craft paper: Choose vibrant colors to make your origami chicken truly stand out. If you don’t have origami paper, regular craft paper can work too. You’ll need it to be a square sheet of paper, just like many traditional origami.
- Sharpie: This will come in handy for adding details to your chicken’s face.
- Craft glue: Use craft glue to attach the comb and eye to your chicken.
Instructions
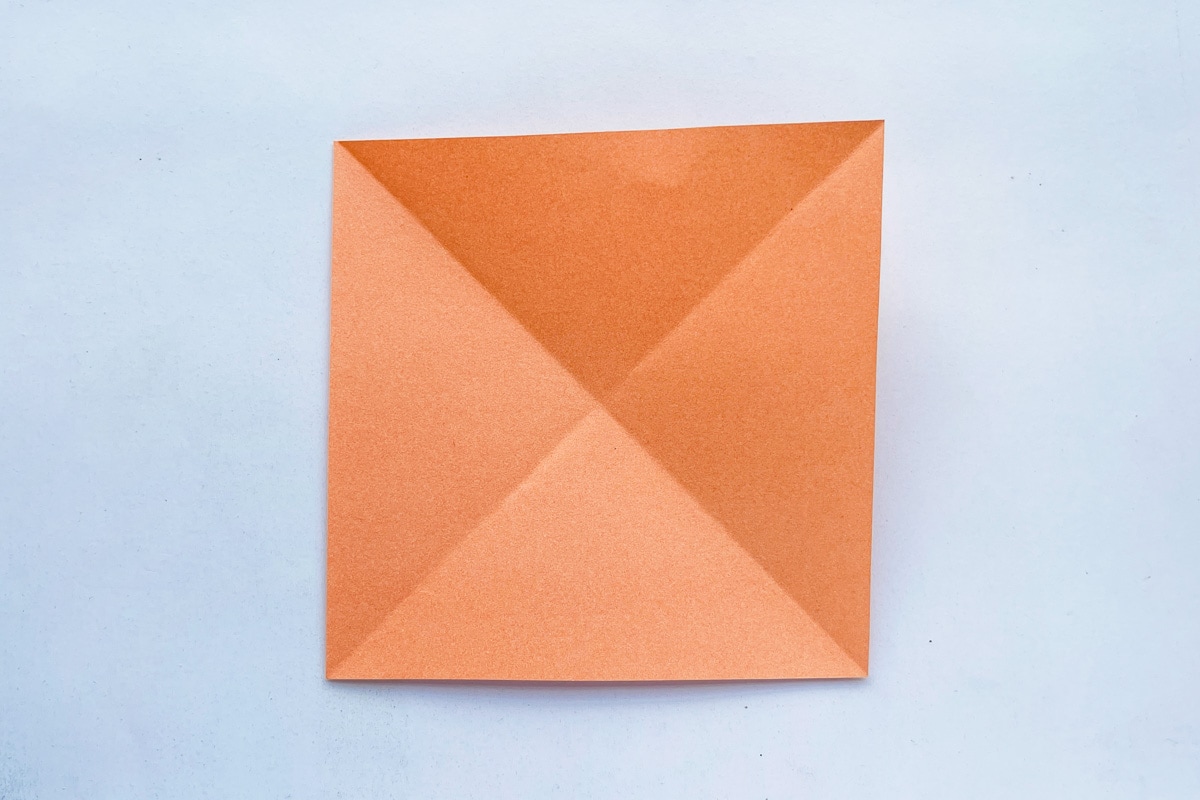
Step 1: Start with a square paper. Fold the paper in half diagonally from both sides, then unfold. These folds will create creases to guide your future folds.
Step 2: Take one corner of the square paper and fold it to the center of the square.

Step 3: Fold all four corners of the square paper to the center.

Step 4: Fold the four corners of the current square pattern to the center once again.

Step 5: Neo you can unfold two opposite corners from the last folds, forming a shape similar to that below.

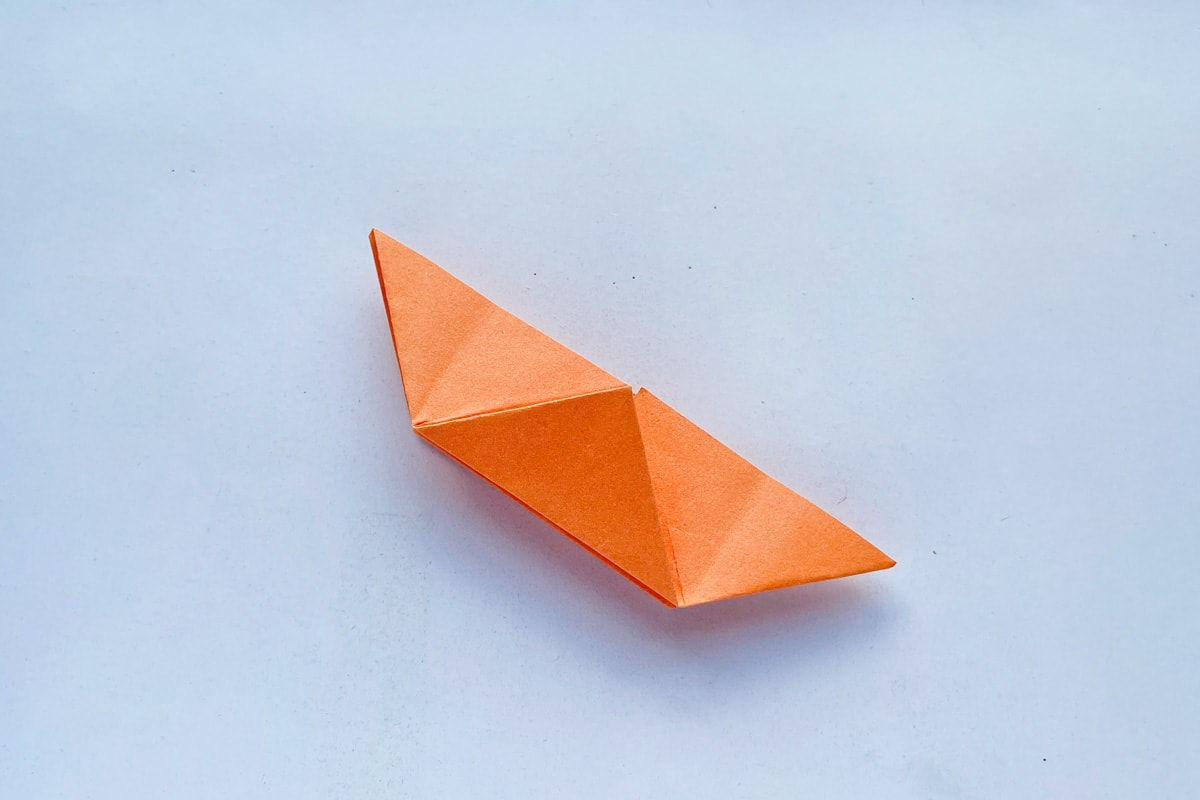
Step 6: Fold the current pattern in half along the long side, making sure the corner flaps face outward.
Step 7: Hold the side corner flaps firmly in place and fold out any one of the open corners towards the closed side of the pattern.

Step 8: Smooth out the fold and flatten it along with the rest of the pattern.

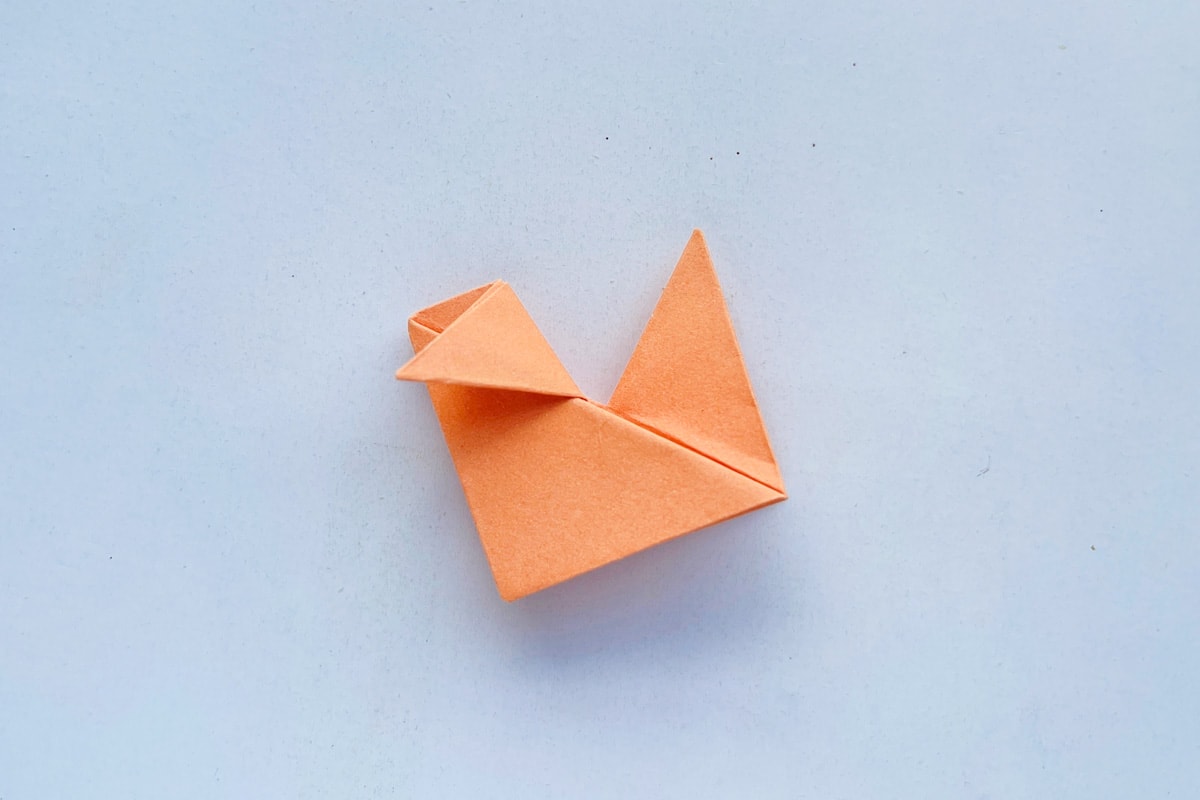
Step 9: Repeat the previous step for the other side. Your pattern should now have one large triangle (body), one small triangle (head), and another small triangle (tail-feather).

Step 10: Fold one of the small triangle parts in 1/3, keeping the shorter part near the body. This neat fold creates a defined crease line.
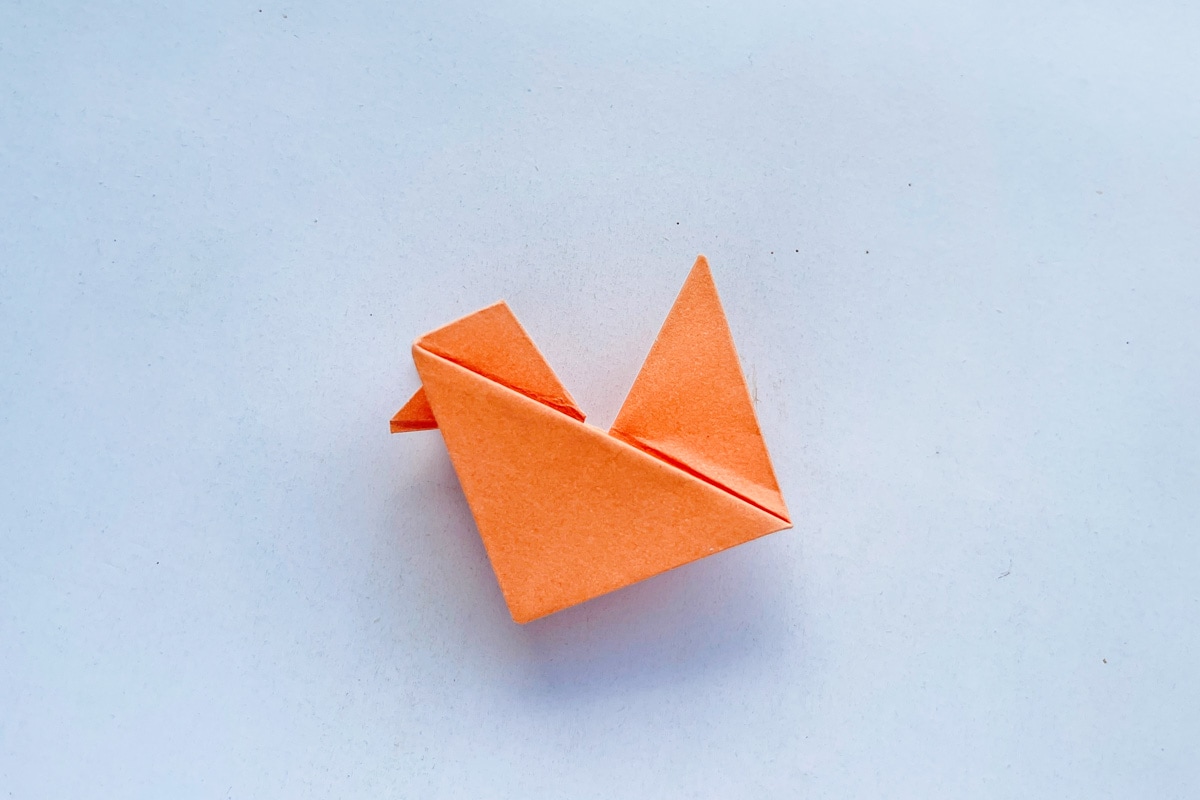
Step 11: Unfold the previous fold.

Step 12: Use the crease from the last step to fold the paper inwards, creating the head of your origami chicken.
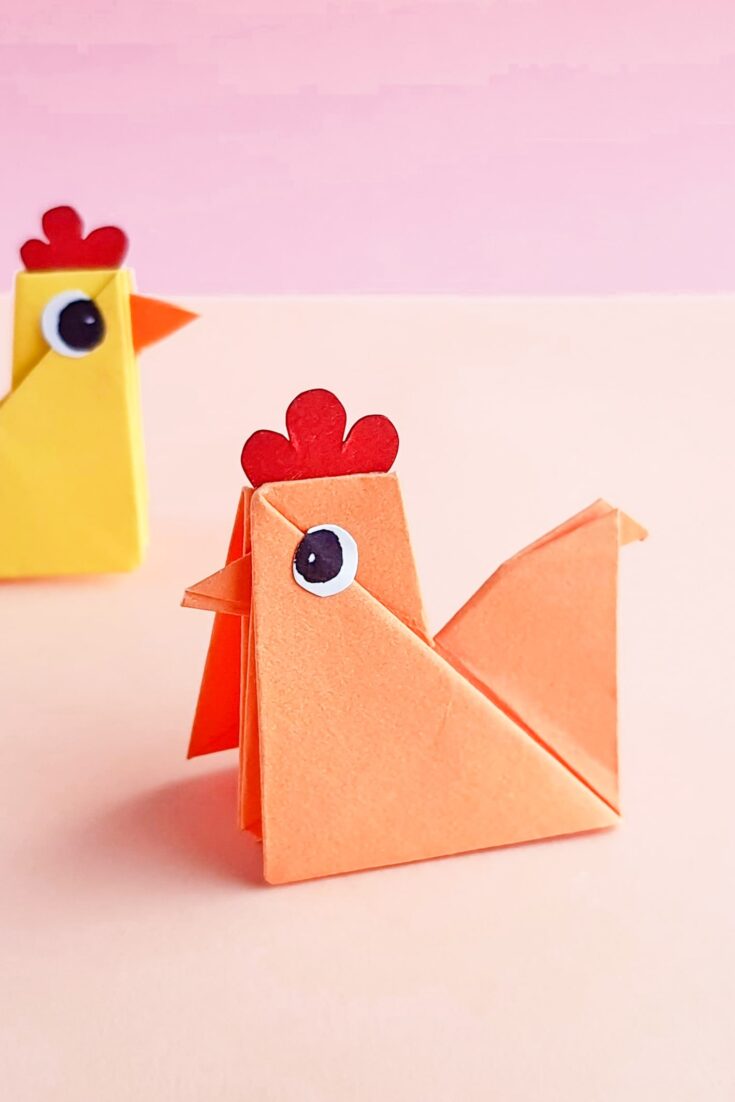
Step 13: Trace and cut out a comb pattern and an eye. Attach the comb along the top straight side of the head and place the eye below the comb on the chicken’s head.

Congratulations! You’ve successfully completed your easy origami chicken.
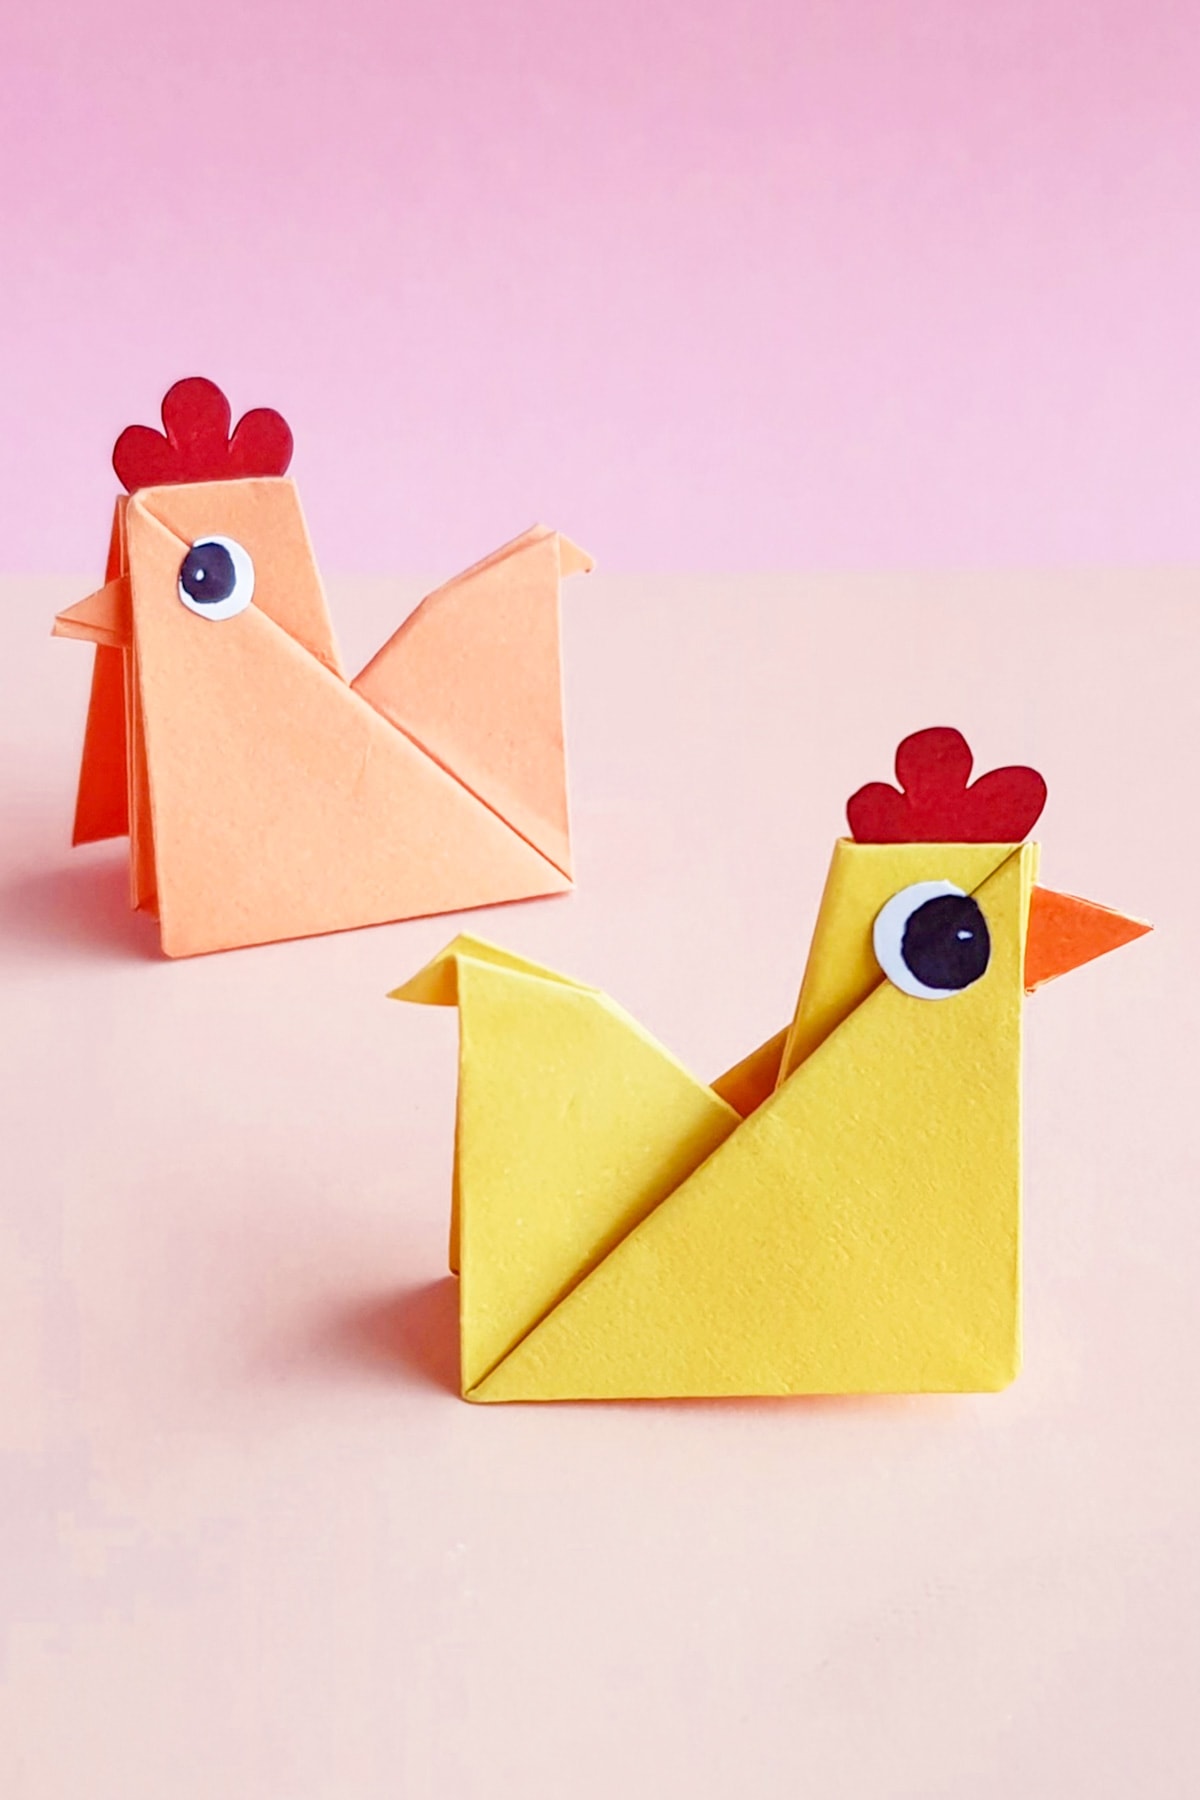

Now you have a delightful little creature that can be displayed or used as a cute addition to your crafts.
With the comb, I think this looks like an adorable origami hen.
Enjoy the process of making more origami chicks and let your creativity soar!
Top Tips
Here are our top tips for making an origami chicken.
- Start with the Right Paper: Use origami paper or lightweight craft paper for the best results. The square shape and thinness of the paper make it easier to fold and achieve crisp edges.
- Fold Neatly and Precisely: Take your time with each fold, ensuring they are clean and accurate. Smooth out creases and align edges to create a well-formed chicken.
- Use a Bone Folder or Your Fingernail: To create sharp creases, run a bone folder or gently press along the folds with your fingernail. This step adds precision and helps the paper hold its shape.
- Personalize with Details: Get creative with your chicken by adding additional features like a beak, wings, or even feathers. Use markers or colored pencils to draw eyes, patterns, or other decorative elements to make your chicken unique.
Origami Chicken
The intricate folding process of this easy Origami Chicken craft helps kids develop their fine motor skills while engaging their creativity as they design their own feathered friend. It's a delightful addition to Easter festivities, farm-themed parties, or as a charming decoration for any occasion. Let children explore their imagination as they bring their chickens to life.
Materials
- Colored origami paper or light craft paper
- Black marker or pen
- Craft glue
Tools
- Bone folder or pencil to create sharp edges
Instructions
- Begin with a square paper. Fold it in half diagonally from both sides, then unfold to create creases.
- Take a corner of the square paper and fold it towards the center.
- Fold all four corners of the square paper to the center.
- Fold the four corners of the square pattern to the center again.
- Unfold two opposite corners from the previous folds.
- Fold the pattern in half along the long side, ensuring the corner flaps face outward.
- Hold the side corner flaps firmly and fold one of the open corners towards the closed side of the pattern.
- Smooth out the fold and flatten it along with the rest of the pattern.
- Repeat the previous step for the other side. Your pattern should now have a large triangle (body), a small triangle (head), and another small triangle (tail-feather).
- Fold one of the small triangle parts in 1/3, keeping the shorter part near the body to create a neat crease line.
- Unfold the fold made in the previous step.
- Use the crease from the last step to fold the paper inwards, forming the head of the origami chicken.
- Trace and cut out a comb pattern and an eye. Attach the comb along the top straight side of the head and place the eye below the comb on the chicken's head.