
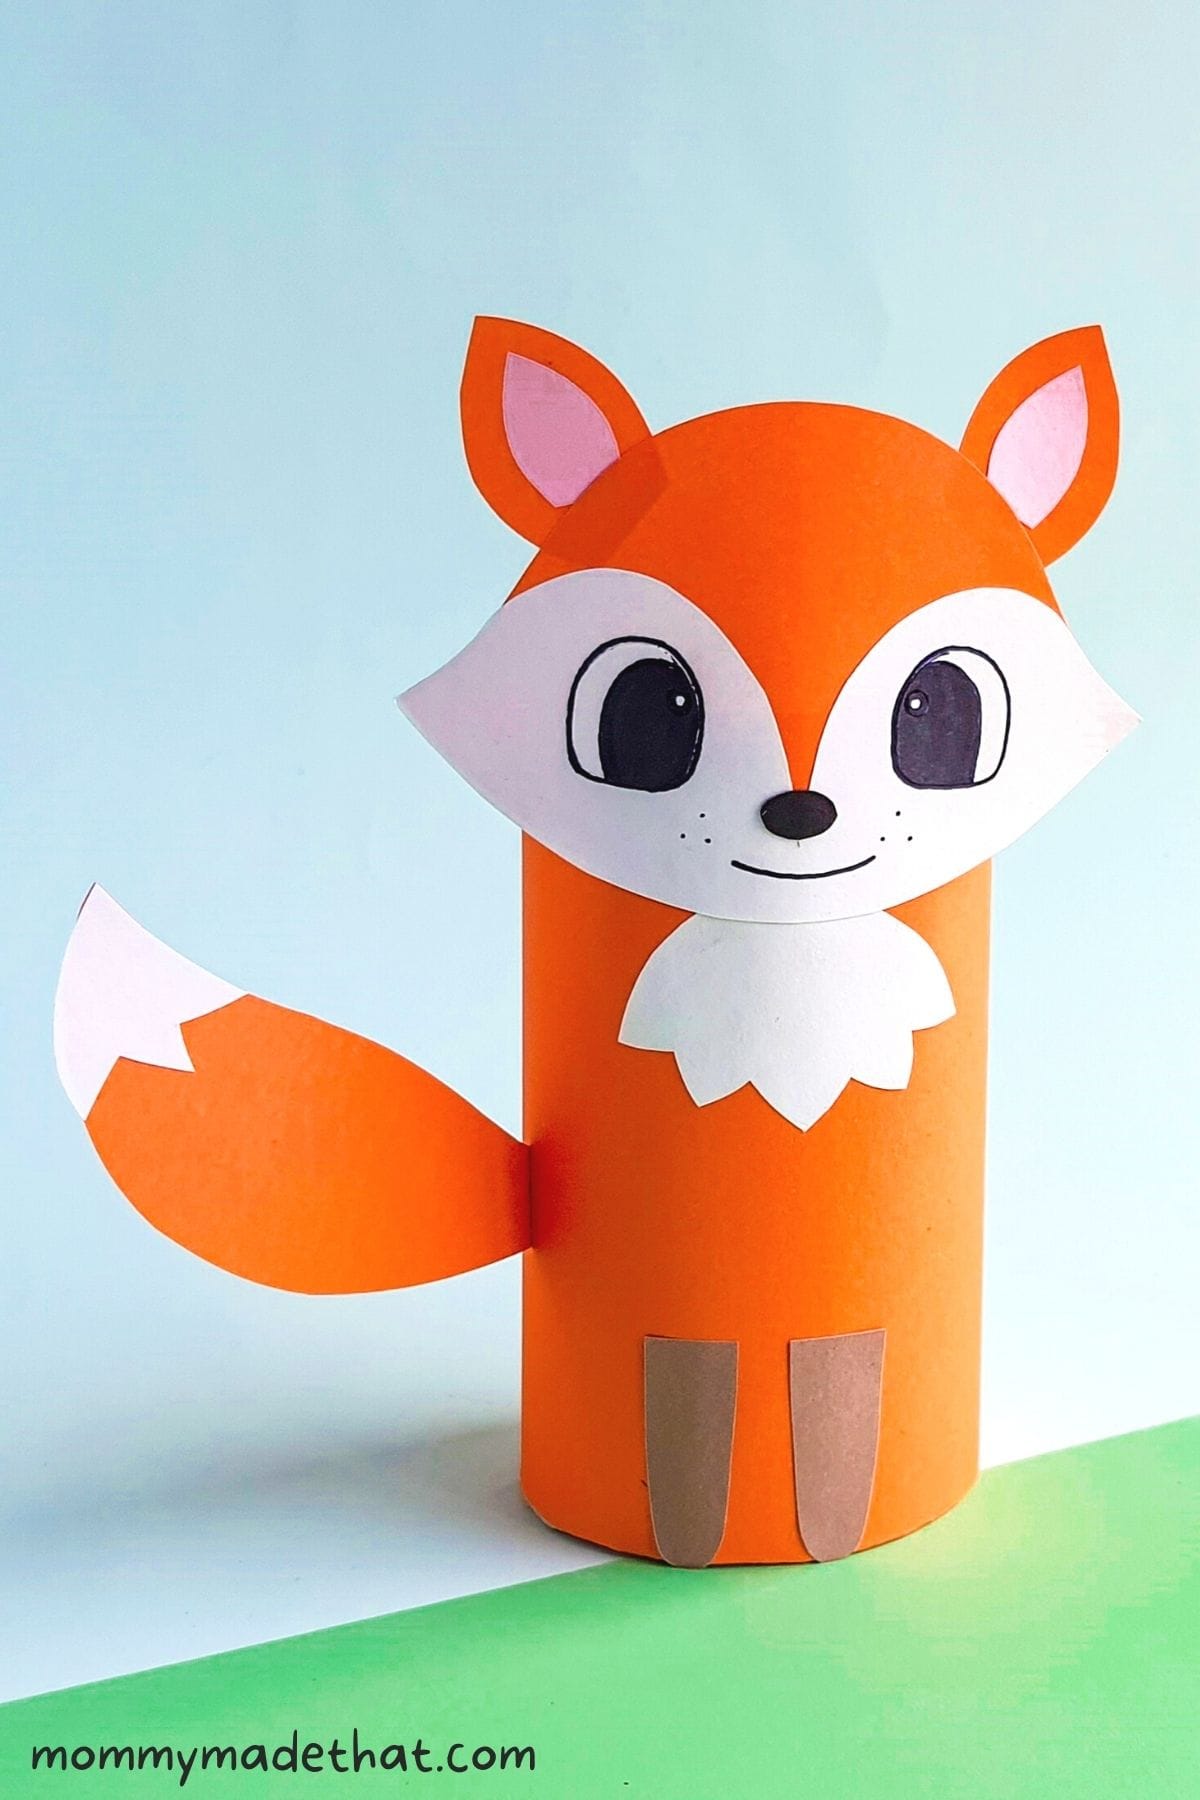
Toilet Paper Roll Fox Craft (+Free Printable Template)
This toilet paper roll fox craft is an adorable craft that’s easily made with our free printable fox template.
We love all sorts of easy crafts around here. And this toilet paper roll craft just is just way too cute.
We have lots of toilet paper roll animal crafts on this site, but this fox craft might just be my favorite.
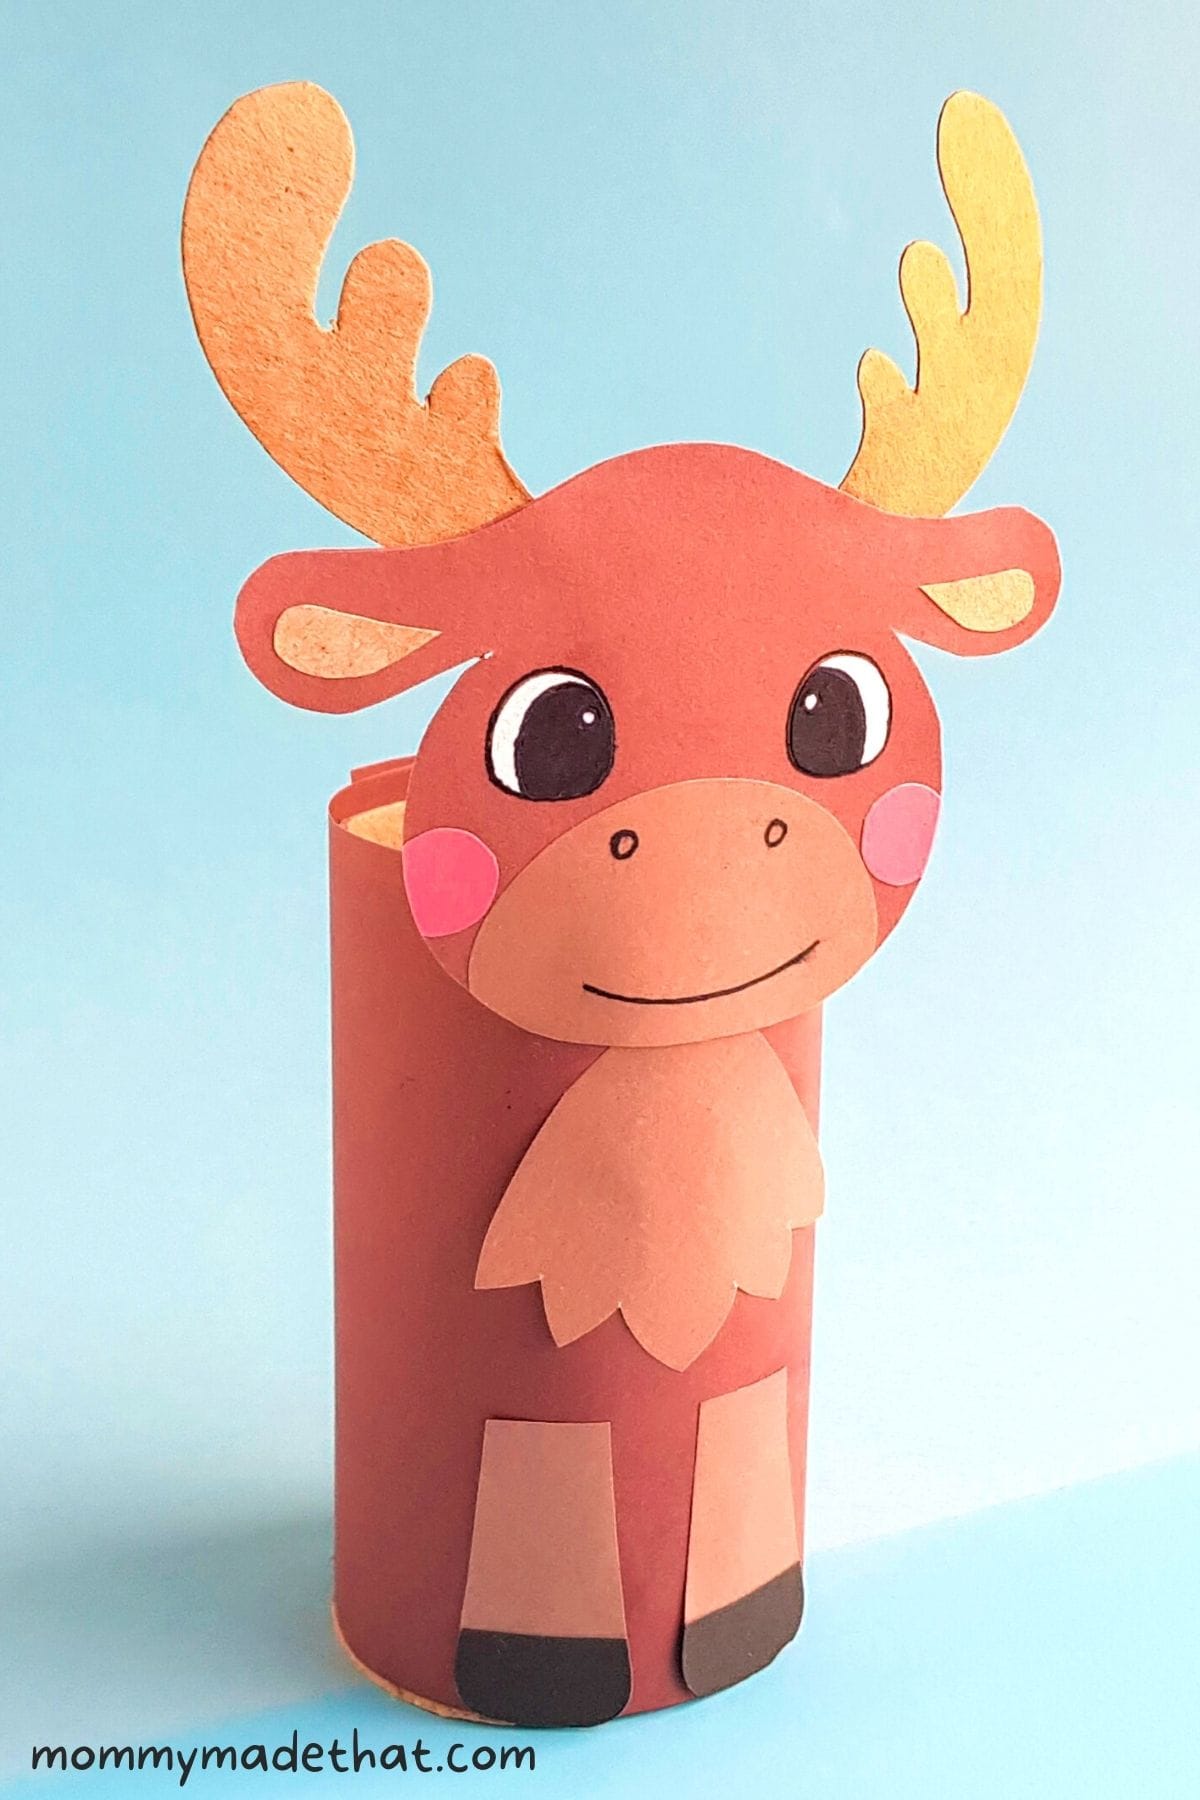
He’s made from just a toilet paper roll and some pretty colored craft paper. He pairs great with our toilet paper roll moose.
And if you are looking for more fox crafts, be sure to check out our felt fox craft as well.
Although construction paper would work well too.
Table of Contents
Materials and Supplies

For our fox, we just needed a few simple materials and basic crafting supplies.
Fox template: Grab it at the bottom of this post.
Colored craft paper: We used orange, brown, pink, black and white. But you can make your fox any color you choose.
Toilet Paper Roll: I love toilet paper roll crafts, it’s a fun way to recycle our everyday items.
You’ll also need some craft supplies :
- Scissors
- Pencil
- Black marker
- Craft glue
How to Make a Fox From a Toilet Paper Roll
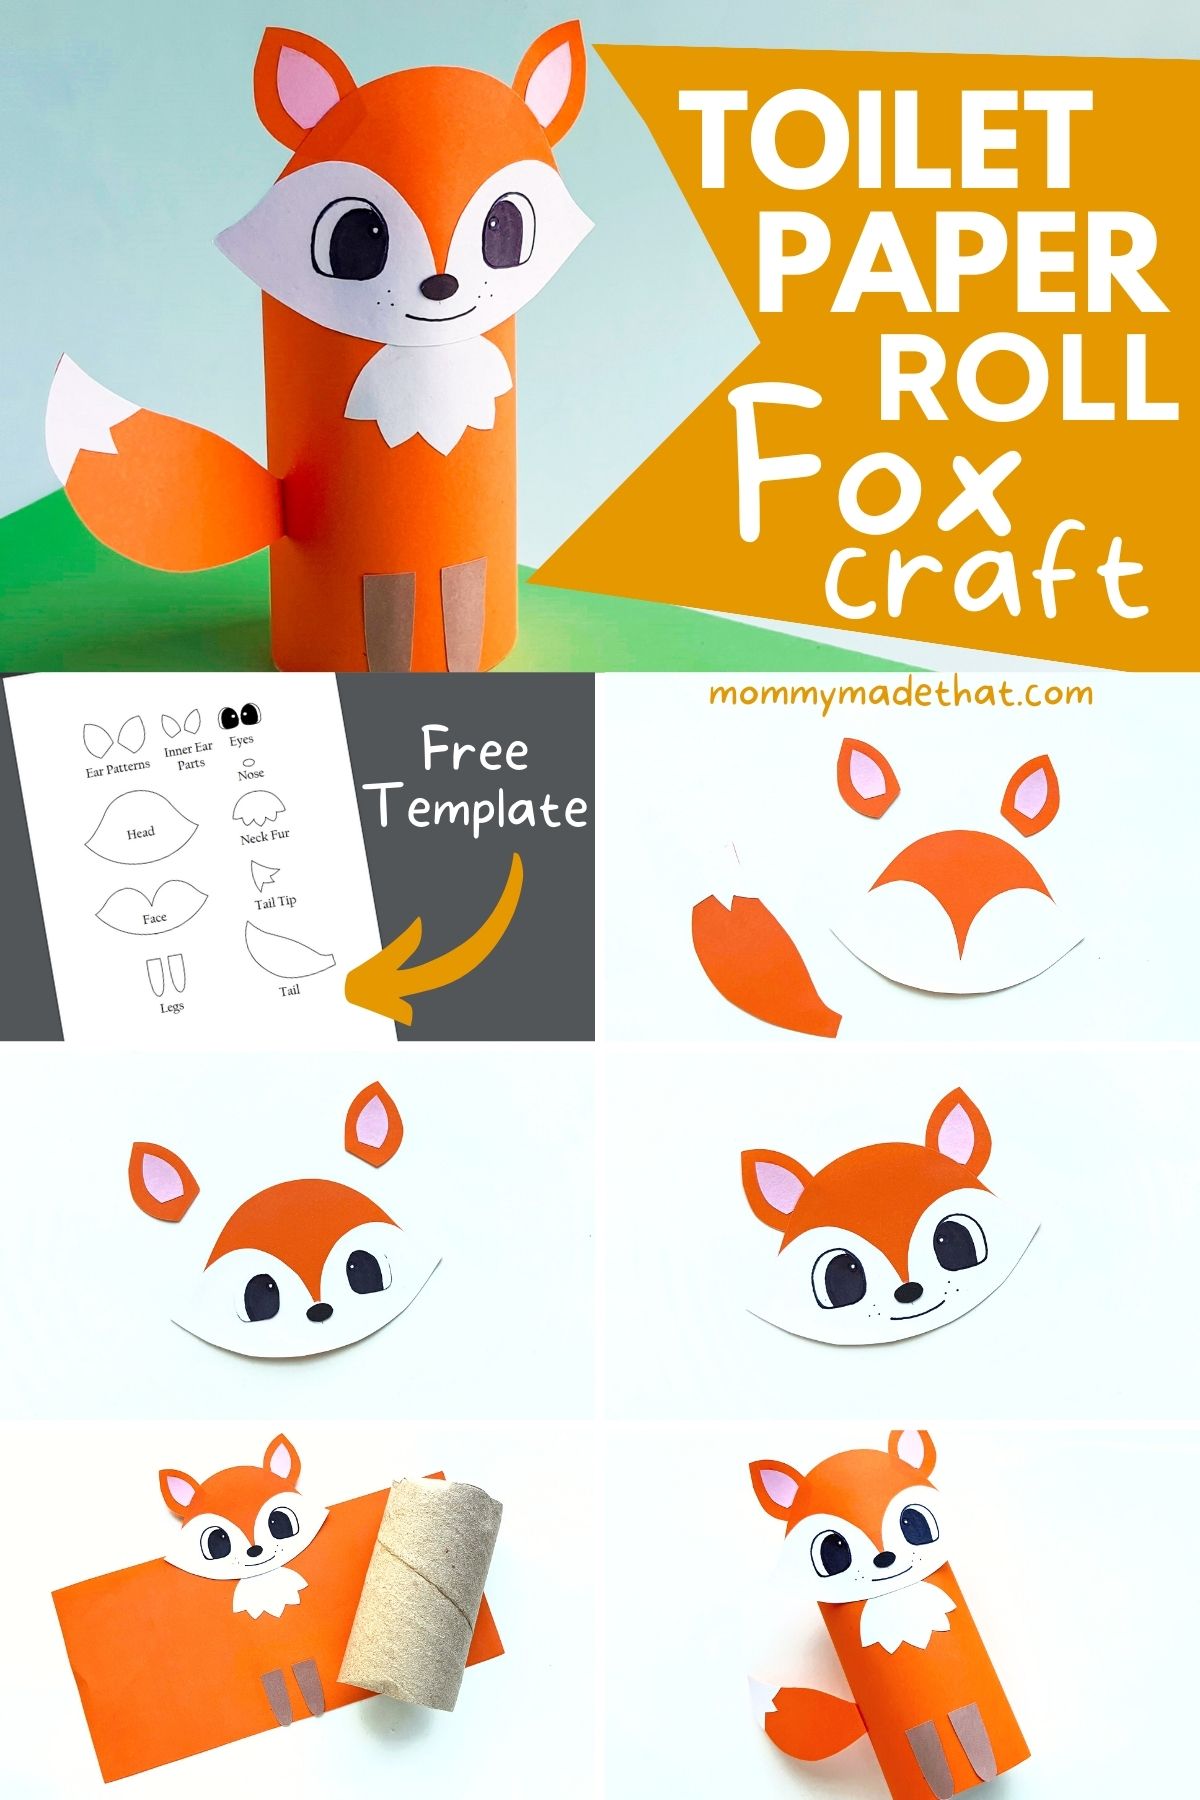
For this fox craft, start by downloading and printing the fox template.
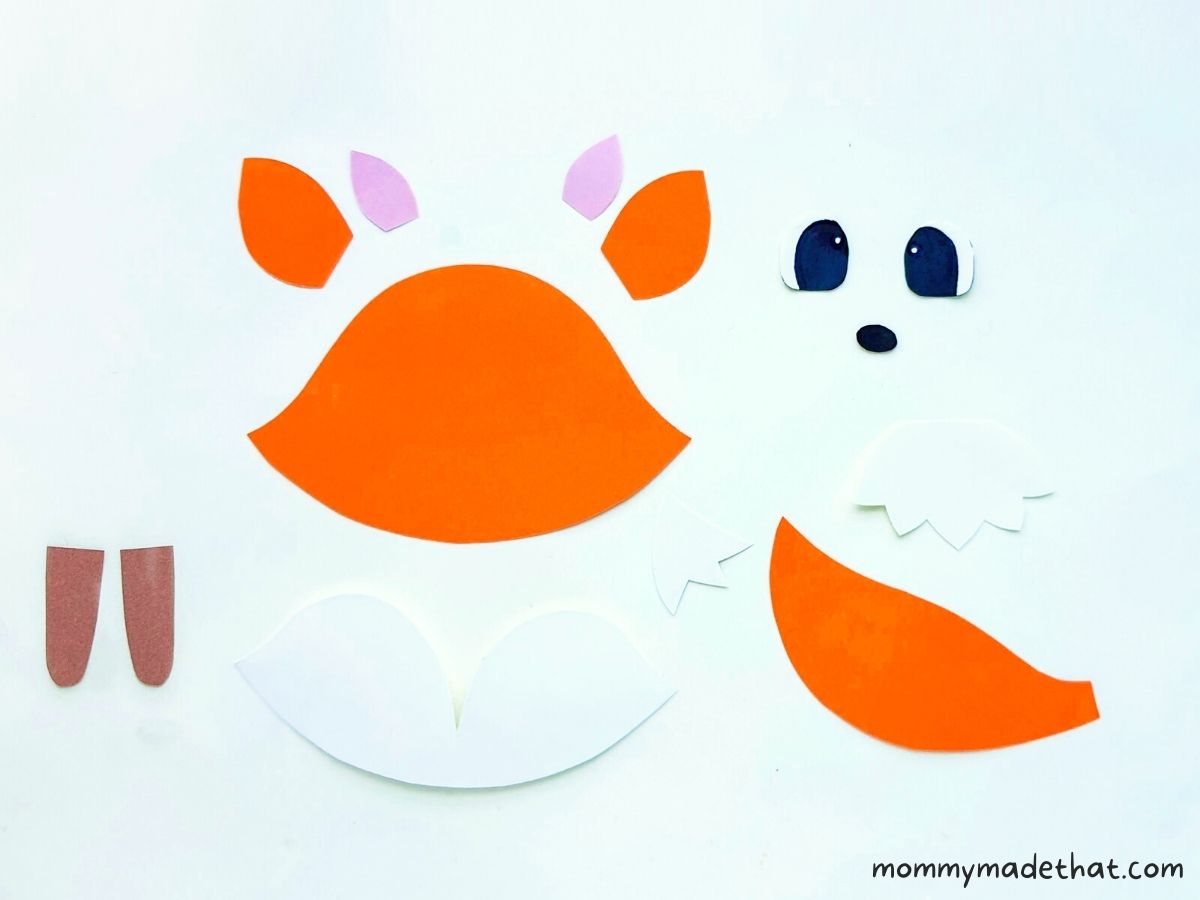
Then grab your colored paper. Trace the head piece, ears and tail patterns onto the orange paper.
Then trace the neck fur, face and tail tip onto the white paper.
Next, trace the inner ear areas onto the pink paper. The nose from the black paper and the legs from brown.
Cut out all the pieces and set them aside.
Now assemble the tail by attaching the white tail tip to the end of the main tail piece.
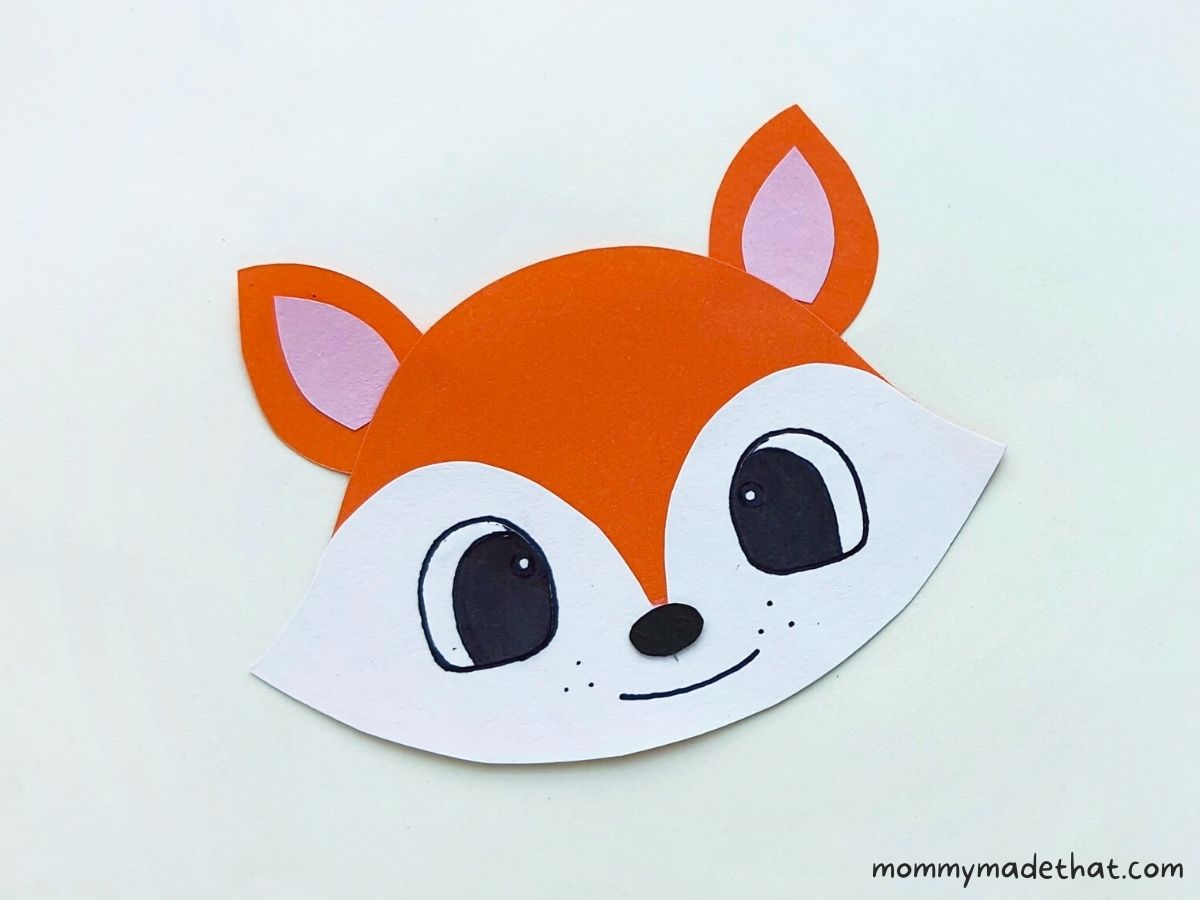
Attach the pink inner ears onto the center of the main ear pieces and the face area onto the bottom of the head cutout like shown below.

Next, attach the eyes and nose to the white face area to create your fox’s face.
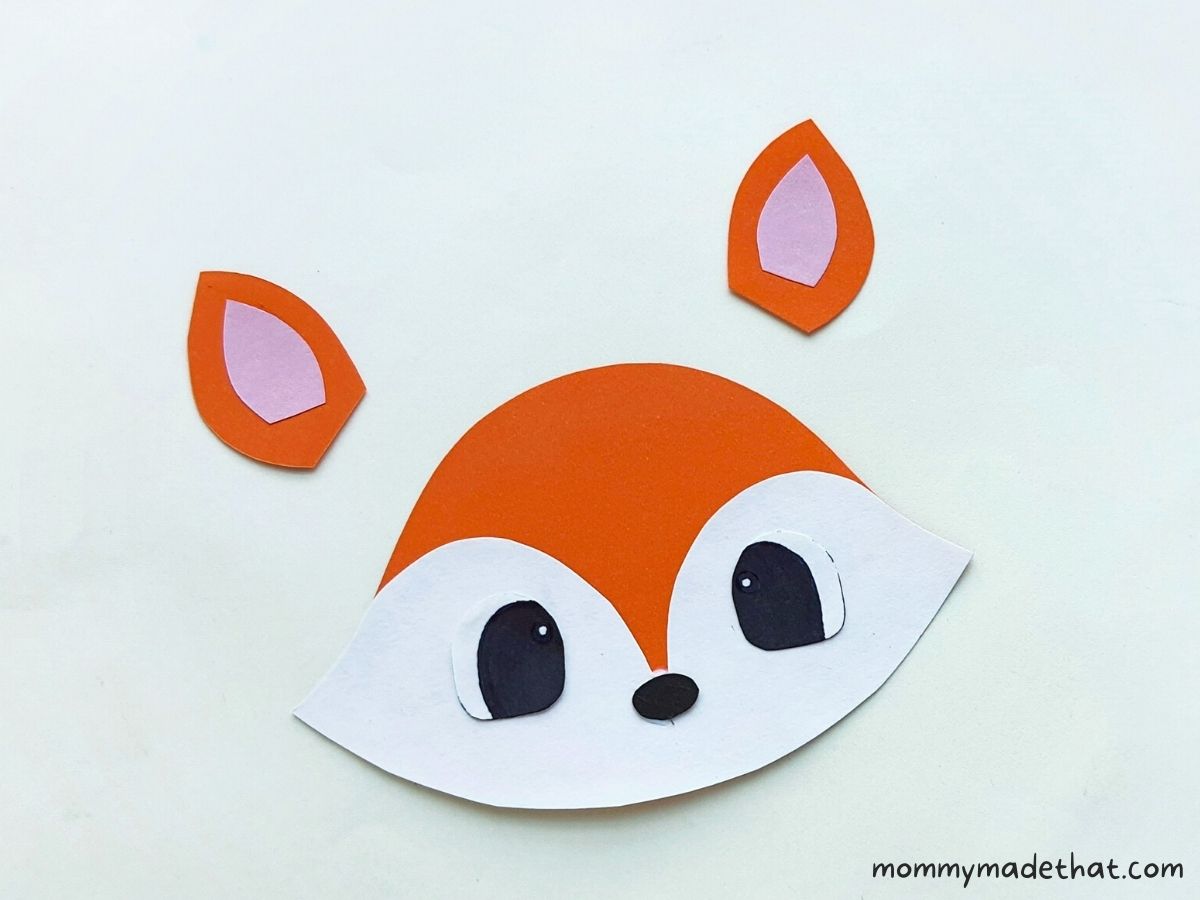
Then glue the ears to the top of the head.
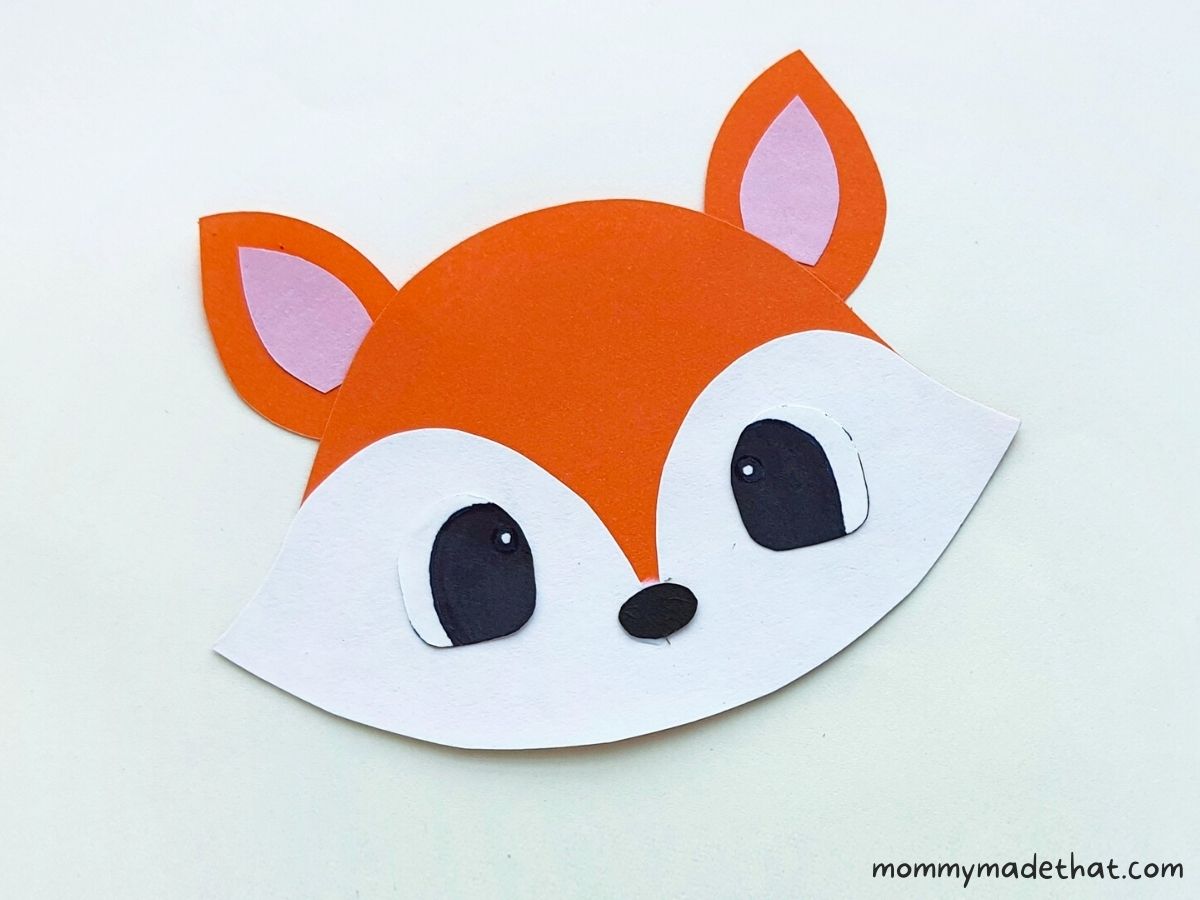
To finish the fox’s face, use a black marker to draw around the eyes, add dots for whiskers and a cute smile.
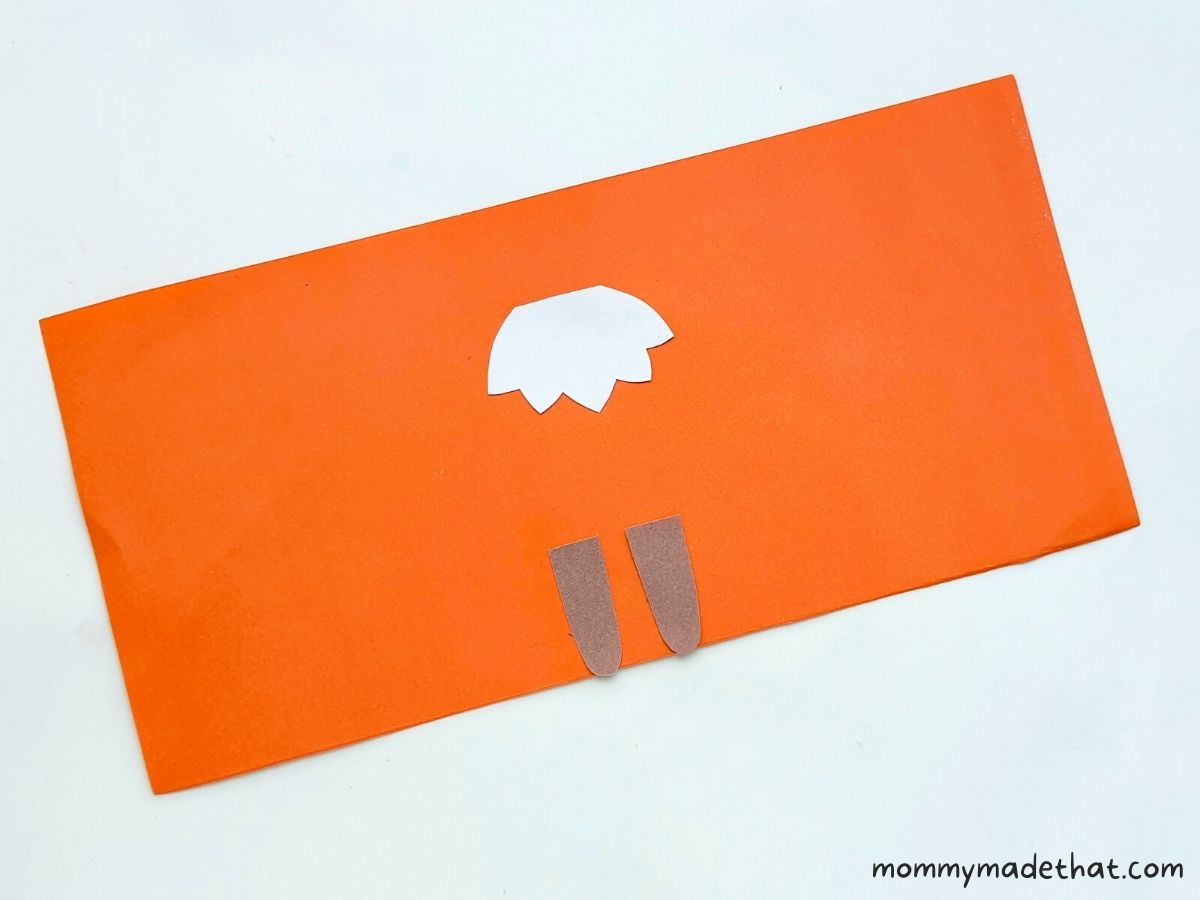
Next, cut out a piece of orange paper big enough to wrap around your toilet paper roll and trim off any excess.
But don’t glue it down yet.
Lay the orange paper flat and attach the fox’s legs near the bottom of the center of the paper as shown below.
Then attach the fur about an inch above the legs.
Next, attach the fox’s head right above the fur. It should stick above the square piece.
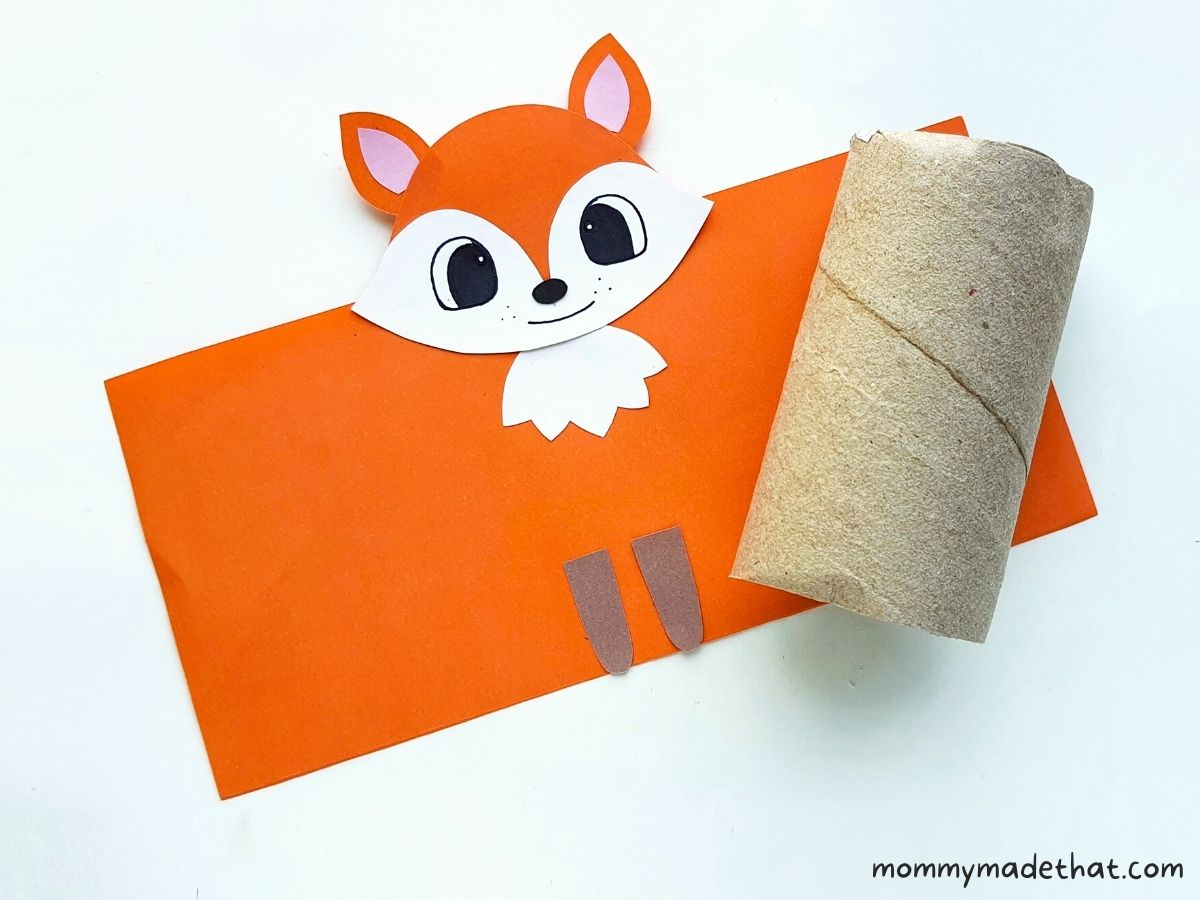
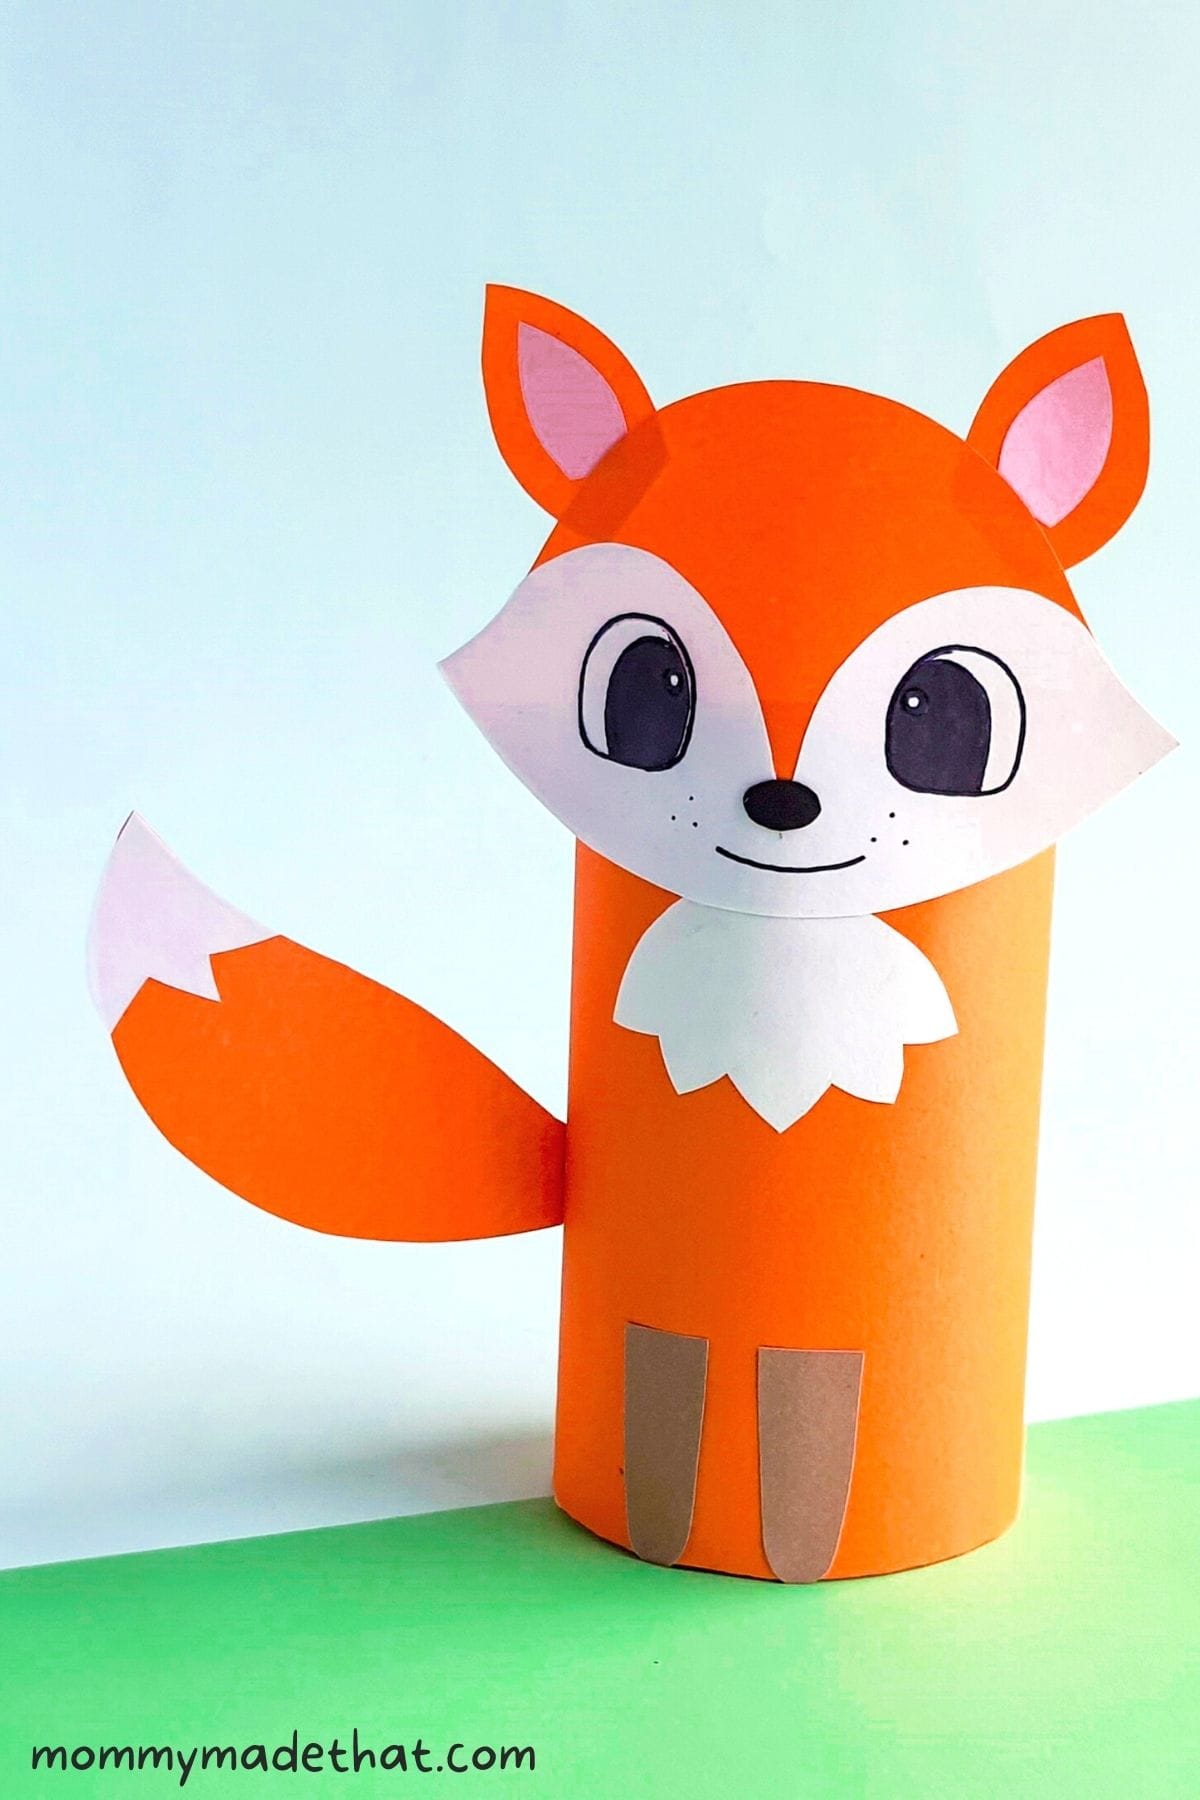
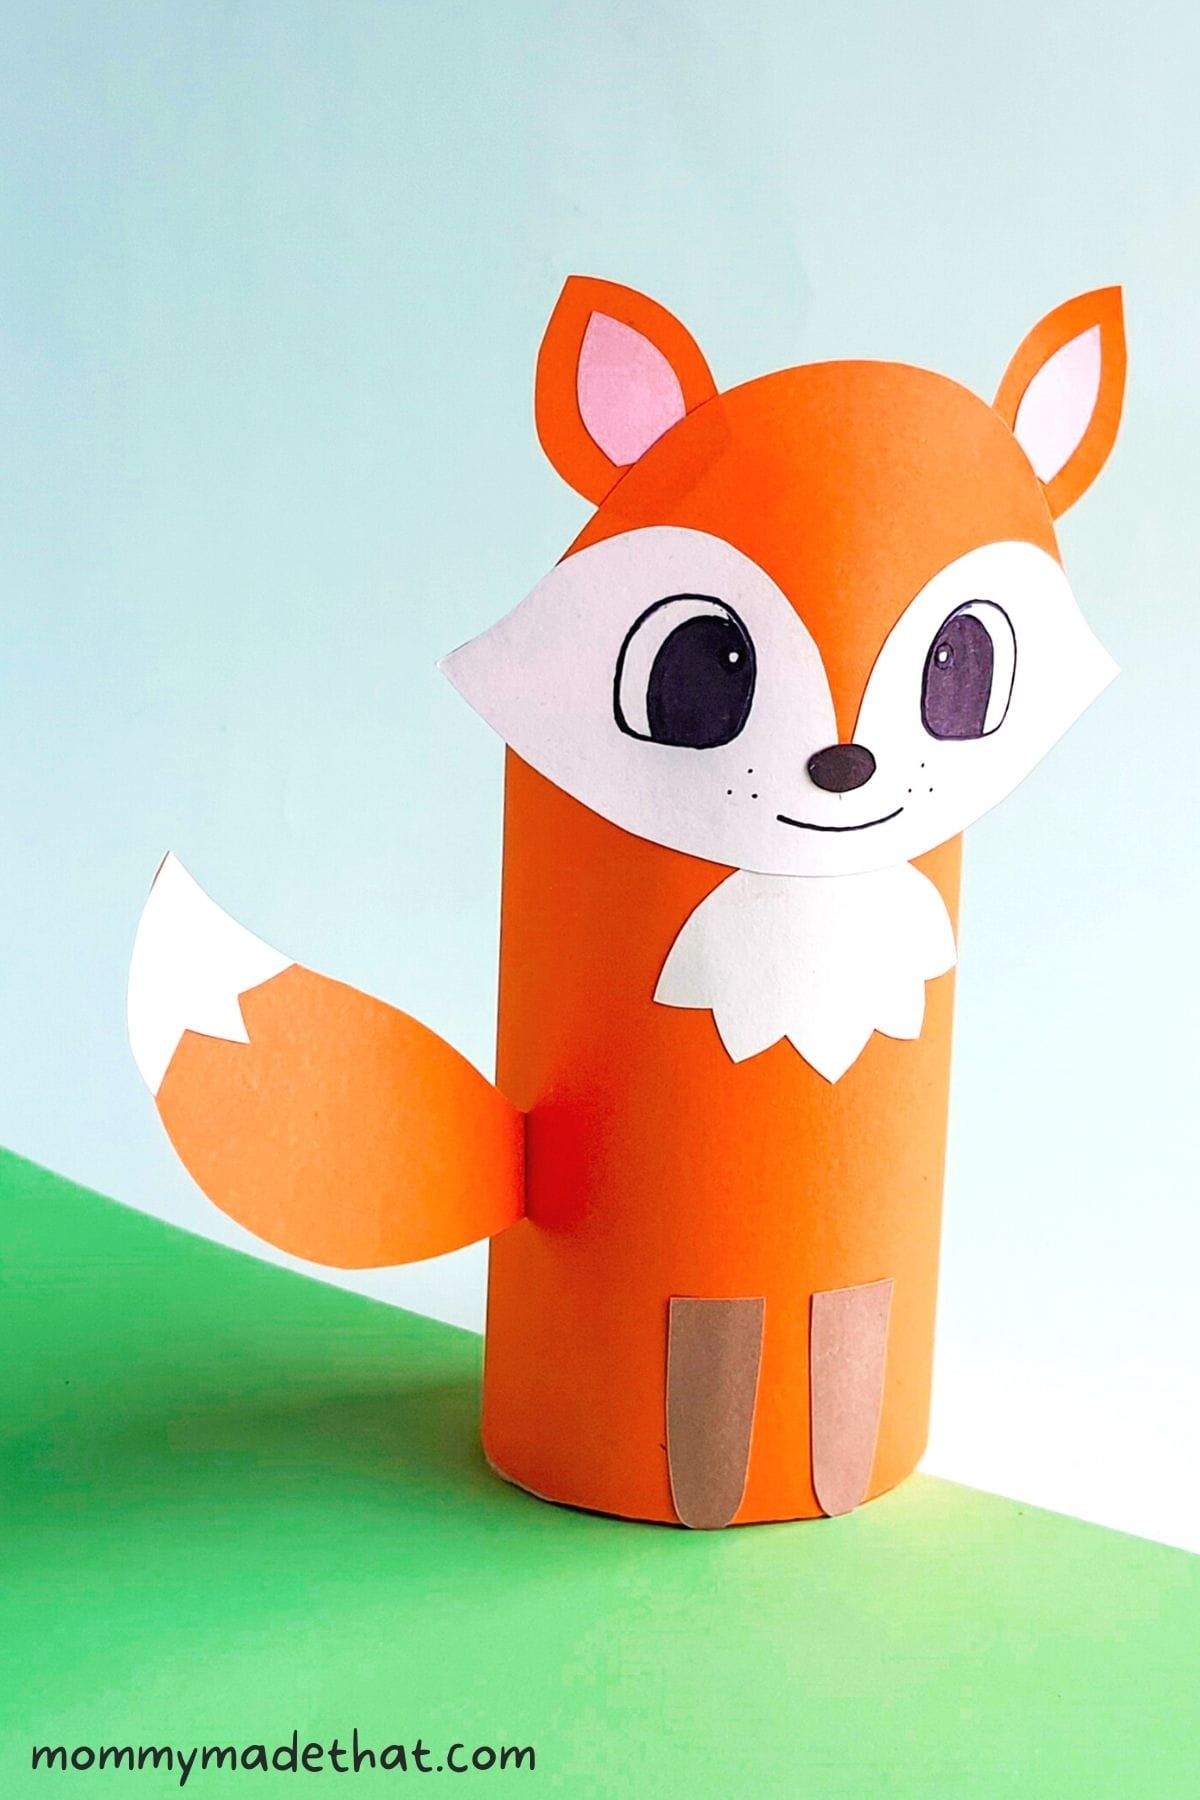
Now wrap your fox around the toilet paper roll and glue it down.

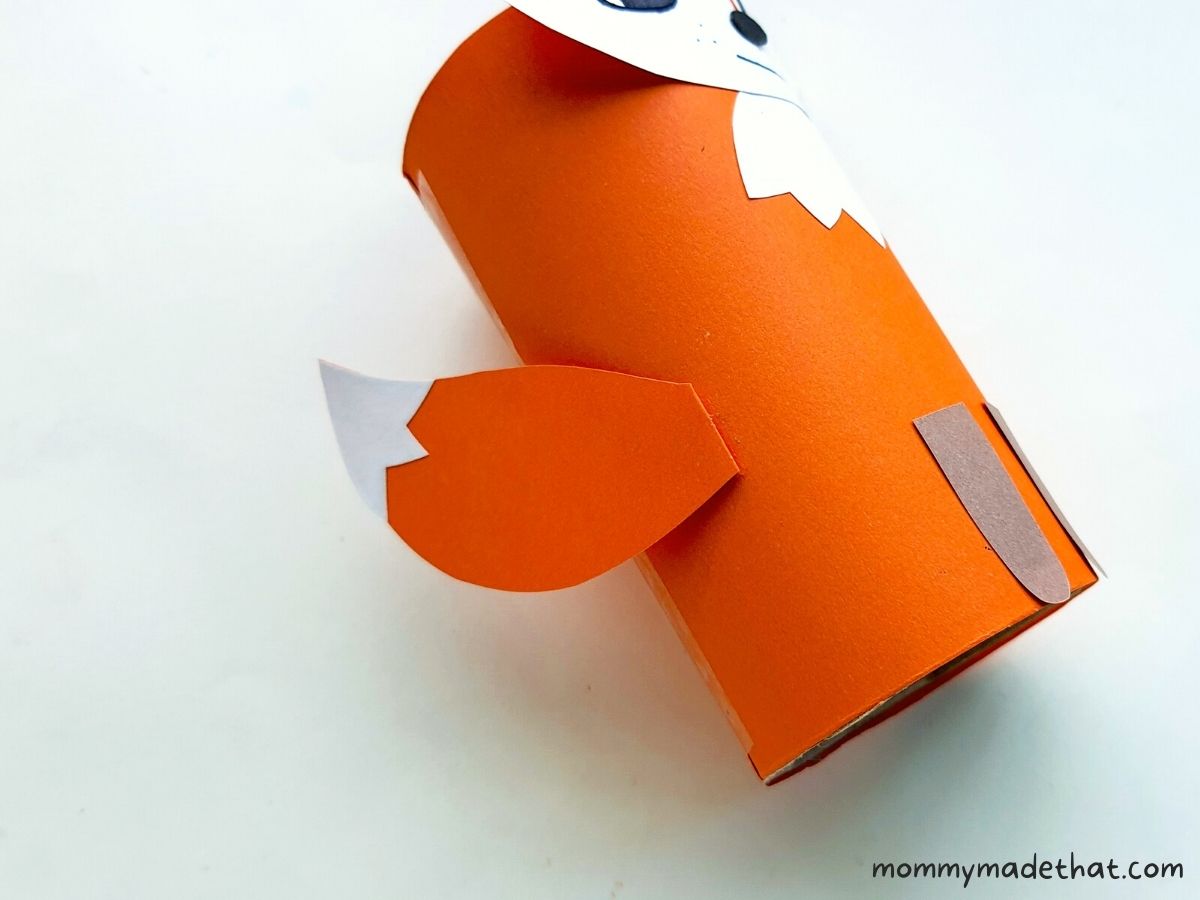
Apply a small amount of glue to the base of the tail, and attach it to the side of the toilet paper roll, allowing the rest of the tail to hang to the side.
Let all the glue dry completely, and admire your adorable toilet paper roll fox craft!
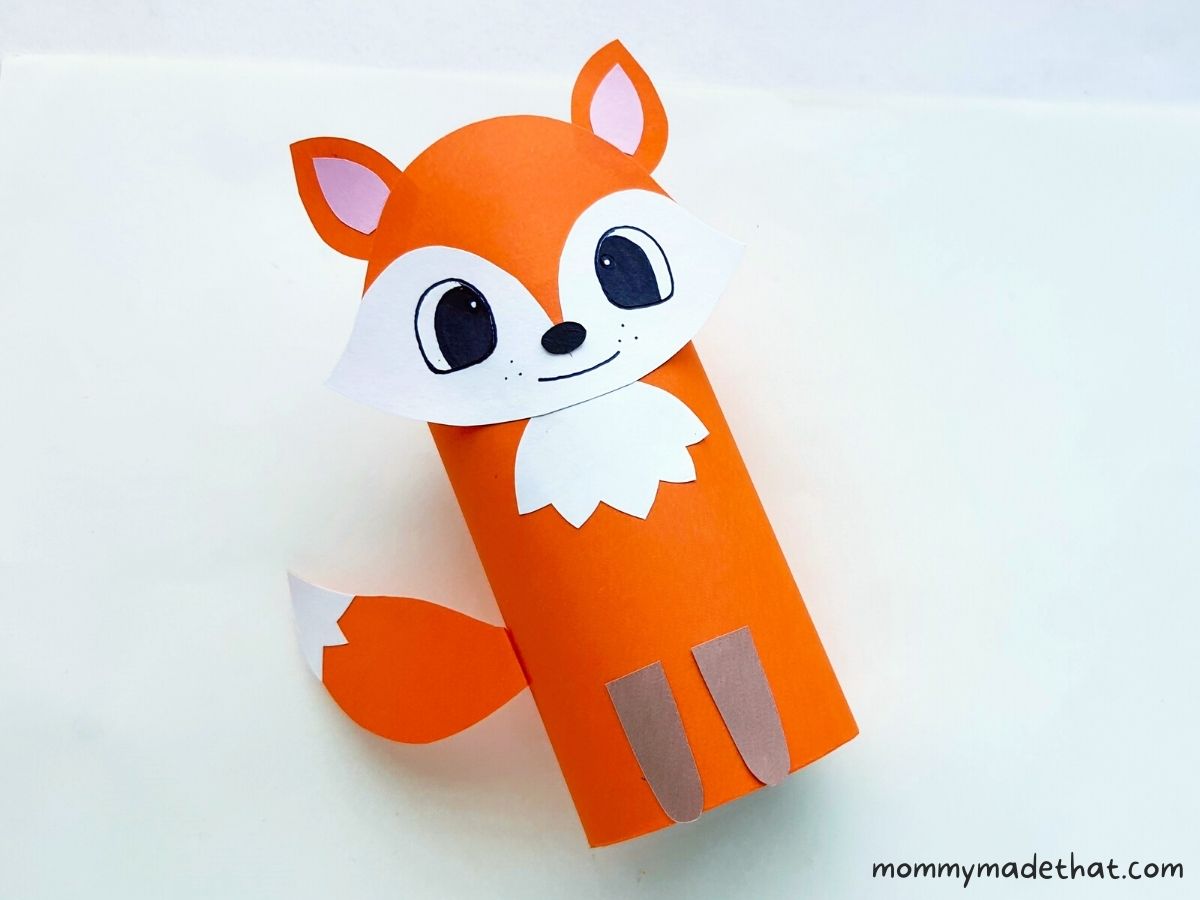
Isn’t he cute!
Grab the Fox Template
To grab the printable fox craft template, put your email in the box below. We’ll send it straight to your inbox along with our favorite free printables.
This is for personal or classroom use only please, not for commercial use.
Naming your fox is half the fun! Check out these fox names for some adorable and creative ideas.

Toilet Paper Roll Fox Craft
This toilet paper roll fox is a cute and fun fox craft that's perfect for using up those empty toilet paper rolls!
Materials
- Fox craft template
- Orange craft paper
- Black craft paper
- White craft paper
- Pink craft paper
- Toilet paper roll
Tools
- Scissors
- Craft glue
- Pencil
- Black marker
Instructions
- Download and print the fox craft template
- Trace all the fox pieces onto different colored papers. We traced the head, ears and tail onto orange. The neck fur, face and tail onto white. The inner ears on pink. The nose onto black and the legs on brown.
- Cut out all the fox pieces.
- Assemble the tail by attaching the white tip to the orange tail base.
- Attach the pink inner ears to the center of the orange ear pieces.
- Attach the eyes and nose onto the white face piece, and attach the face to the head.
- Attach the ears to the back of the fox's head, facing forward.
- Add details to your fox's face by drawing around the eyes, adding a mouth and a few dots as whiskers.
- Cut an orange piece of paper big enough to wrap around the toilet paper roll. Trim off excess, but don't glue down.
- Attach the legs near the bottom center of the orange rectangle.
- Attach the white fur piece one inch above the legs.
- Attach the fox's head right above the neck fur.
- Wrap the fox body around the toilet paper roll and glue down.
- Apply a small amount of glue to the base of the tail, and attach to the side of the paper fox.
- Let dry and enjoy!
Notes
A small bit of glue goes a long way in this craft.
For more fox crafts, check out our 3d Fox scene craft. Or our adorable paper fox bookmarks for kids.
Wonderful