
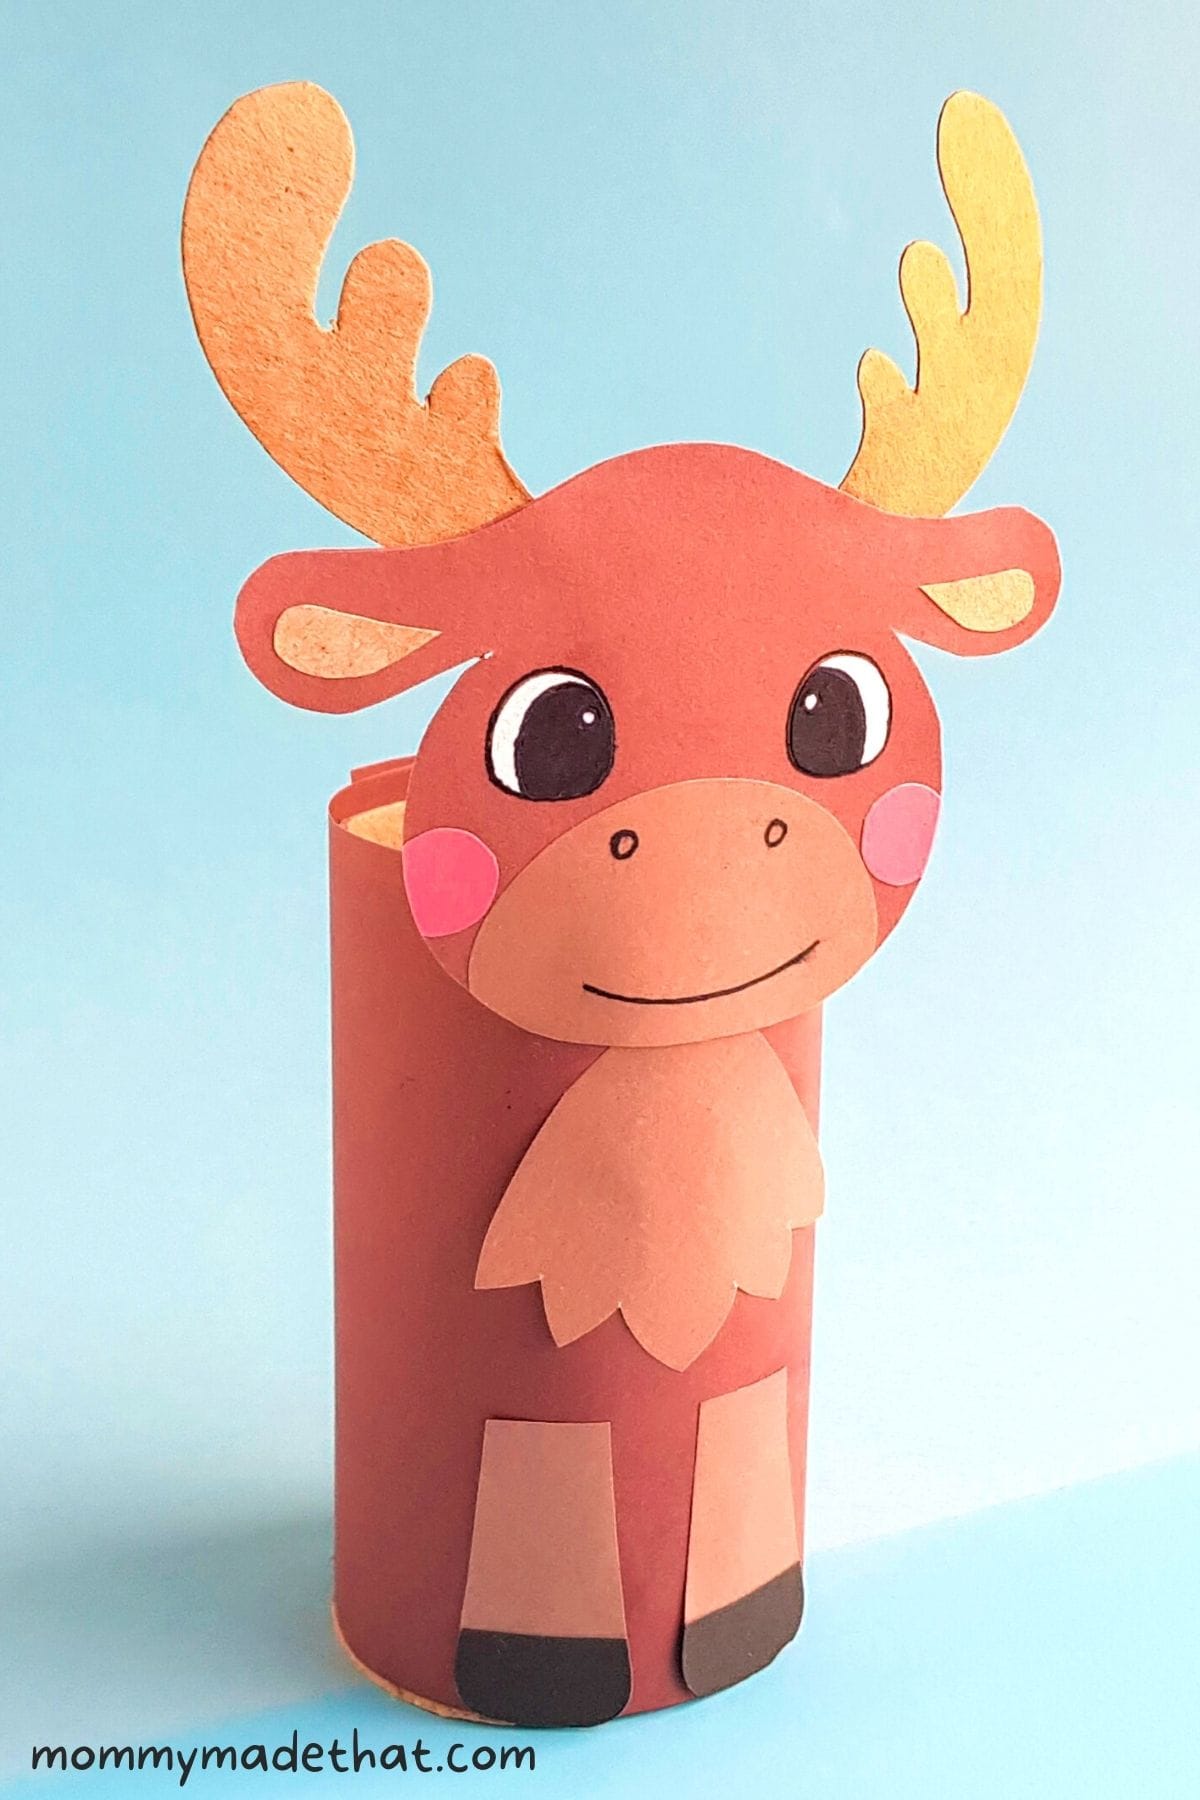
Adorable Toilet Paper Roll Moose Craft (+Free Template)
Looking for a fun moose craft to make with the kids?
This toilet paper roll moose craft is a fun and easy craft using our free printable moose template!
Toilet paper roll crafts are a favorite around here. Turning trash into a fun and lively creature is so rewarding.
Much like our toilet paper roll fox and our toilet paper roll ladybug, this guy is all fun. You can check out all of our toilet paper roll animals for more creative craft ideas.
And you can make this paper moose craft just from colored craft paper and our toilet paper moose template.
Table of Contents
Materials & Supplies Needed
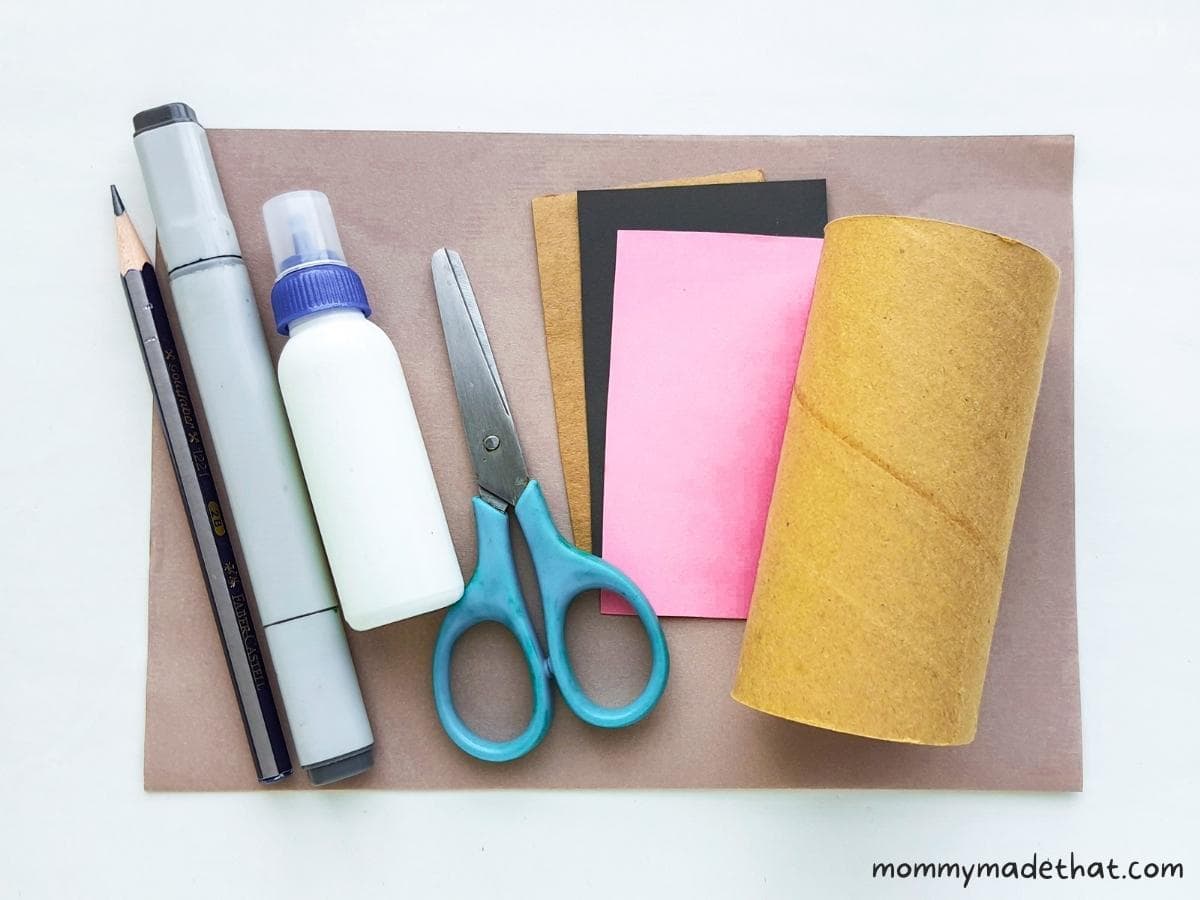
To make your moose, you’ll need a few basic materials and supplies. Nothing fancy here!
Craft template: Grab the moose craft template at the bottom of the tutorial.
Colored Craft Paper: You can also use construction paper. We used two shades of brown plus black, pink and gold cardstock for the antlers. But yellow would work well too or other thin cardboard.
Toilet Paper Roll: An empty toilet paper roll, gives your moose structure to stand up!
Plus some basic craft supplies:
- Scissors
- Craft glue
- Black marker
- Pencil
How to Make a Moose from a Toilet Paper Roll
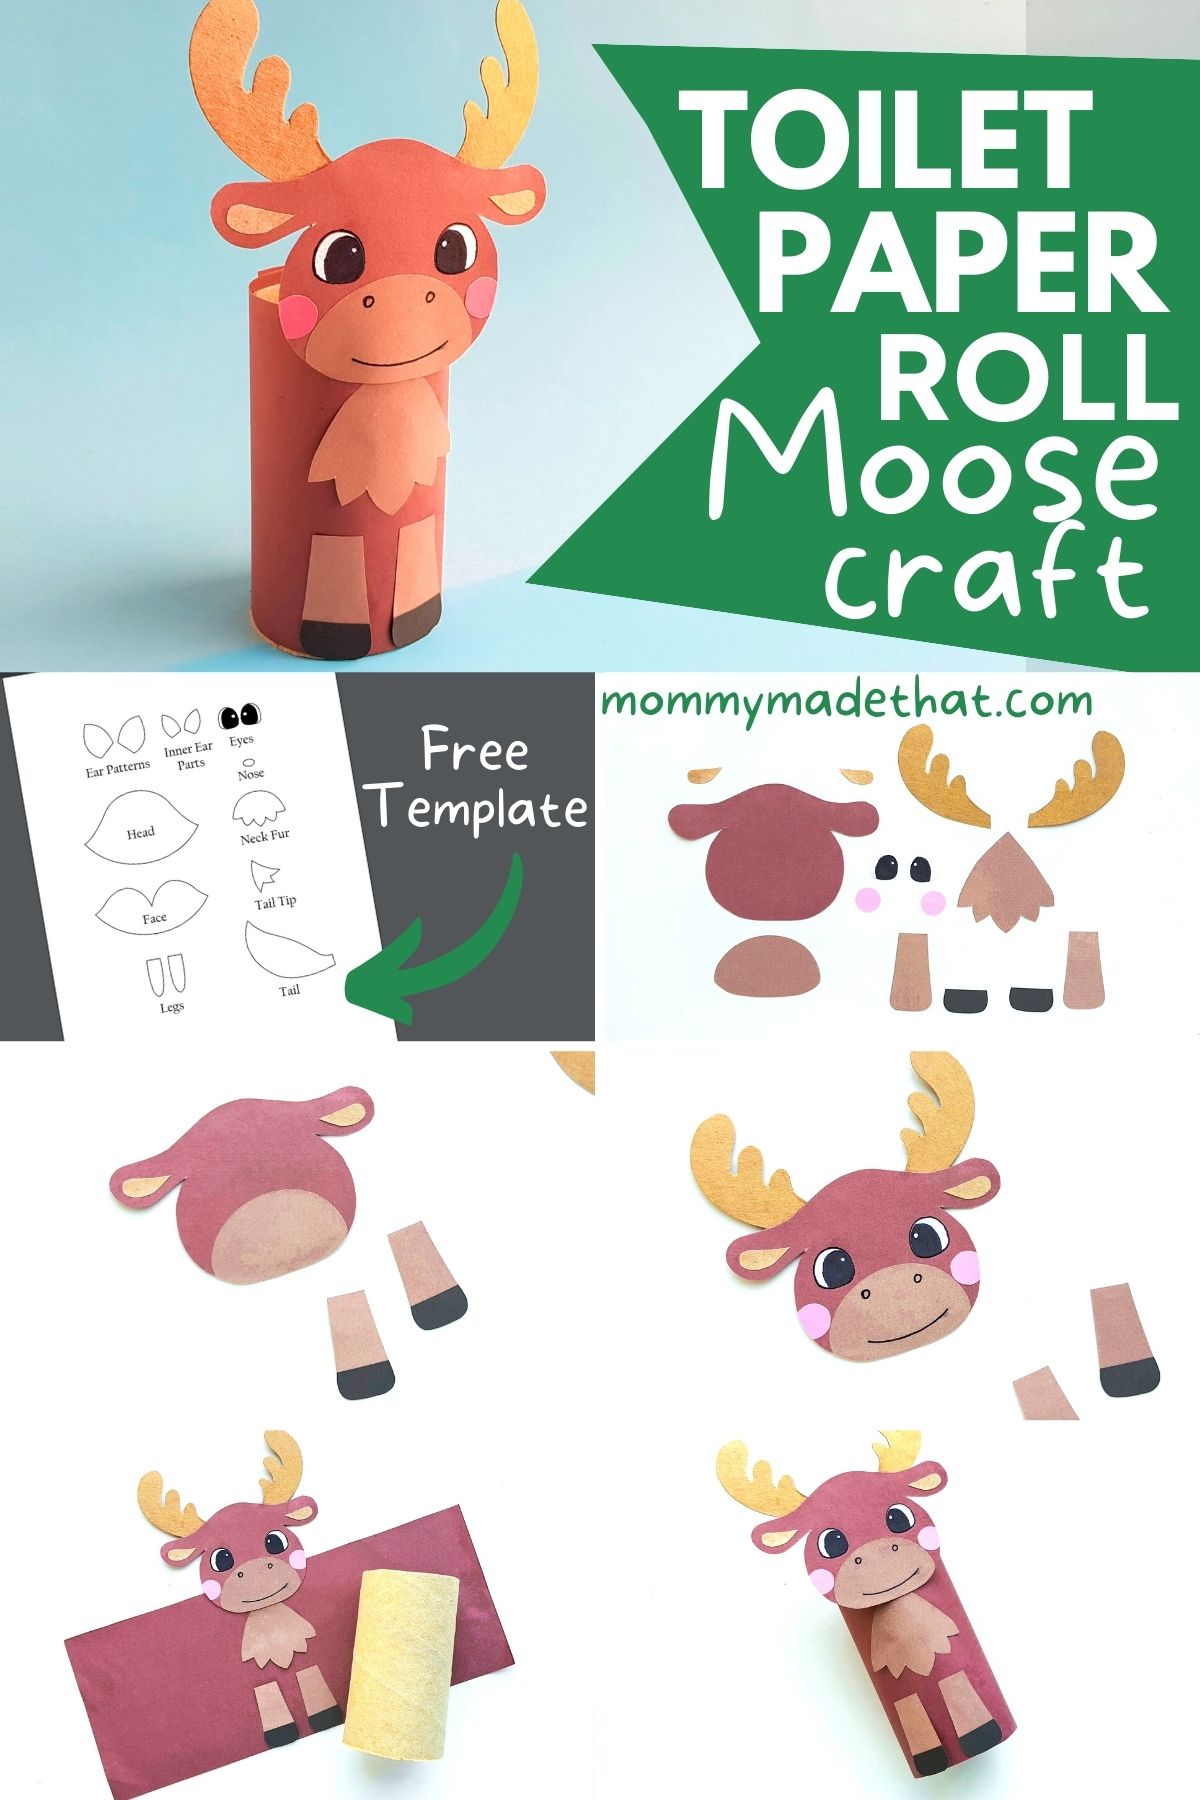
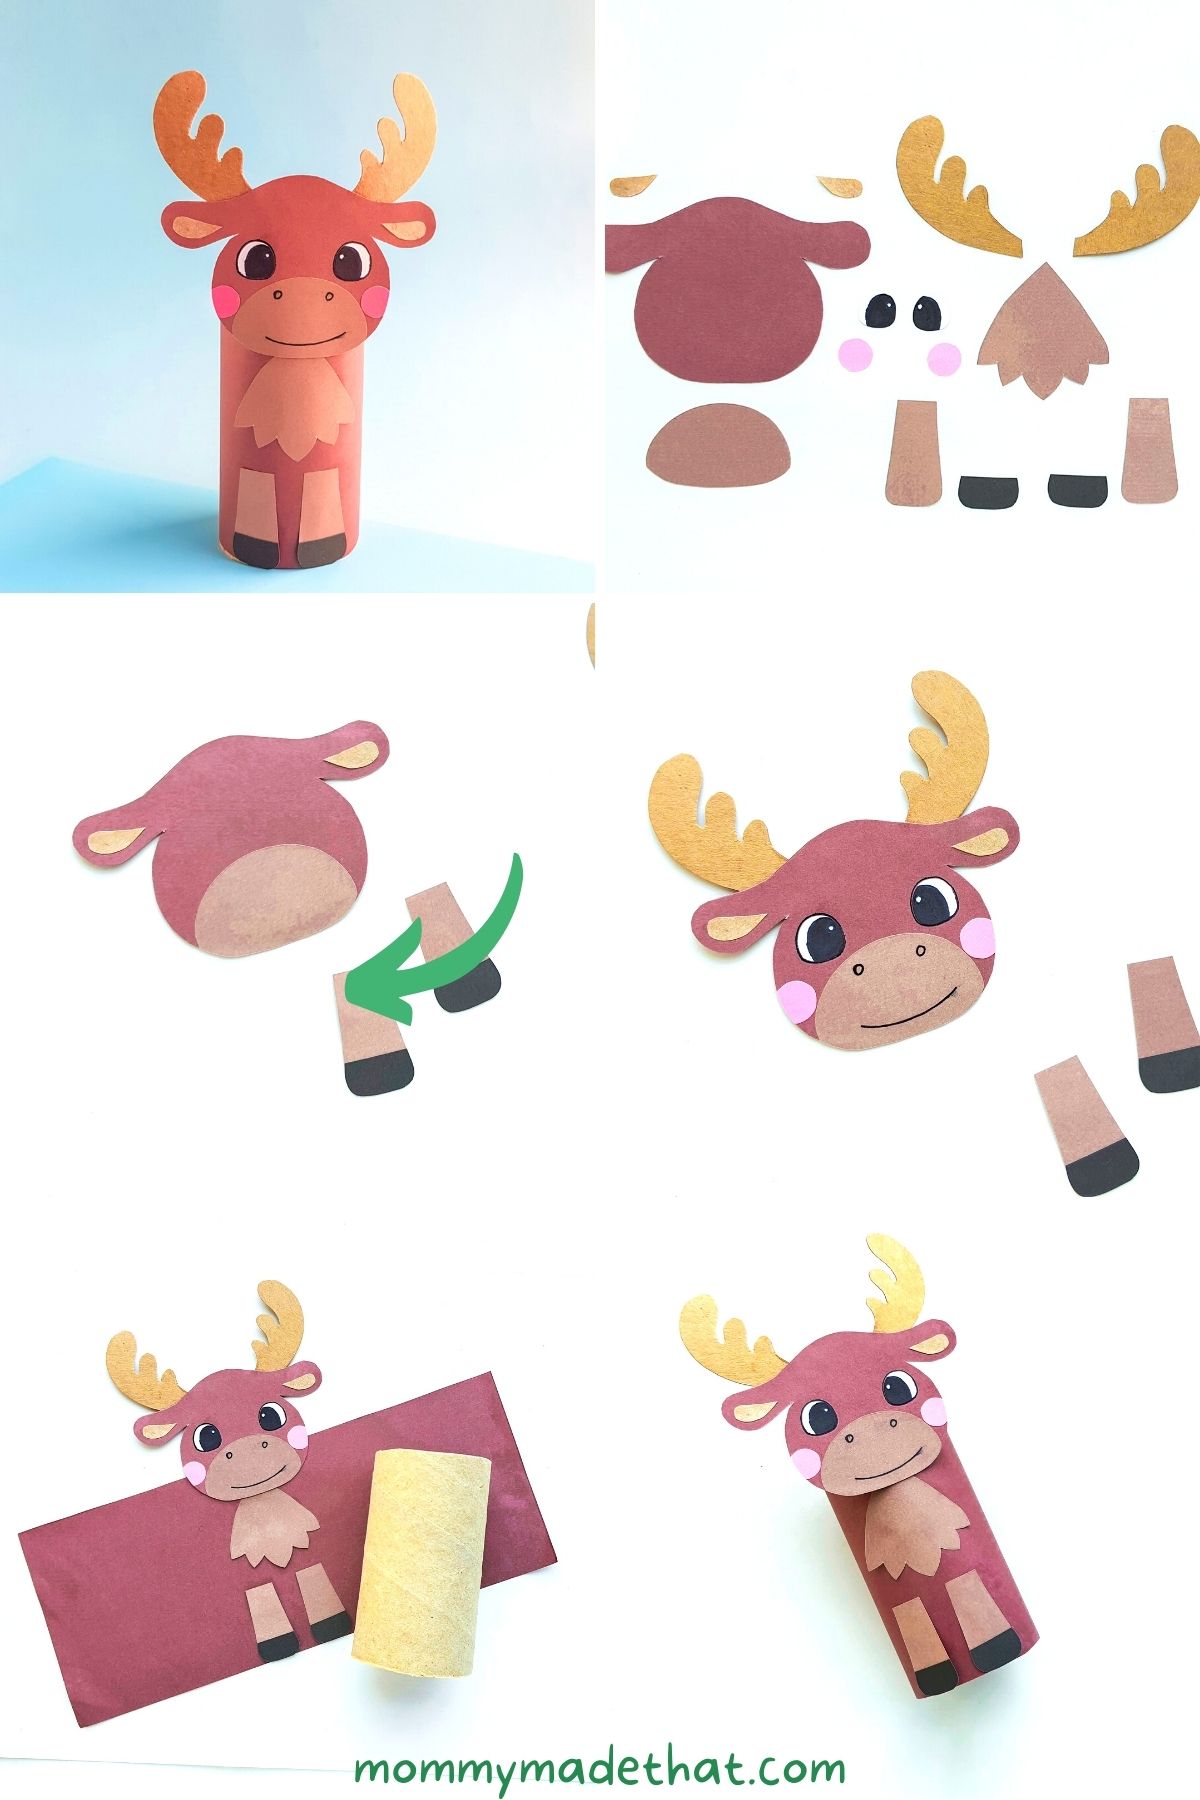
To start, grab and download the free printable moose template.
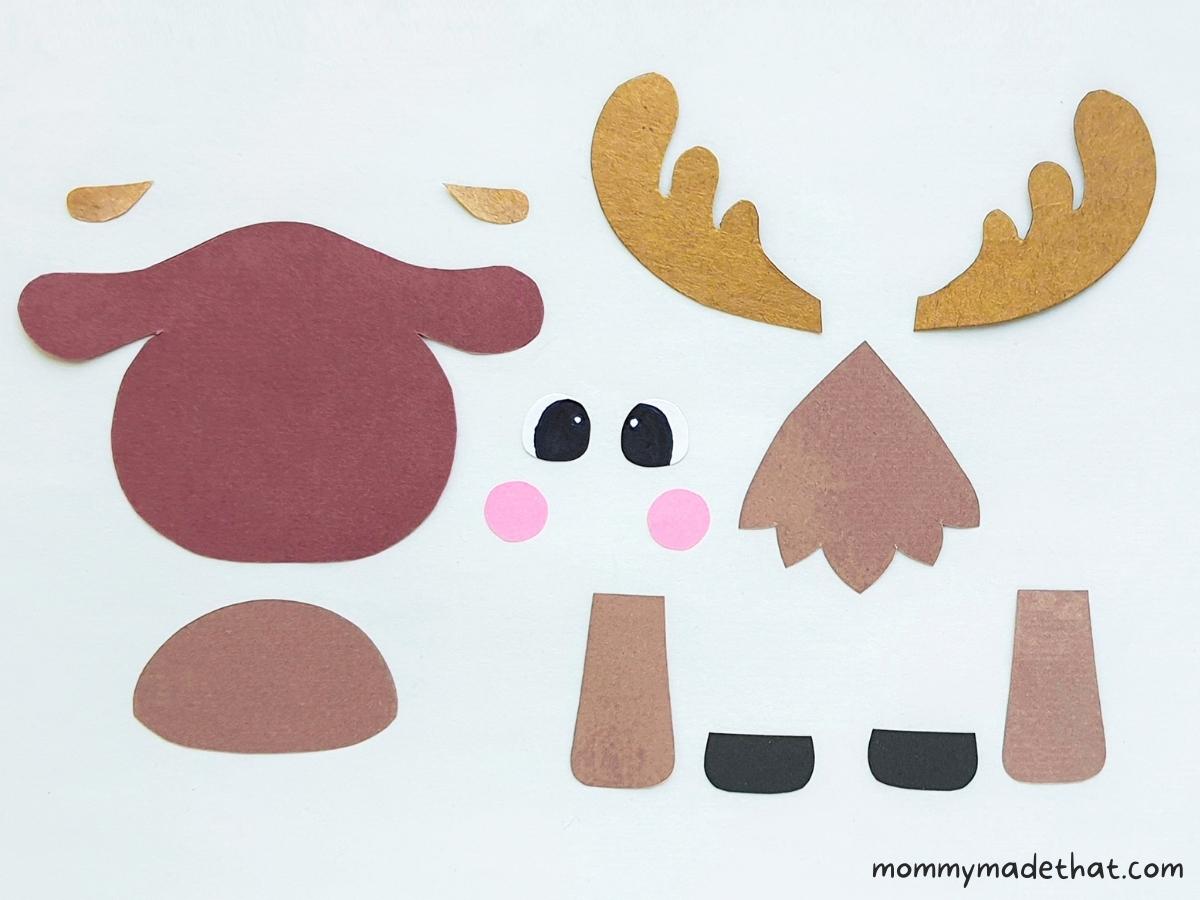
Print the template, cut out all the pieces and grab your craft papers.
Grab two different shades of brown paper for the body and head pieces of your moose.
Grab a separate brown or gold-colored cardstock for the antlers.
Trace the moose template patterns onto your craft papers and cut them out.
We used one brown for the main head piece of the moose. Then a different brown for the leg, lower part of the moose’s face and the dewlap (the fur on the neck).
We used a gold cardstock for the antlers and inner ear pieces.
And pink for the blush, white for the eyes, and black for the hooves.
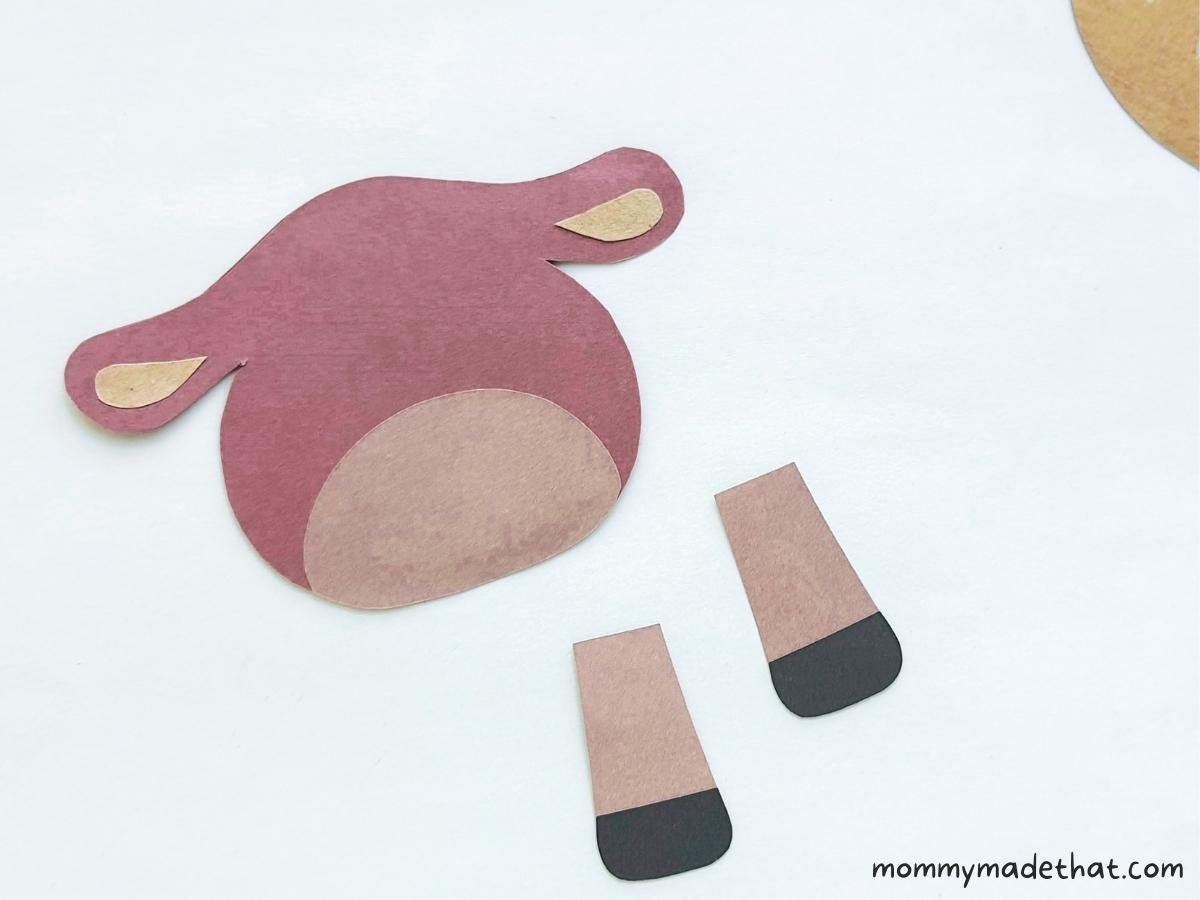
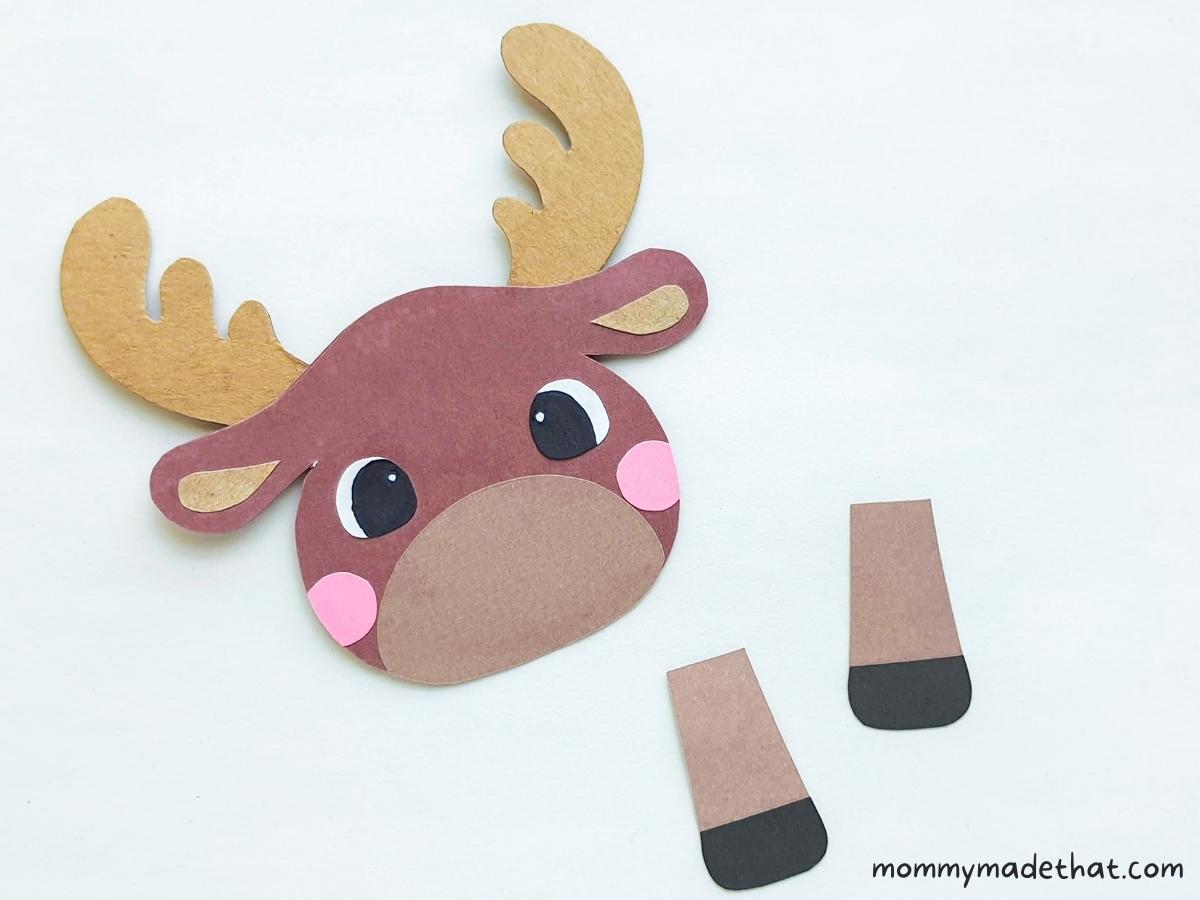
Start assembling the mooses head by gluing the inner ear pieces to the head cut out like shown below.
Then attach the lower face to the head piece.
Next, attach the hoof pieces to the bottom of the legs.
Attach the antler’s to the top, back area of the moose’s head. Having the branch pieces facing toward each other.
Glue on the eyes and cheek pieces to the head.
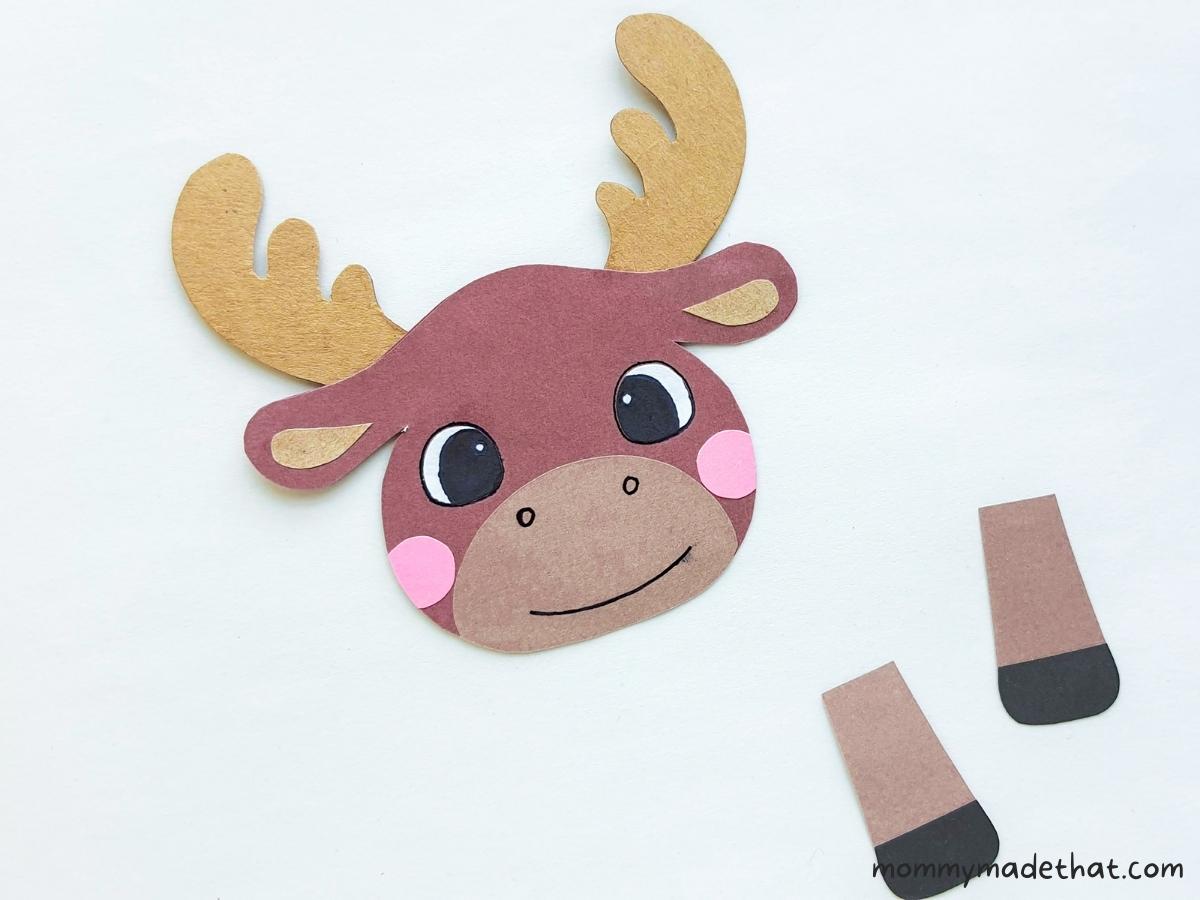
Use a black marker or pen, add details to your moose’s face.
We traced around his eyes, added two nostrils and a big smile for the mouth.
Now that your mooses head is done, lets start assembling the main body.
Measure out a piece of dark brown paper to form out the moose’s body.
You want a piece big enough to wrap around a toilet paper roll completely.
Don’t attach it to the roll yet.
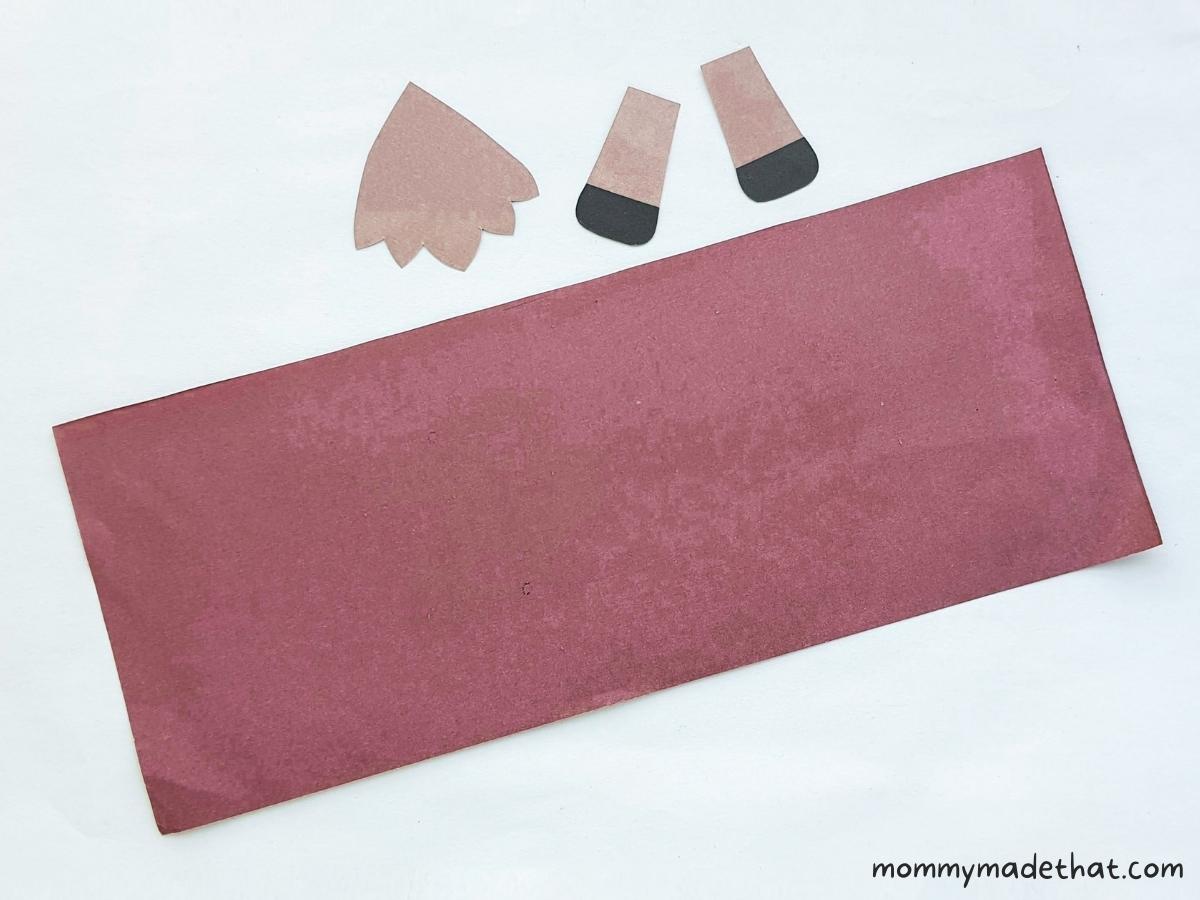
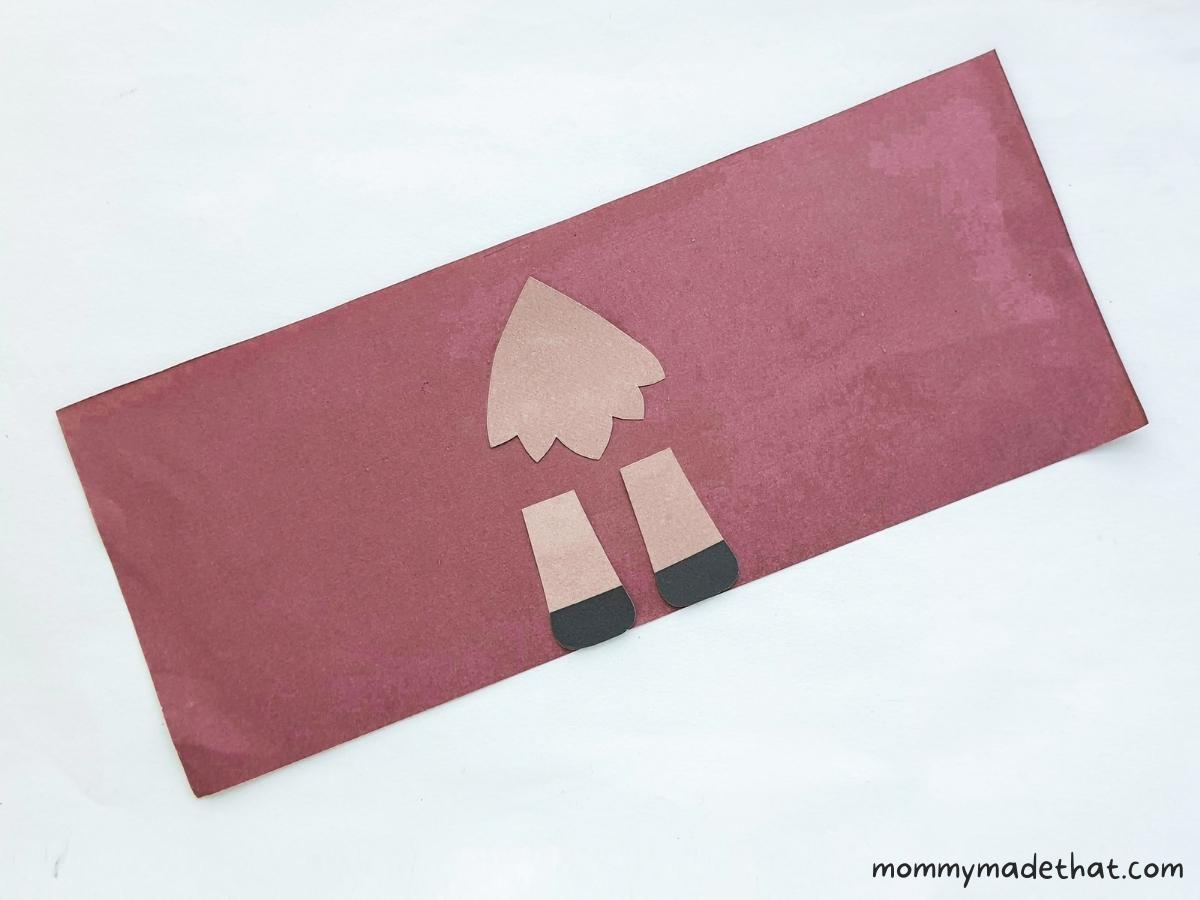
Next, lay out the large body piece and attach the legs of the moose to the bottom center of the body.
Attach the chest fur piece above the moose legs.
Attach the moose’s head just above the dewlap. It’ll over lap the fur piece and the head will be well above the body pieces, like shown below.
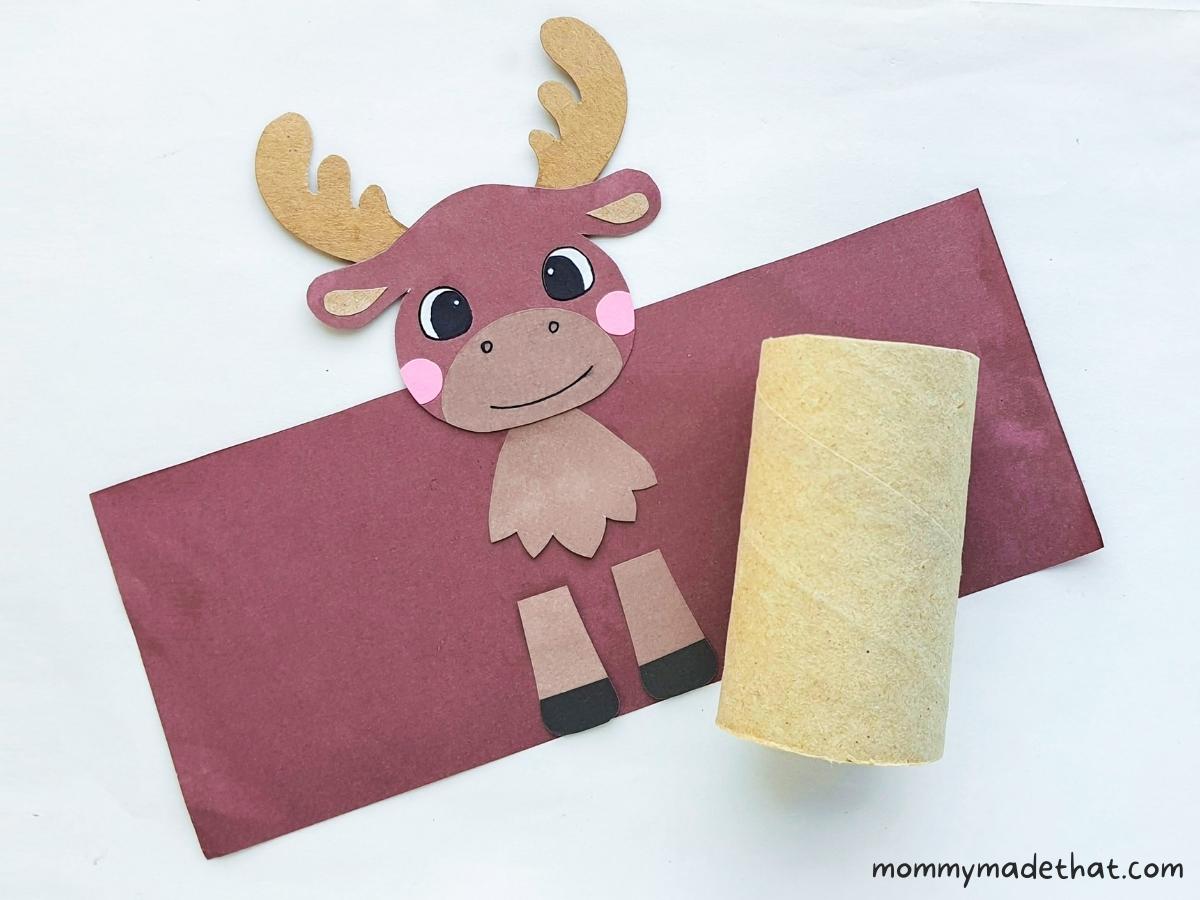
Finally, add glue to the back of the moose body and attach it to your toilet paper roll.
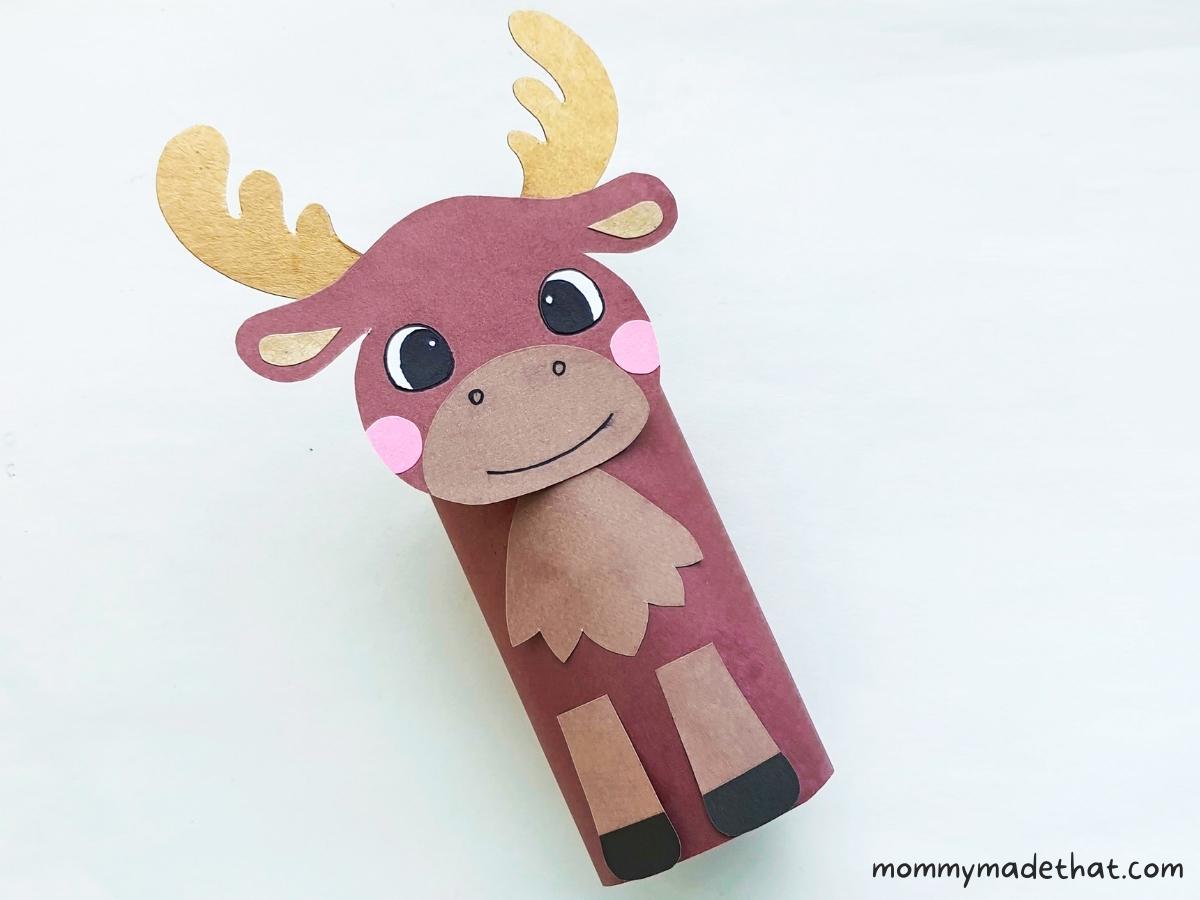
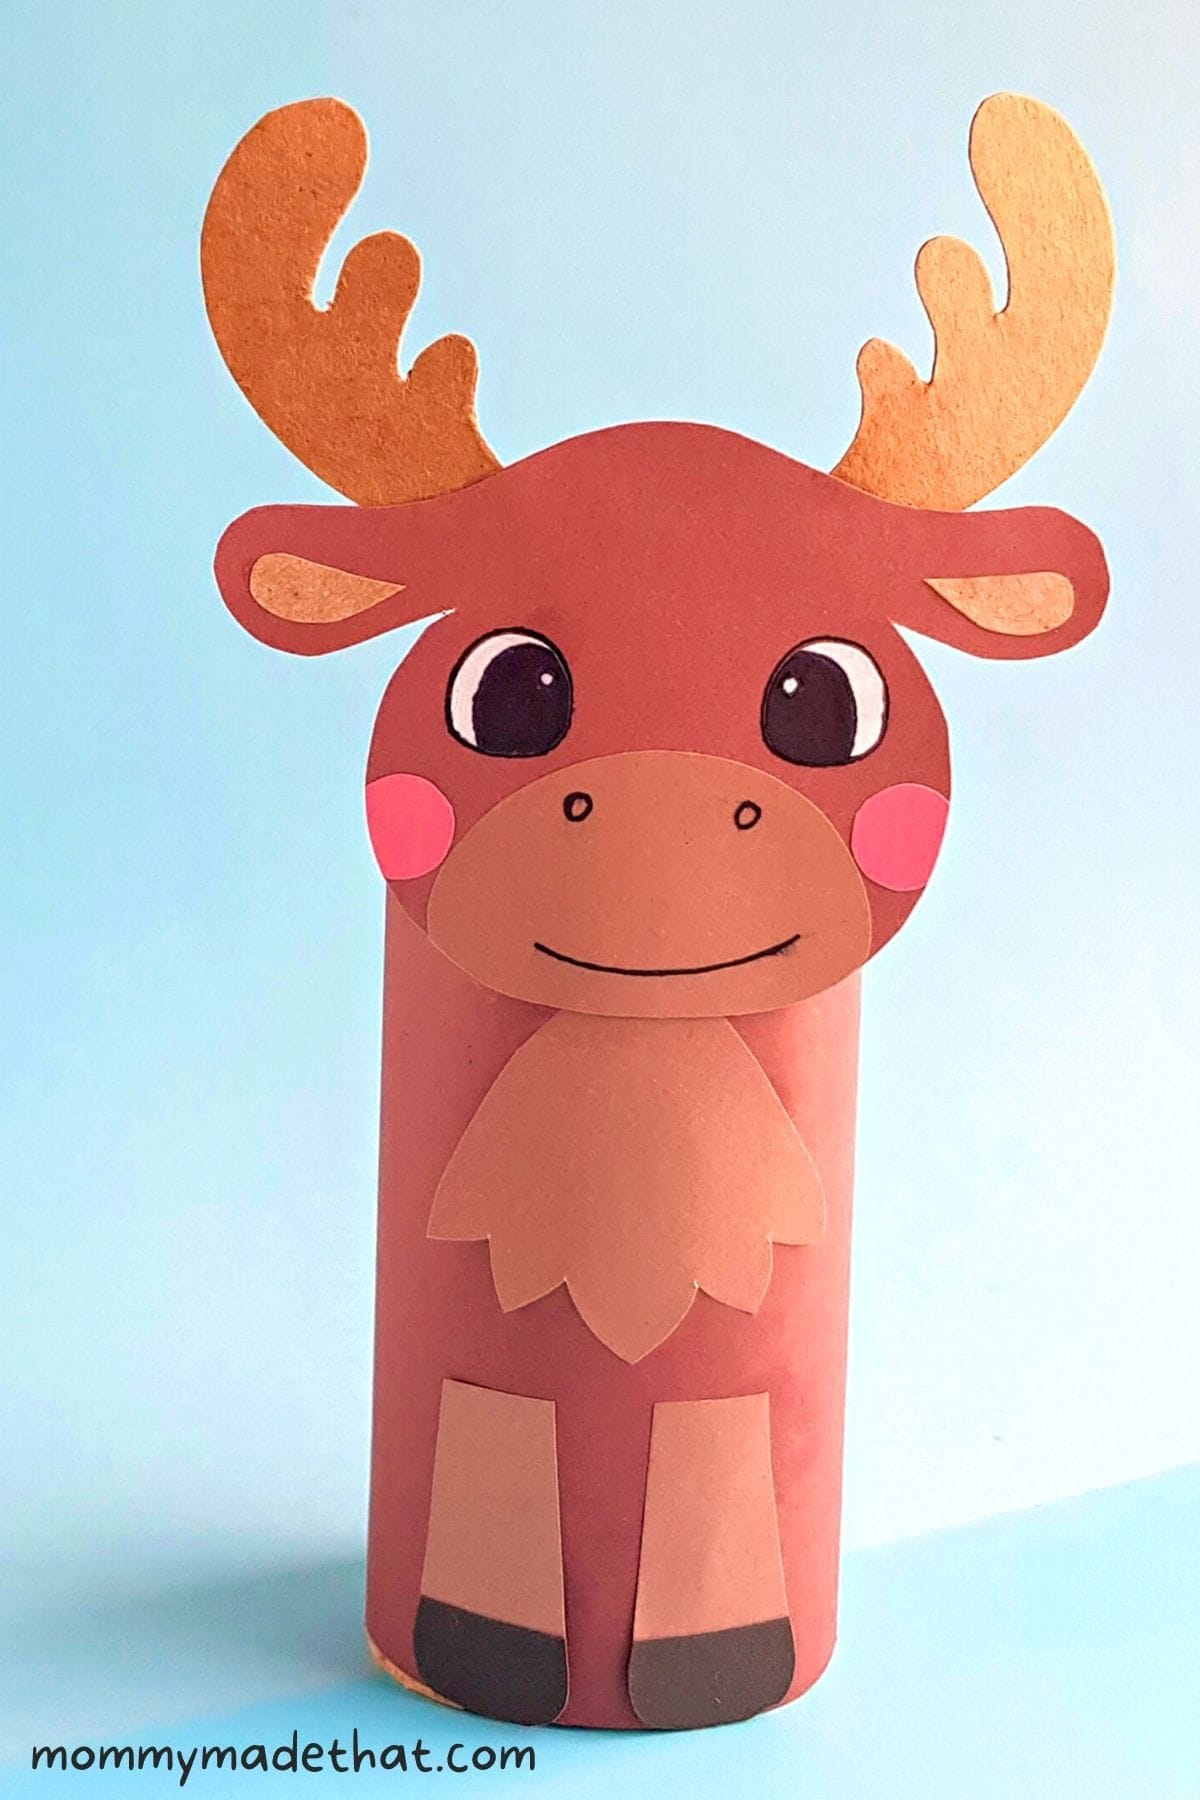
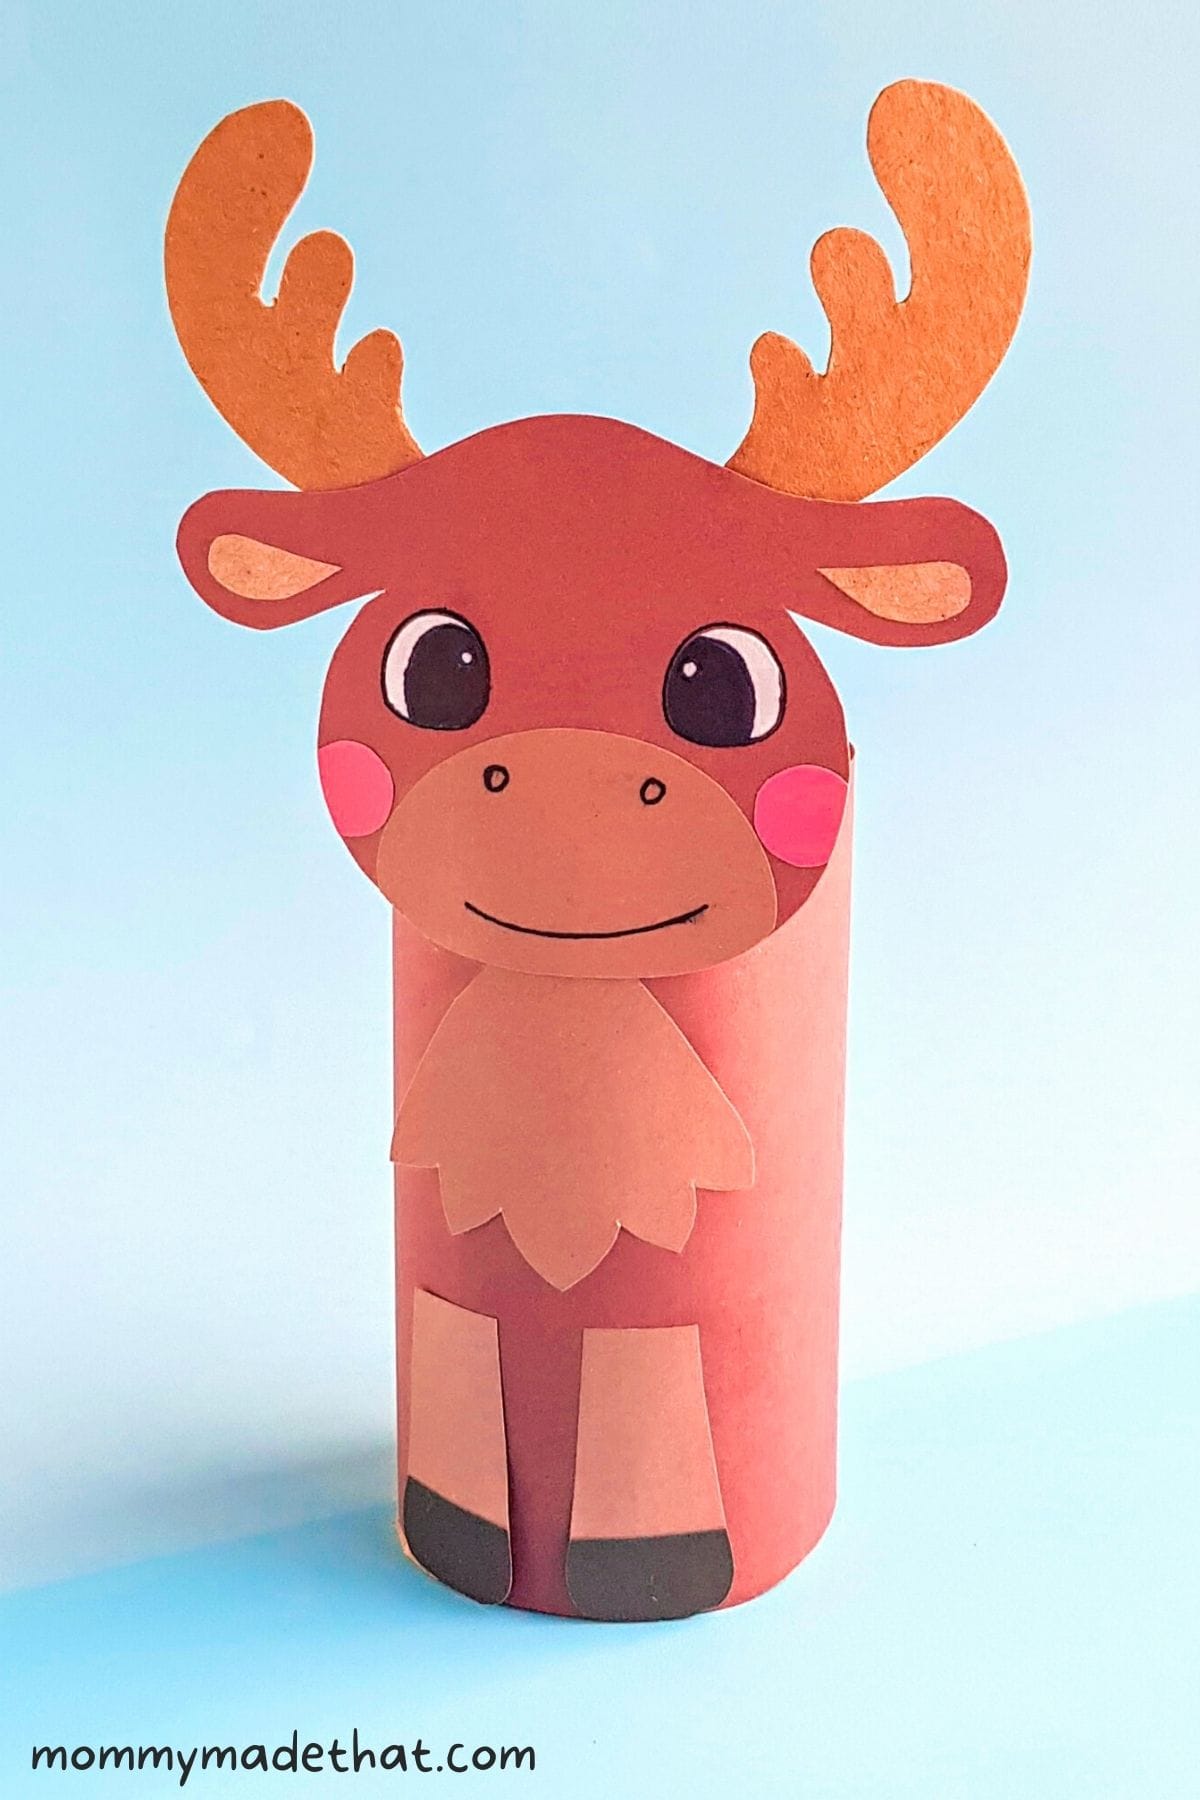
And ta-da! You’re paper roll moose is finished! Cute little guy right?
Grab the Moose Template
To grab the moose craft template, put your email in the box below. We’ll send you the free printable template along with our other favorite freebies.
This is for personal or classroom use only, not for commercial use. Thank you!
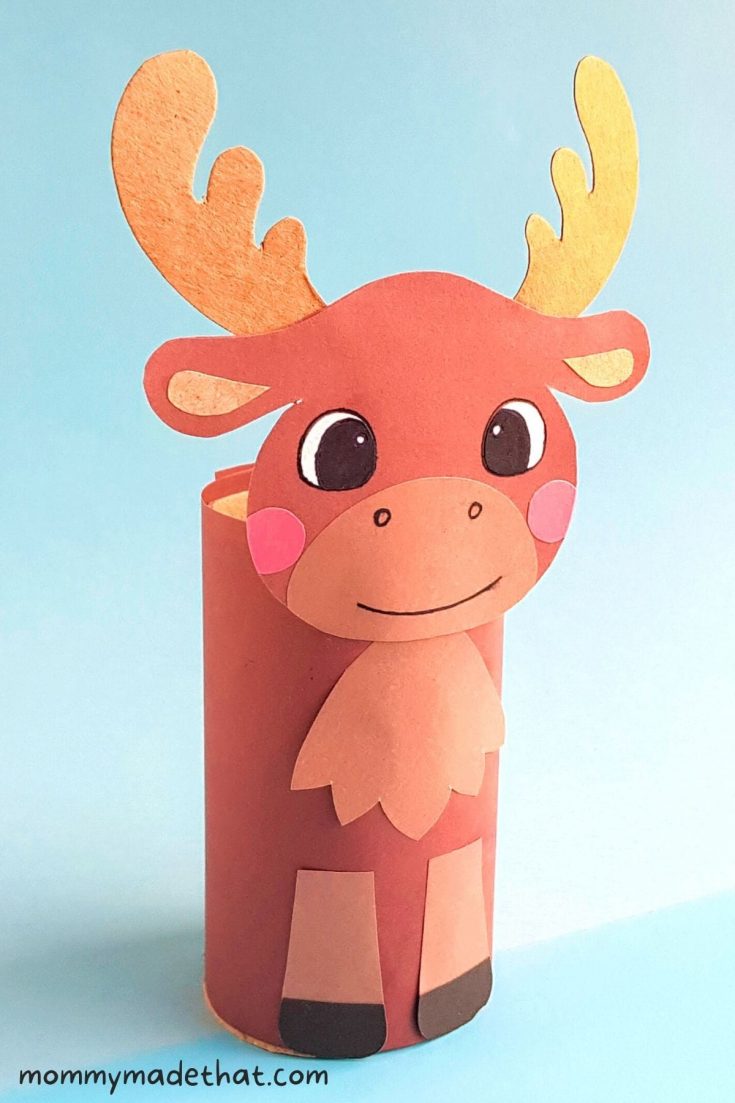
Toilet Paper Roll Moose Craft
This adorable toilet paper roll moose is so much fun to make and play with! Use our template to create a cute paper moose craft that you can attach to an empty toilet paper roll.
Materials
- Moose craft template
- 2 different shades of brown craft paper
- Brown or gold cardstock
- Pink craft paper
- Black craft paper
- White craft paper
Tools
- Scissors
- Pencil
- Black marker
- Craft glue
Instructions
- Grab and print the moose craft template from the printable library.
- Print the template, cut out all the pieces and grab your craft papers.
- Grab two shades of brown paper for the body and head pieces of your moose.
- Grab a separate brown or gold-colored cardstock for the antlers.
- Trace the moose template patterns onto your craft papers and cut them out.
- Use one brown for the main head piece of the moose.
- Then a different brown for the legs, lower part of the moose's face and the dewlap (the fur on the neck)
- Use a cardstock in gold or brown for the antlers and inner ear pieces.
- Use pink for the blush, white for the eyes, and black for the hooves.
- Assemble the mooses head by gluing the inner ear pieces to the head cut out.
- Attach the lower face to the head piece.
- Attach the hoof pieces to the bottom of the legs.
- Attach the antler's to the top, back area of the moose's head. Having the branch pieces facing toward each other.
- Glue on eyes and cheek pieces to the head.
- Use a black marker or pen, add details to your moose's face.
- Measure out a piece of dark brown paper the size of the toilet paper roll to form the moose body.
- Lay out the large body piece and attach the legs of the moose to the bottom center of the body.
- Attach the dewlap, chest fur piece above the moose legs.
- Attach the moose's head just above the dewlap.
- Attach the assembled moose to the toilet paper roll.
- Enjoy!
Notes
A small bit of glue goes a long way in this craft

Very cute! Looks more like a caribou than a moose, though.