
DIY 3D Flower Pop Up Card: Easier than it Looks!
This DIY flower pop up card is a fun and beautiful craft perfect to give to your favorite people. The 3D flowers seem to magically bloom when you open the card!
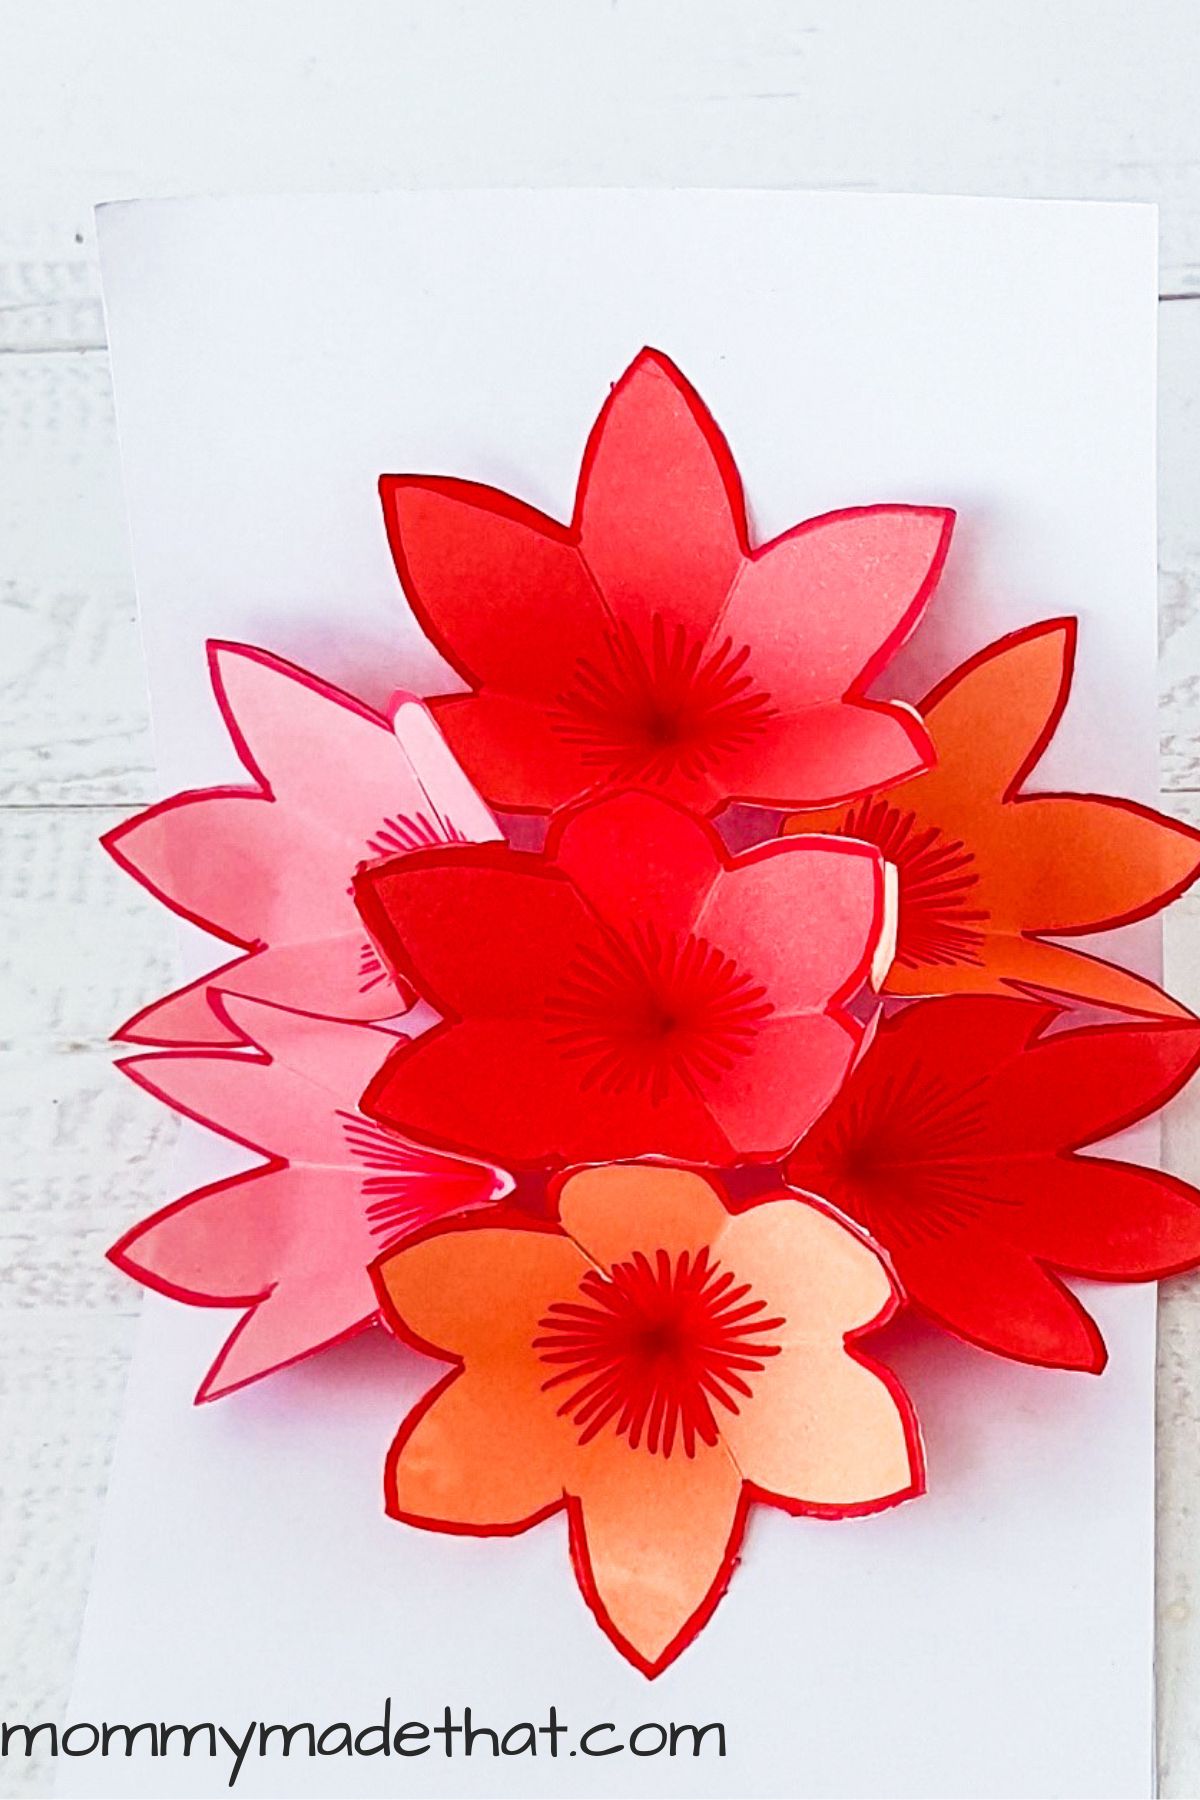
Create a beautiful DIY flower pop up card that’s sure to impress your loved ones!
With this easy-to-follow guide, you’ll be able to craft a stunning card that will be a heartfelt reminder of how much they mean to you.
This project is great for any occasion, big or small, and can be tailored to suit anyone’s style.
From a pretty birthday card to just creating some flower art. But I especially love this as a Valentine’s day craft or a DIY Mother’s day card.
And if you like this craft, check out our other pretty paper flower crafts like our how to make a paper rose tutorial and our pretty paper flower wreath.
Let’s get started on making the perfect handmade pop up card!
Materials
To make your colorful flower bouquet pop up card, you’ll need only a few materials.
Colored craft paper: We used different shades of pink and red for our flowers.
Cardstock paper: For the card itself. This adds stability to the card and makes it “pop up” easier.
And a few basic craft supplies:
- Pencil
- Sharpie or gel pen
- Scissors
- Craft glue
How to Make a Pop Up Flower Card
Start by selecting your pieces of colored paper. Unlike most of our other crafts, this one doesn’t need a template.
Instead, you can free-hand the flowers easily, like shown below.
Step 1: Start your First Flower
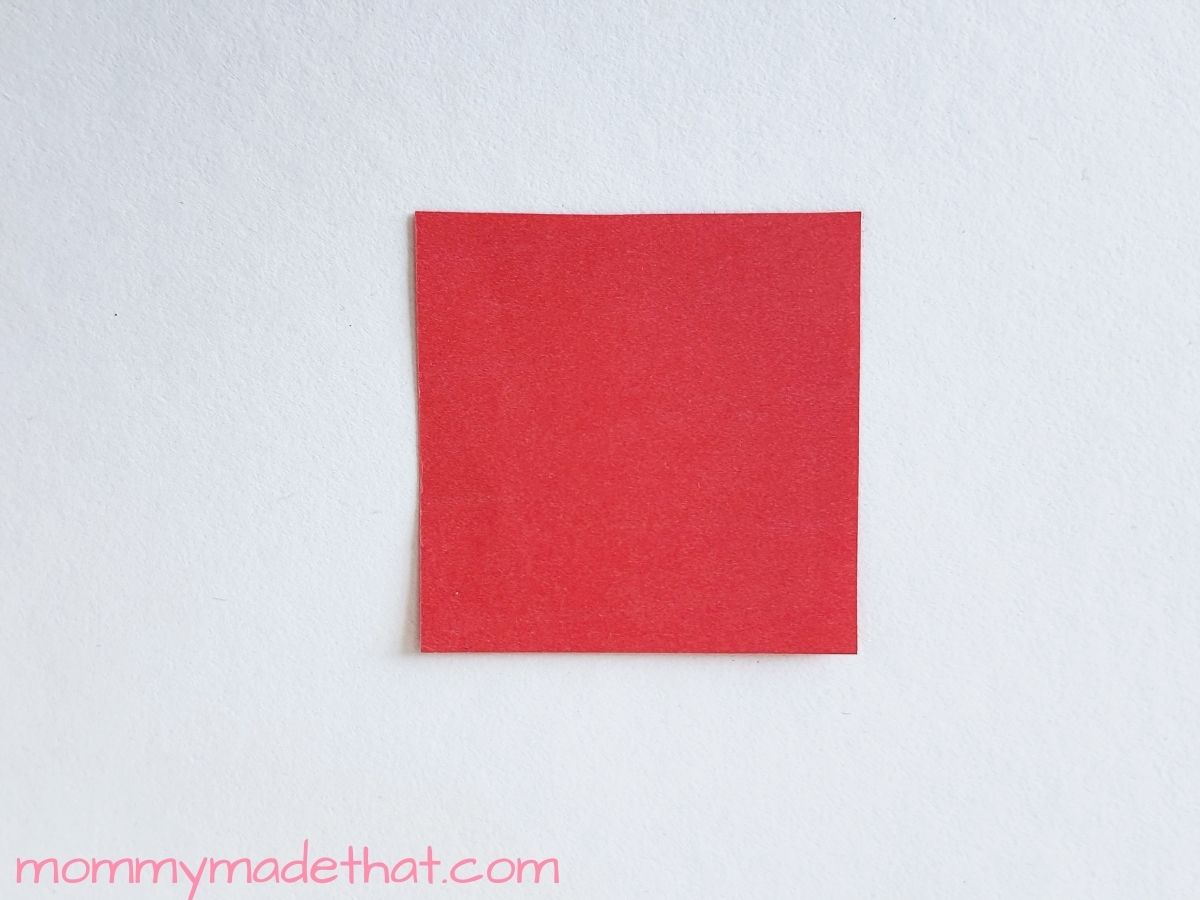
Start by cutting your colored papers into squares. We used 3 inch by 3 inch squares for ours. We used 7 flowers total for our card.
Step 2: Fold
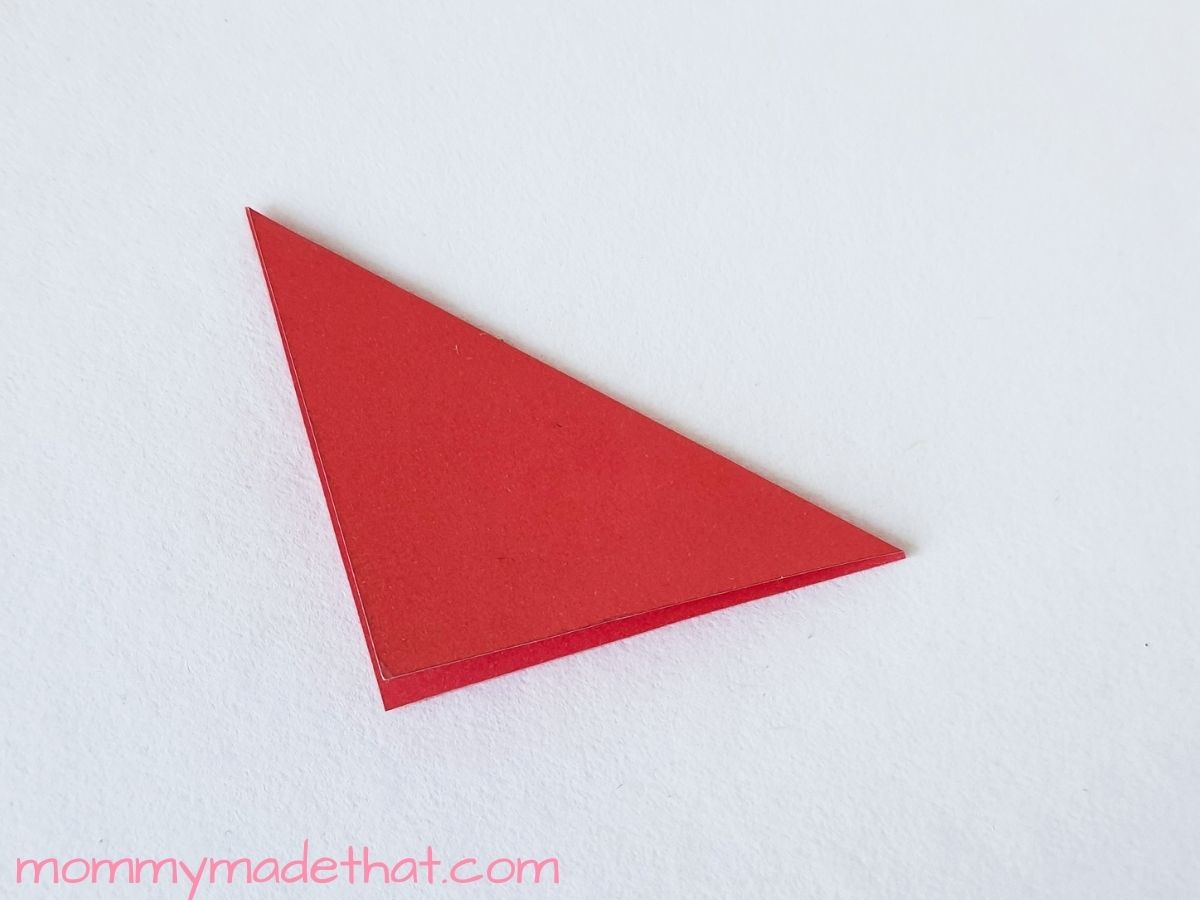
Grab on square and fold the paper in half diagonally.
Step 3:
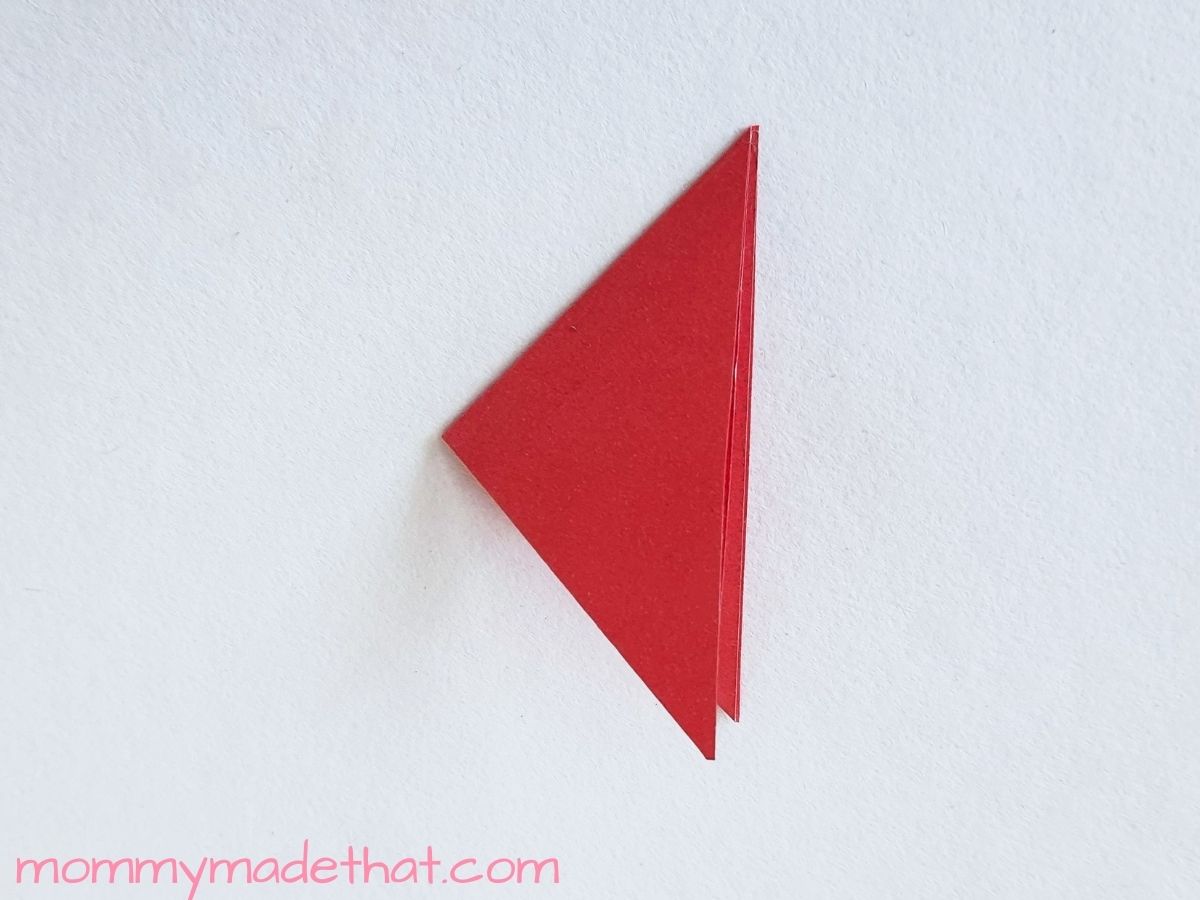
Fold again in half diagonally like shown above.
Step 4:
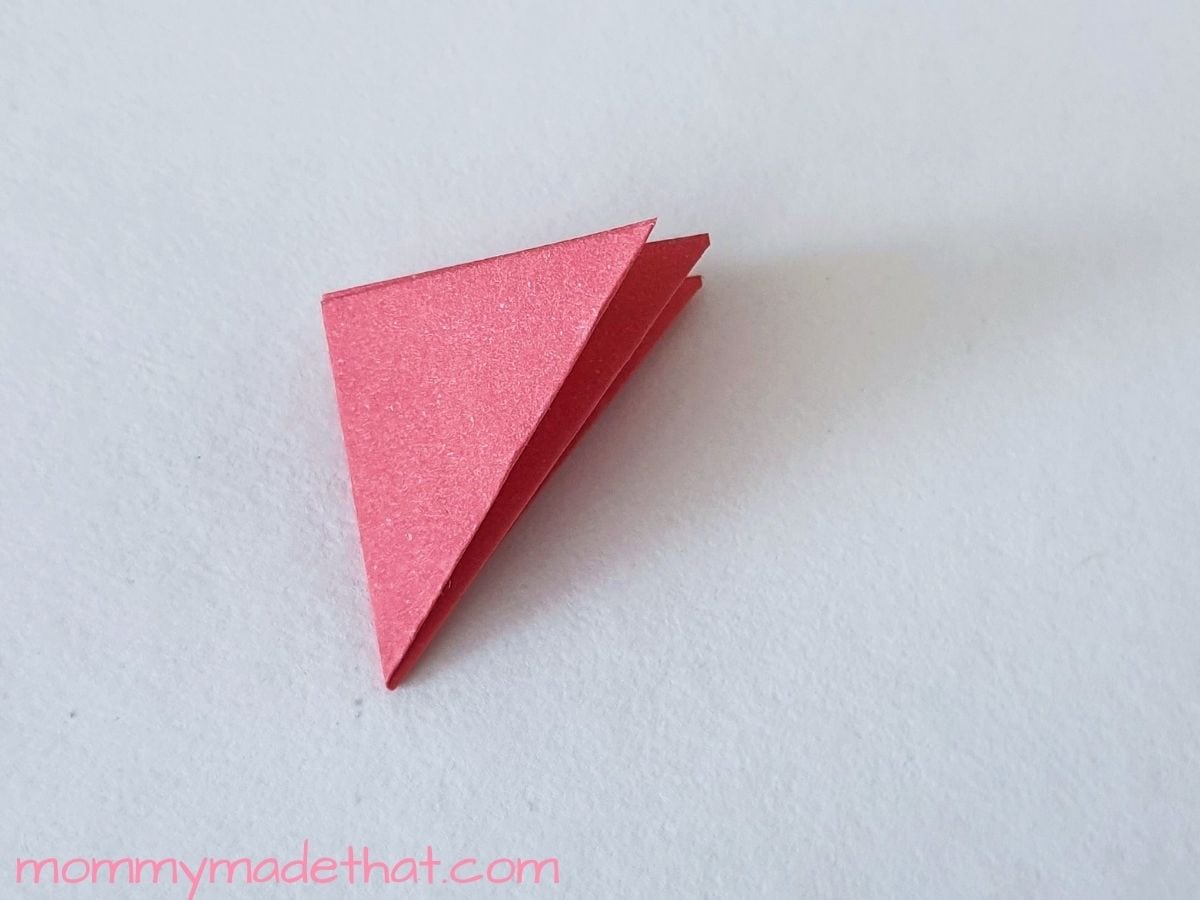
Now fold each flap in half on both sides, toward the outside.
Step 5:

Use your pencil to trace a petal pattern by keeping the tip of the petal opposite to the closed corner.
Step 6:
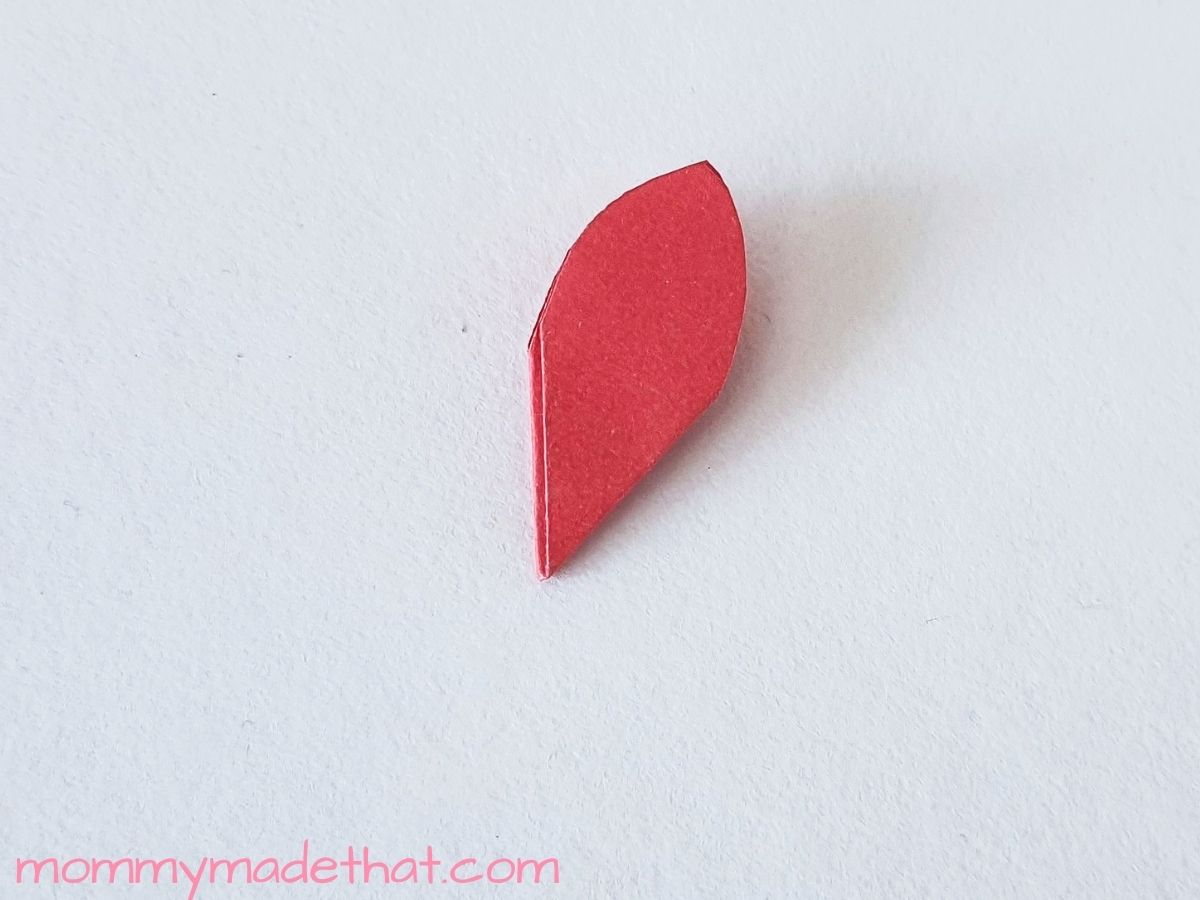
Cut out the traced petal, just the top half, leaving the rest connected.
Step 7:
Unfold the petal cutout, it should look similar to the flower shape above.
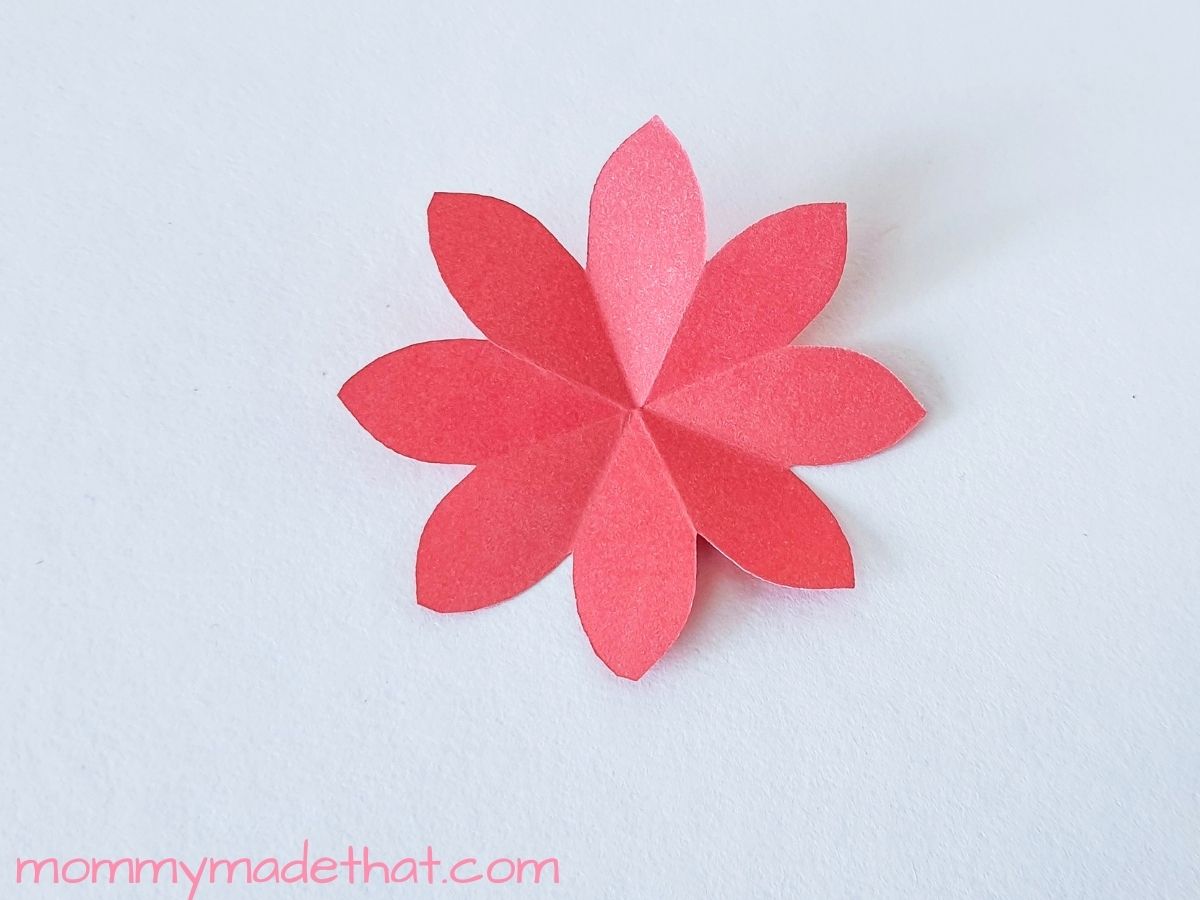
Step 8:
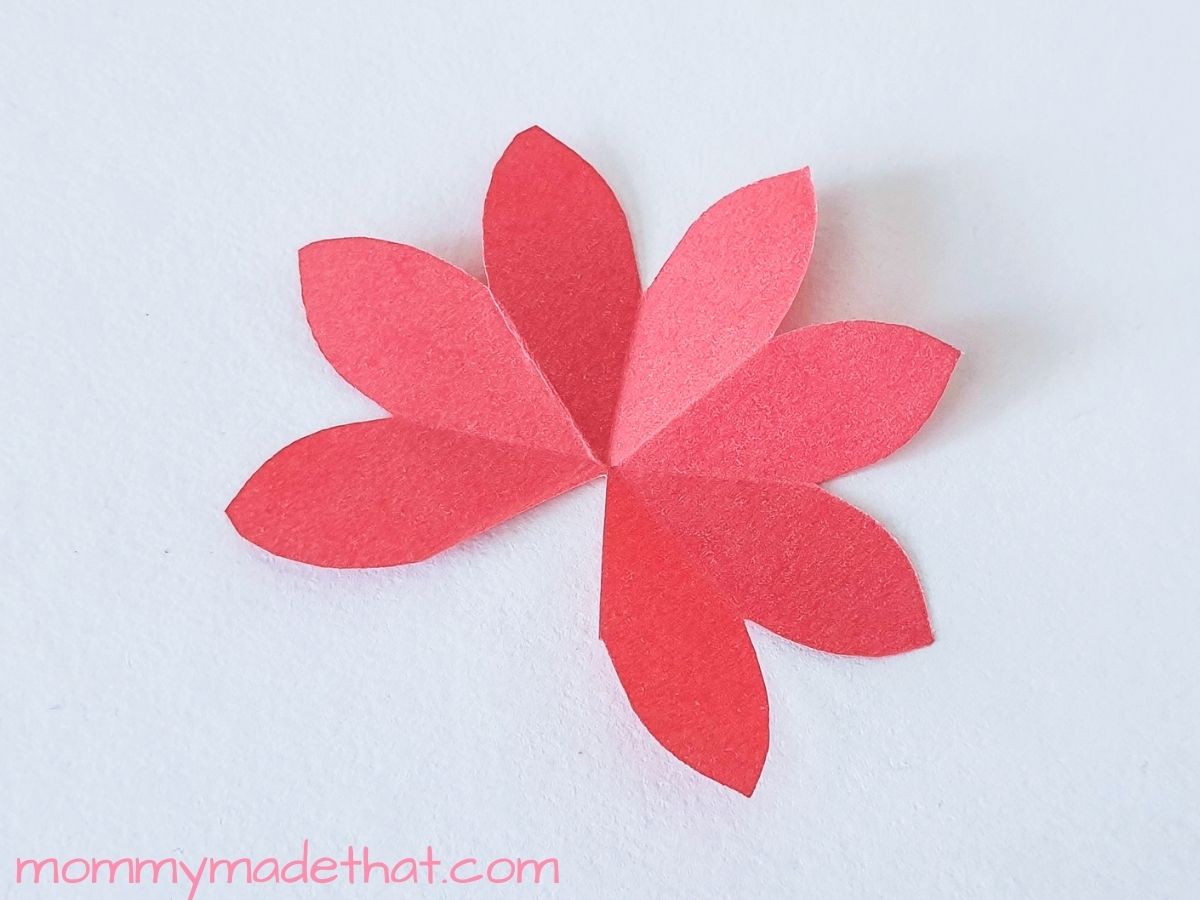
The pattern should have 8 petals total. Cut out 1 petal from the pattern, leaving you with a flower that has 7 petals.
Step 9:
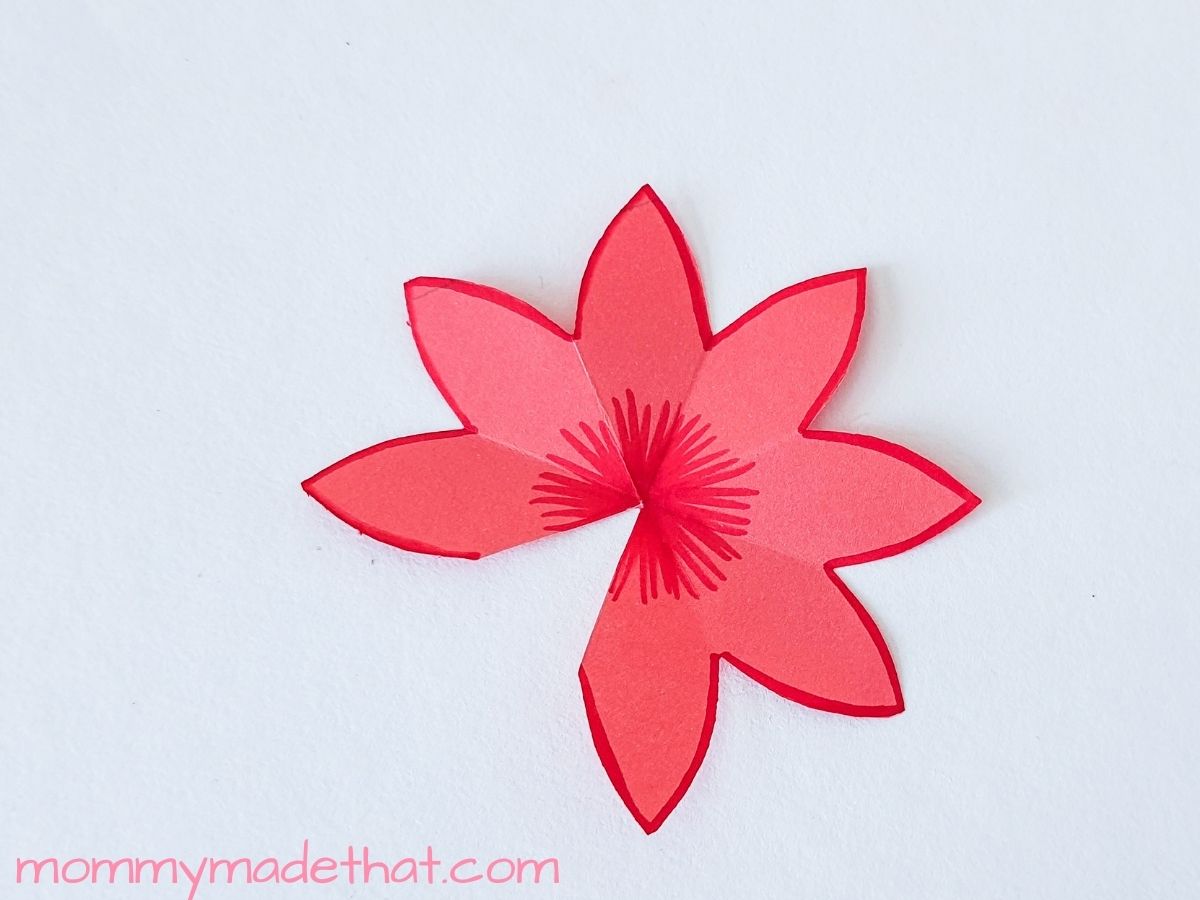
Using a thin marker or colored pen, trace the outline of the flower and add some details to it.
Step 10:
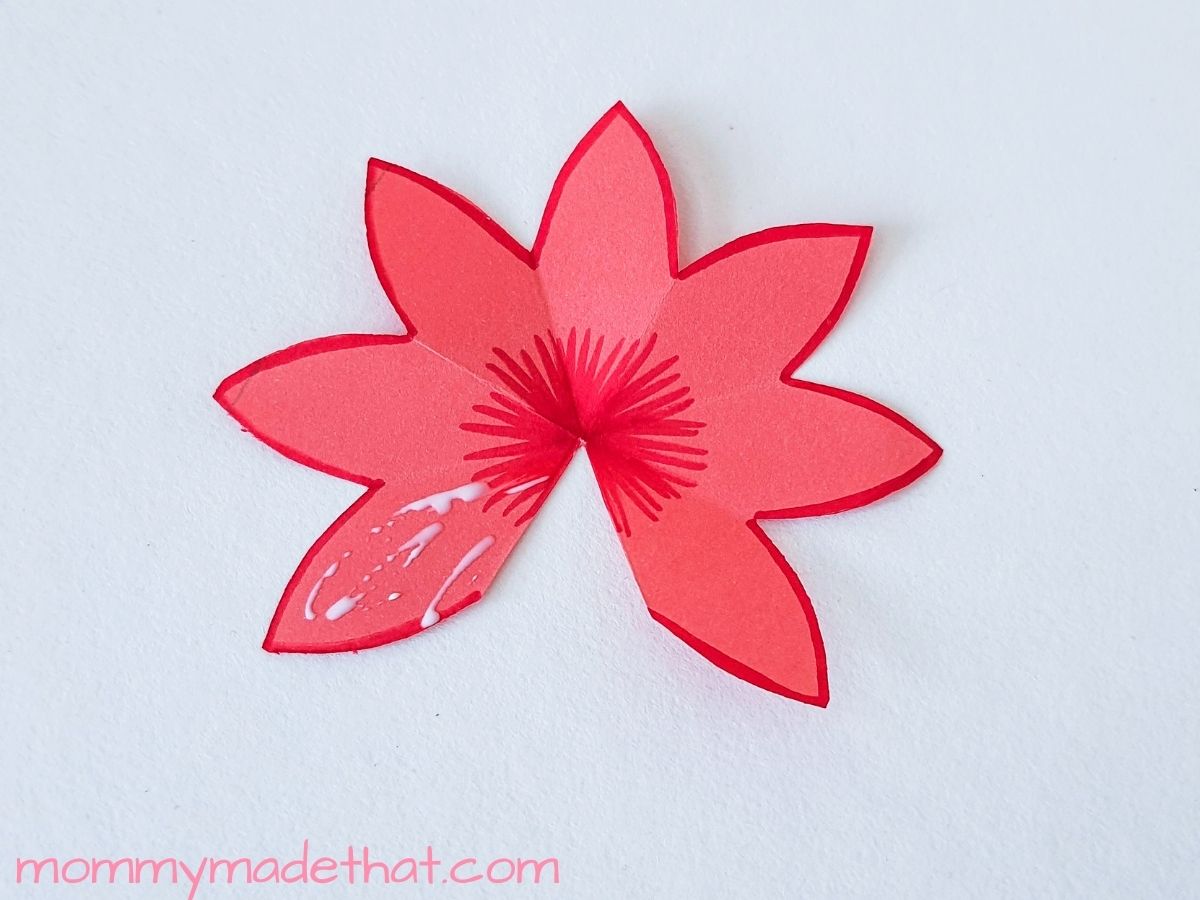
Apply glue to one of the petals, next to the area you cut your petal out of.
Step 11:
Overlap the petal on the other side of it, over the glued one and join together creating a 3D flower.
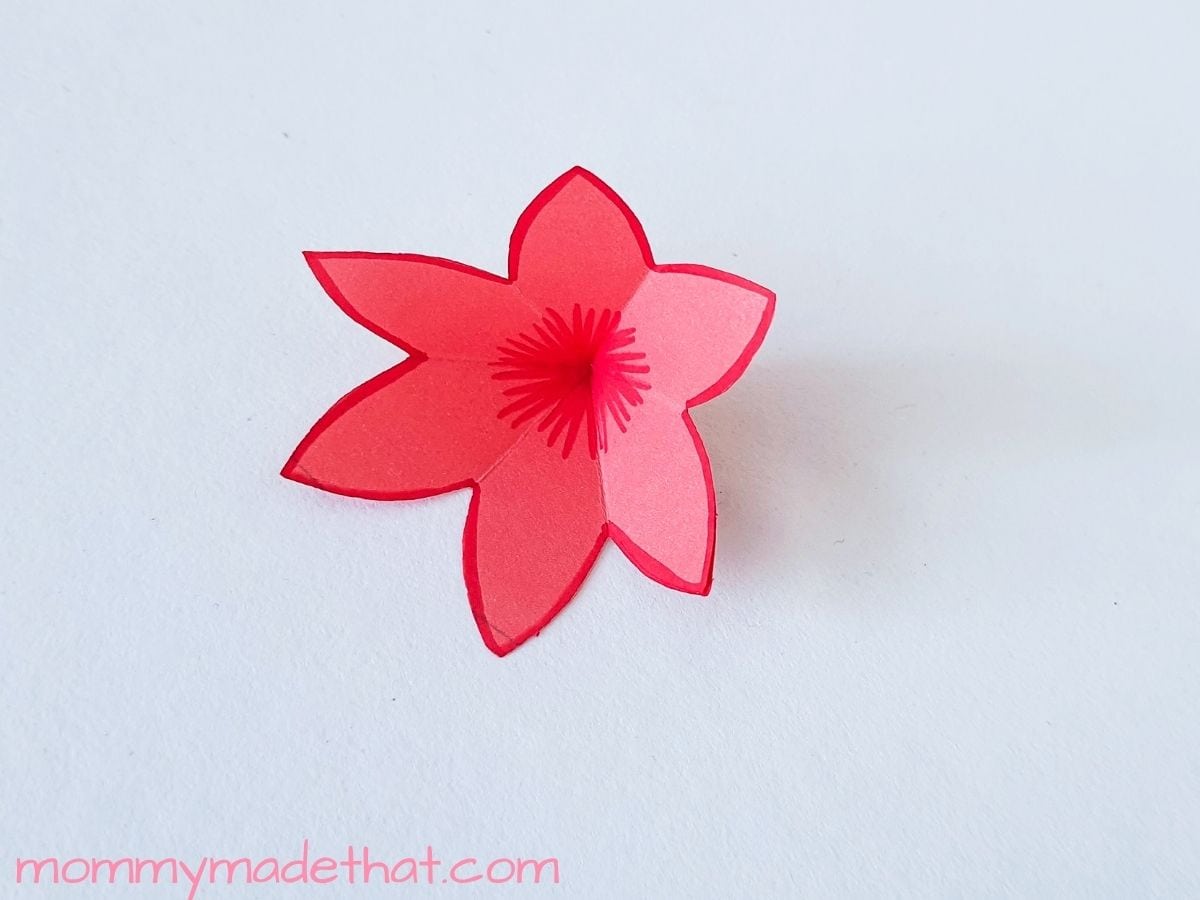
Step 12:
Make 6 more flowers, using the steps 1-11. We’ll need 7 flowers total to make our pop up card.
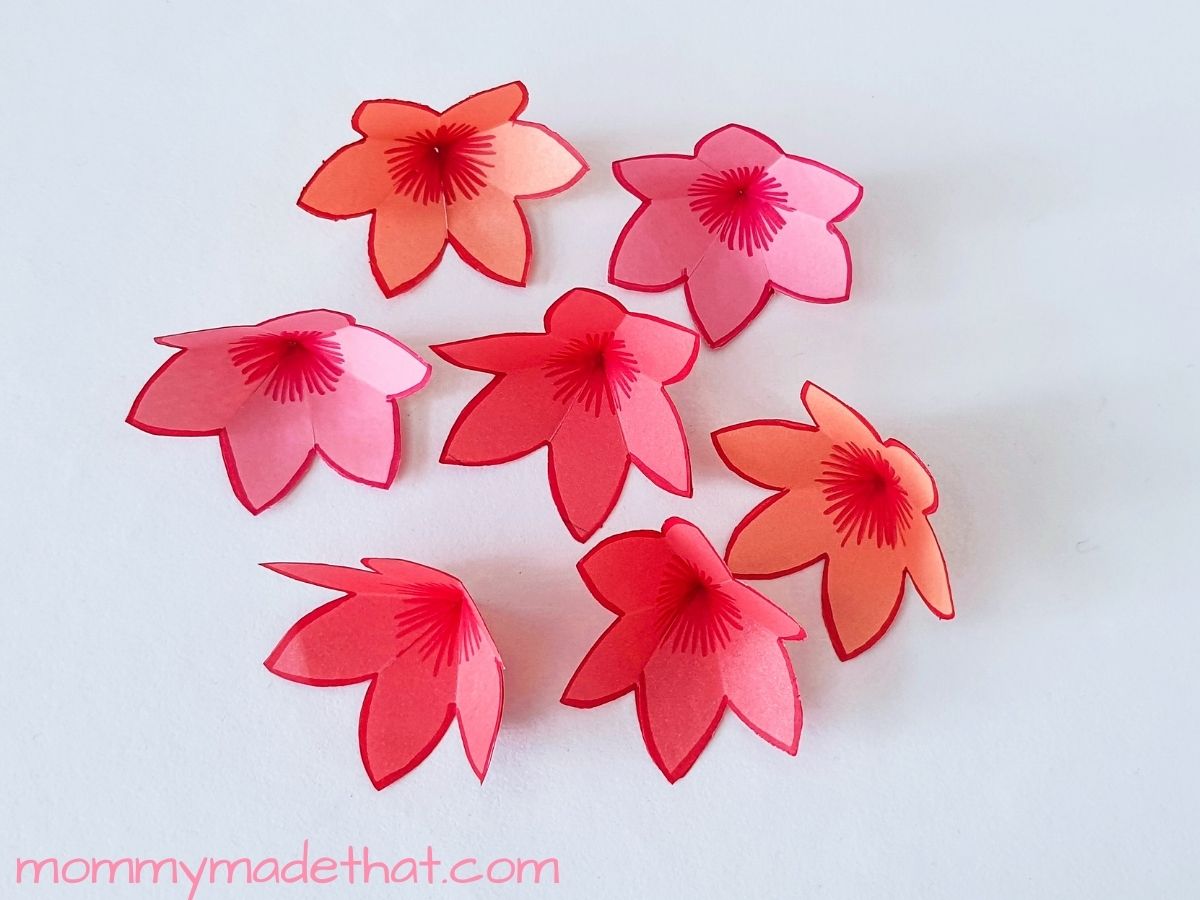
Step 13:
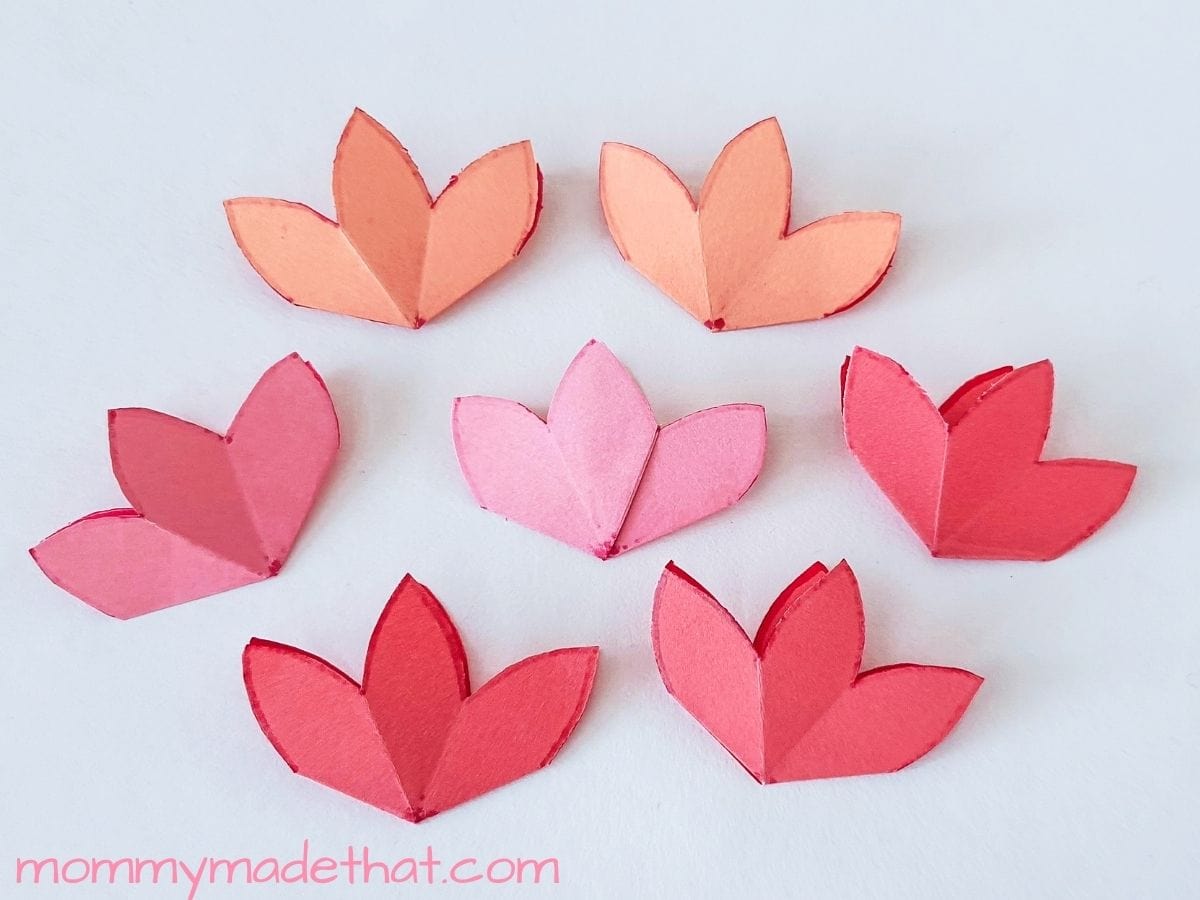
Once you have all your flowers made, flatten the paper flowers by aligning them symmetrically, like shown above.
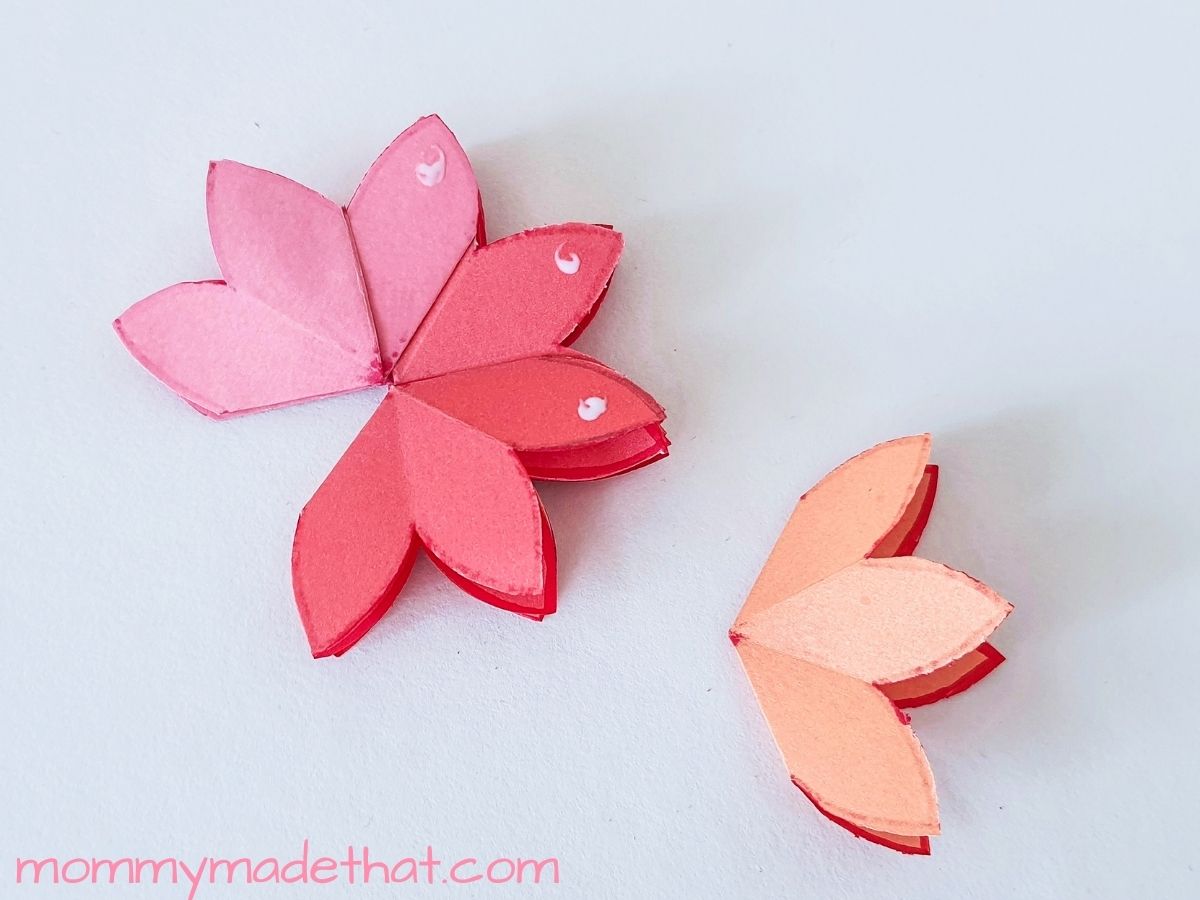
Step 14:
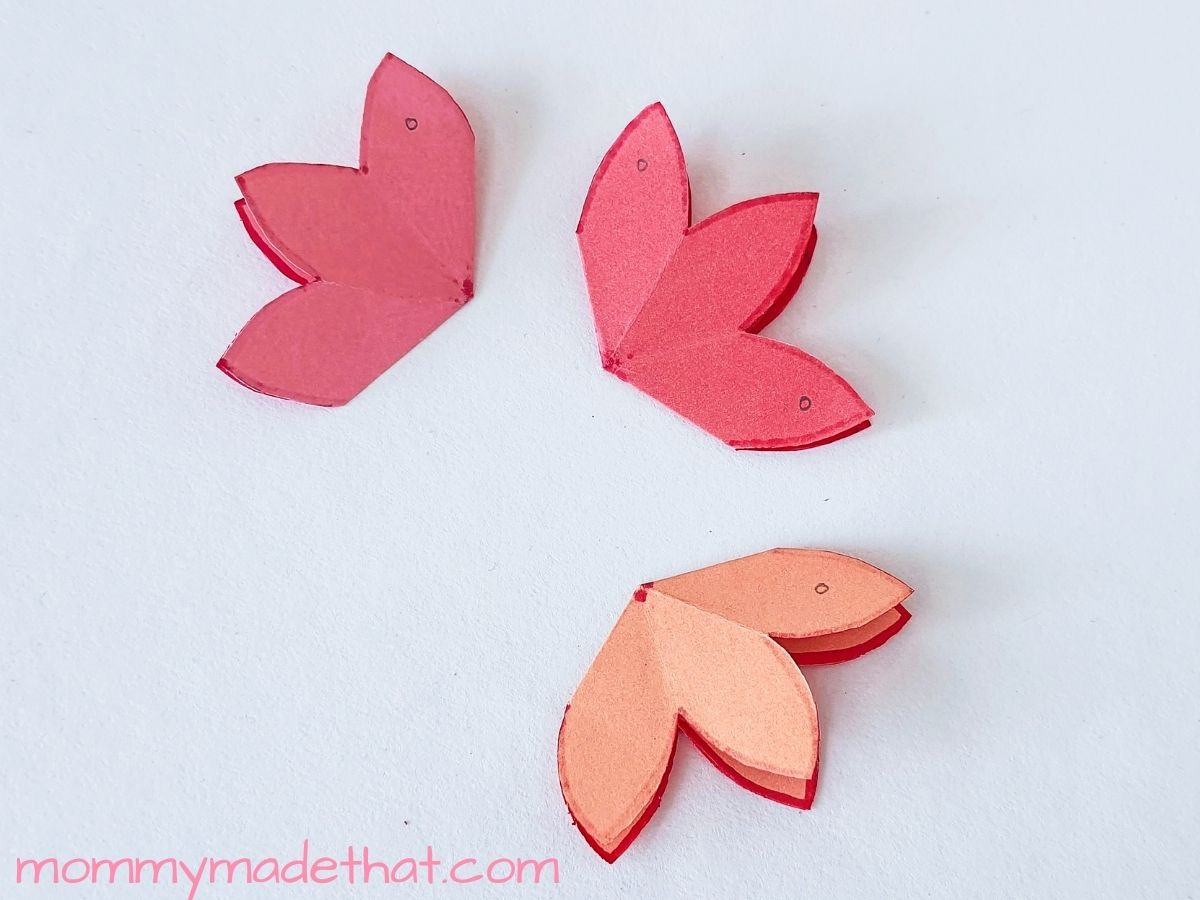
Grab 3 of the flattened flowers. Notice the marked points drawn onto the flowers above. Apply a drop of glue on the marked spots of the middle flower.
Step 15:
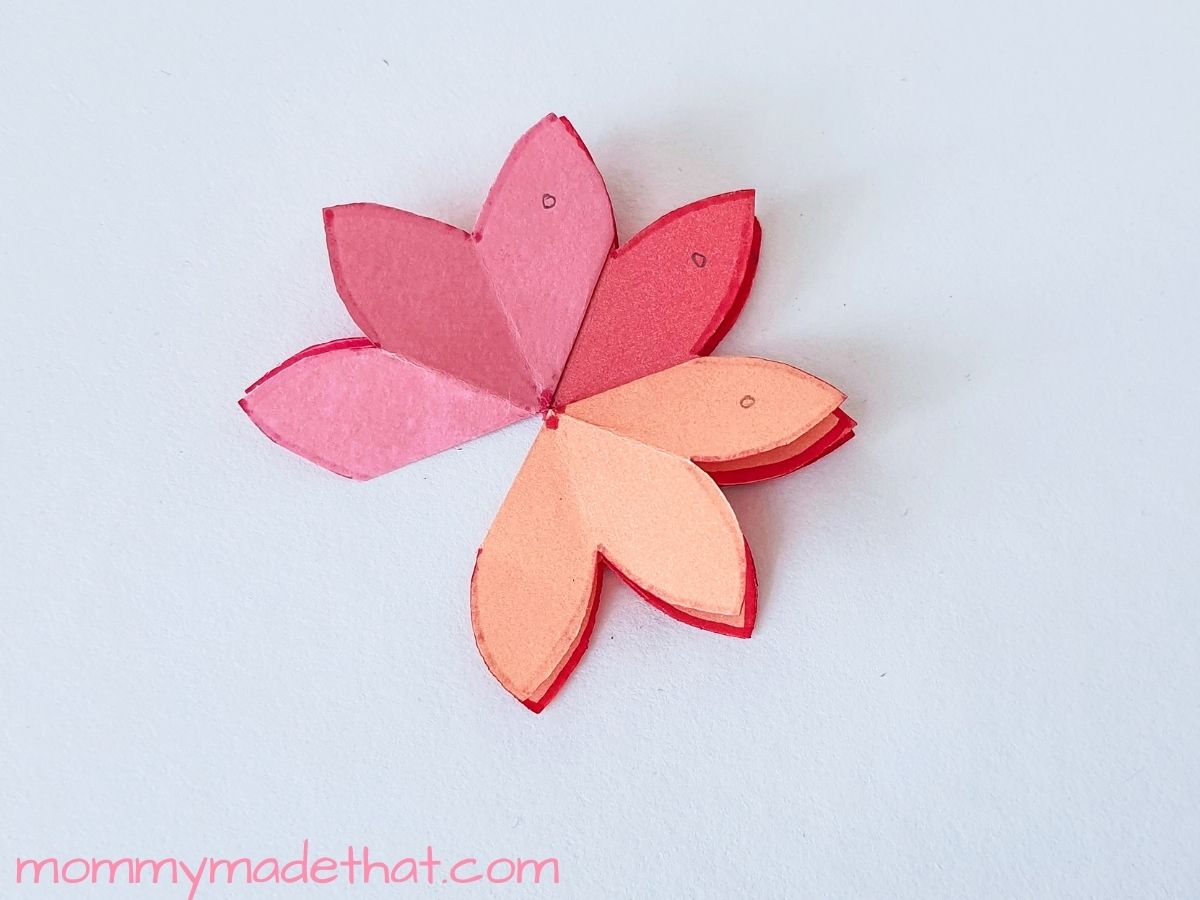
Then join the side petals of the 2 other flowers on both sides (glued) petals of the middle flower, like shown above. So the “middle flower” should be sandwiched in between both flowers on either side.
Notice the three dots above again, this is where you’ll place glue in the next step.
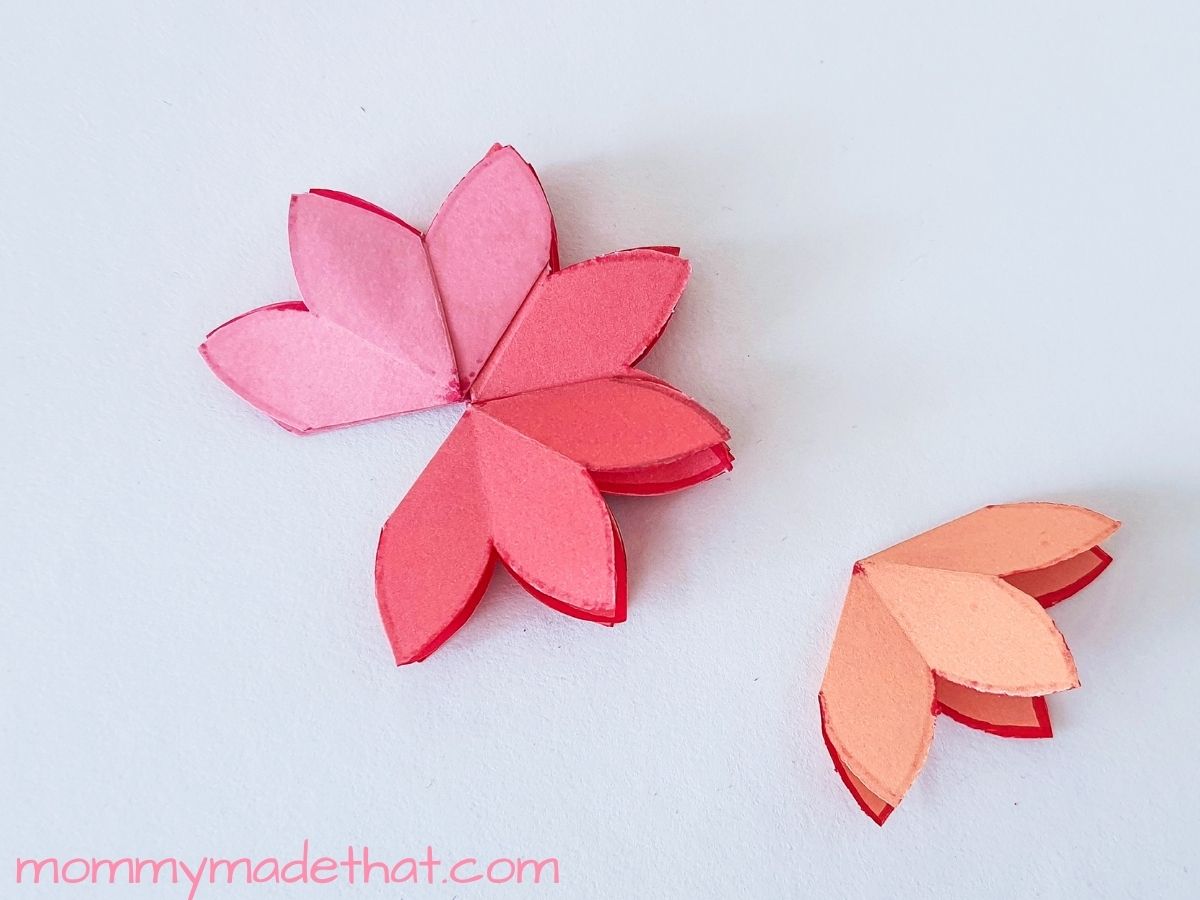
Step 16:

Now, drop glue on the 3 middle petals and place a flower pattern on it.
You should now have a 4th flower overlapping the 3 original flowers on the top section.
Step 17:

Next, apply a dot of glue on the 2nd, 3rd and 5th and 6th petals, like shown above.
Step 18:
Attach 1 flower pattern on each side. This should leave the middle petal showing from the flower under it.
Step 19:
Apply glue on the 3 middle petals again.
Step 20:
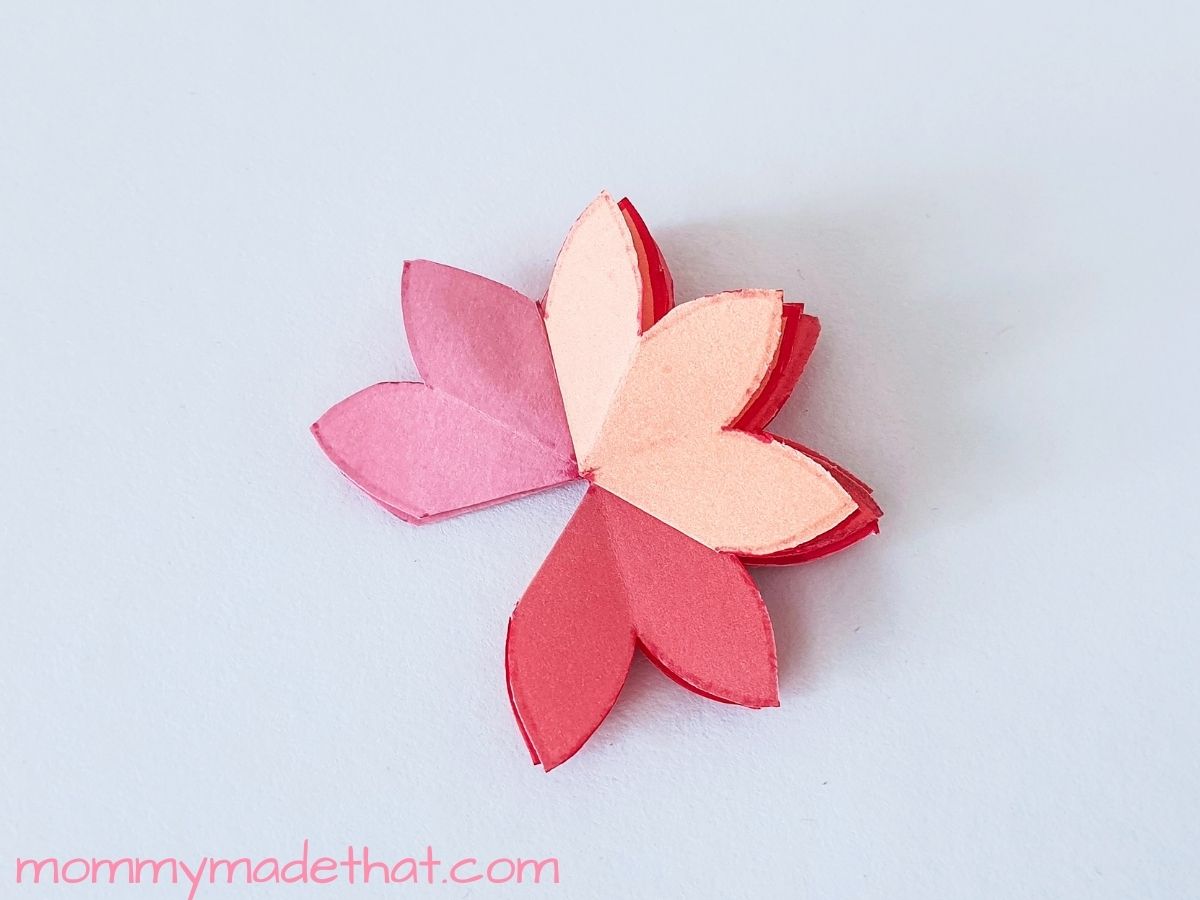
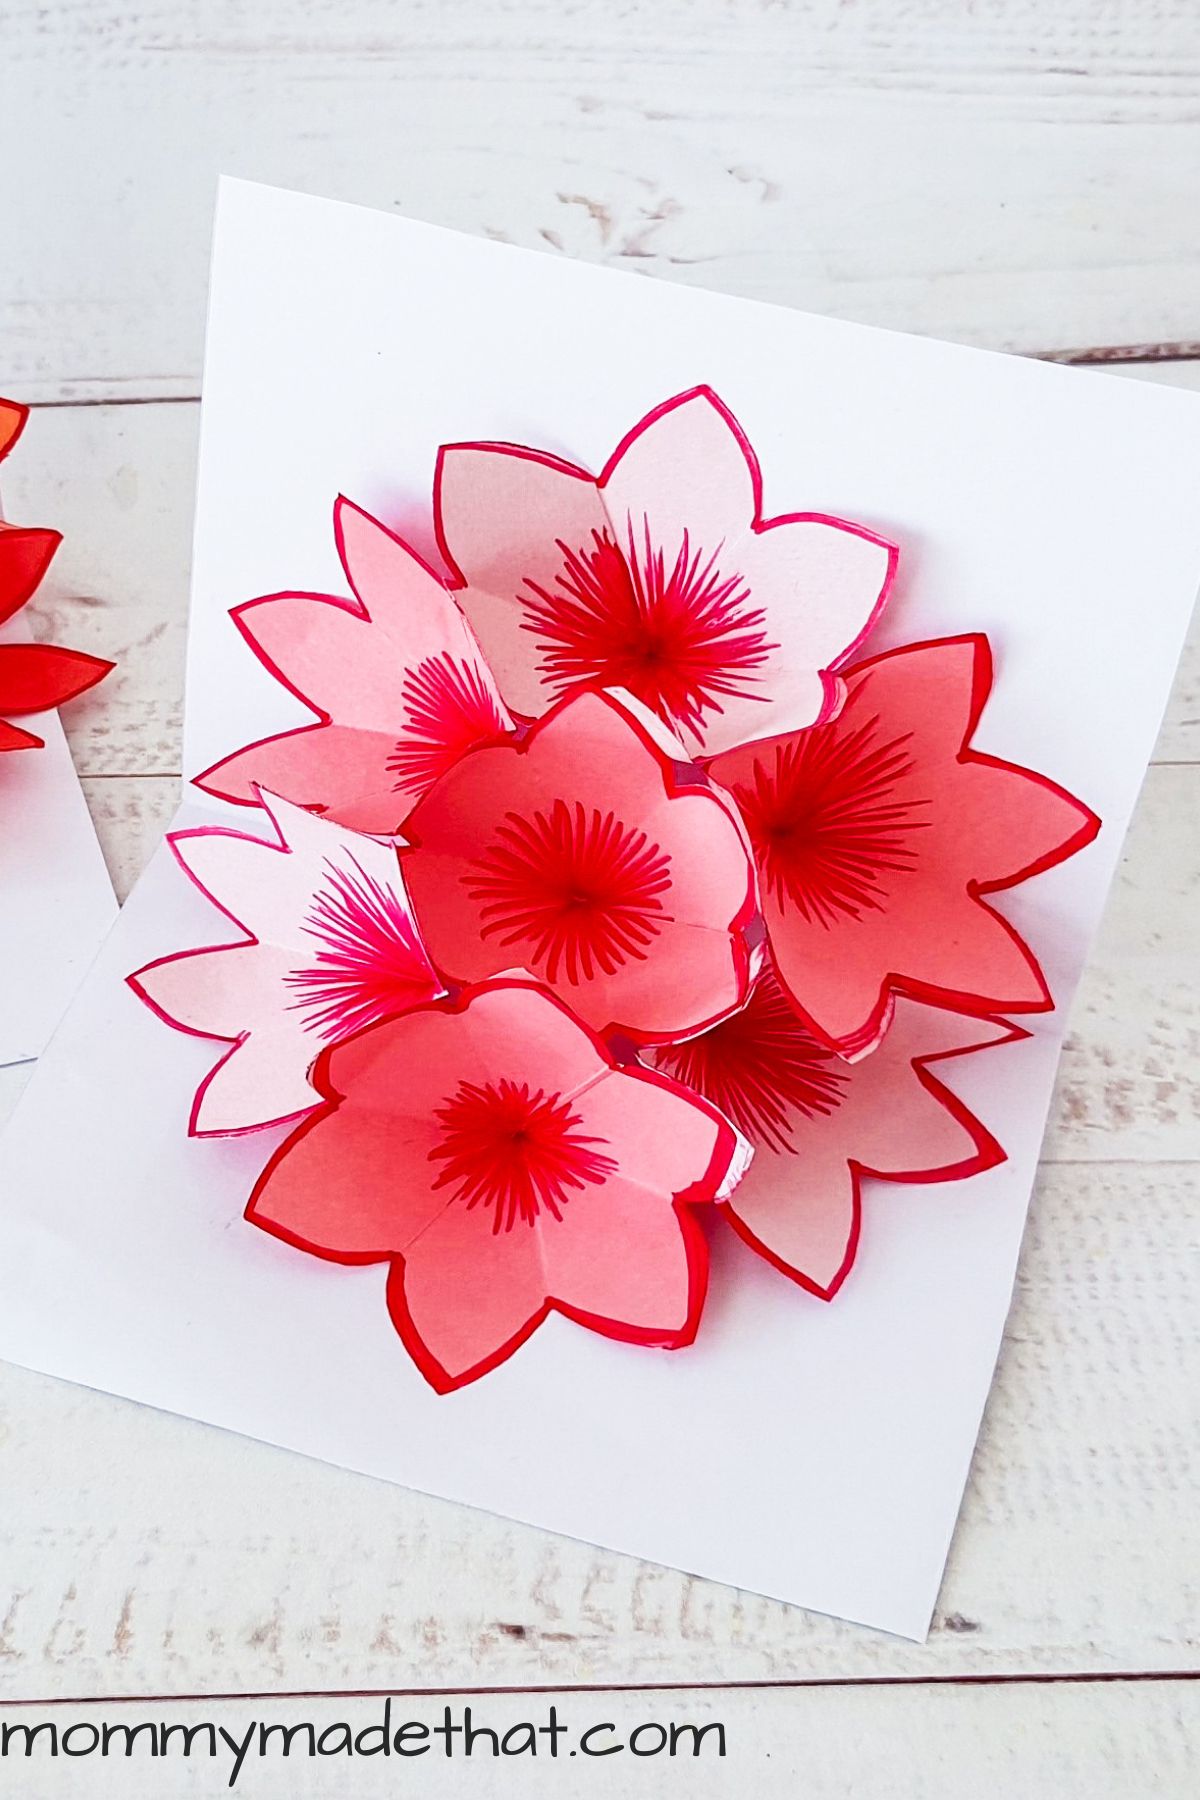
Finally, attach the last flower pattern on the middle petals (glued petals). And now the pop-up flower is ready to be put into your card!
Step 21:
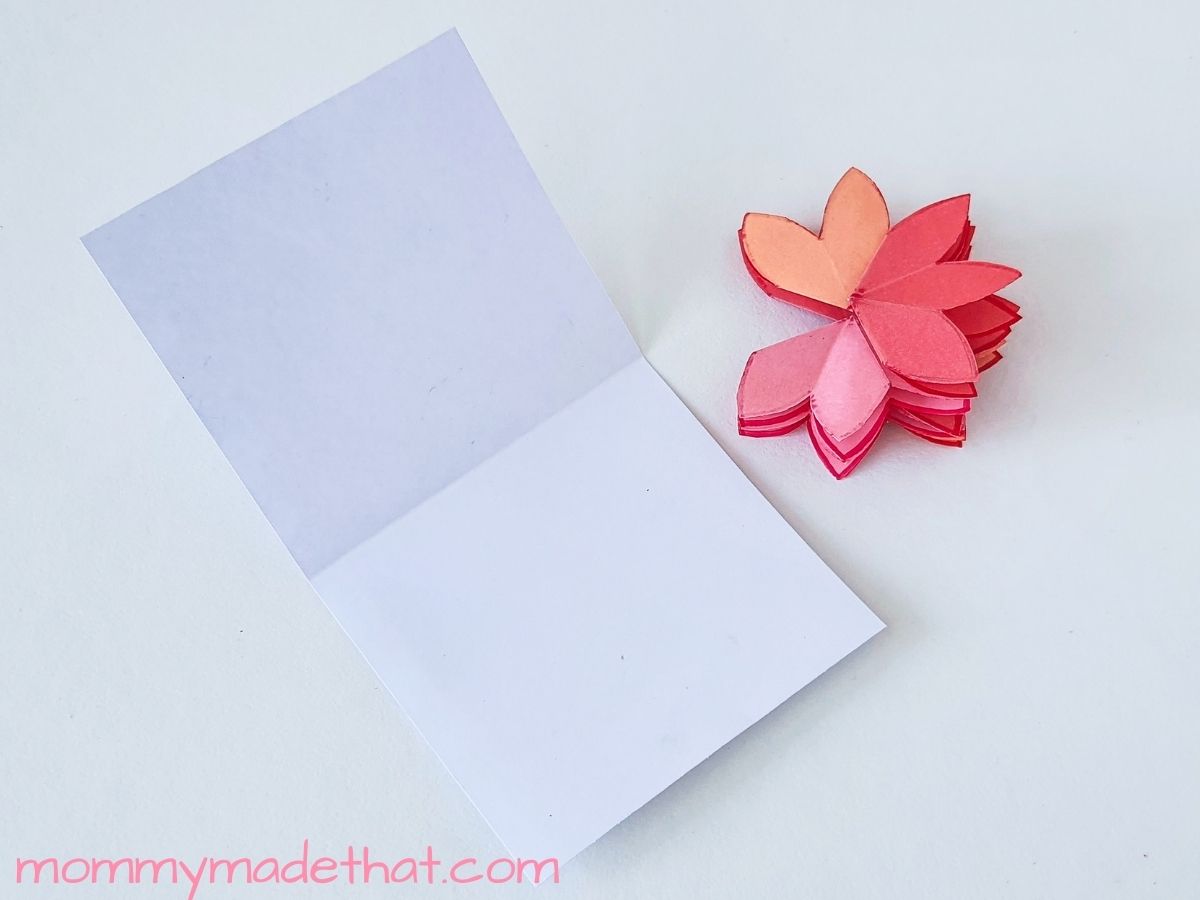
Now, take your cardstock and cut it to the size you want your card to be. I suggest keeping the card’s ration twice the size of the pieces of paper you made your flowers.
Our flowers where 3 inches, so our card is 6 inches. You can always trim the card later if you need to.
Step 22:
Next, apply glue on the middle petal of any one side and place it on the card with the petal tips facing outside and the flower center towards the closed side of the card.
Keep a 1/2-inch gap from the closed side of the card.
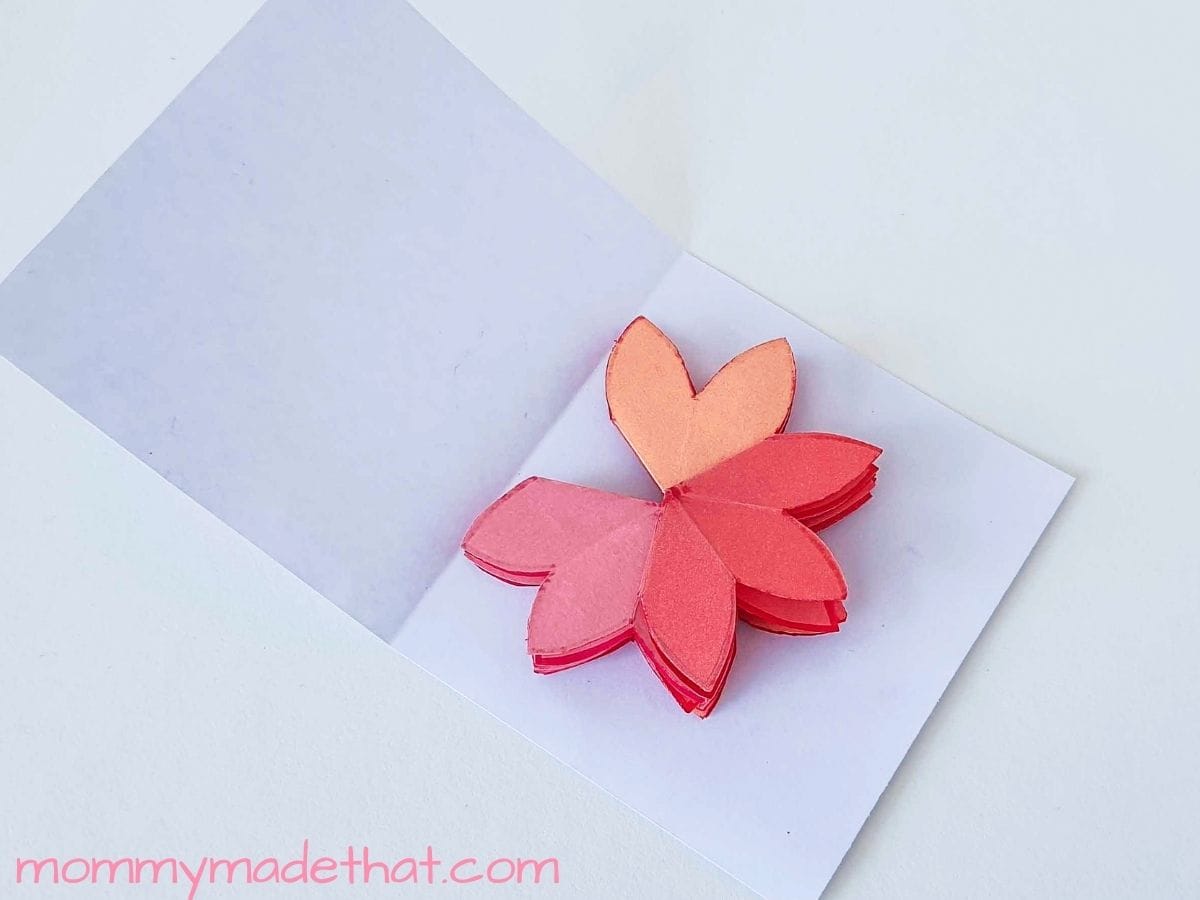
Step 23:

Apply a drop of glue on the middle petal of the other side and close the card.
Press the outer surface of the card on the glued petal to make sure that it is completely attached.
Allow the glue to dry completely and then open the card. Your flowers should turn into big blooms when you open the card.
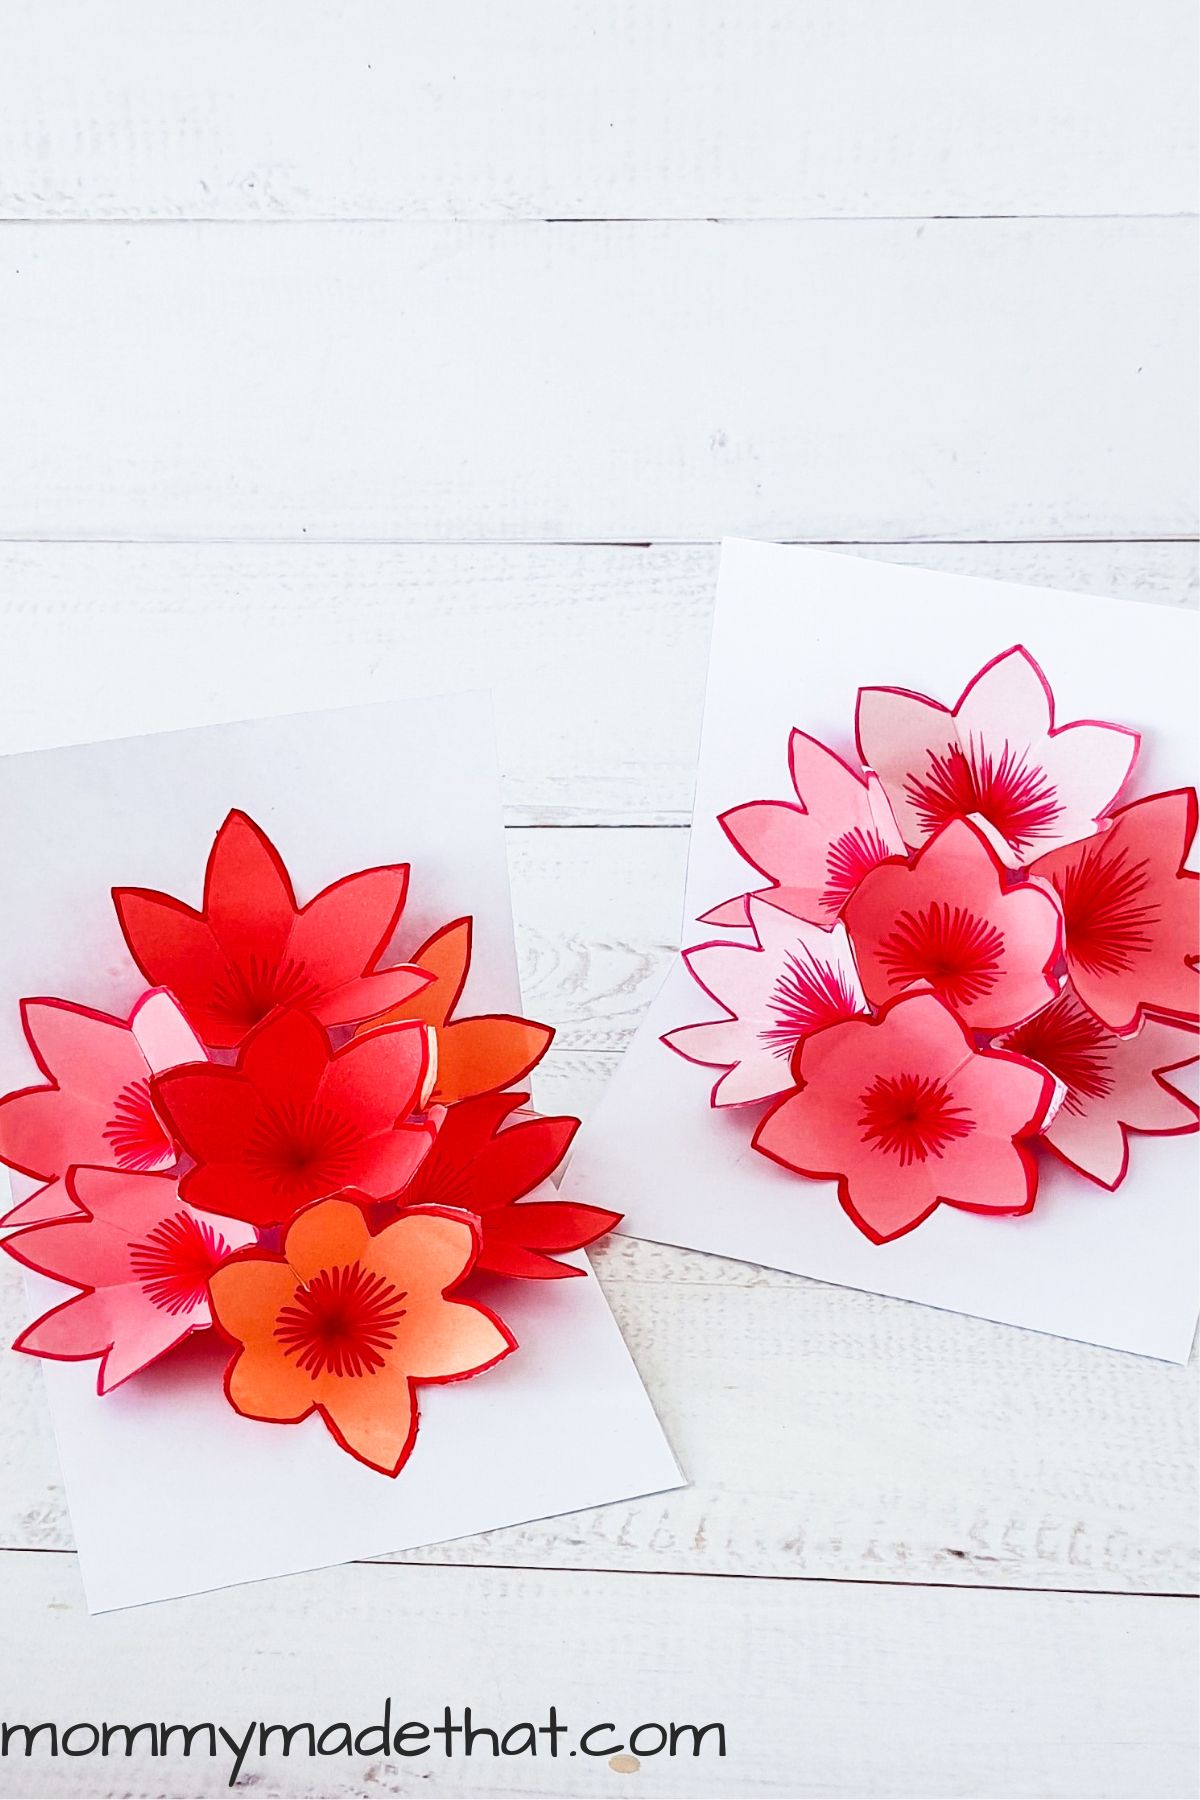
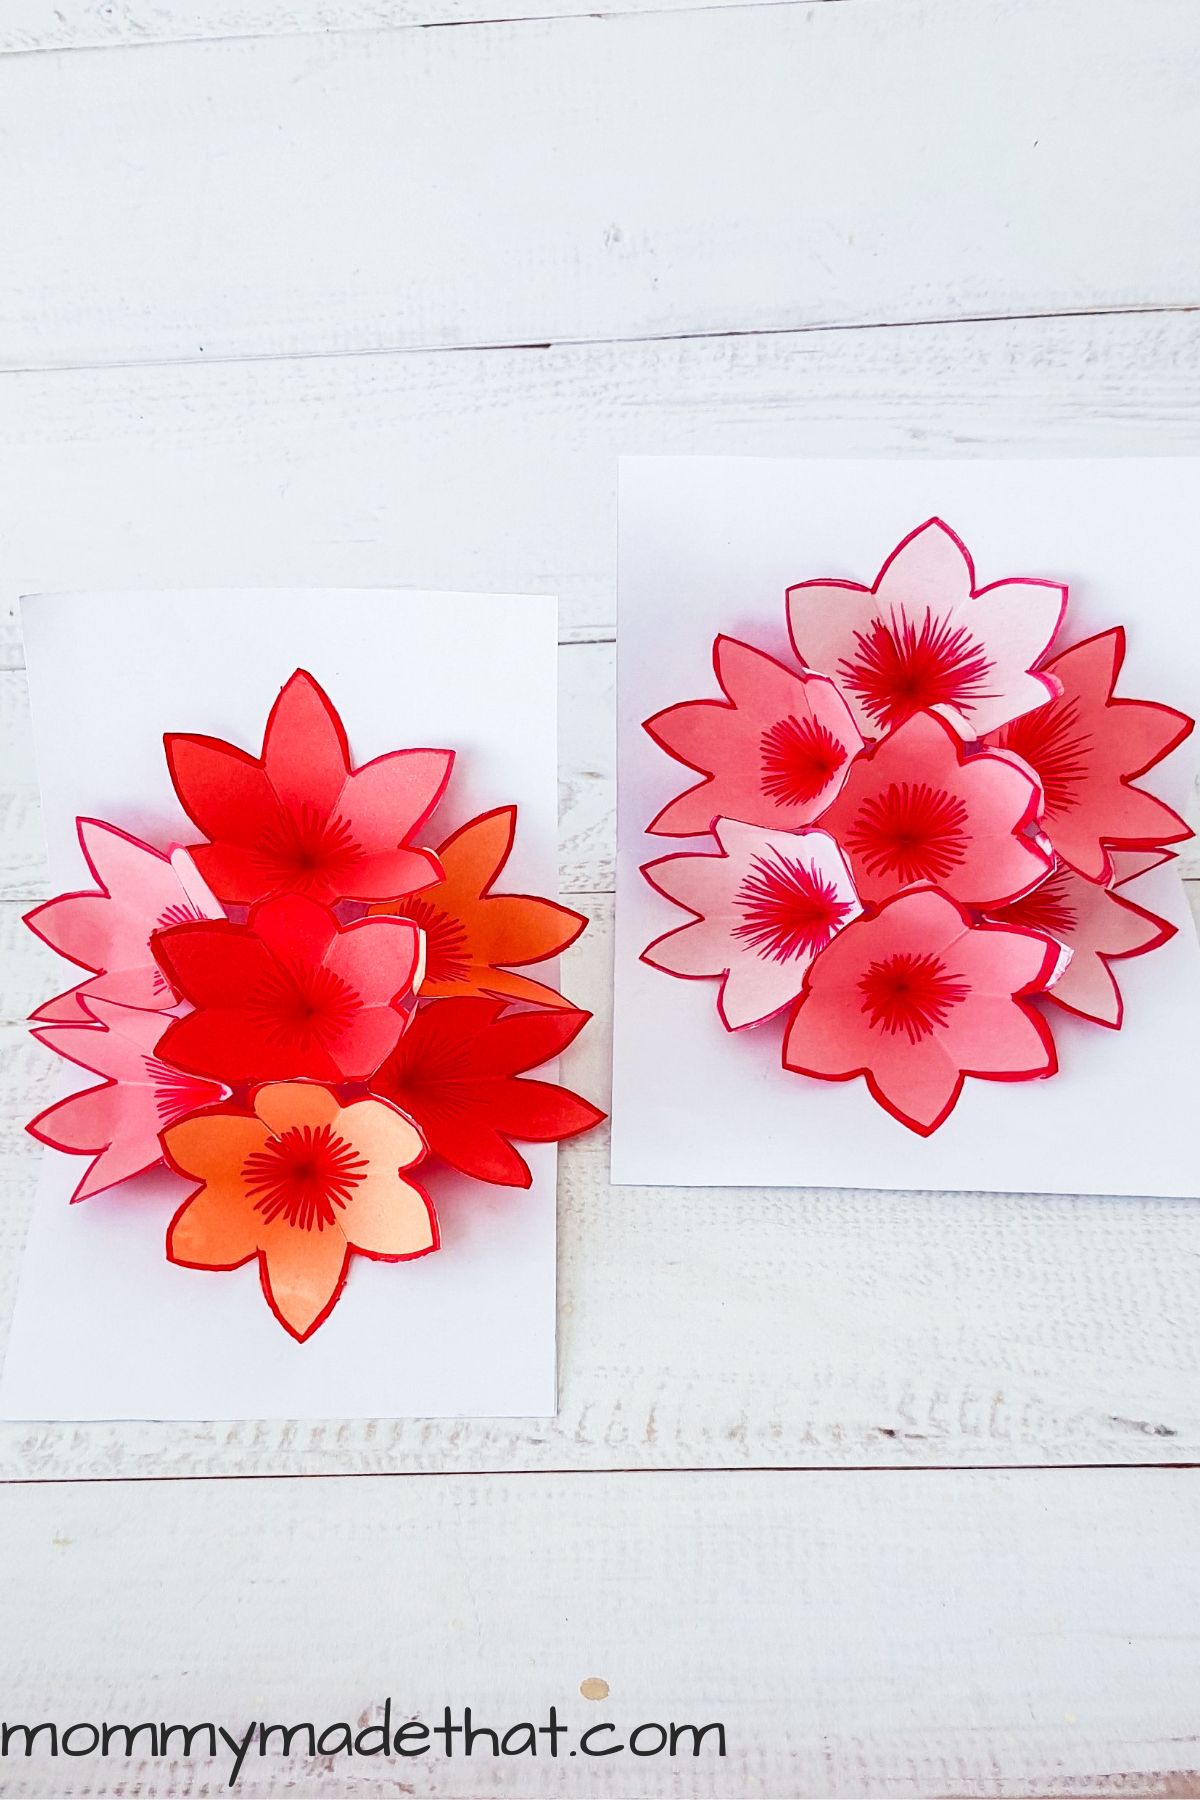
You should end up with a pretty 3D flower card! We made 2 cards, one with lots of shades of pink. And one with reds and oranges thrown in.
You can make your flower cards in any colors your heart wants! Maybe in the favorite colors of the receiver?


you confused me at step 17 and 18 🙁 what did you do?