
Adorable Paper Snow Globe Craft (With Free Template!)
Today we are making this adorable paper snow globe craft. This craft is perfect for the wintertime and it’s so easy to make!
This paper snow globe craft is a great winter craft project for kids of all ages!
It’s an easy and inexpensive way to make beautiful decorations for your classroom or home.
This craft requires only a few simple materials, such as paper, glue, and scissors.
This would make an adorable paper ornament for the Christmas tree.
And since it does feature a cute pine in the snow globe scene we included it in our Christmas tree crafts. But it’s also a great snowman craft for kids.
If you’re looking for more snowman activities, we’ve got some cute snowman printables like our pin the nose on the snowman game and roll a snowman dice game.
We also have free printable snow globe templates and cute snow globe coloring pages if you’re looking for some more snow globe fun.
With these easy instructions and tips, you’ll have your own little paper snow globes in no time!
Table of Contents
Materials
Colored craft paper: We used white, blue, gray, brown, green and a touch of orange. Construction paper would also work.
Paper Snow Globe Template: You can grab our craft template at the end of the tutorial.
You’ll also need some basic craft supplies like:
- Craft glue
- Sharpies or thin colored markers
- Scissors
- Pencil
How to Make a Paper Snow Globe
To make this snow globe, start by printing out our paper snow globe template. Then follow these instructions.
Step 1: Cut out the Pieces
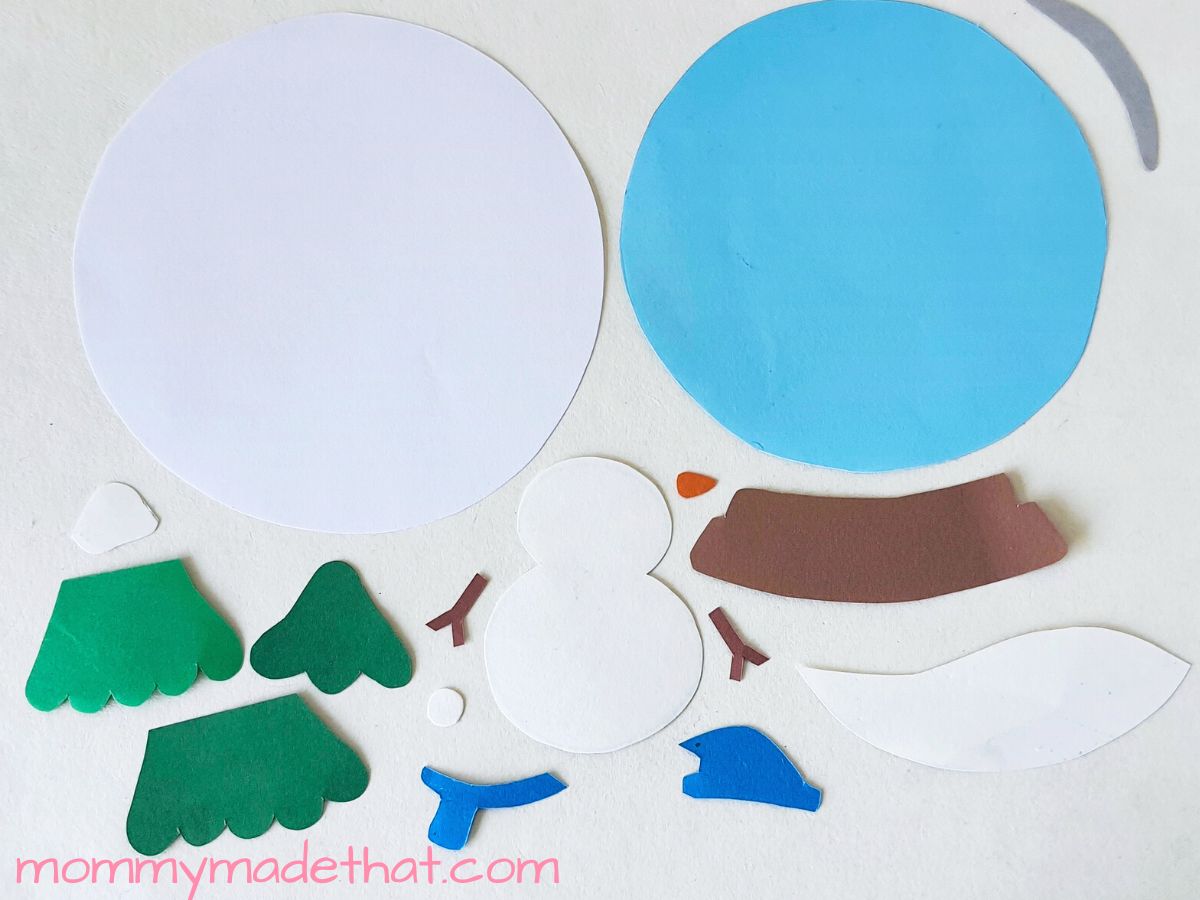
Then cut out all the pattern pieces from the printable. Choose which colors of paper you’ll use and start tracing out the template pieces onto them.
Or you could just color in the template pieces and assemble them.
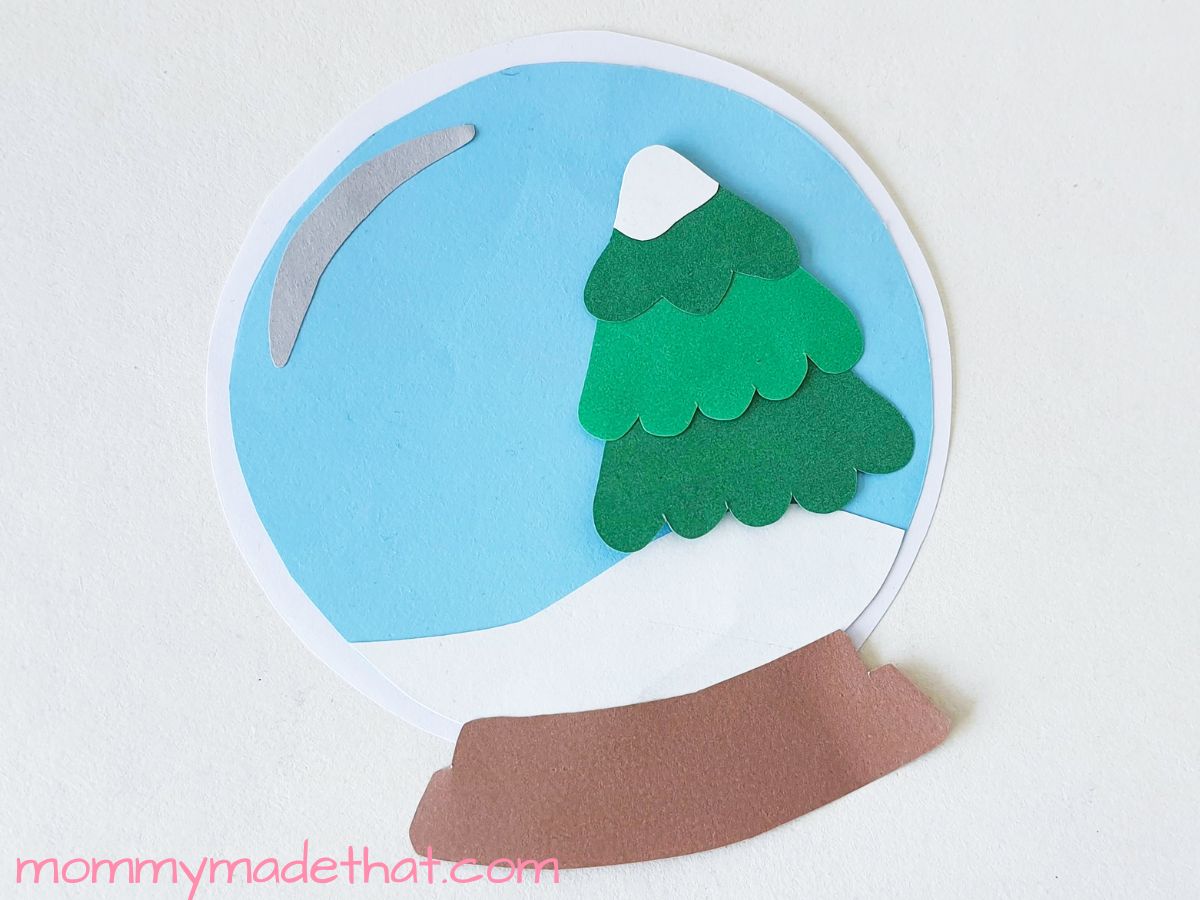
Our template includes the tree, a snowman, a glass base, the snow globe base and some snow pieces.
Cut out all the pieces from the colored paper.
Step 2: Assemble the Globe
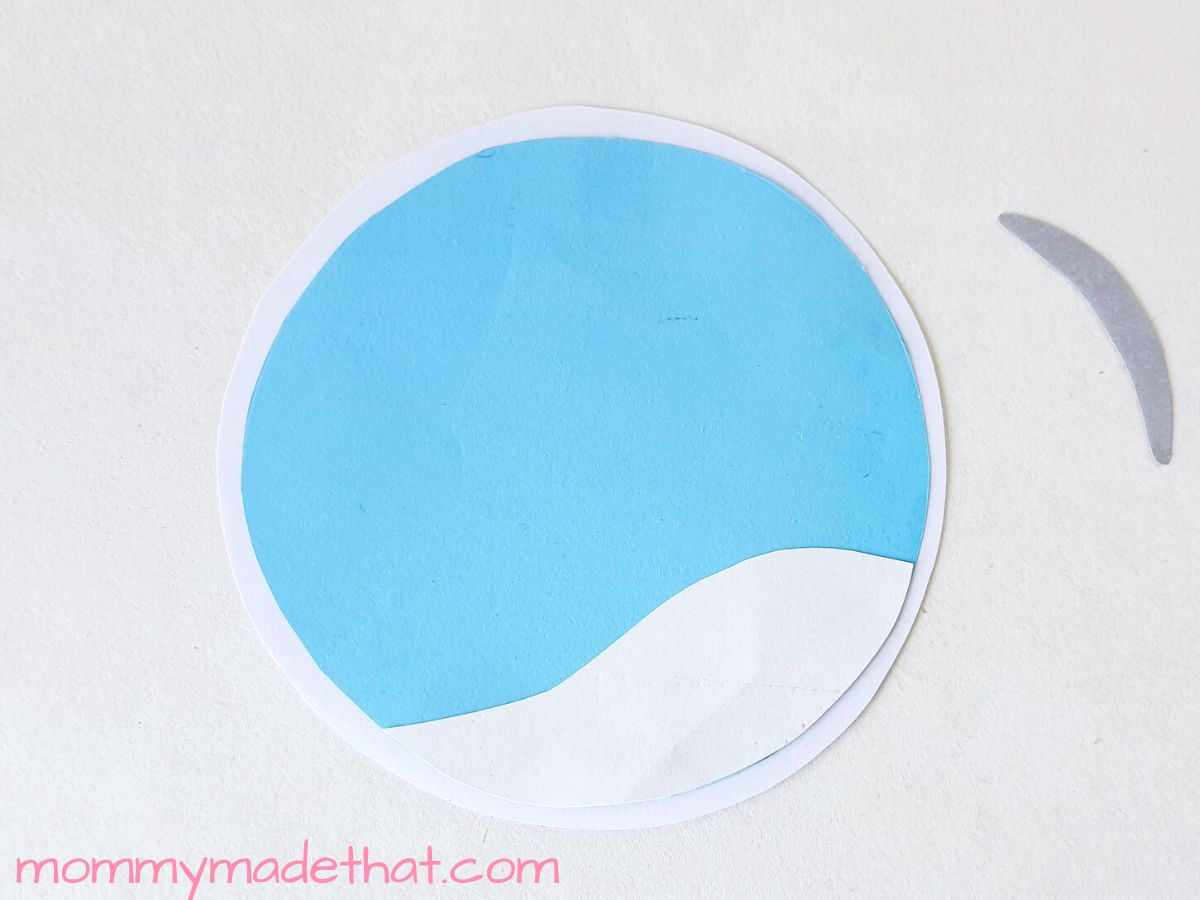
Start by attaching the smaller glass base onto the big one. Then glue the snow to the bottom area of the inner glass base.
Step 3: Attach the Base
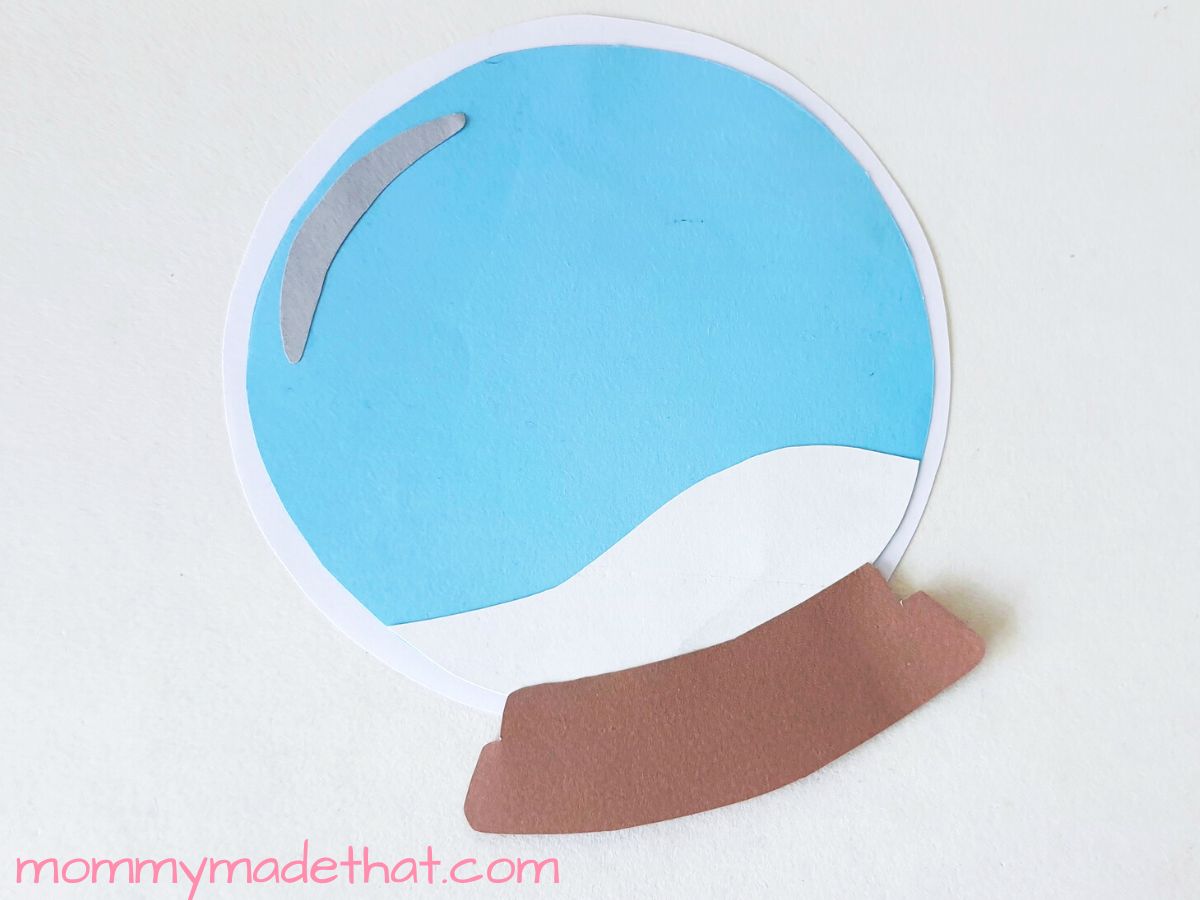
Then attach the curve-shaped cutout (a sparkle on the glass) on a side of the glass base, keeping the round side of the cutout facing outside.
Like the photo shown above.
Step 4: Start Assembling the Tree
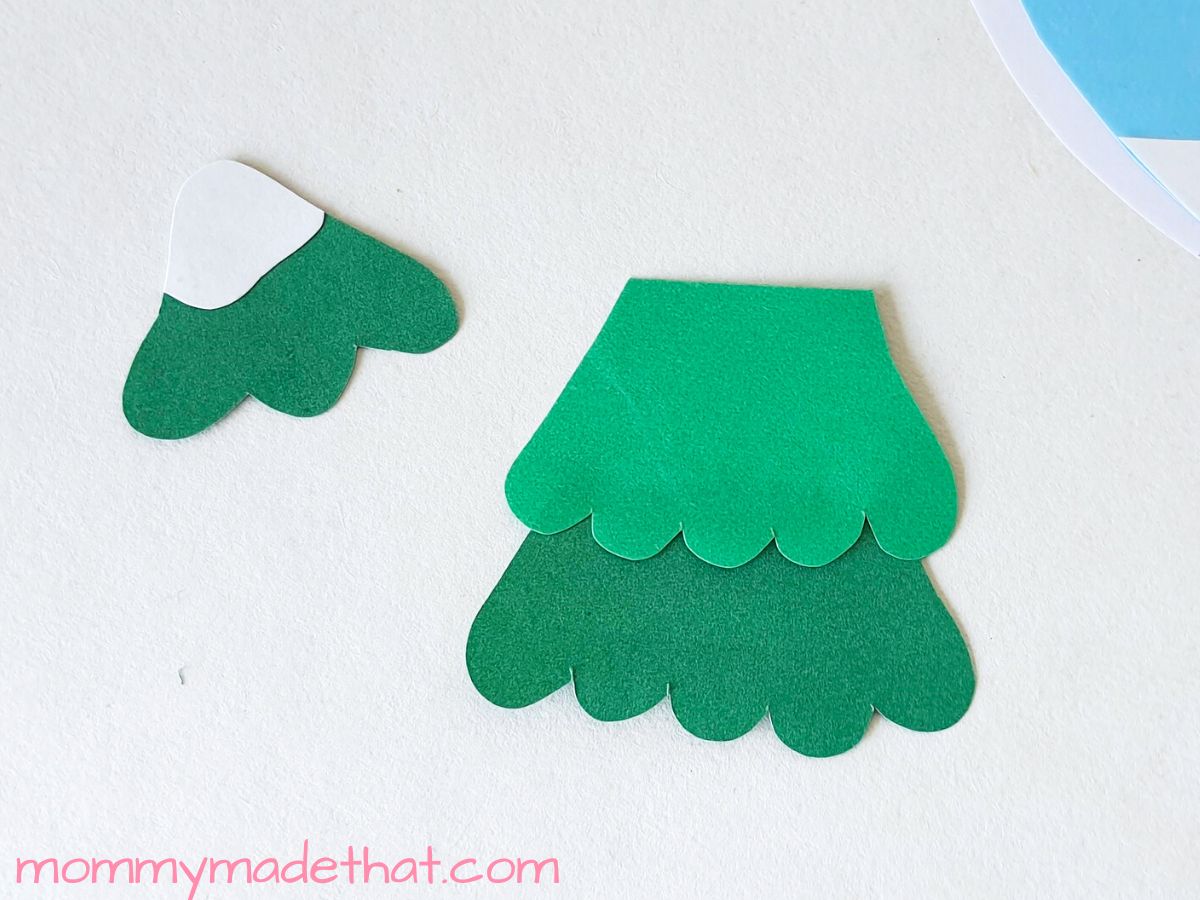
Start gluing the tree pieces together. And the snow piece on the top of the tree.
Step 5: Complete the Tree
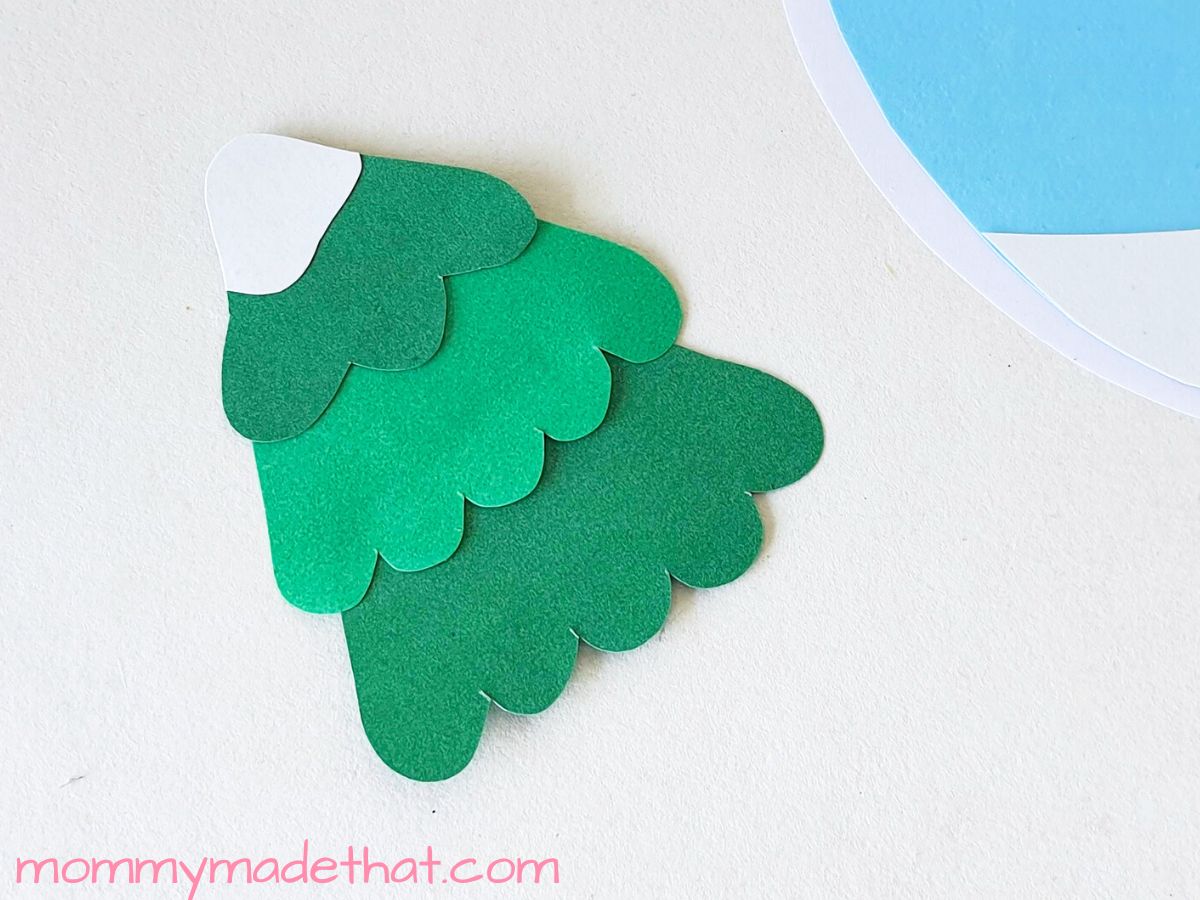
Finish putting the tree together. This will help complete our snowy scene inside the globe.
Step 6: Start on the Snowman
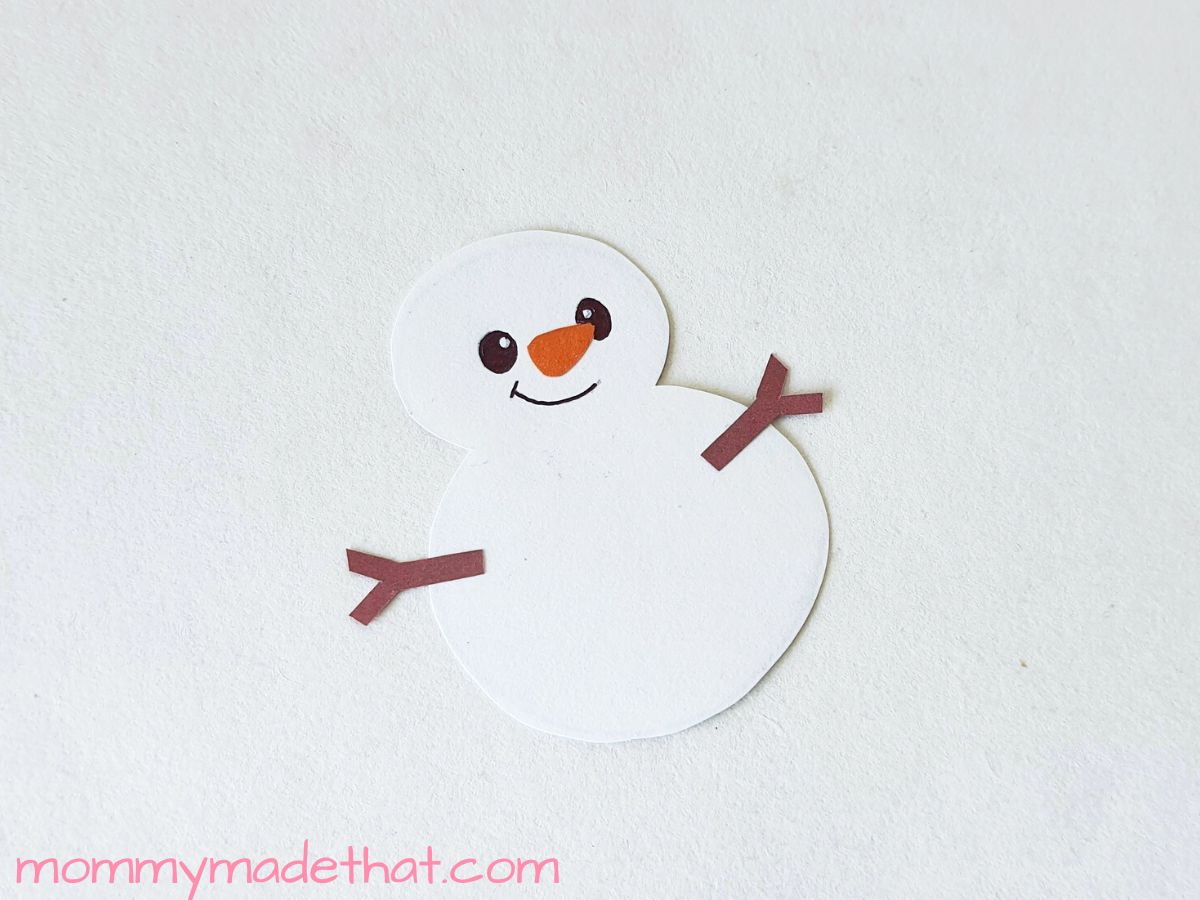
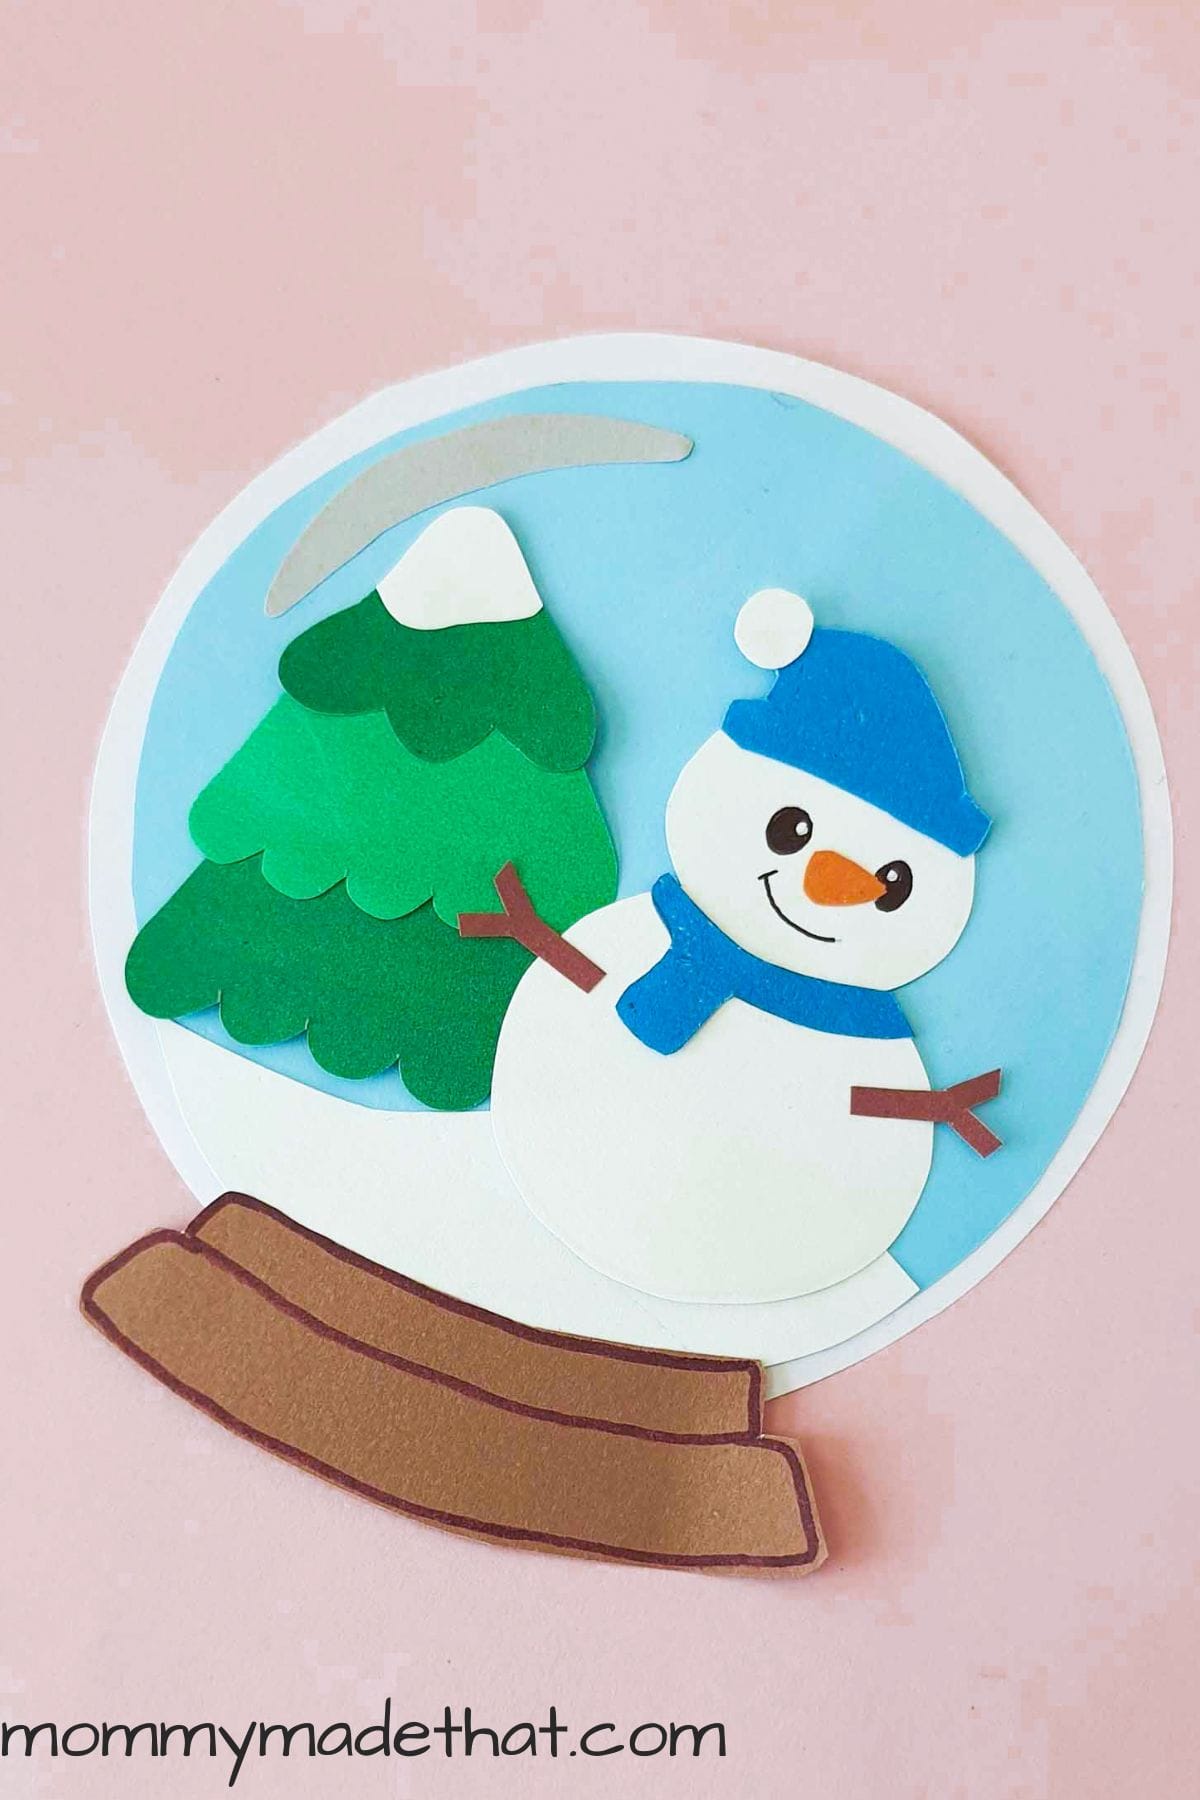
Grab the snowman pieces and glue the 2 stick hands on each side of the snowman.
Add his carrot nose and use a black marker or pen to draw on a set of eyes and a mouth. We made a cute little smile.
Step 8: Finish the Snowman
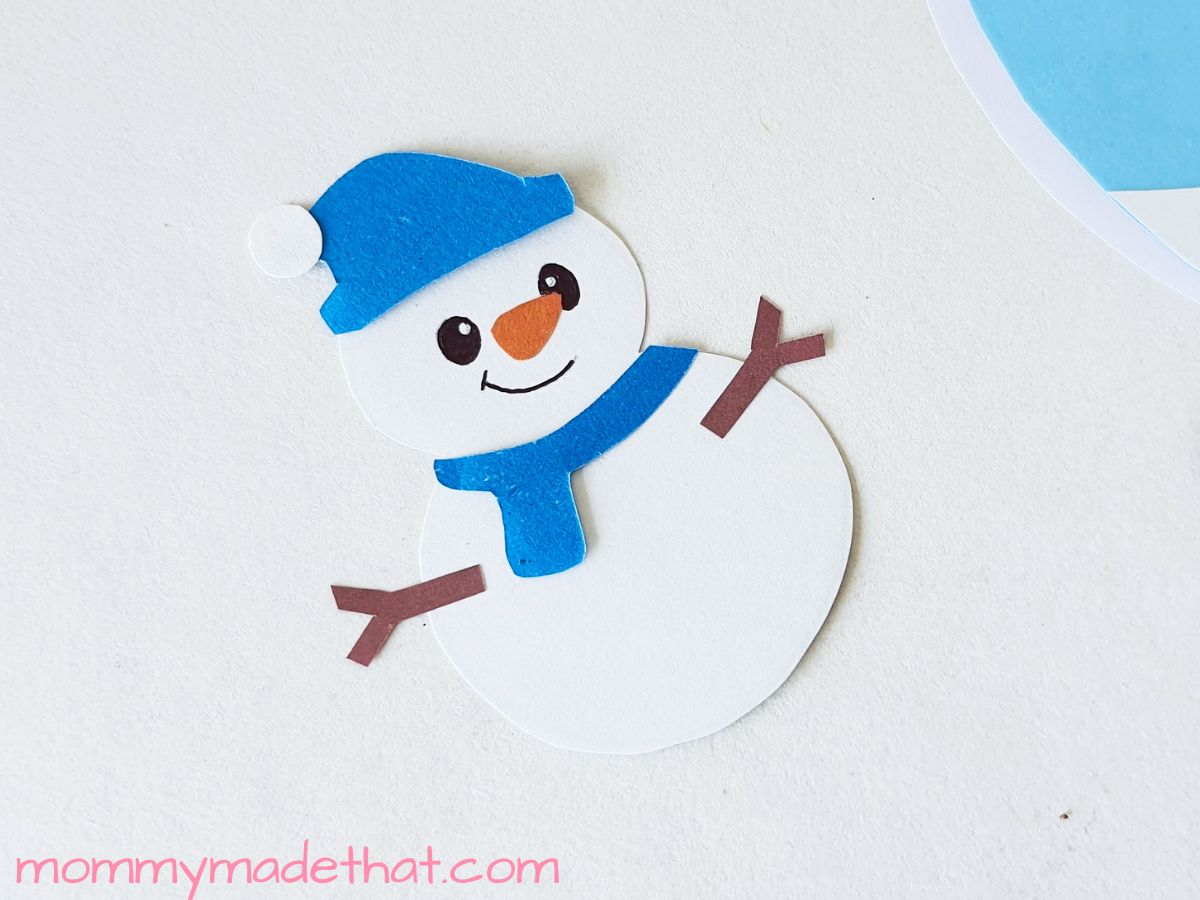
Glue the scarf and hat on the snowman.
Step 7: Start Making the Snow Globe Scene
Going back to your snow globe, attach your tree.
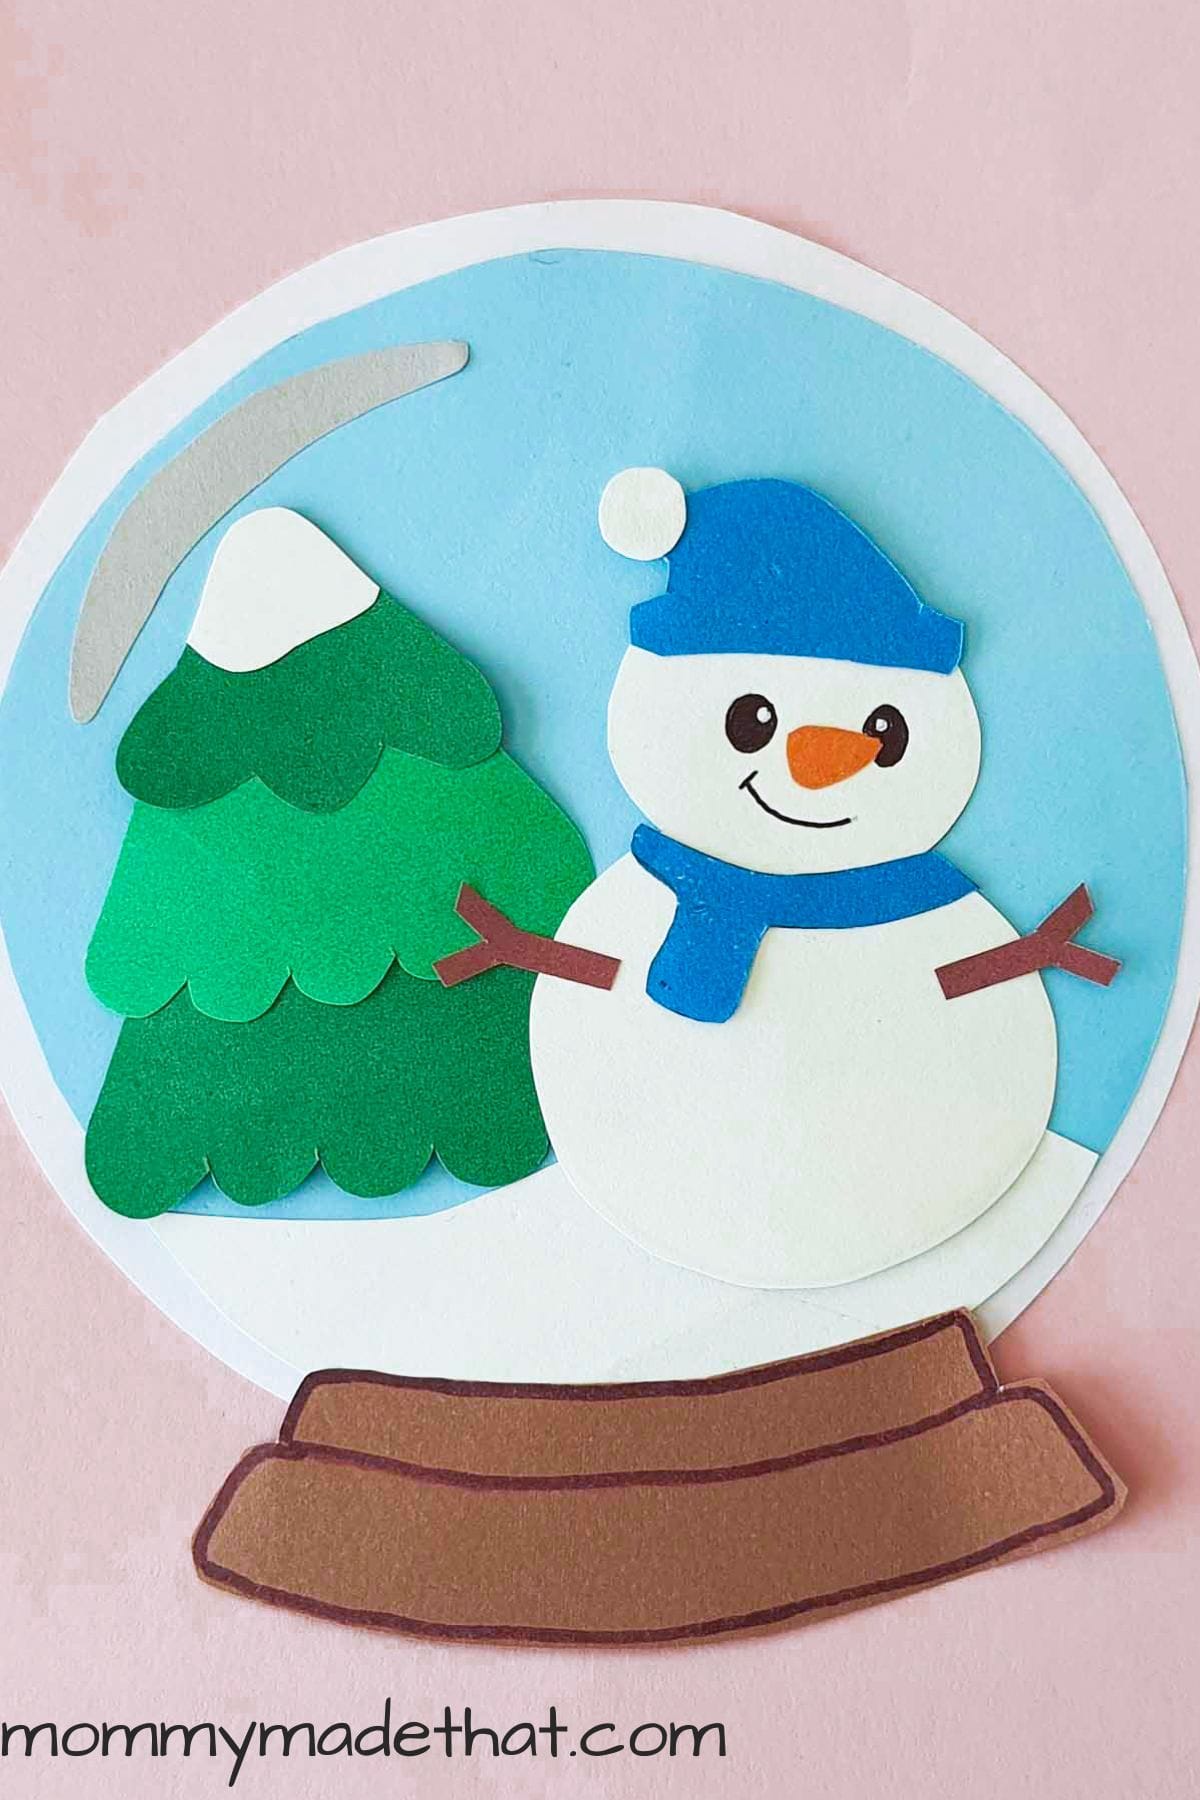
Step 9: Finish the Snow Globe Craft
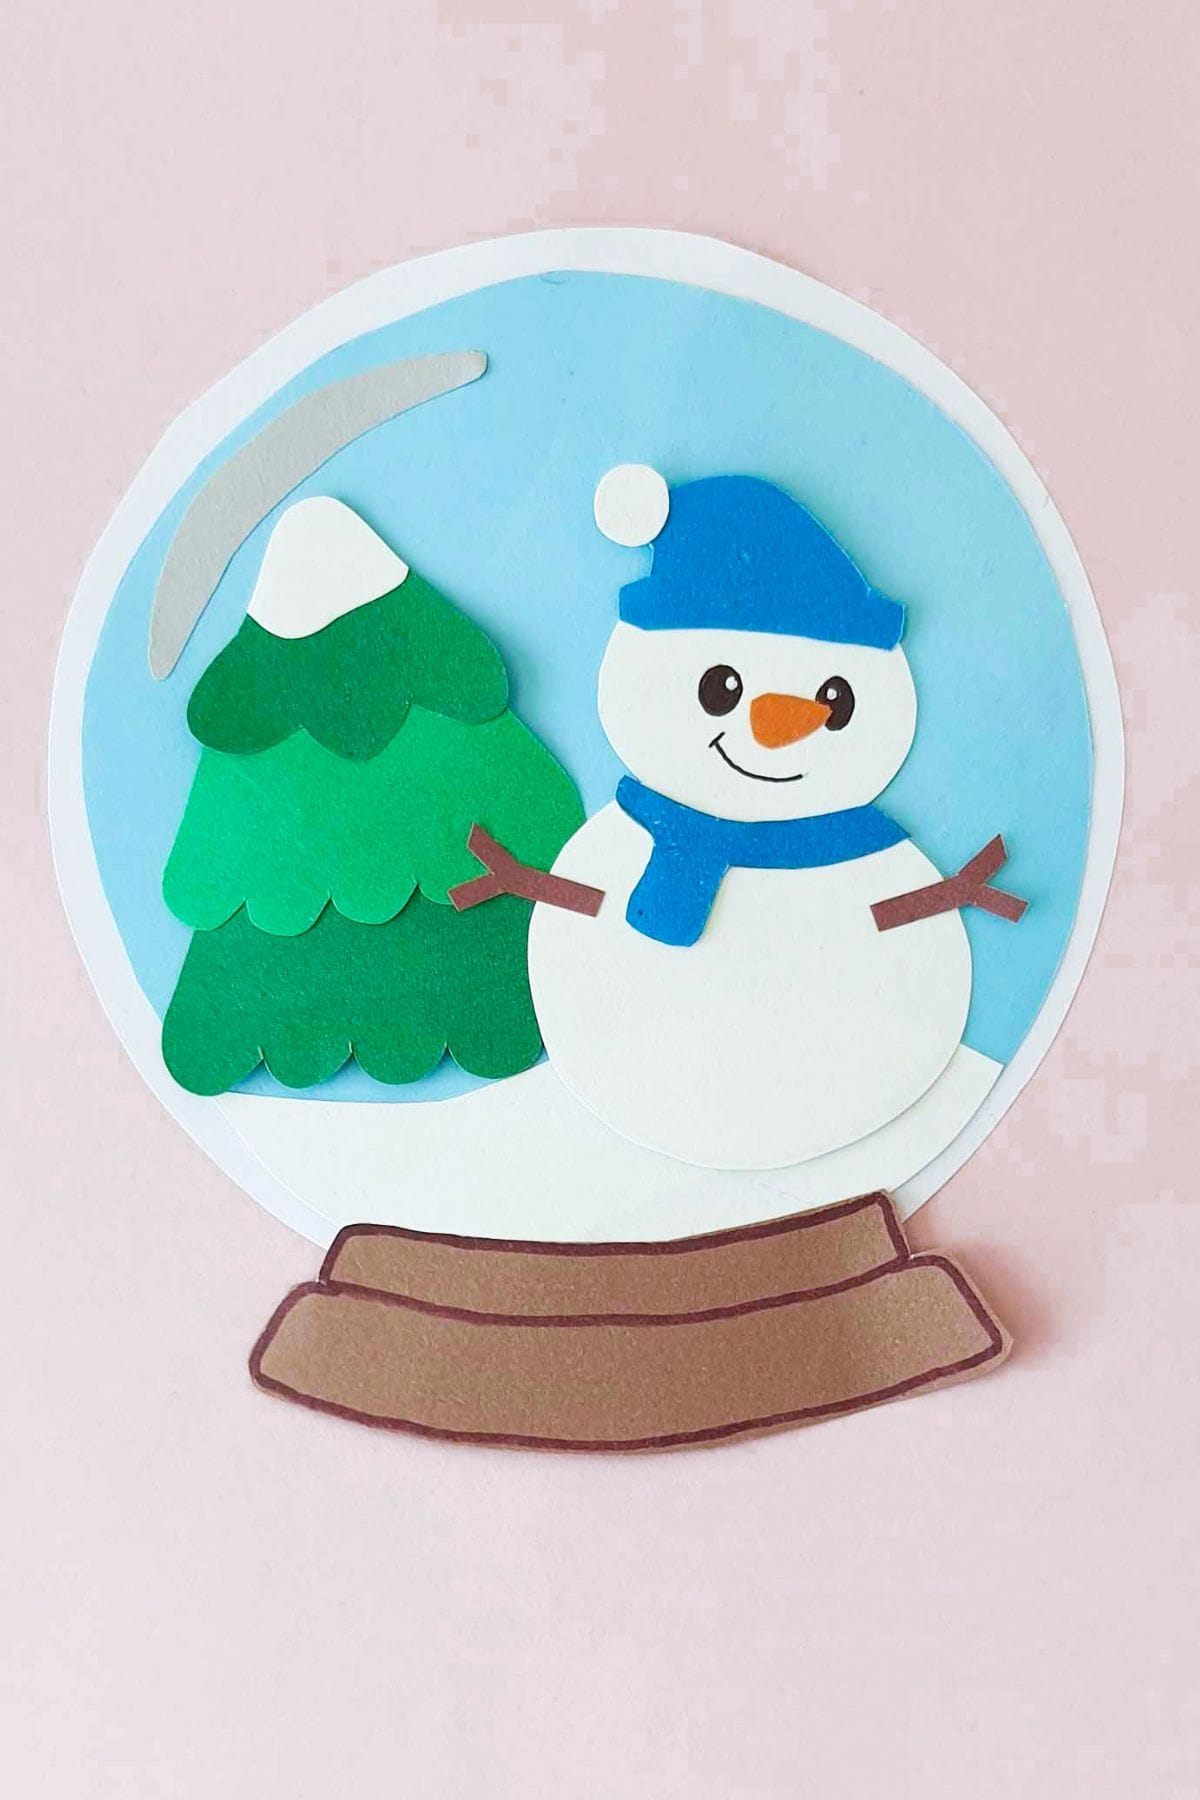
Then place in your snowman in front of the tree. We used some thin markers to add details here and there to our snow globe.
It would also be fun to add some touches like white glitter dots for snow if you have glitter glue on hand.
Isn’t it cute! I just adore this little craft. Make sure to give your little guy a cute snowman name when you’re done.

Paper Snow Globe Craft
This adorable paper snow globe craft is a fun winter craft for kids of all ages.
Materials
- Colored paper
- Snow globe craft template
- Craft glue
Tools
- Scissors
- Pencil
- Black men or maker
Instructions
- Print out the template and cut out all the pieces. Trace the template pieces onto your chosen craft paper colors.
- Start assembling the globe by attaching the smaller glass base onto the bigger one. Then glue the snow toward the bottom.
- Attach the curve shape to the top of the globe, then attach the base.
- Start assembling the tree pieces. Place the snow piece on the very top of the tree.
- Finish assembling the tree.
- Start assembling the snowman by attaching the stick arms to each side. Add his nose and draw on a face.
- Finish the snowman by adding on his scarf and hat.
- Attach the tree to one side of the center of the globe.
- Then attach the snowman to finish the scene. Add any additional cute details you'd like.
Notes
Don't feel limited by just using paper in this craft. Have fun adding any little details to personalize your snow globe scene. Markers, glitter and gemstones would all make super fun ways to customize your craft project.
Grab the Paper Snow Globe Template
To grab our free printable template, put your email in the box below. We’ll send the template straight to your inbox.
This is for personal or classroom use only please, not for commercial use. Thank you!
Our template includes two versions of this snow globe craft. A smaller template and a larger template so you can choose how big you want your snow globe to be.
Even though this is a fun kids craft, I also think this is an adorable craft for adults to make too. These would be gorgeous on a handmade Christmas card or as winter decor for the house.
Have fun making your own snow globes!
Looks very cute.