
How to Make a Paper Rose (With Free Printable Template)
Want to learn how to make a paper rose? This paper rose tutorial provides step-by-step instructions for creating a beautiful and realistic looking rose using paper.

Looking to add a touch of timeless elegance to your home or special event? Look no further than the charming and versatile DIY paper rose!
With its delicate petals and stunning design, a well-made paper rose can add a touch of sophistication to any space or occasion. But don’t worry, you don’t need to be a skilled crafter to create one of these beauties.
There are lots of fun and easy paper flower crafts that require minimal supplies and produce pretty paper flowers!
With this step-by-step tutorial, anyone can master the art of crafting beautiful paper roses. Just be sure to take your time and follow the instructions carefully, and soon enough you’ll have a one-of-a-kind decoration that’s sure to impress.
Materials Needed
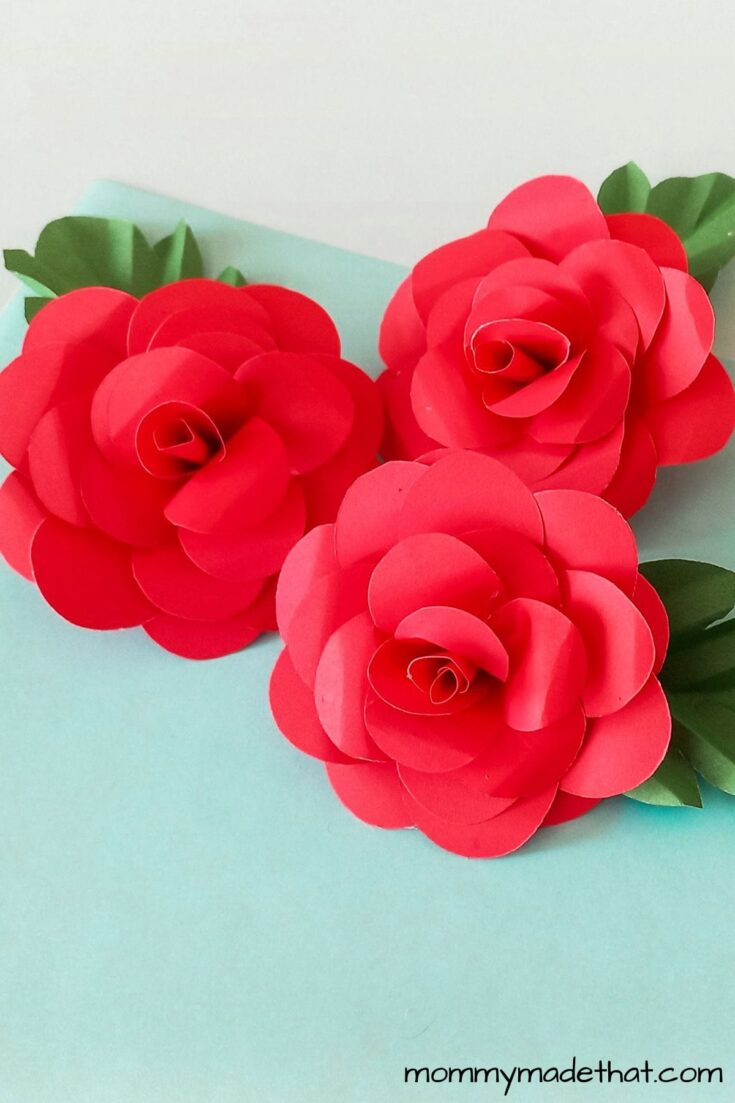
Colored cardstock or thick craft paper: While you could use thinner paper, thick paper will give your roses way better structure. You can use any color you’d like for your roses. We choose red paper for the roses and green paper for the leaves.
Paper rose template: You can grab it for free at the end of this tutorial.
You’ll also need some basic craft supplies like:
- Pencil
- Scissors
- Craft glue
- Black marker
How to Make a Paper Rose
Start by printing and cutting out the template patterns. Trace the patterns onto your selected craft or cardstock paper and cut them out.
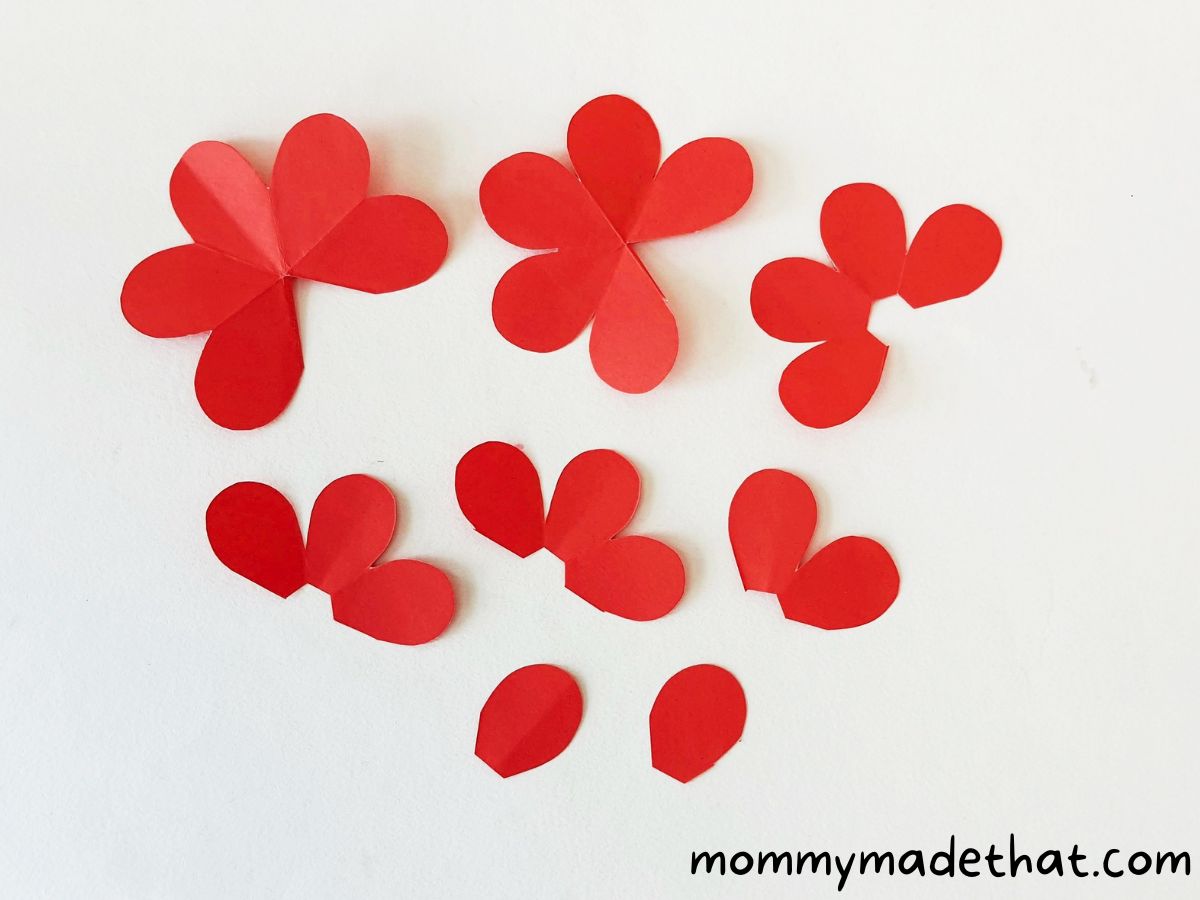
Glue along an open side of one of the 5-petal cutouts. Then join it with the adjacent open side to close the 5-petal cutout.
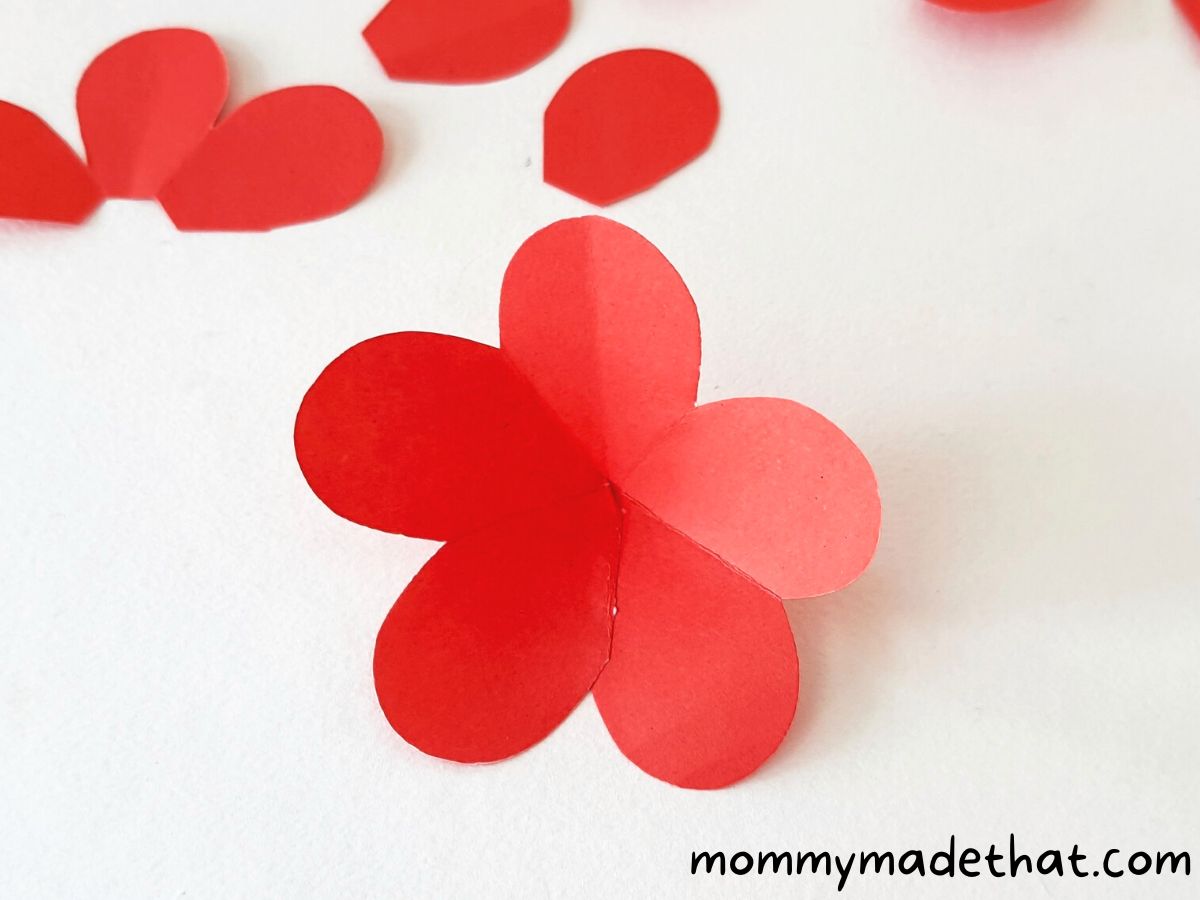
Use a small round object, like a pencil or pen, to curl the round ends of the petal pattern.
Repeat steps 2 and 3 for the other 5-petal cutout so you end up with two flower shapes that look similar to that below.
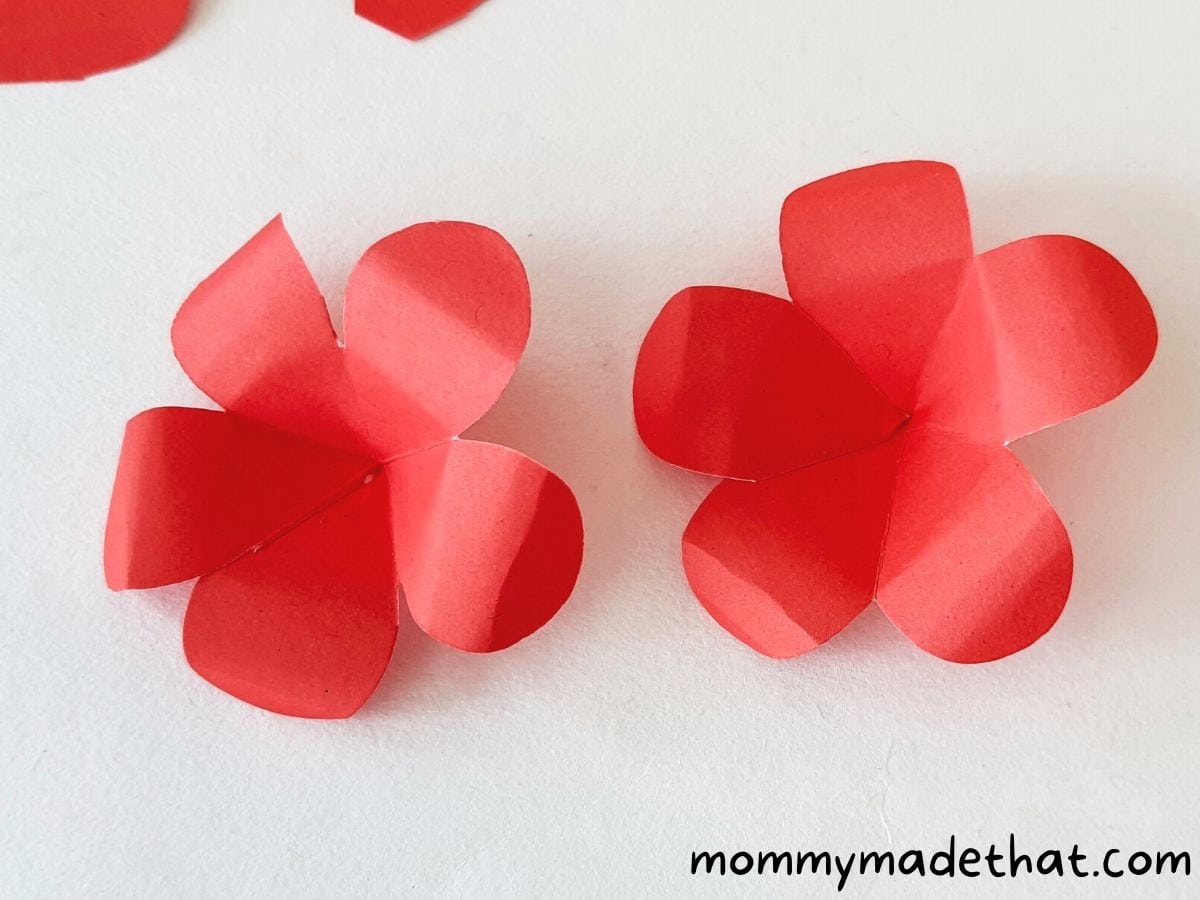
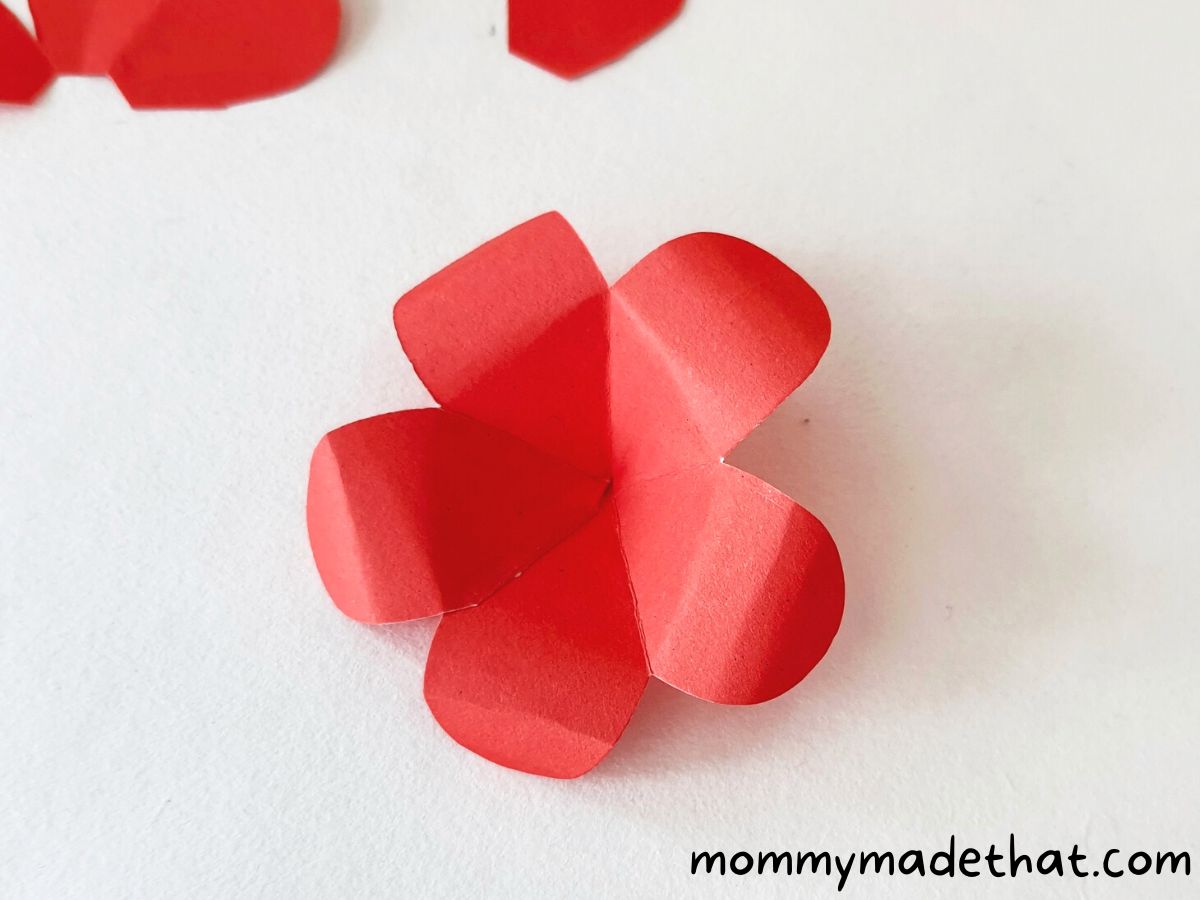
Apply glue along an open side of the 4-petal and both 3-petal cutouts. Then, join the 2 open sides of each cutout to form the 4-petal and 3-petal patterns.
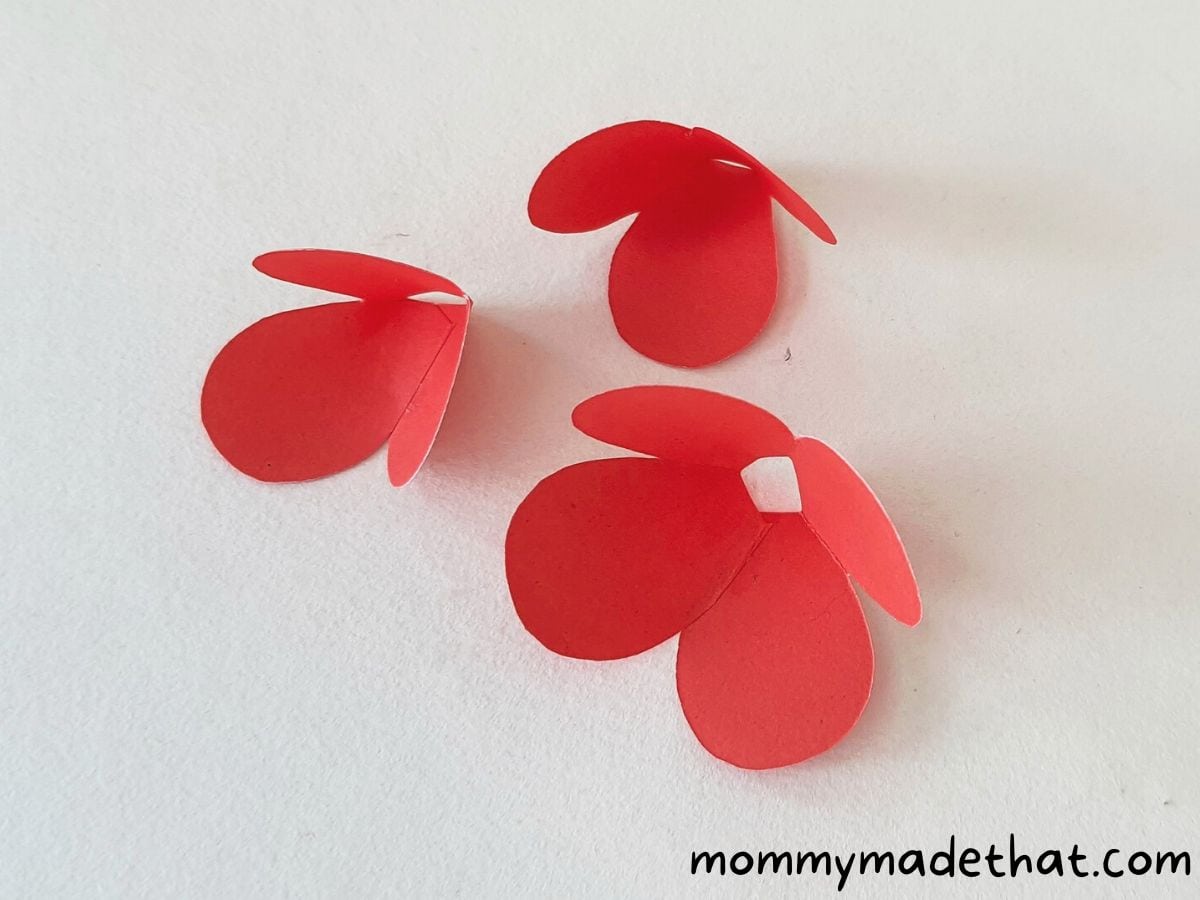
Use the small round object to curl the round ends of the petals on these cutouts as well.

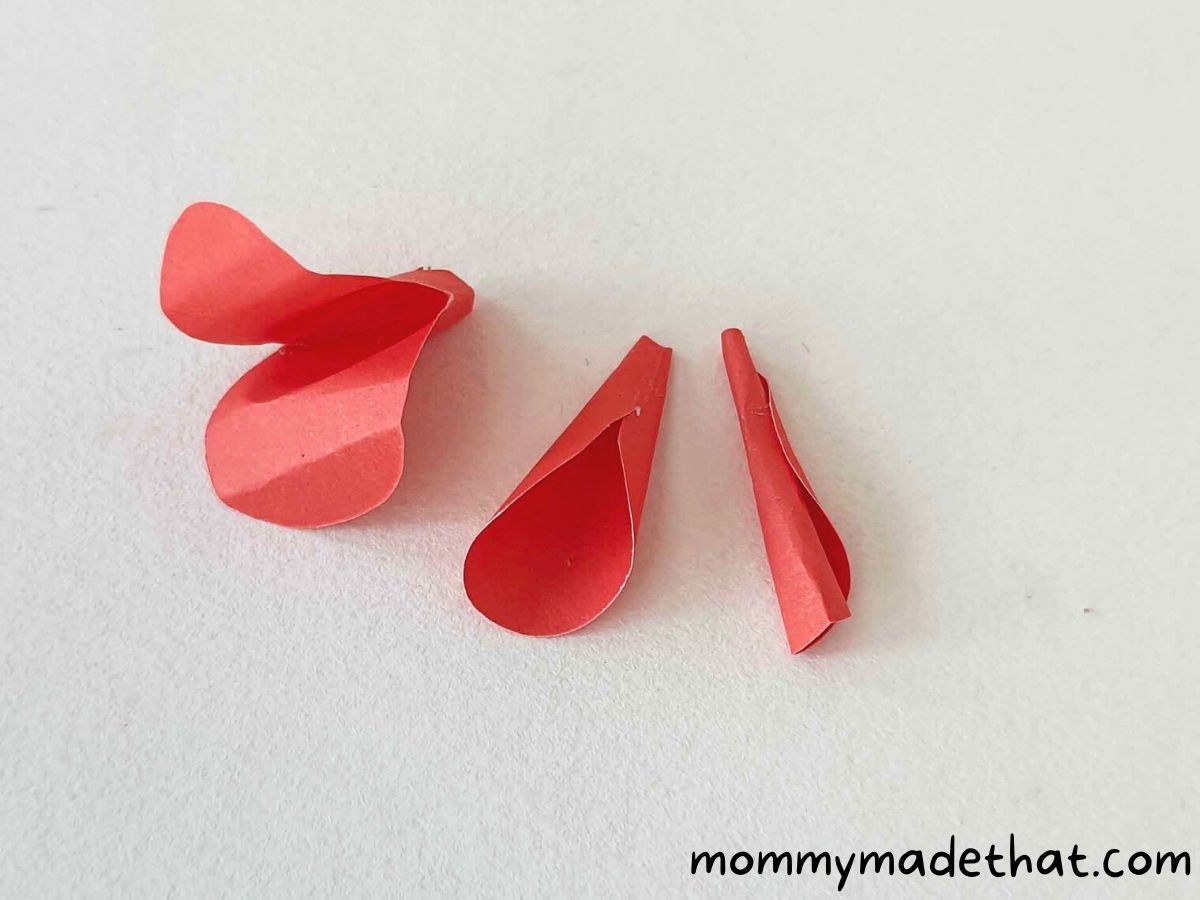
Prepare the 2-petal cutout by rolling it and joining the open ends. Then, take each of the 1-petal cutouts and coil them, securing each one with glue, like shown below.
Once all the petals are prepared, it’s time to start assembling the rose! Apply glue to the center of one of the 5-petal patterns and place the other 5-petal cutout on top.
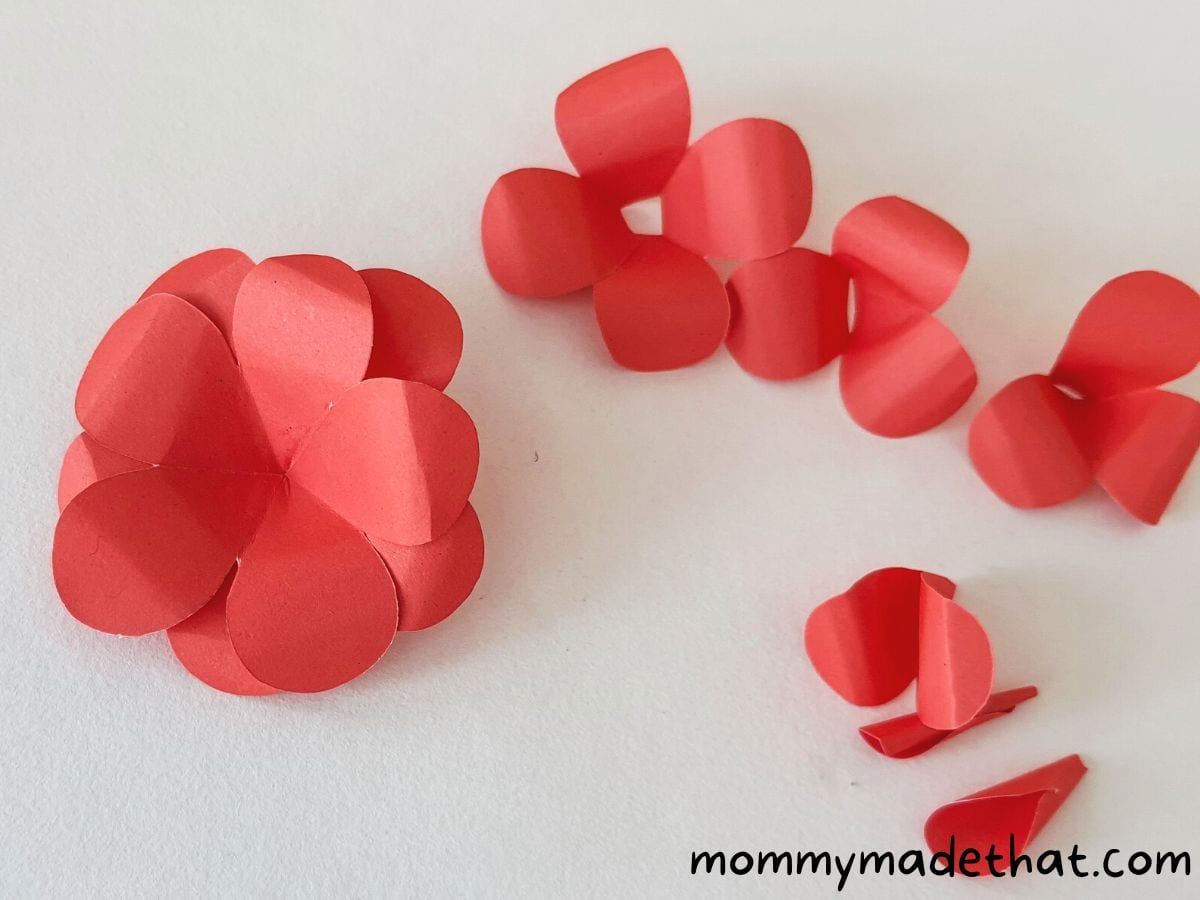
Join the 4-petal pattern next, followed by the bigger 3-petal patterns.
Now, place the small 3-petal pattern in the center of the big one.

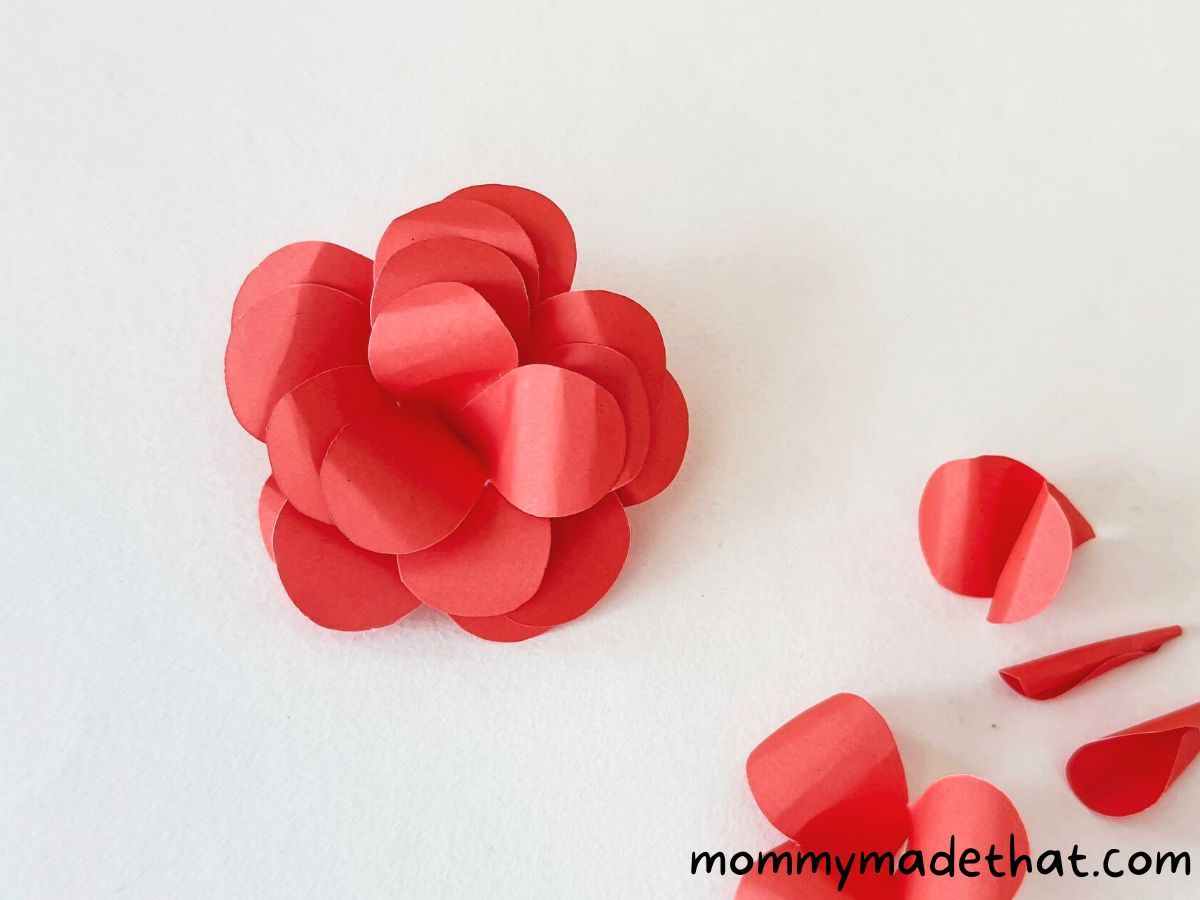
Join the 2-petal pattern next, and then insert the smaller 1-petal coil inside the larger one to create one set of petals.

Finally, complete the rose by joining the set of petals from step 11 inside the 2-petal pattern.
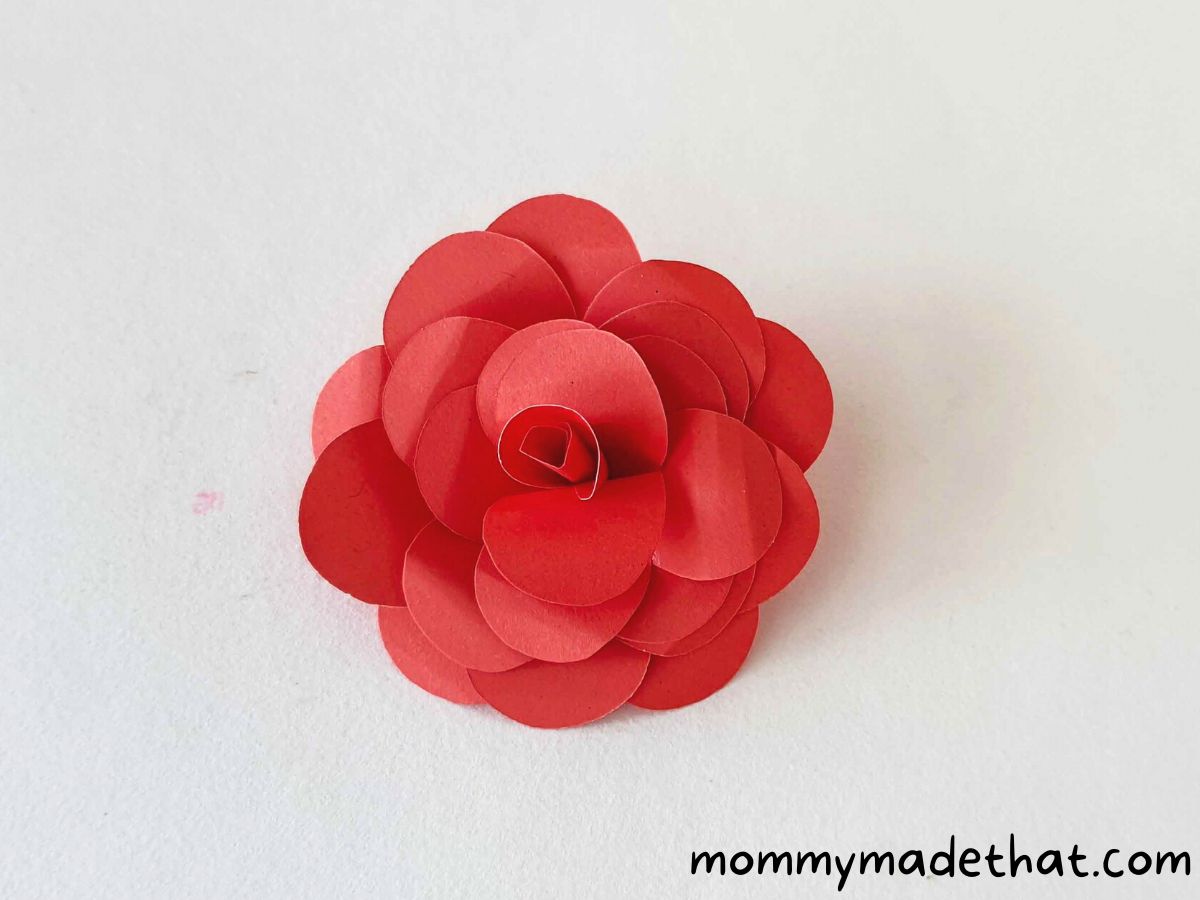
Allow the glue to dry thoroughly before using your finished paper rose for decoration or any other crafting endeavors!
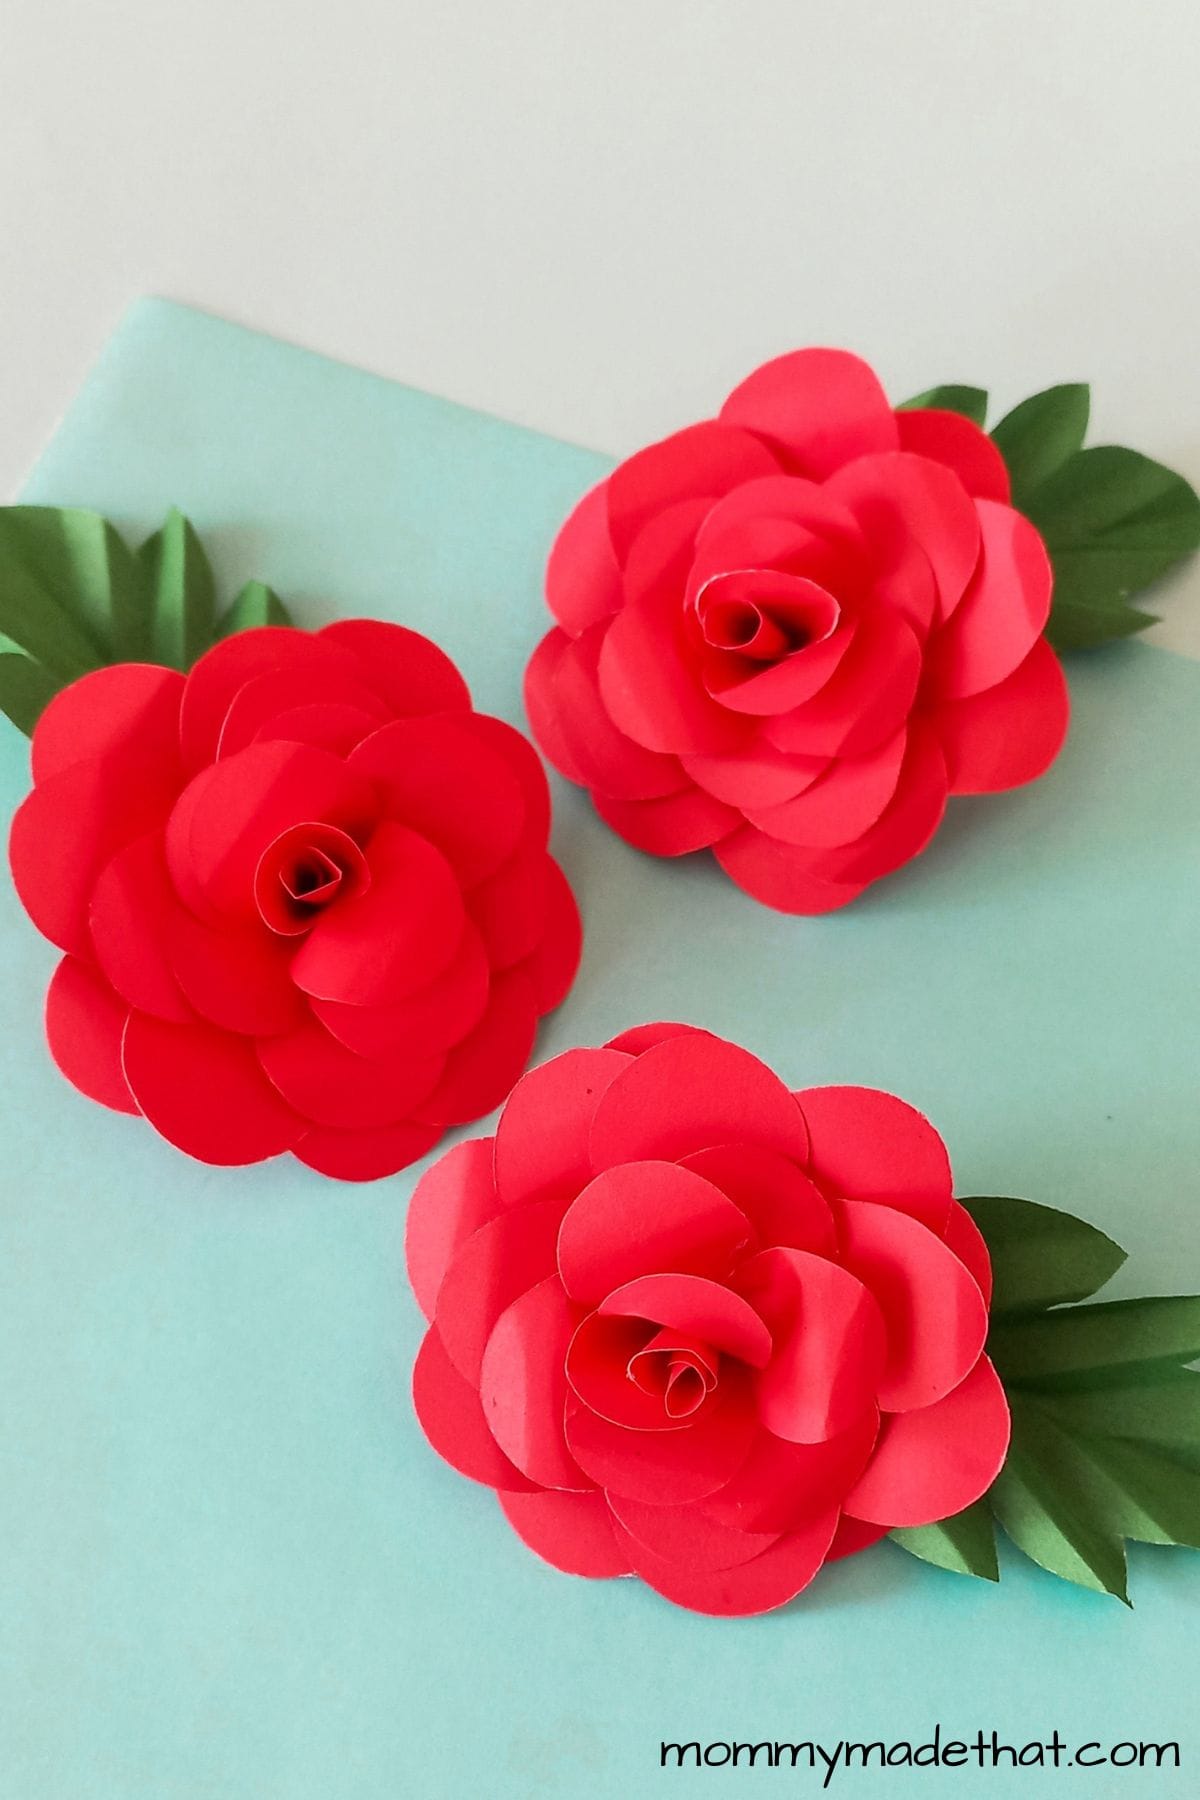
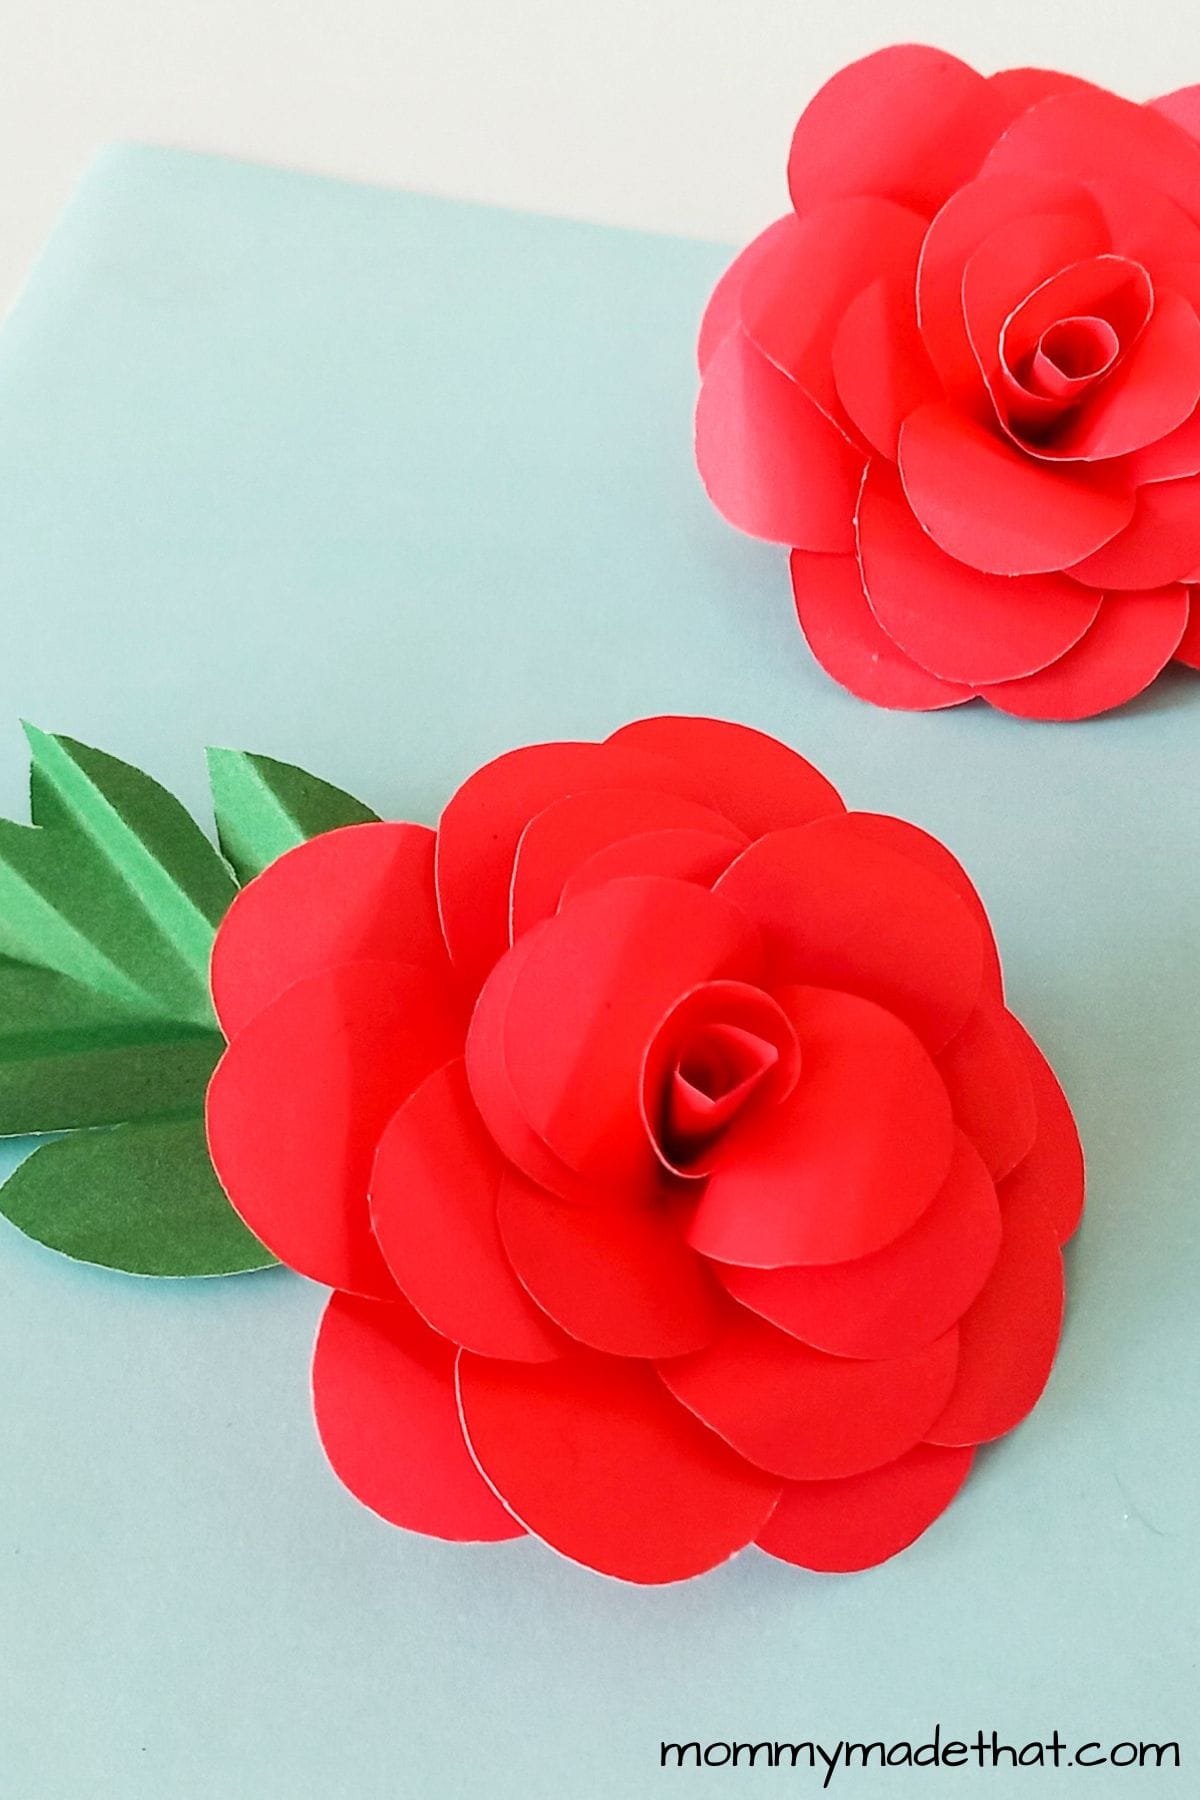
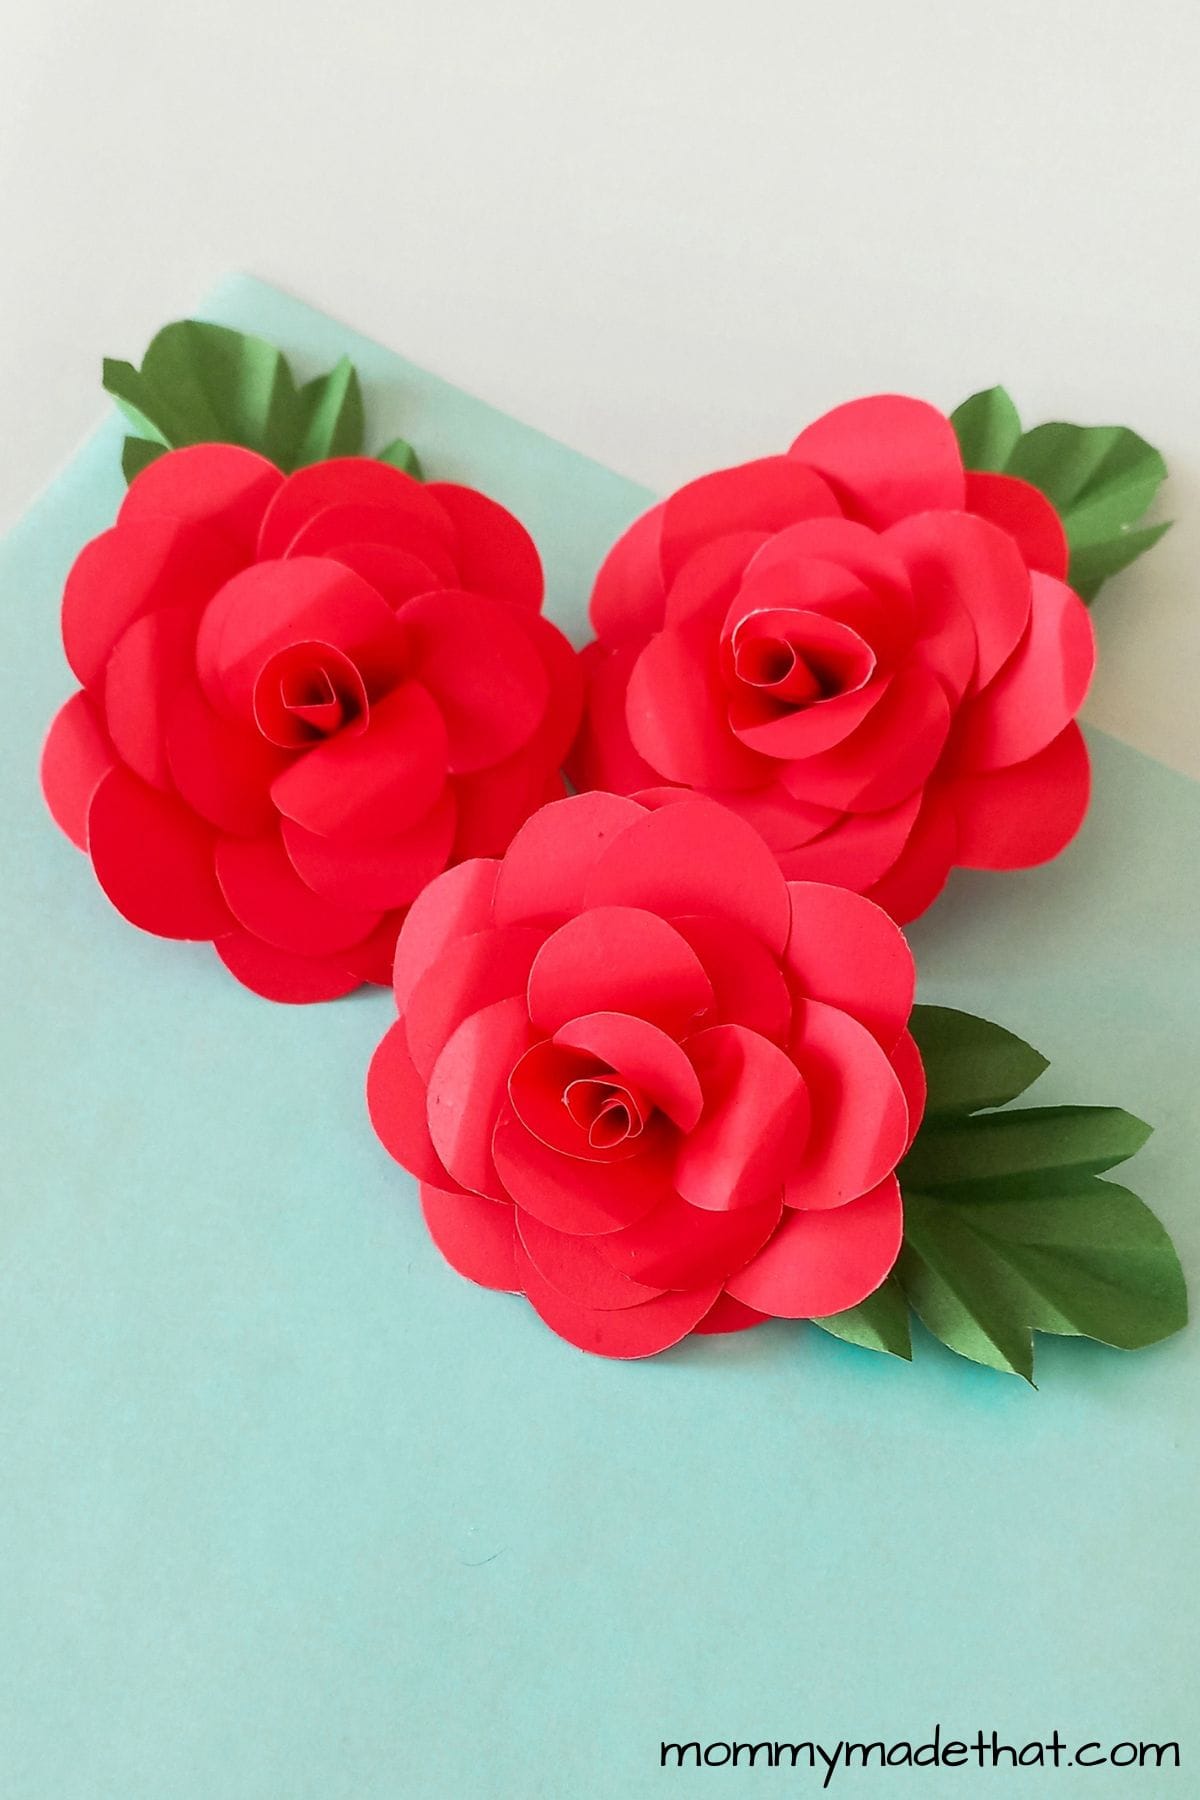
We added big bright green leaves for our paper rose.
Grab the Paper Rose Template
To grab the free printable rose flower template, put your email in the box below.
We’ll send the template straight to you inbox where you can download it and print it out.
Have fun making paper roses from our free template! These are for personal or classroom use only please. Not for commercial use. Thank you!
Paper Rose
Craft elegant paper roses with this easy tutorial! Follow the step-by-step instructions to create stunning decorations perfect for any occasion.
Materials
- Colored craft paper
- Paper rose template
Tools
- Scissors
- Pencil
- Black marker
- Craft glue
Instructions
- Print and cut out the template patterns. Carefully trace and cut the patterns out of craft paper.
- Glue one 5-petal cutout into a circle. Repeat for the other 5-petal cutout.
- Curl the rounded ends of the 5-petal cutouts with a pencil.
- Glue the 4-petal and 3-petal cutouts into circles. Curl the rounded petal ends.
- Prepare the 2-petal cutout by rolling and gluing it into a circle. Coil the 1-petal cutouts and secure with glue.
- Glue two 5-petal circles together for the center. Add the 4-petal, large 3-petal, and small 3-petal circles.
- Add the 2-petal circle. Insert the coiled 1-petal circles to form petals.
- Glue the petals into the 2-petal circle to complete the rose.
- Allow the glue to dry before using or displaying the paper rose.
Notes
Thicker craft paper or cardstock will produce better roses
We how you enjoyed learning how to make a paper rose! It’s way easier than it seems.
And I think you’ll love turning paper into real looking roses just as much as we did.
So grab some craft paper and get started making your own roses.


awesome
awesome crafts