Peacock Bookmark Craft (With Free Printable Template)
Today we are making this fun peacock bookmark craft. It may be one of my favorite DIY bookmark crafts for kids. But I must confess, even as an adult, I’m loving these guys!
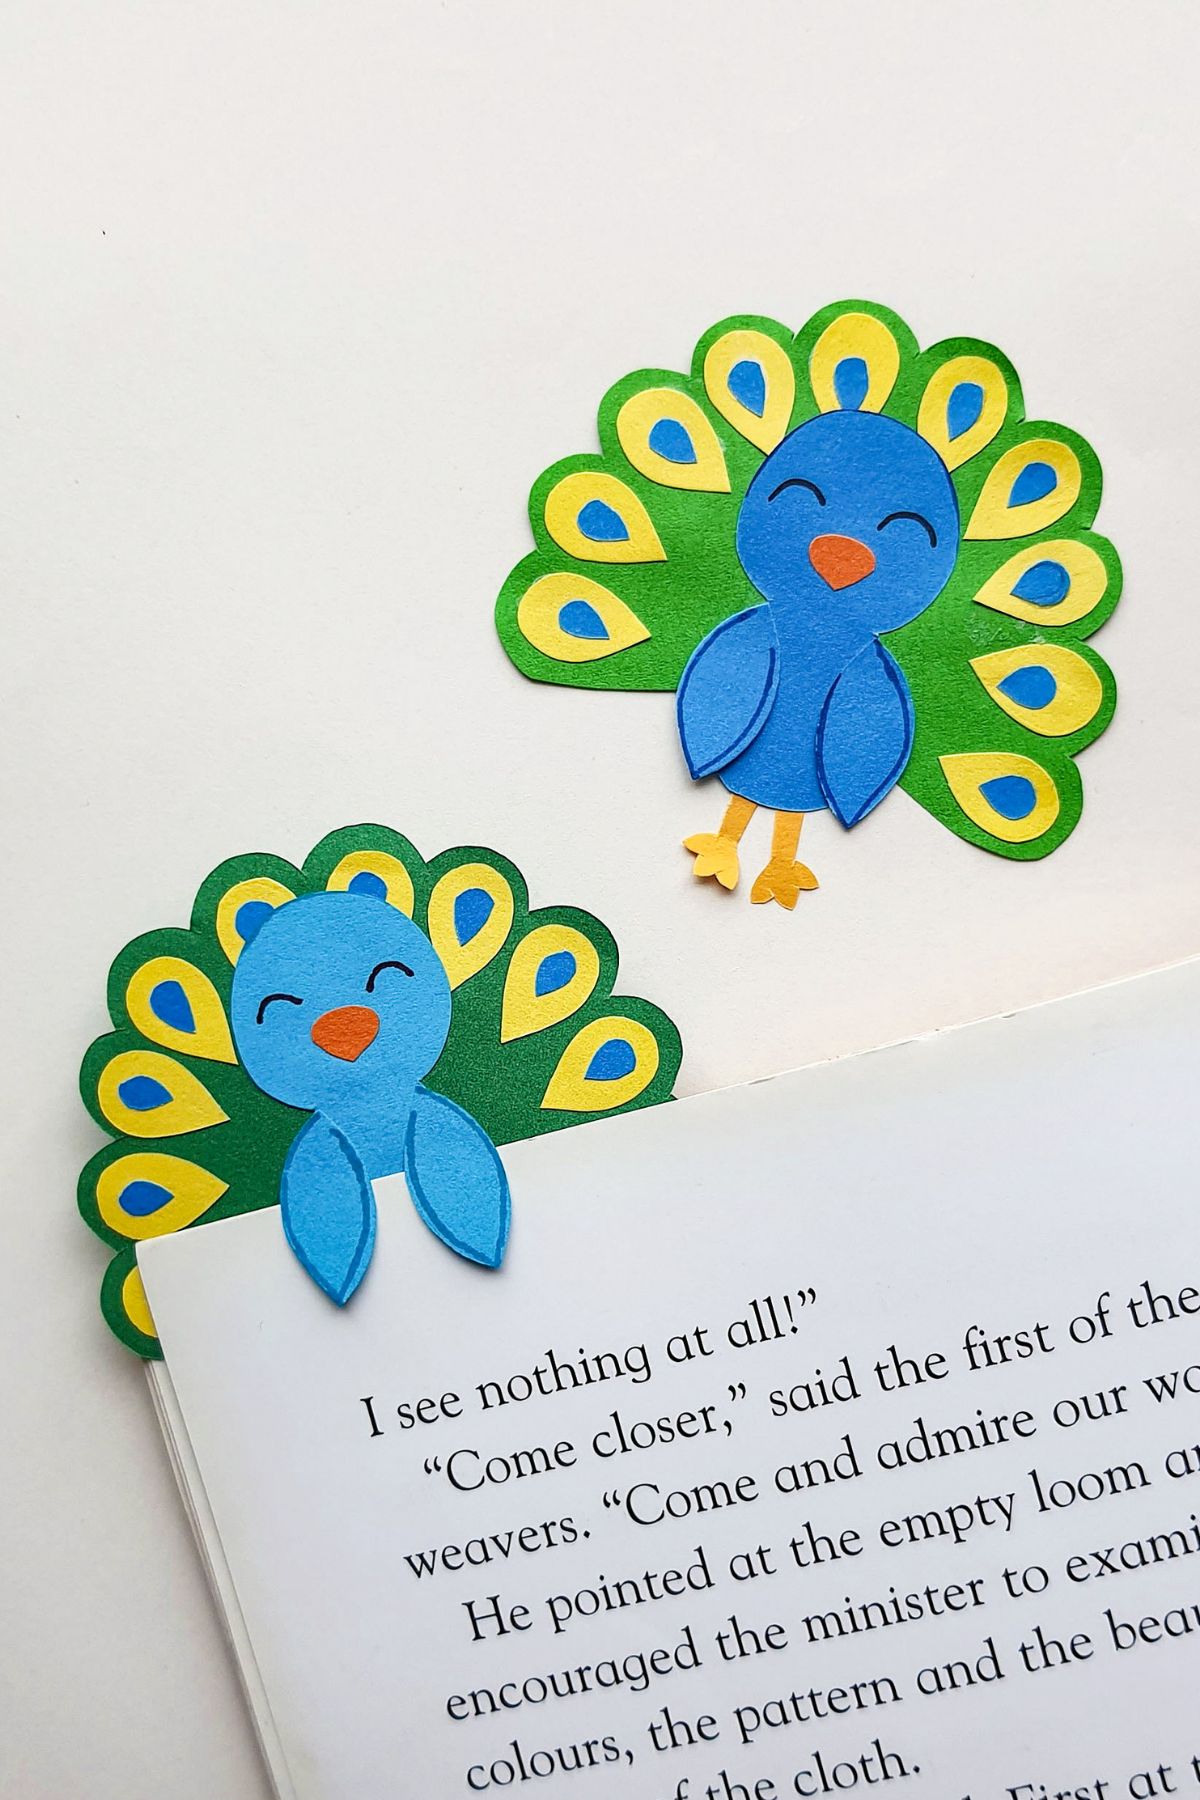
Peacocks are some of the most beautiful animals in the world, and now you can bring a little bit of that beauty into your life with this fun peacock bookmark craft.
This project is perfect for kids of all ages, and it’s a great way to add a little bit of personality to your book collection.
With just a few supplies, you can create a bookmark that is both unique and stylish.
So, gather up your materials and get ready to craft!
Table of Contents
Materials Needed
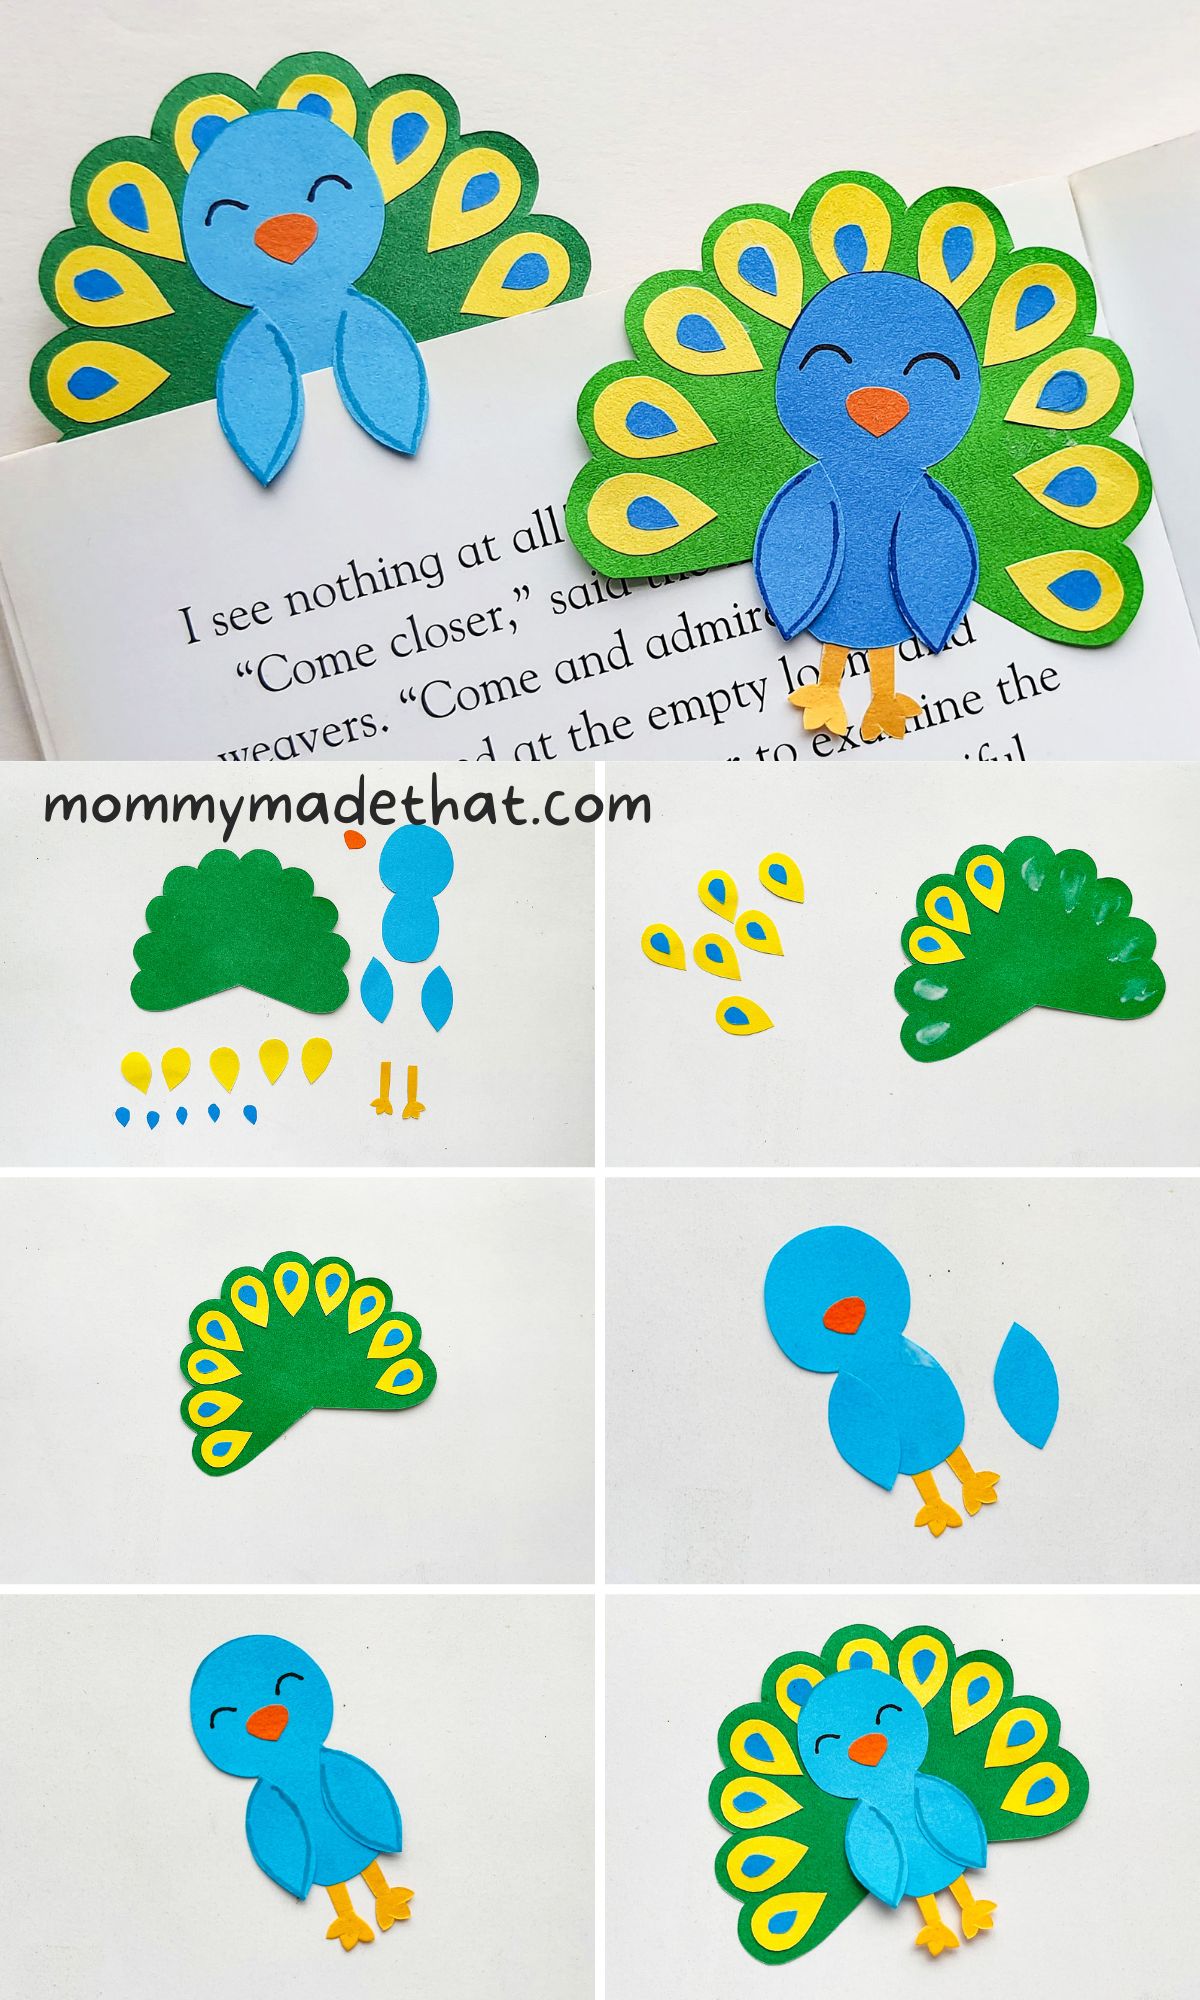
Peacock bookmark template: You can find it at the bottom of this post.
Colored craft papers: We used various colors, like blue for the body, green for the tail feather base, orange for the beak, yellow for the legs and various colors for the feather accents.
You’ll also need some basic craft supplies like
- Scissors
- Pencil
- Black marker
- Craft glue
How to Make a Peacock Bookmark
To get started grab the colors of craft paper you’ll be using for your peacock craft.
Then print out the peacock bookmark template. Trace and cut out all the different pieces of the peacock.
The template includes a tail feather base, feather accents, the body base, wings, beak and leg patterns.
Once you have your pieces cut out, attach one small teardrop shape to each of the larger teardrop shapes.
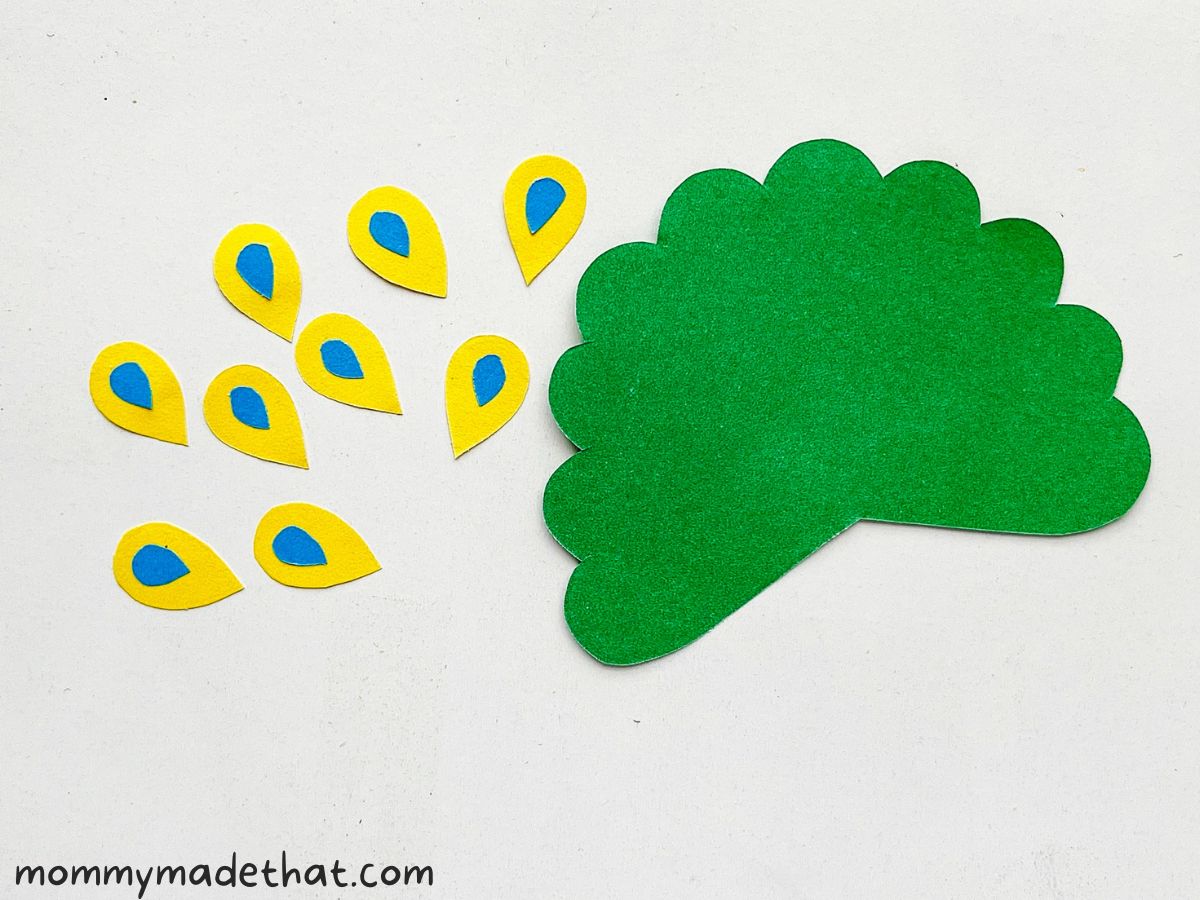
Now attach the tear drop pieces to the tail feather base.
You’ll want to put one shape into each of the scallop edges like shown below.
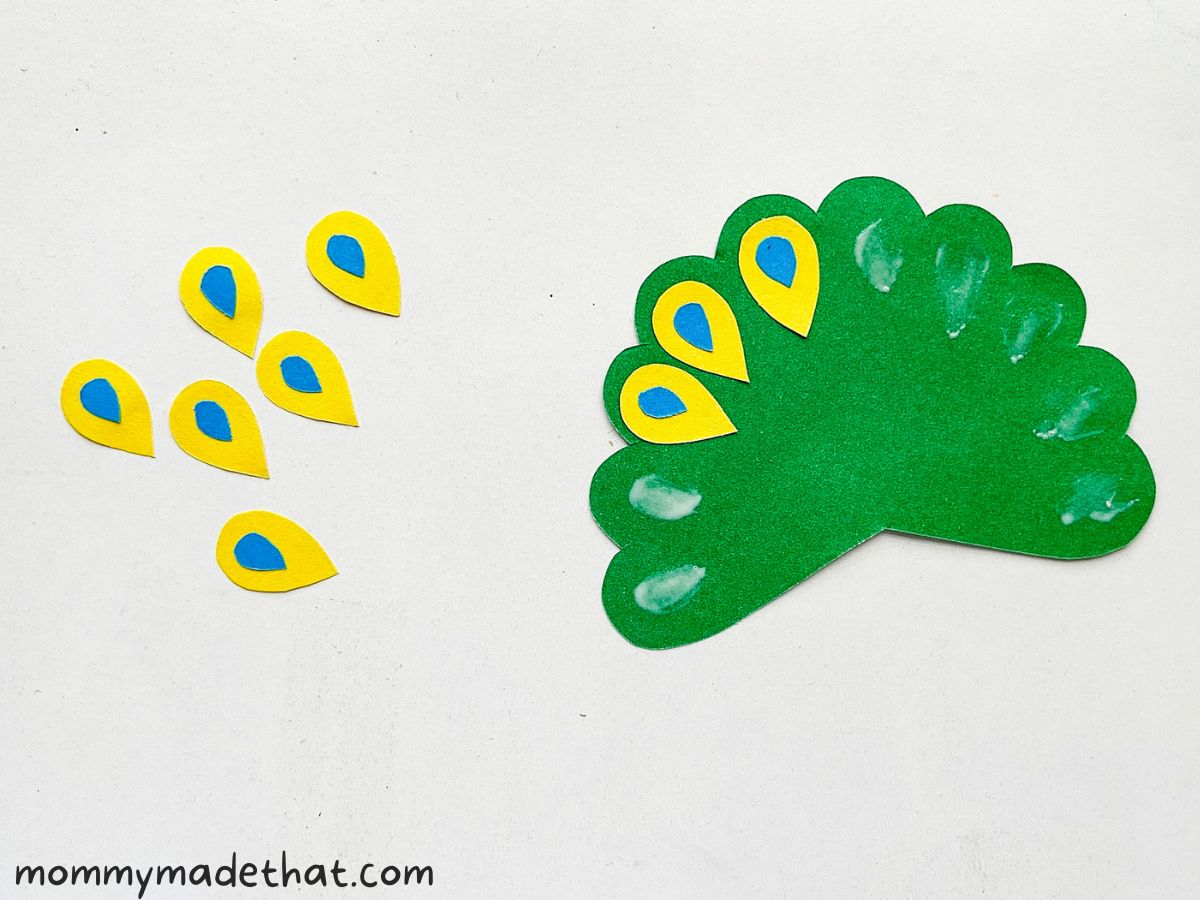
Finish attaching the teardrop shapes to the peacock’s tail.
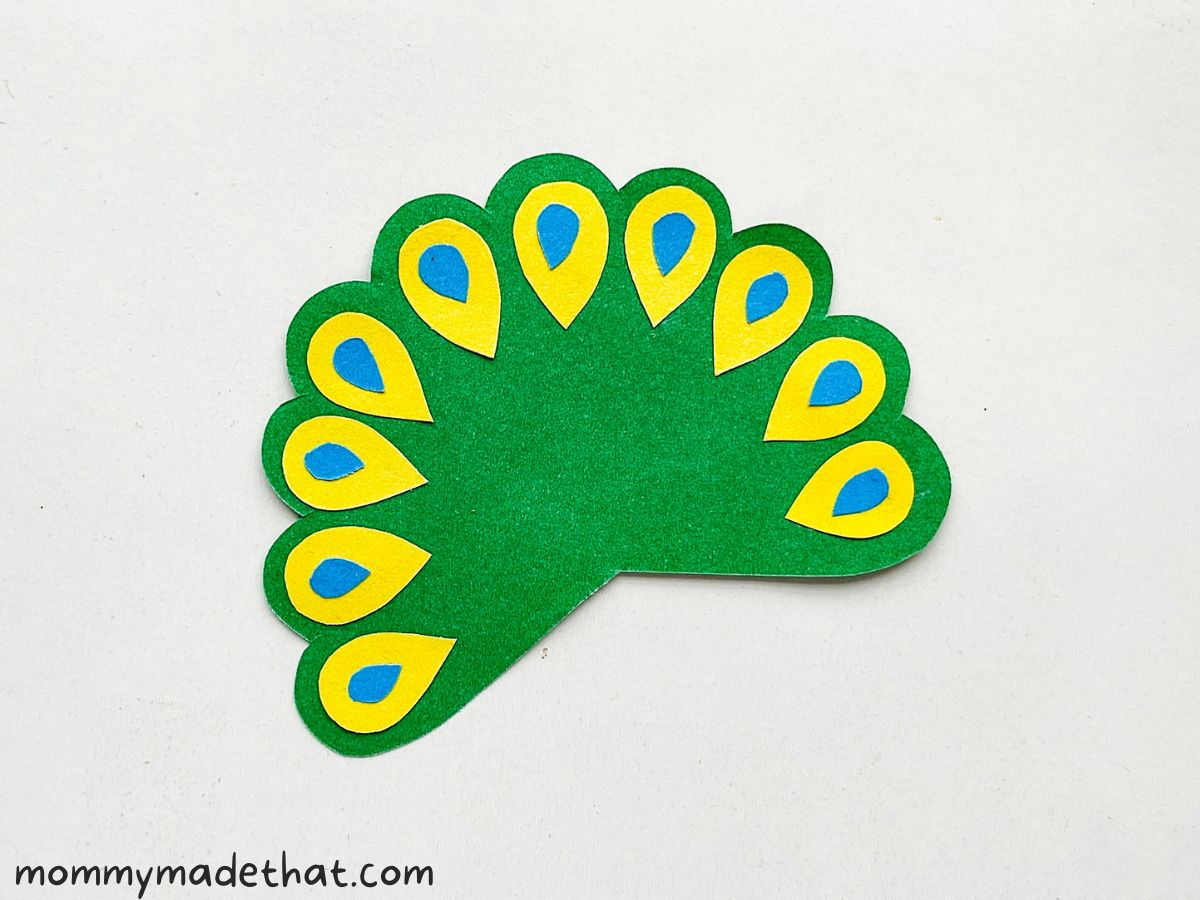
Now set the tail to the side, and let’s start working on the peacocks body.
Attach the leg pieces to the bottom side of the body base.
Then attach the beak to the head of the body.
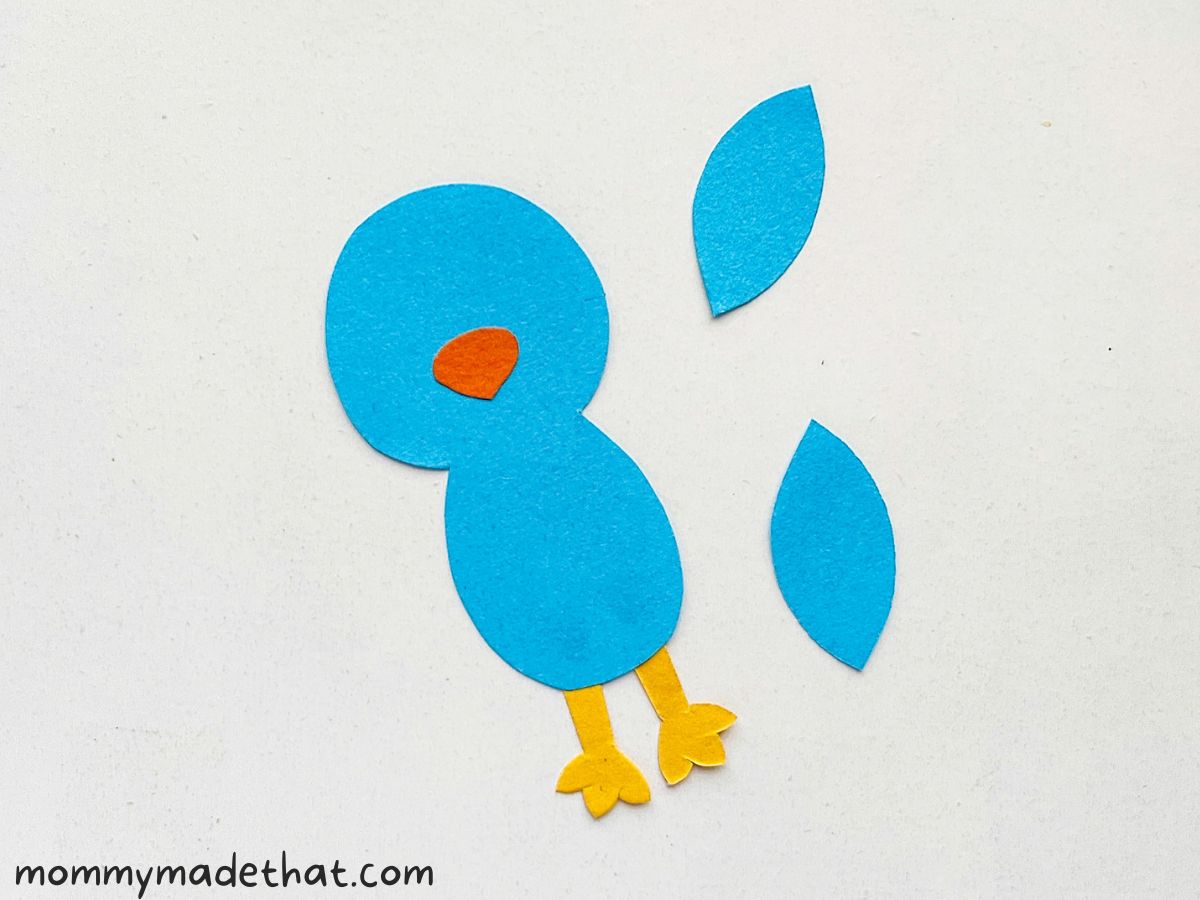
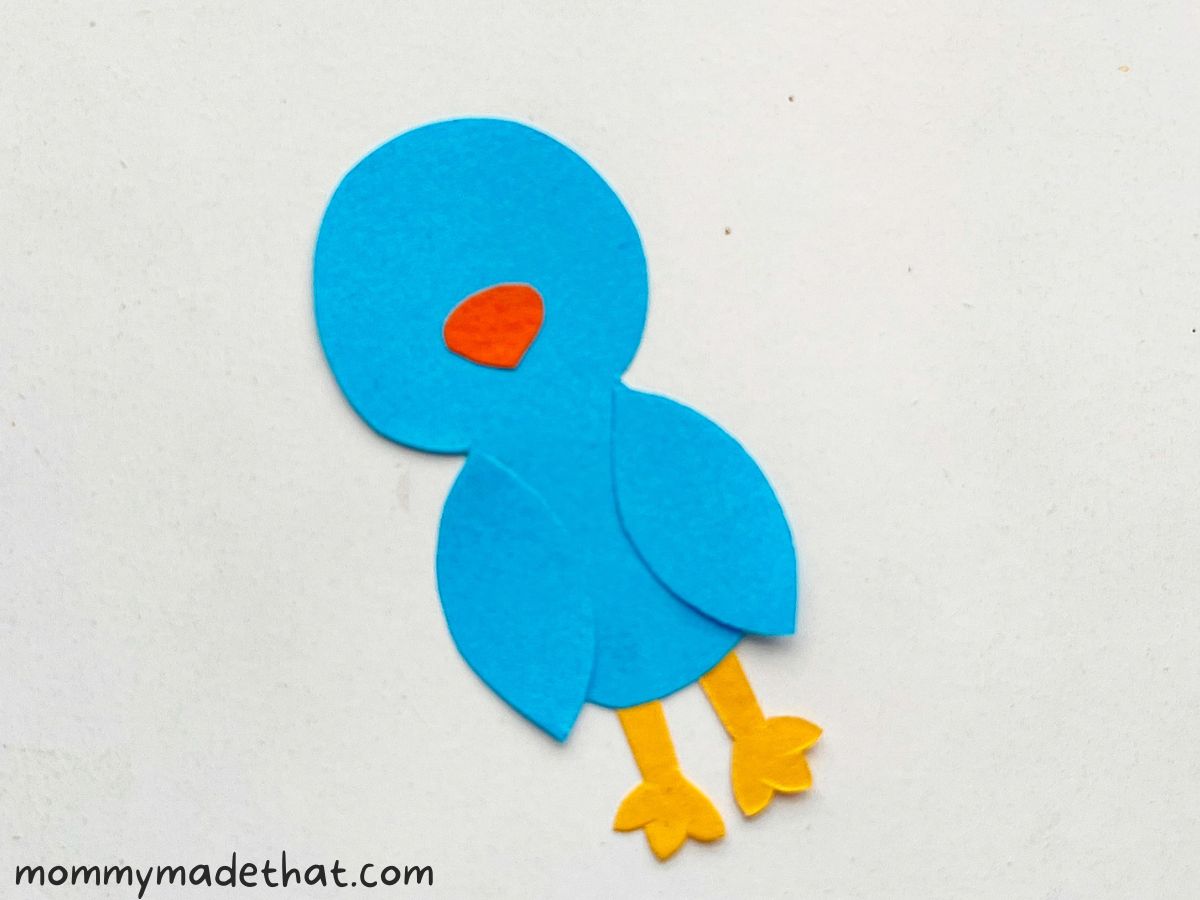
Next, apply glue to one side of the wing cut out and attach the end of it to the side of the peacocks body.
Make sure to only attach the top half of the wing, and let the bottom part be free from glue. (This will be what holds the pages of the book later.)
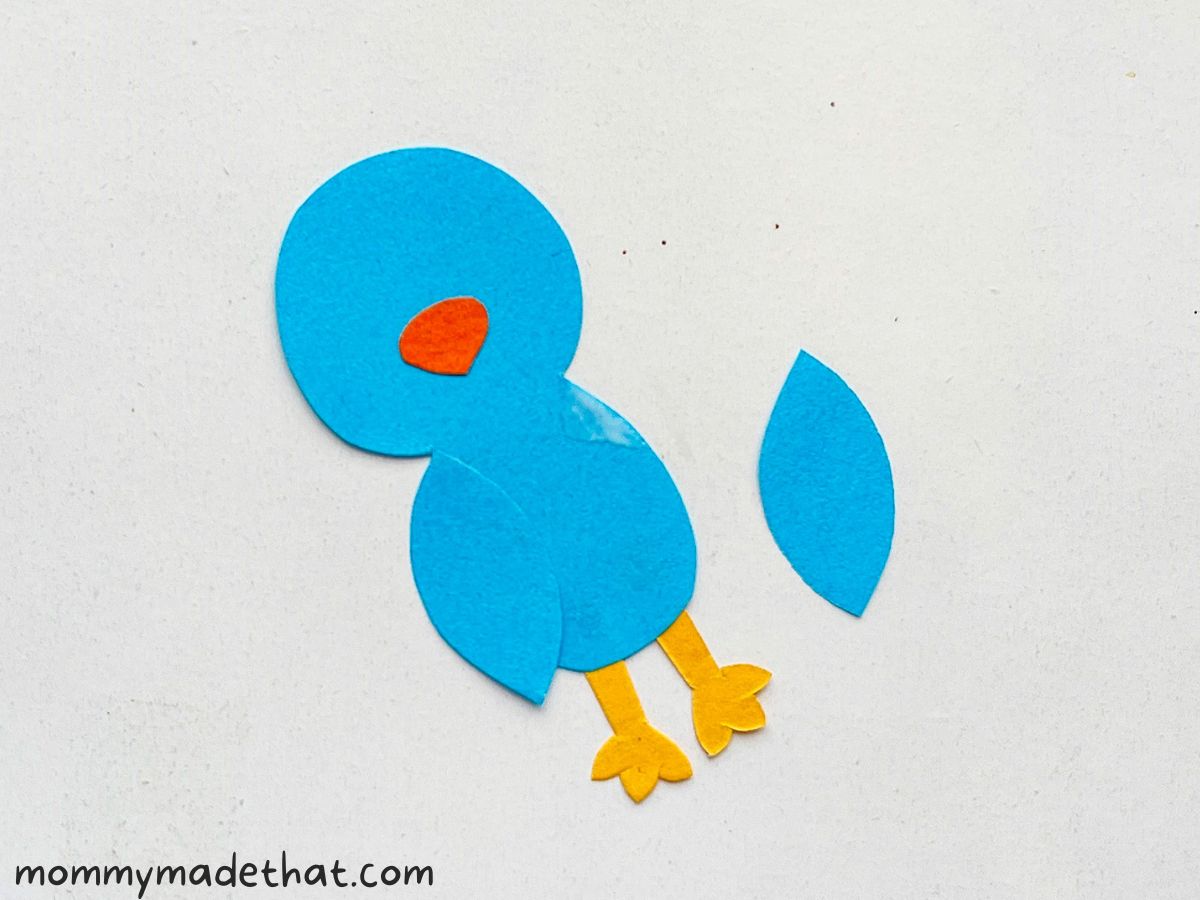
Then attach his other wing to the other side of the body.
Now you can use your black marker to draw eyes onto the peacocks face.
We also added little outlines to the wings for some additional detail, but you don’t have to.
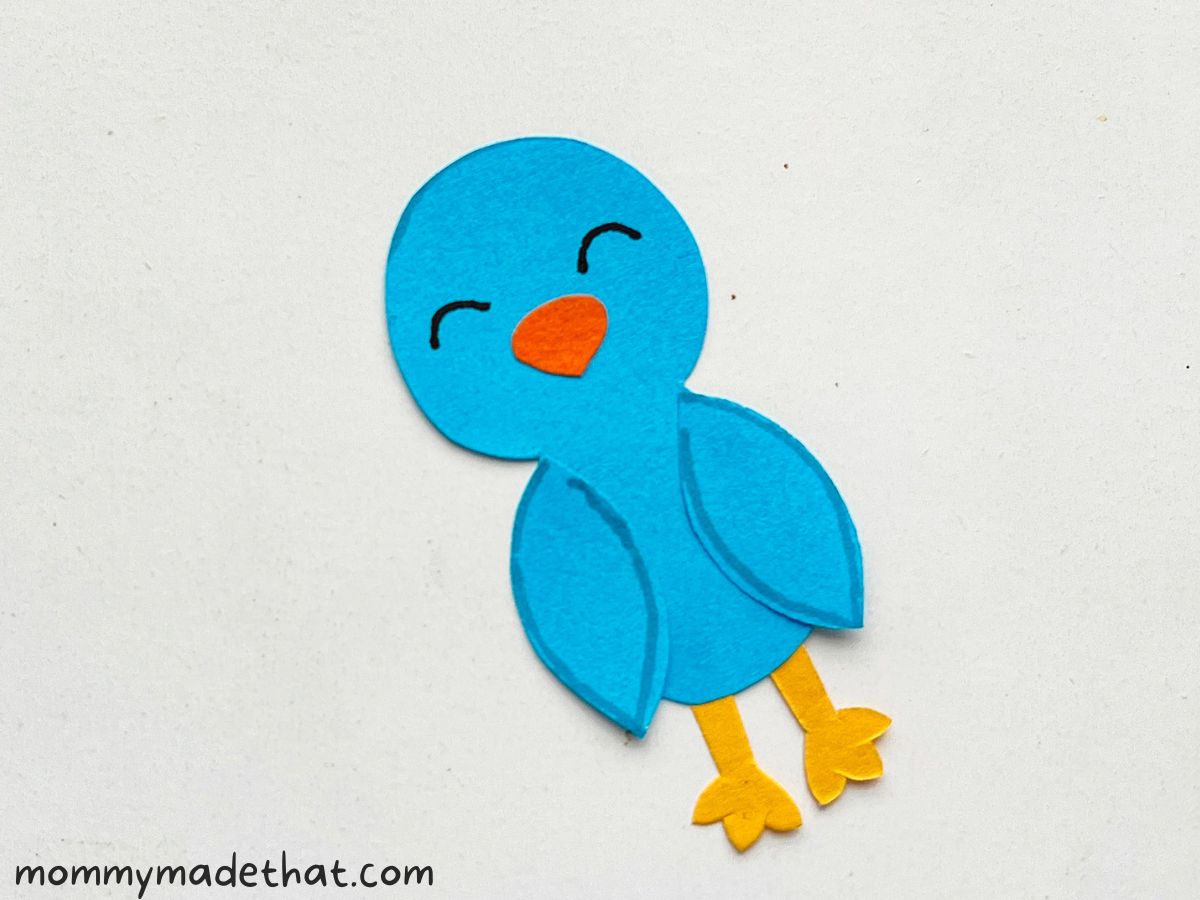
Now you can attach the peacock’s body to the tail feather.
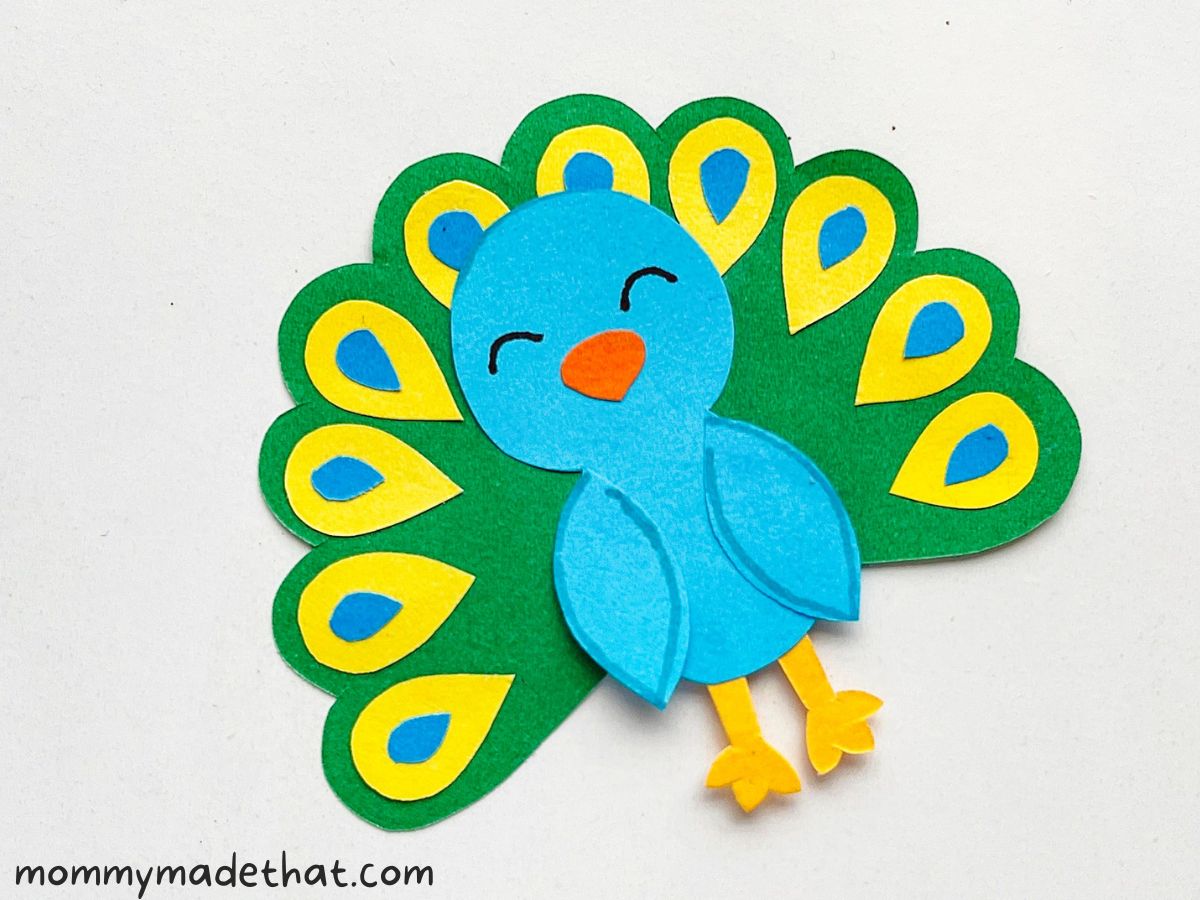
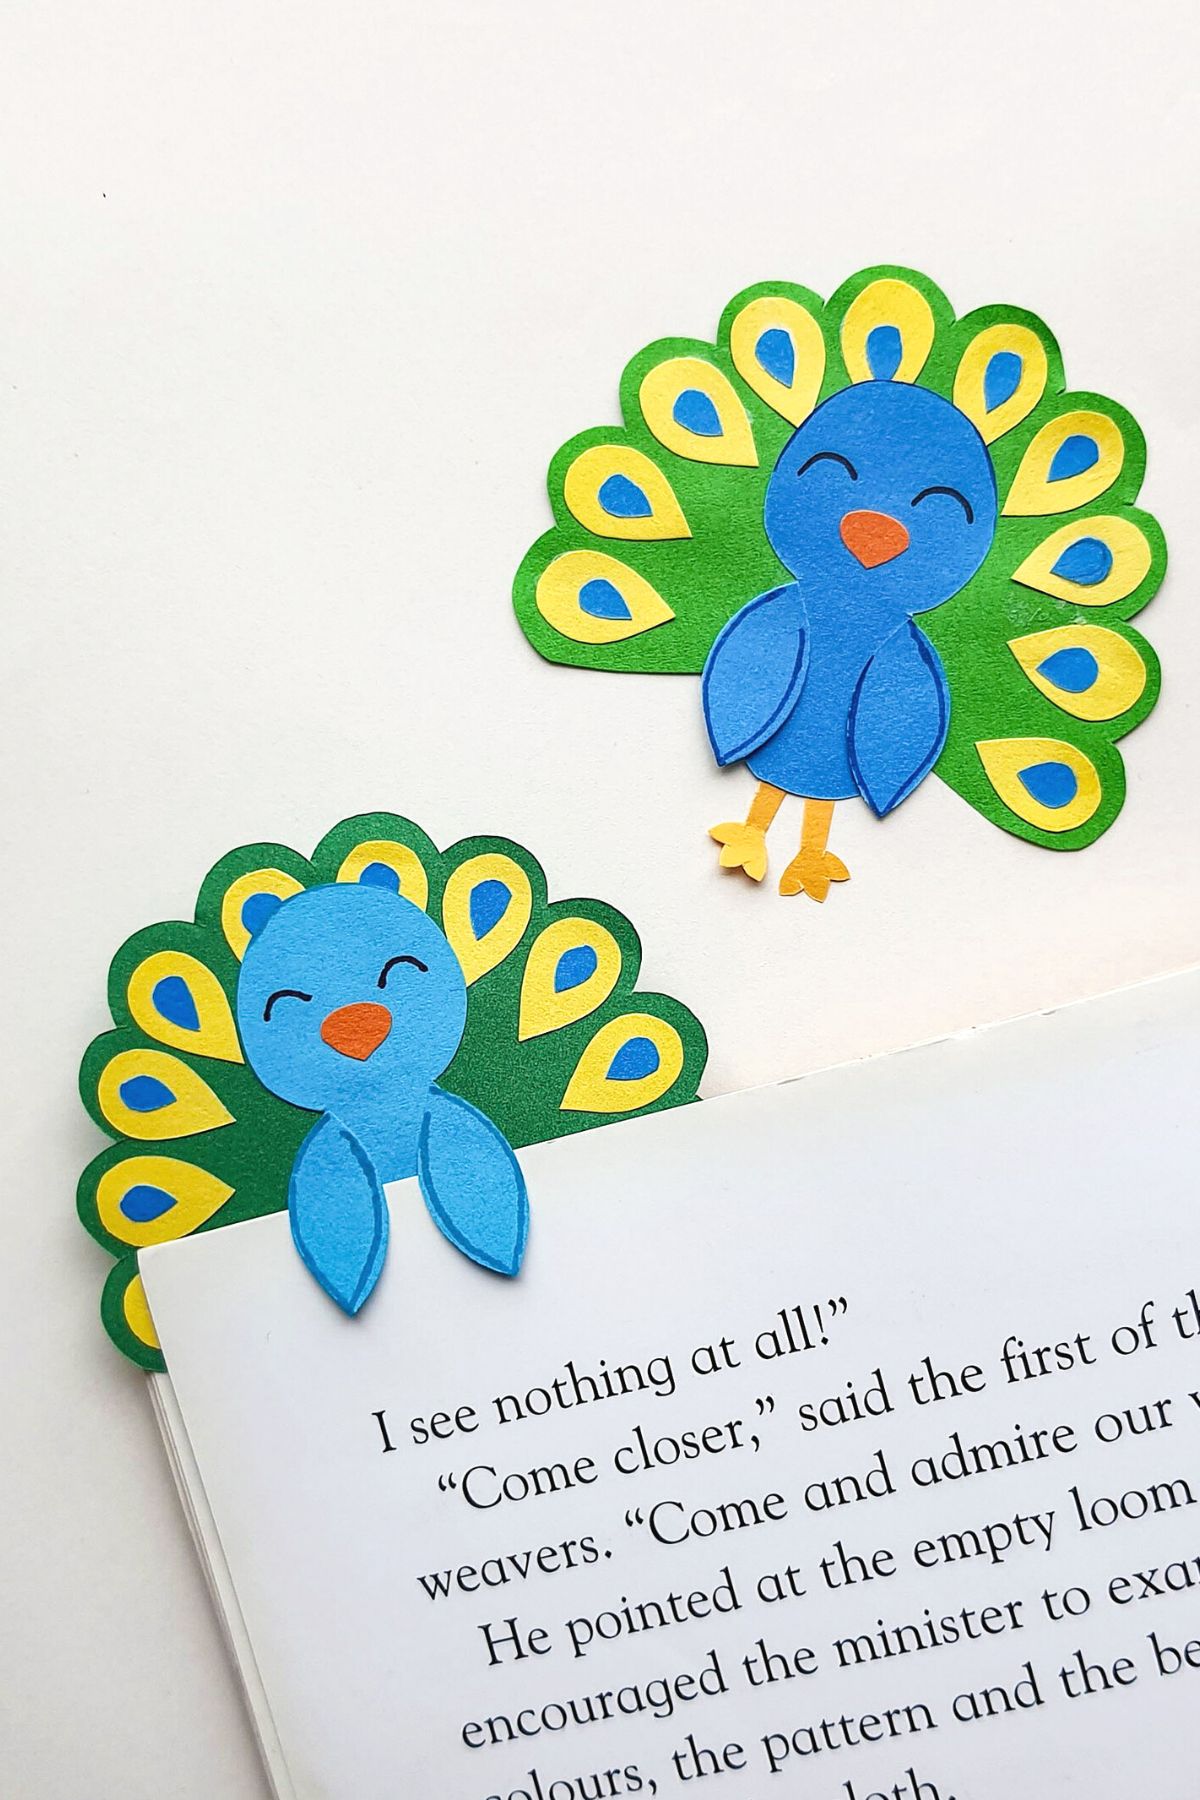
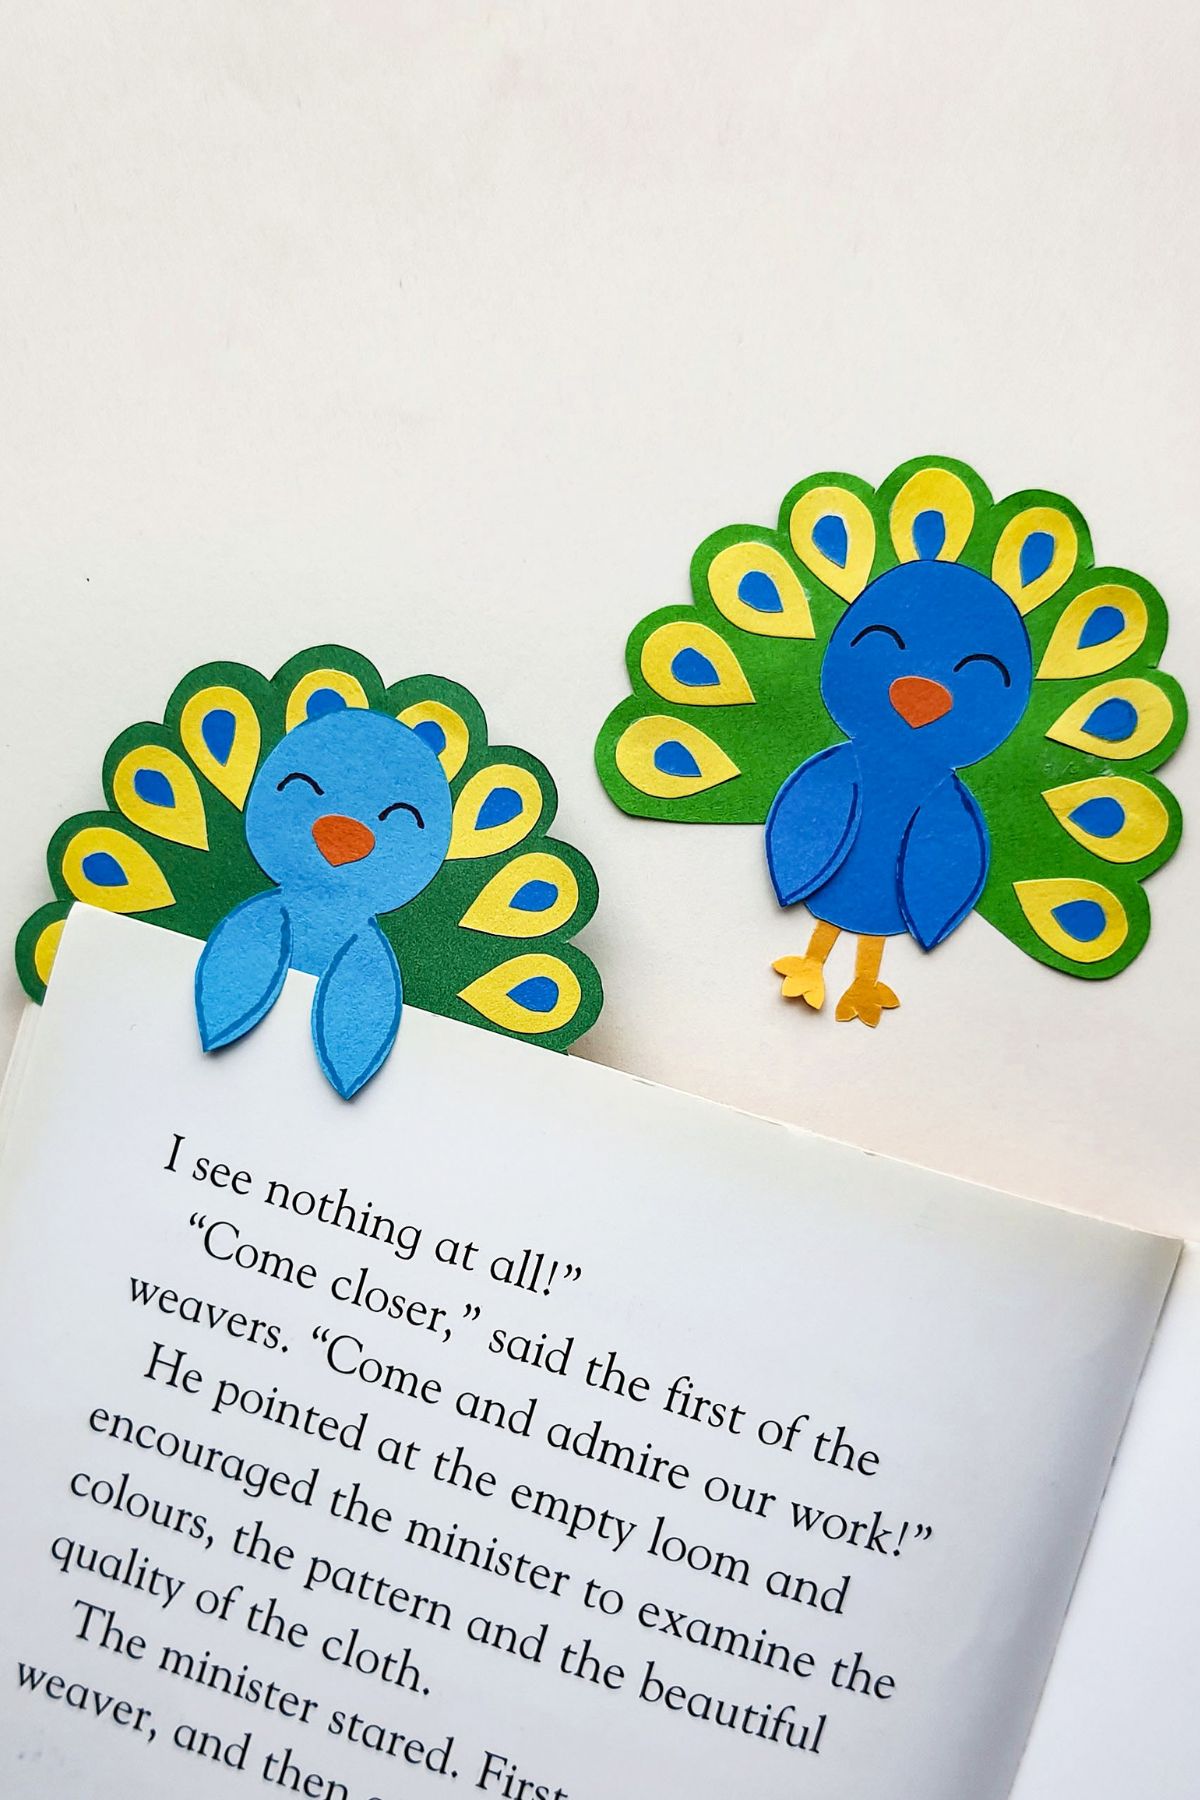
And that’s it! Your adorable little paper peacock bookmark craft is finished!
To use this little guy as a bookmark, simply insert a sheet of paper in between the wings and the body so he’s grabbing the pages, like shown below.
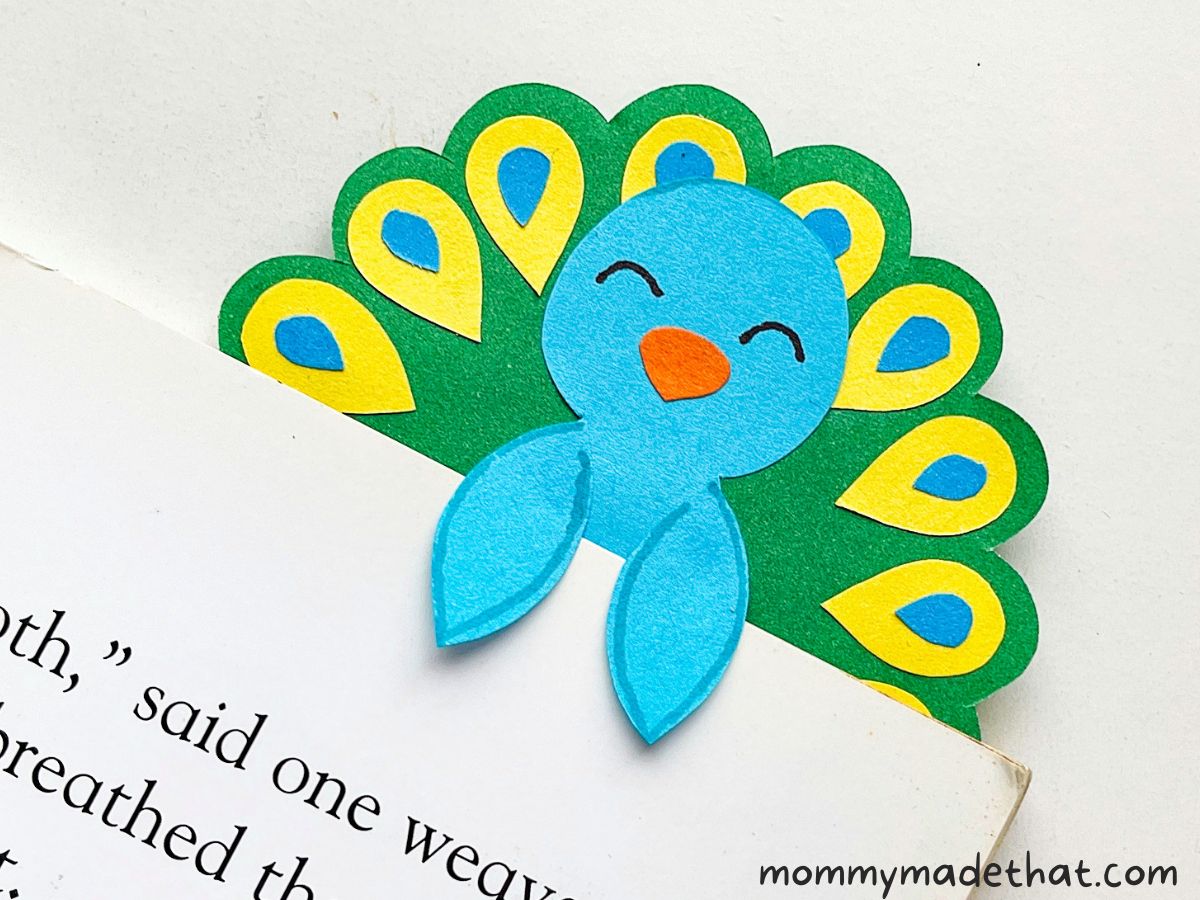
Isn’t he adorable!?
We had to make a friend to go along with him of course.
Grab the Peacock Template
To grab the free printable peacock template, put your email in the box below.
We’ll send it straight to your inbox!

Peacock Bookmark Craft
These adorable peacock bookmarks are a fun craft that inspires a bit of reading as well.
Materials
- Peacock bookmark template
- Colored craft paper
Tools
- Black marker
- Pencil
- Scissors
- Craft glue or glue stick
Instructions
- Start by printing out the peacock craft template.
- Cutout the shapes and trace them onto the colored paper.
- Glue the small tear drop shapes onto the larger ones.
- Attach the teardrop shapes onto the peacock's feather tail base, nestling them into the scallops of the tail.
- Set the tail aside, to start working on the peacock's body. Attach the legs to the bottom of the body base.
- Then attach the beak to the center of his face.
- Next, apply glue to one side of a wing piece, and attach it to the peacock's body, making sure to leave the bottom half of the wing free. (This will be what allows him to hold onto the page as a bookmark.)
- Repeat on the other side with the other wing.
- Next, draw eyes and trace his wings for additional detail.
- And you're all done! Enjoy you're peacock bookmark!
Notes
You can get as creative as you like with the colors you choose for your peacock. Have fun mixing it up and creating a unique creation all your own!