Haunted House Perler Bead Pattern (Free Printable Template)
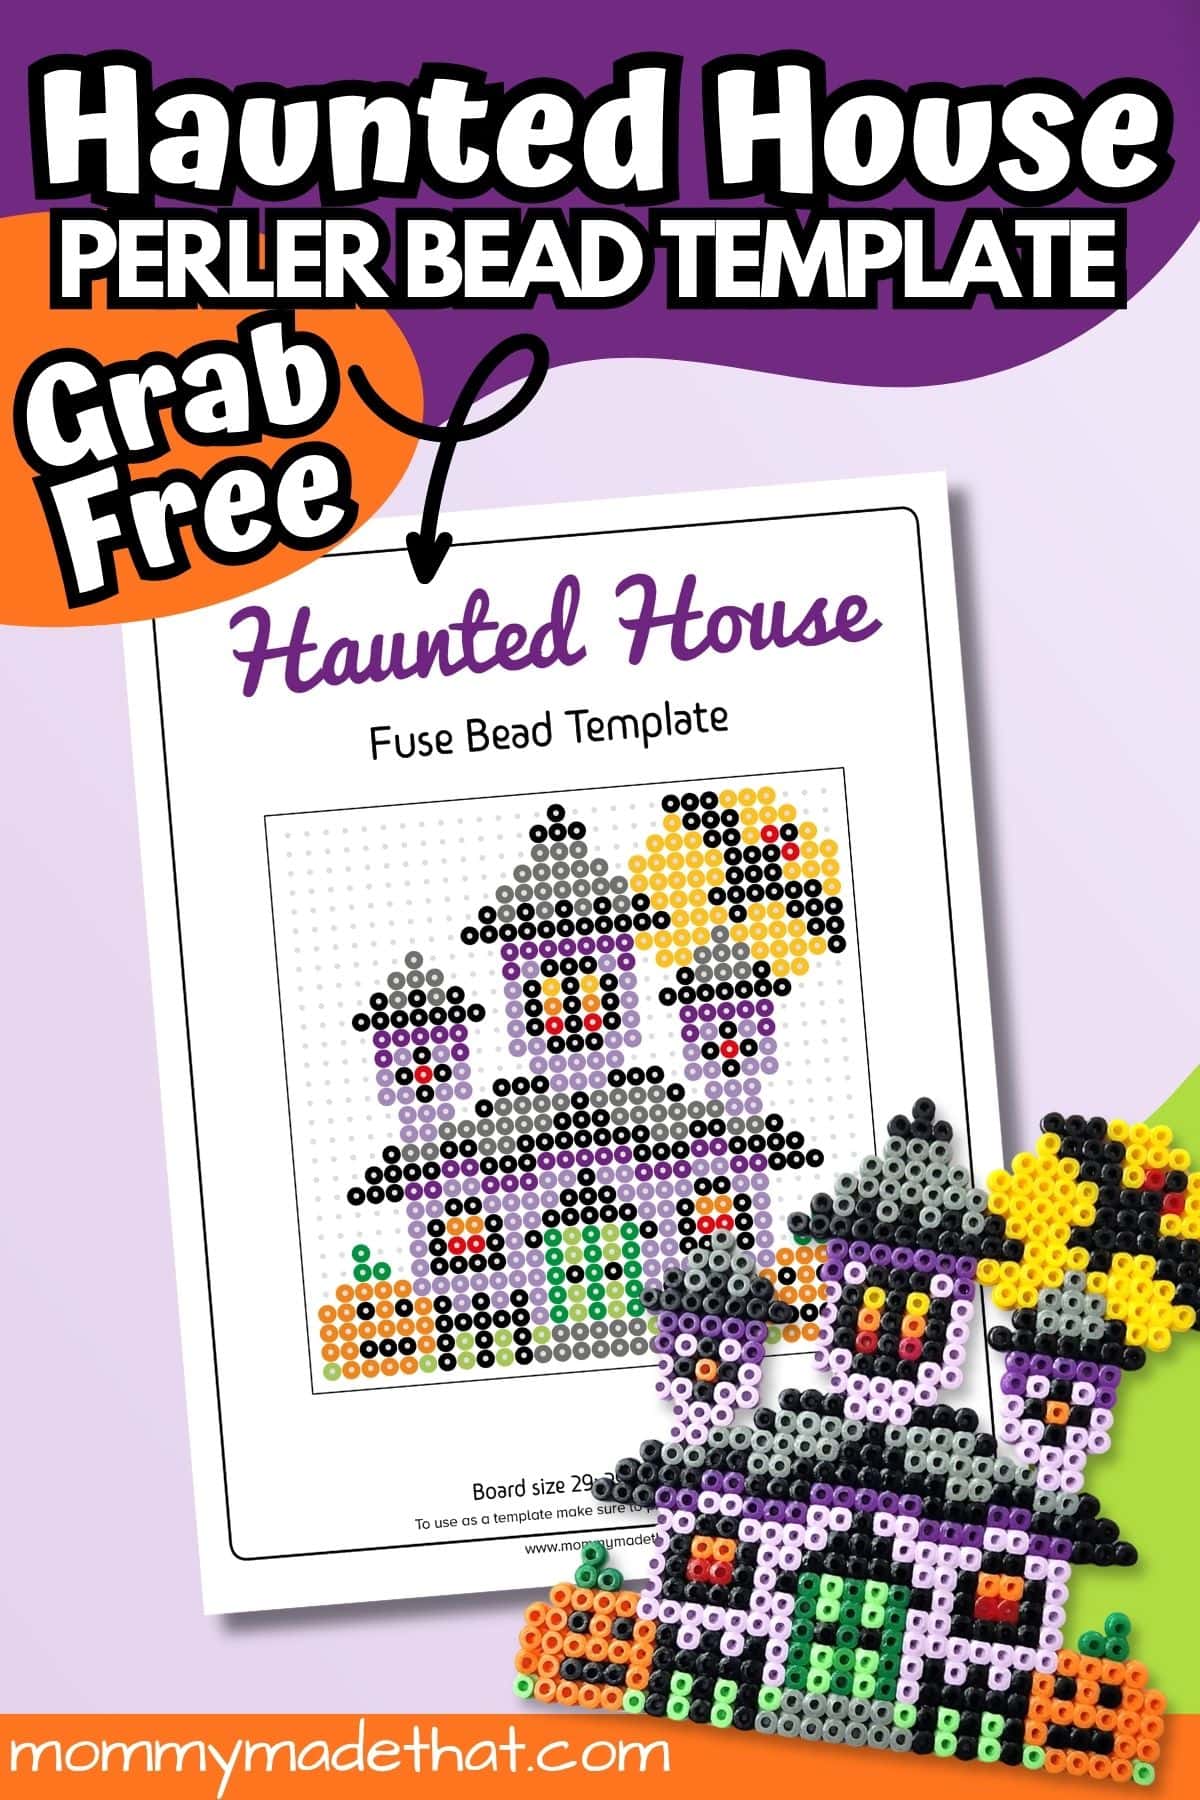
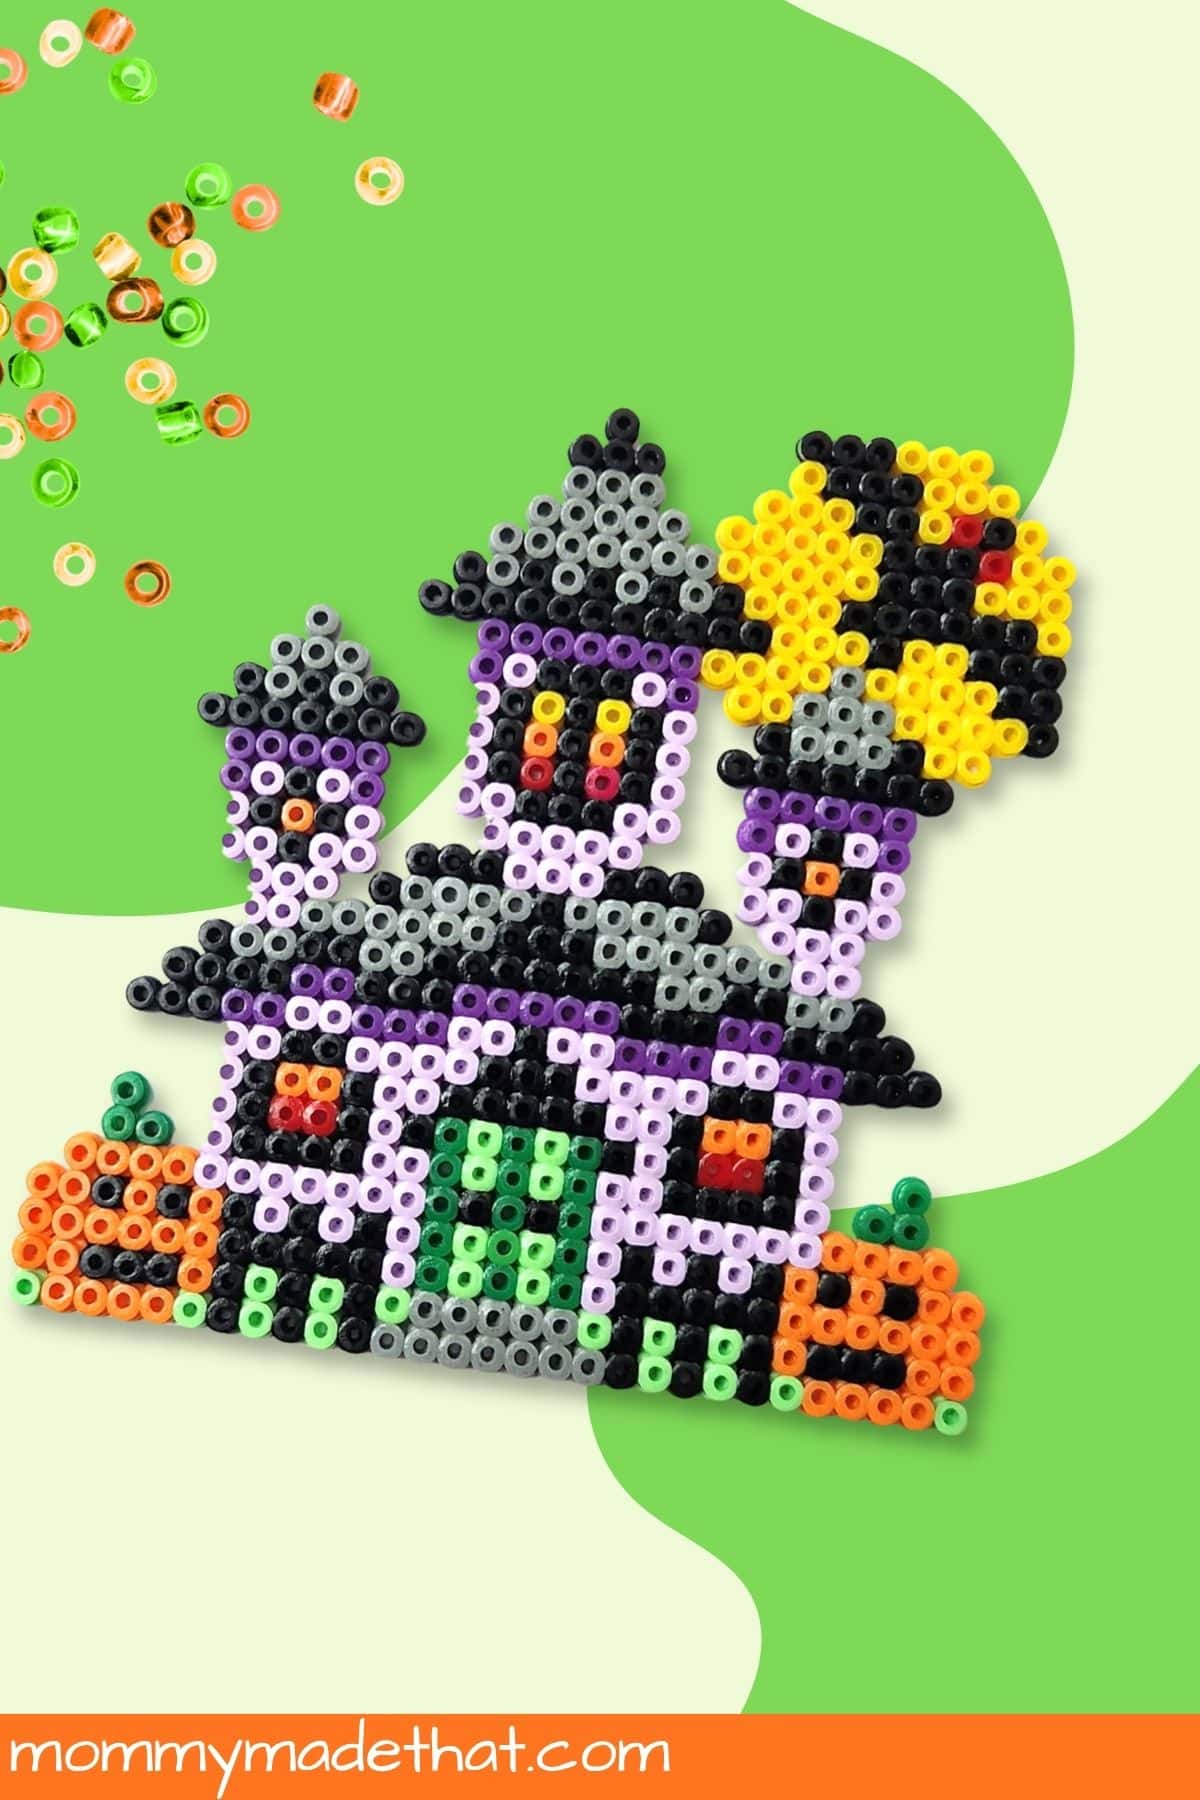
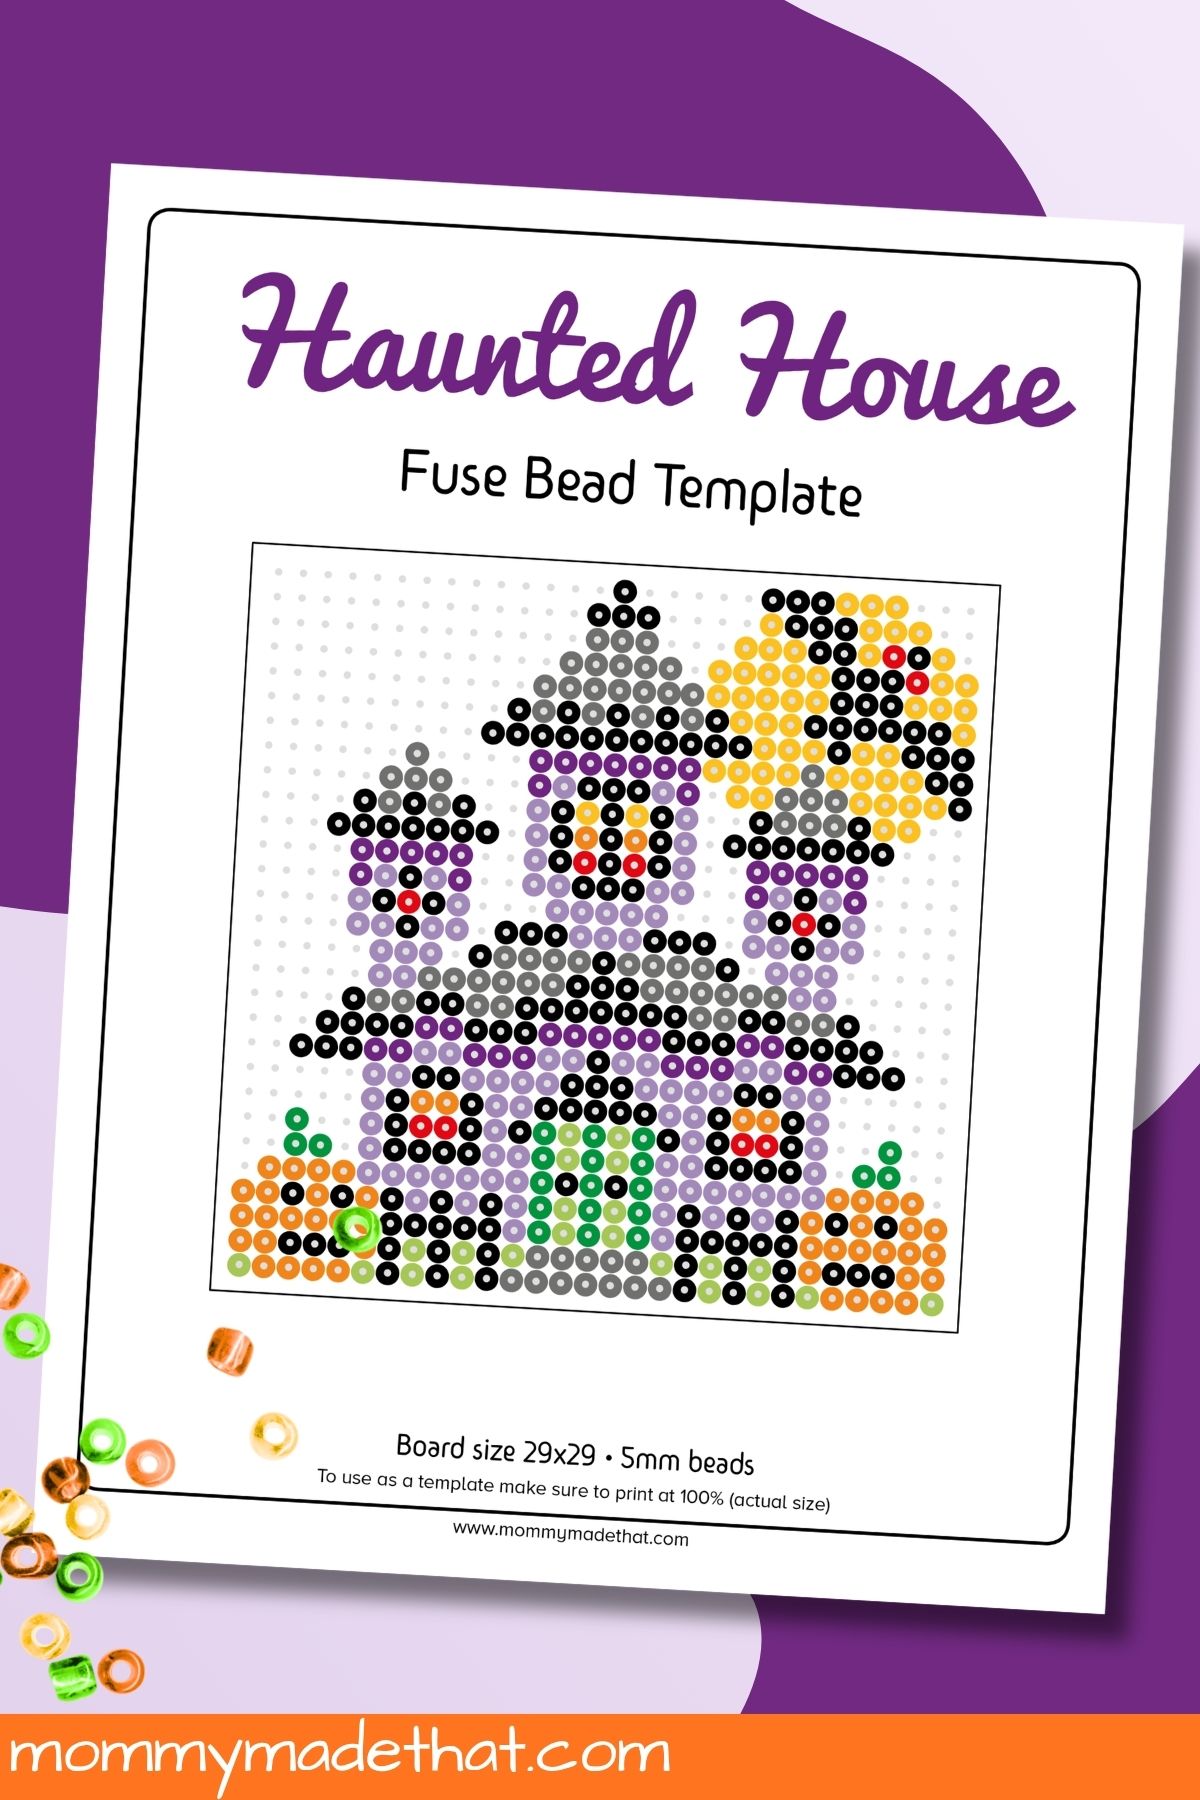
Make a spooky little decoration with this haunted house Perler bead pattern! The purple house has pointed towers, bright windows, a green doorway, and jack-o’-lanterns on either side. A yellow moon above the roof finishes the Halloween scene.
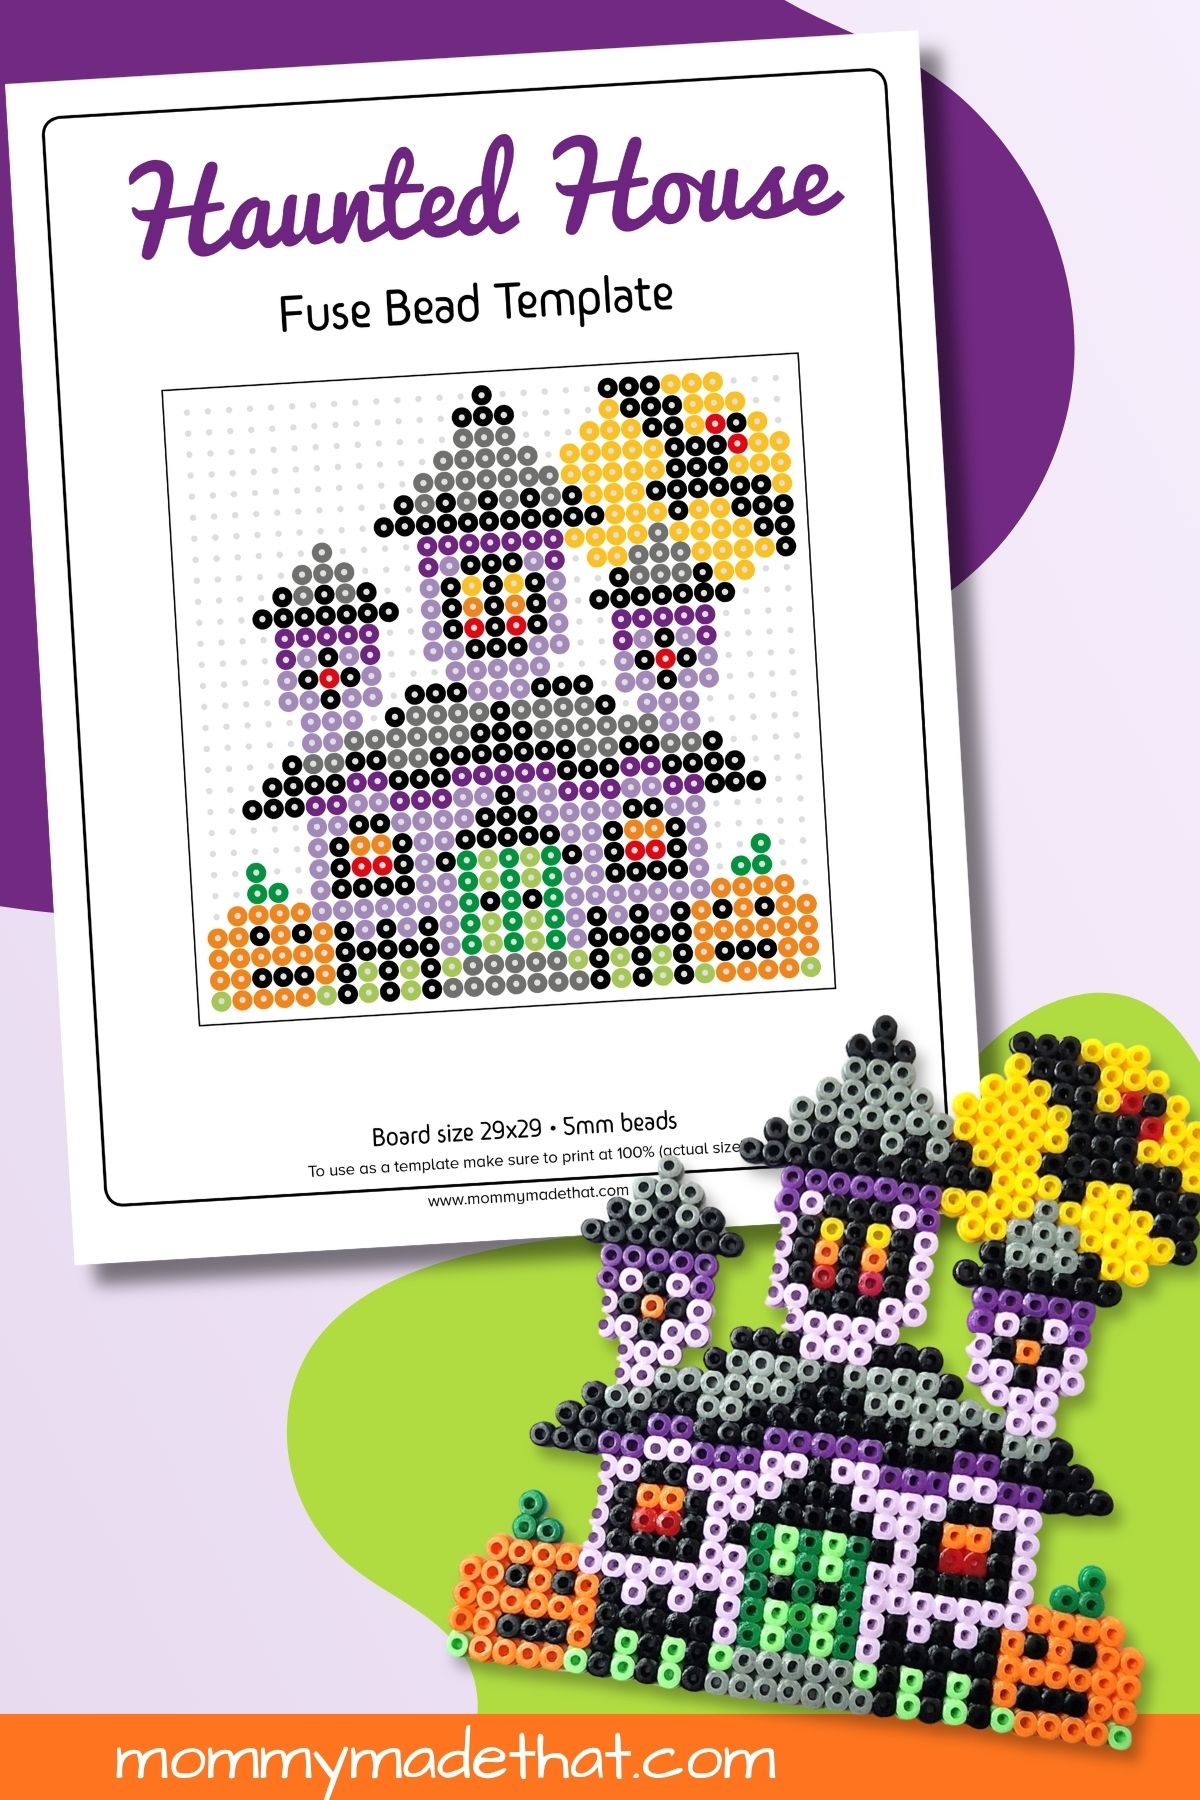
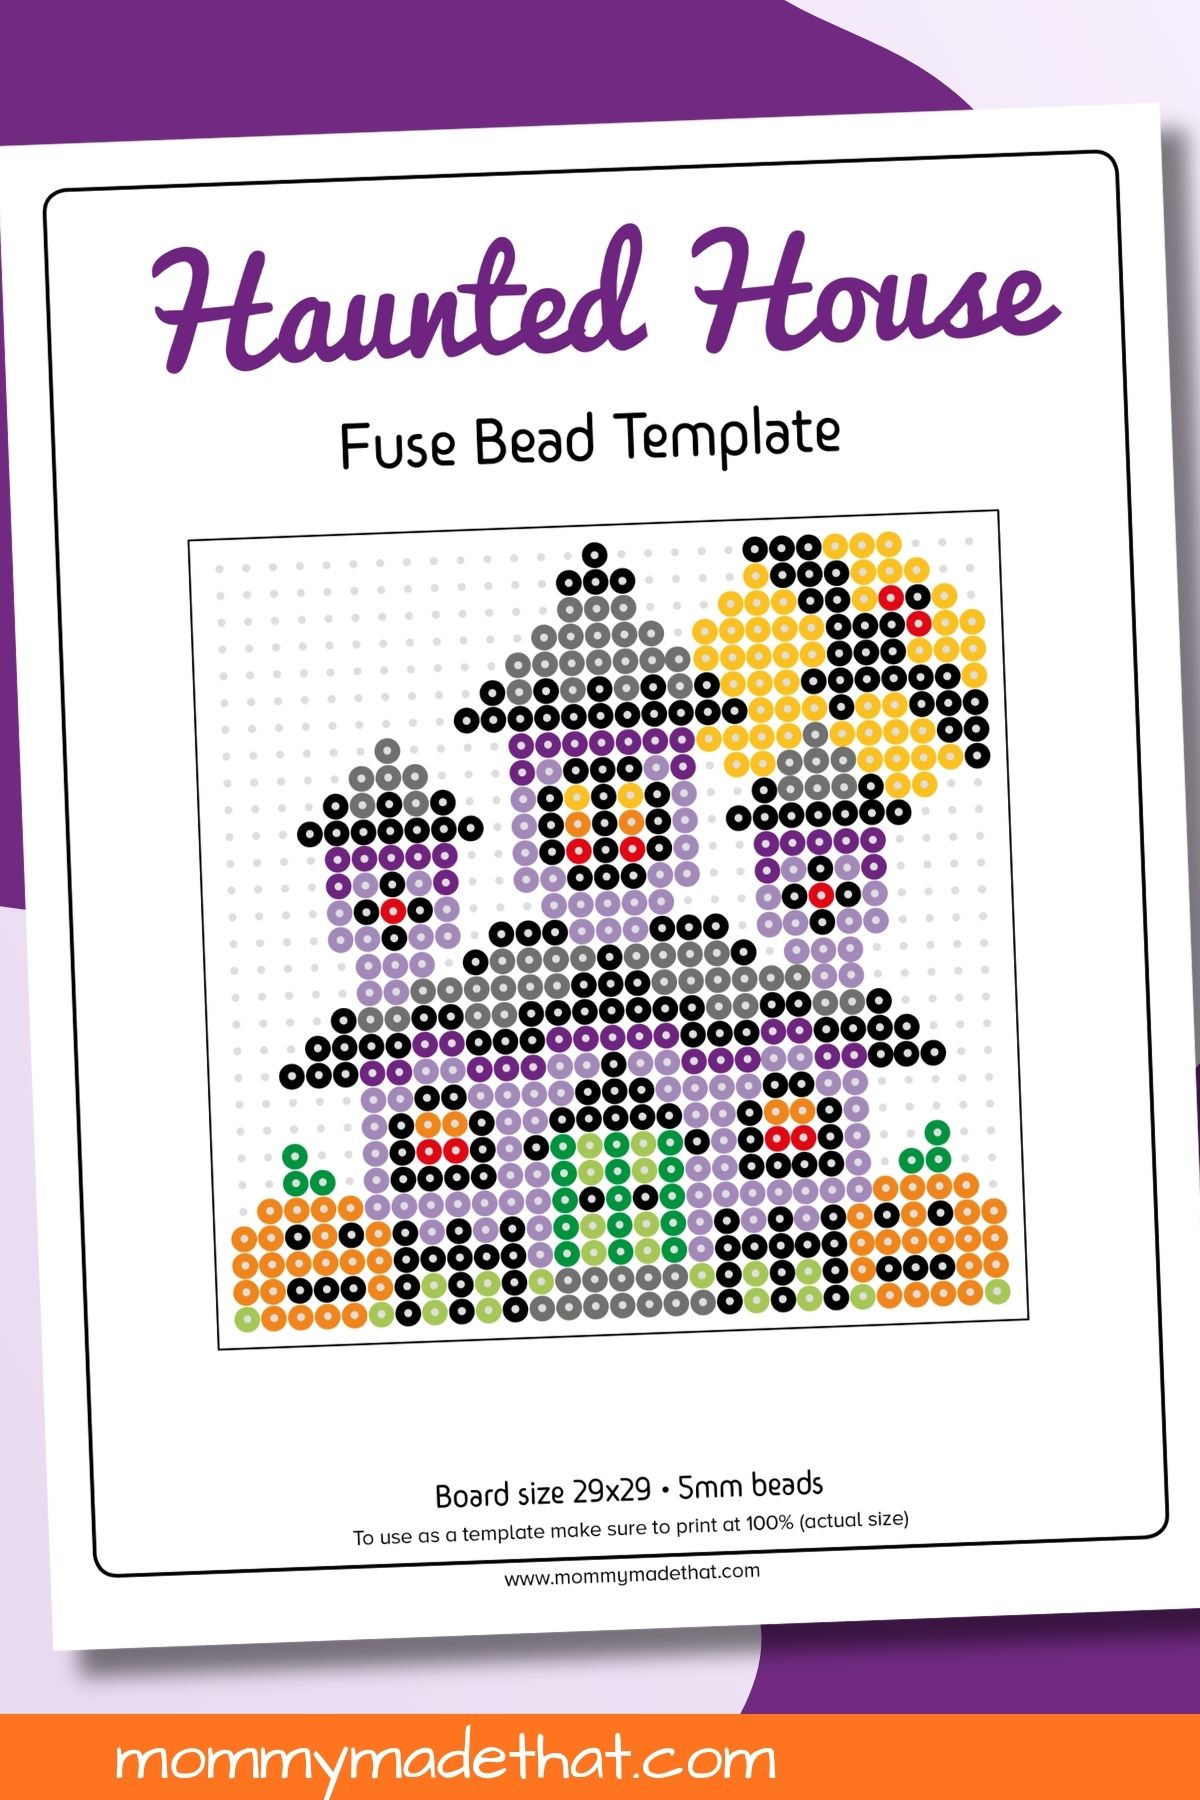
This printable gives you a color guide to follow as you place each bead. If you’d like a smaller project to start with, our easy Halloween Perler bead patterns include pumpkins, candy corn, and other simple spooky shapes.
About the Haunted House Template
The download is a one-page, full-color PDF with one haunted-house design. It is marked for a 29 × 29 square pegboard and 5mm beads. The finished craft is a flat bead decoration with the house, pumpkins, and moon arranged together in one scene.
There are plenty of little details to follow, especially around the windows and rooftops. It’s a good project for bead crafters who enjoy working through a larger pattern, and you can complete it in sections if you prefer shorter crafting sessions.
Supplies You’ll Need
- The haunted house fuse bead template
- A square pegboard with 29 × 29 pegs, suitable for 5mm beads
- 5mm fuse beads in black, gray, light purple, dark purple, yellow, orange, red, green, and light green
- Bead tweezers (optional)
- Bead ironing paper recommended by your bead manufacturer
- A household iron and a suitable heat-safe work surface, used by an adult
Sort the colors into small dishes before you begin. You can choose shades close to those shown in the pattern rather than trying to match the printed colors exactly.
Printing Your Halloween Perler Bead Template
Print the PDF at 100% or Actual Size. The file is a US Letter page, and its instructions specify actual-size printing. Avoid “Fit to Page” or “Shrink to Fit” if you want the dots to line up beneath a clear pegboard.
Check the alignment before placing beads. If the dots don’t match your board, use the sheet beside your workspace as a counting guide. An opaque pegboard works this way too—count the rows and columns as you go.
How to Make the Haunted House
- Set up your pattern and board. Place the printed guide beneath a compatible clear pegboard, checking that the dots line up with the pegs, or keep it beside the board.
- Start at the bottom. Follow the lowest row of the pattern, then work upward. Count the spaces as well as the colored beads so the house and pumpkins stay in the right positions.
- Build the scene row by row. Add the walls, windows, towers, and moon, checking each row before moving on. Leave the unused gray guide dots empty; place gray beads only where the pattern shows a gray bead symbol.
- Check the whole design. Compare the board with the printable and fix any missing or misplaced beads before fusing. Tweezers are handy for changing a bead without disturbing its neighbors.
- Have an adult fuse the beads. Cover the design with the recommended ironing paper and follow your bead manufacturer’s heating, cooling, and second-side instructions. Keep the iron off the bare beads and pegboard.
- Let the finished piece cool. Once it is fully cool and ready to handle, remove the ironing paper as directed and enjoy your haunted-house decoration.
Tips for Following the Pattern
Keep track of your row. Lay a spare strip of paper beside the printed row you’re working on, moving it as you go. This is helpful when several rows use similar colors.
Work on a stable surface. Keep the pegboard somewhere it won’t get bumped, especially if you plan to finish the project over more than one session.
Try a smaller pattern first. Our Perler bead ghost template is another Halloween design to try before tackling all the details in this house.
Can I Use Hama Beads or Other Fuse Beads?
If you’re making this as a Halloween Hama bead project, check that your beads are the 5mm size specified on the template and use the matching pegboard. “Fuse beads” and “melty beads” are other names you may see for this type of craft.
Use one compatible bead range for the project and follow that manufacturer’s ironing instructions. Different bead sizes need different boards, so don’t assume a mini or jumbo bead set will line up with this printed guide.
Ways to Display Your Haunted House
Set the finished piece on a small display easel, attach it to a sturdy handmade Halloween card, or use it as the centerpiece of a seasonal craft display. You could pair it with our Halloween paper village for a table full of spooky houses.
For another season’s bead project, save our Christmas Perler bead patterns. You can also browse our Halloween printables for more activities to go with your craft afternoon.
Grab the Free Printable
Grab the haunted house Perler bead pattern here!
Put your name and email in the pink box below, and we’ll send the free printable straight to your inbox.
Subscribe to our newsletter and get these printables sent straight to your inbox! Already a subscriber? Don’t worry you won’t be subscribed twice but it will send this printable straight to your inbox!
(We will never share or sell your personal information. Read more on our privacy policy.) We will use the information below to send you our newsletter with latest posts and special offers.