DIY 4th of July Windsock Craft
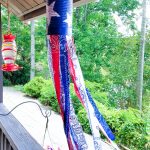
Looking to make your own DIY windsock craft? This 4th of July windsock is a perfect place to start!
Looking for an inexpensive way to decorate for 4th of July and show off your patriotic spirit.
Why not make this fun and easy DIY 4th of July windsock craft. You may already have the supplies you need around the house, but if not they are easy enough to find!
Supplies for the Red White and Blue Windsock
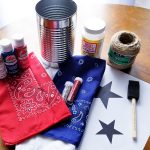
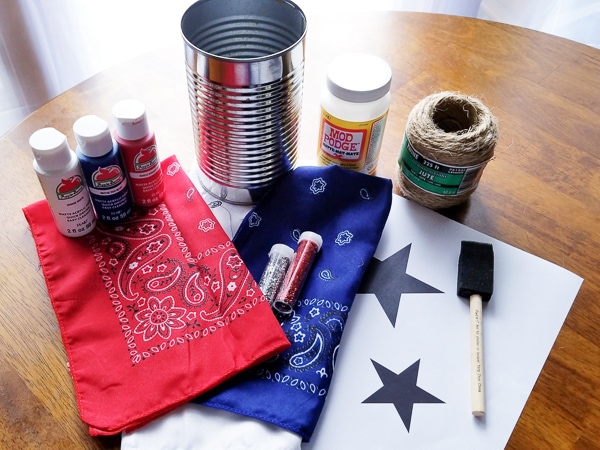
- Large Can of Soup or Green Beans emptied (ex. Dinty More Beef Stew or Hanover Green Beans)
- Red, white and blue acrylic paint
- Foam Brushes
- Silver and Red Glitter
- Red, white and blue bandanas (You can get these at Walmart or the dollar store)
- Star template printout, cut out with Xacto knife
- 2 feet of Jute
- Modge Podge
- Glue Gun
- Printable Star Template (Available in our printable library.)
How to Make Your DIY Windsock Craft
To get started with this 4th of July craft, gather all of your supplies so they are easily accessible.
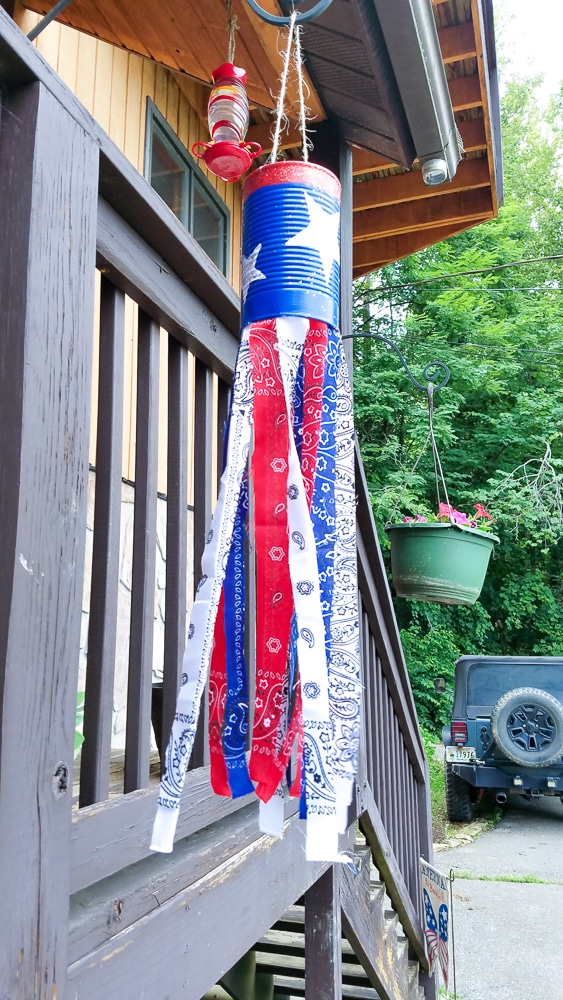
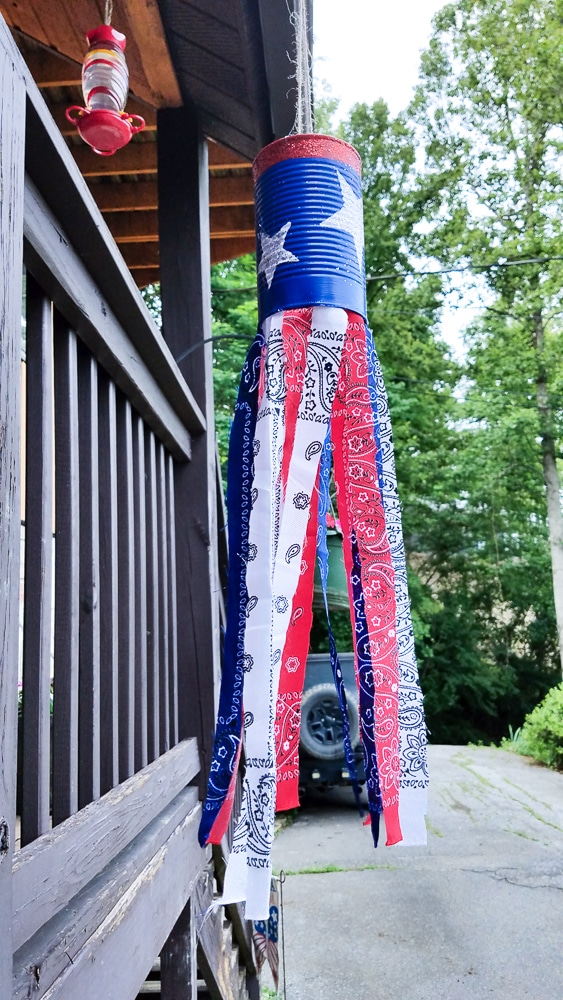
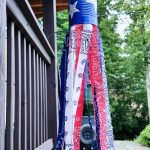
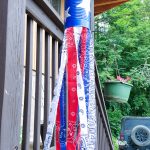
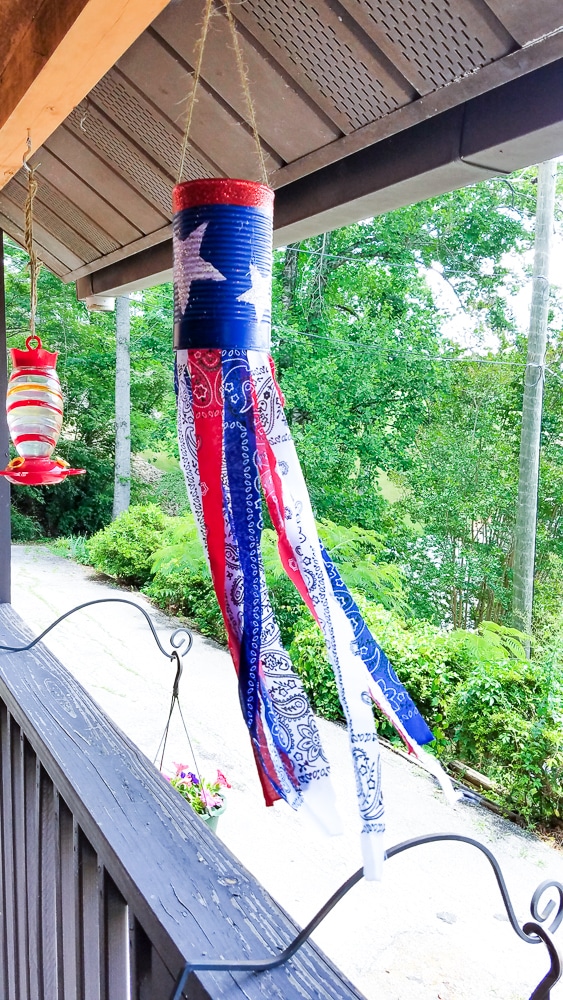
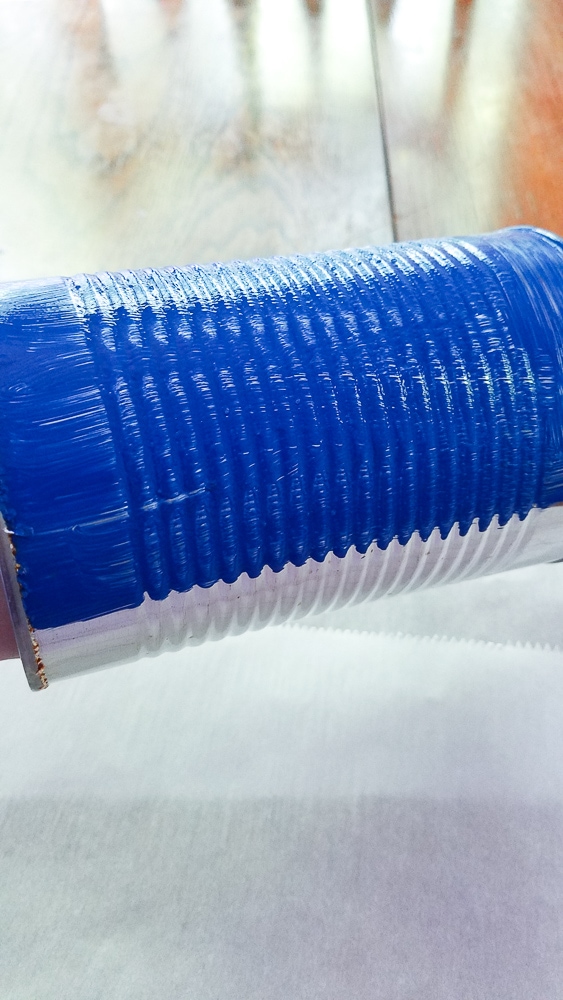
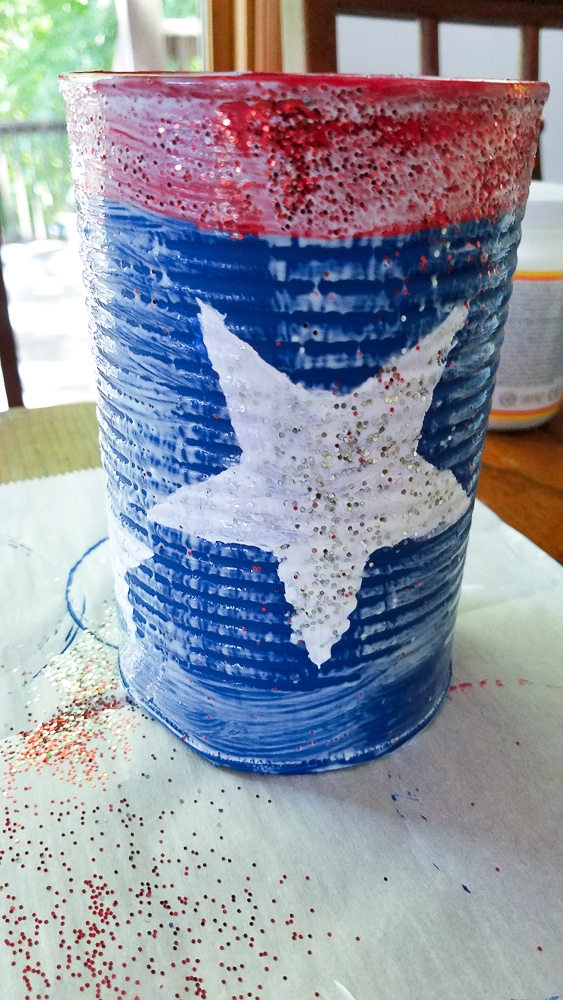
Start by opening both sides of your large can and cleaning it out well. This will be the body of your DIY windsock. Make sure to dry it completely before starting your craft.
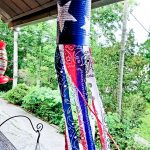
Once your can is dry, paint the entire thing blue. It may take a few coats to cover completely.
Now paint the top inch of your can red. It took us three coats to make sure the blue didn’t show through.
Using the star template, cut out the stars with a xacto knife to create a star stencil for your windsock.
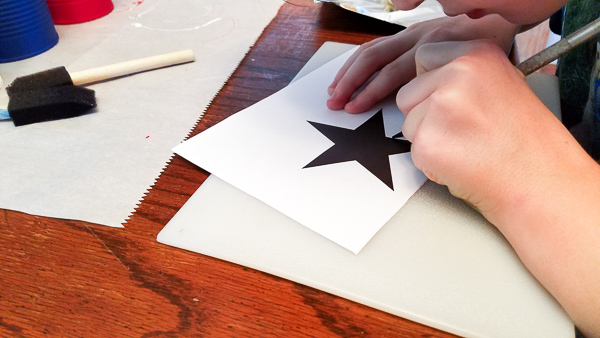
Now tape your start stencil onto your can to use as a guide.
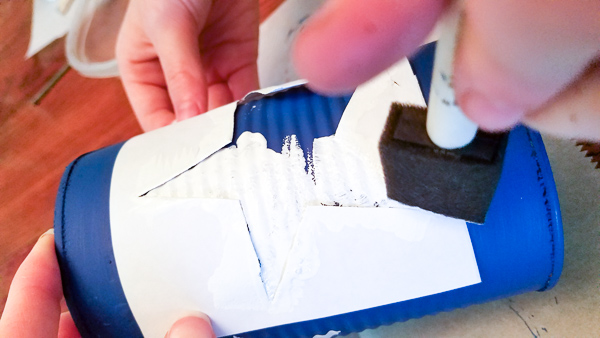
Dip a foam sponge brush into your white paint. Tap sponge into star template until covered.
Gently remove star template and move to a different side of the can.
Repeat the steps for making as many stars as you want to have on your windsock.
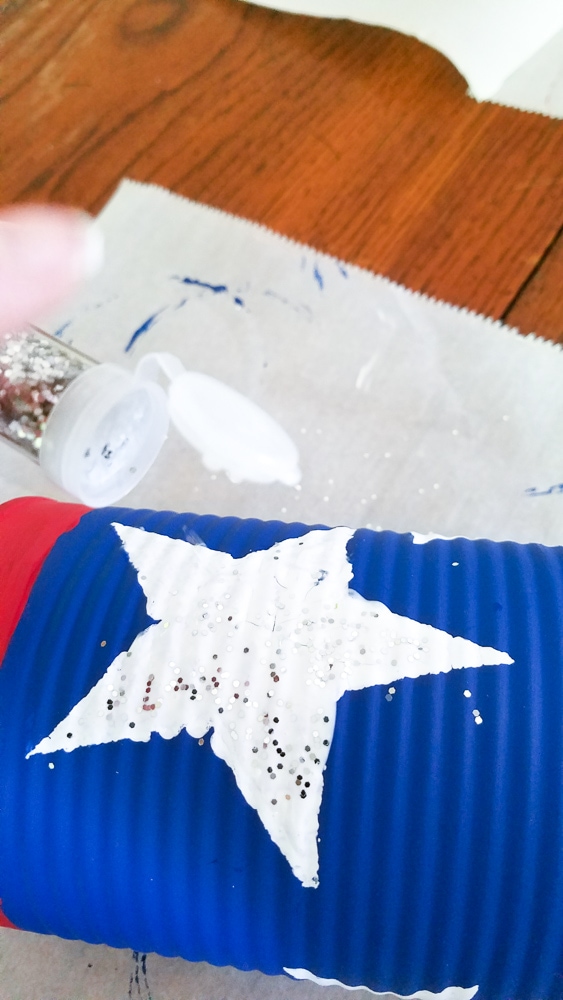
Once the white paint on your can is completely dry, dip sponge brush into Modge Podge.
Carefully paint it inside the star and sprinkle silver glitter. Repeat this step for each star on your windsock.
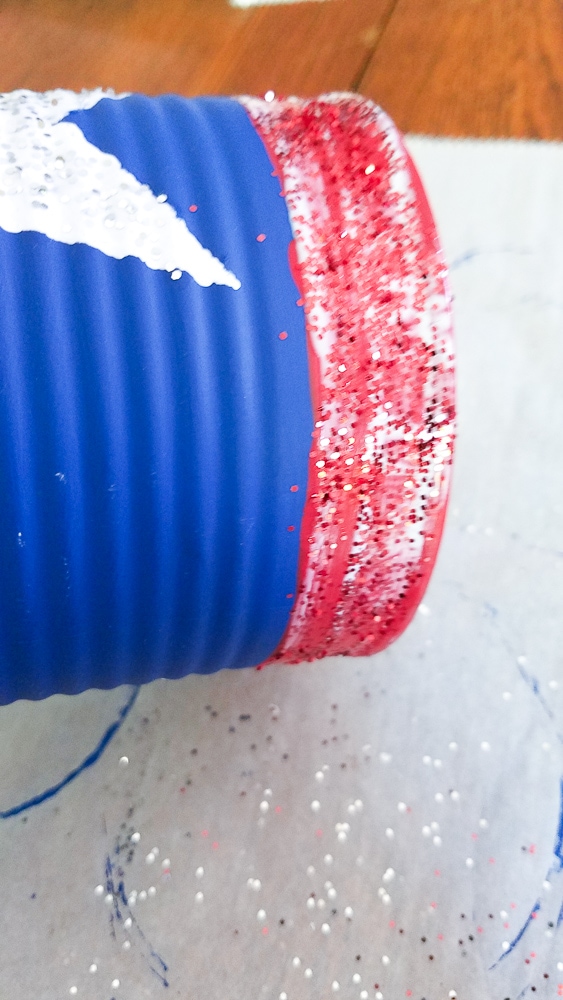
Once all of your star glitter is dry, paint Modge Podge onto the painted red section and add red glitter there too.
Allow to completely dry. The glitter is optional but does add a fun bit of glitz to the project and if your doing this craft with kids, they’ll especially love the glitter steps!
Paint the whole can with Modge Podge. This will seal the can and protect it from the weather.
It will look a milky white when it’s painted but will dry clear and give it a shinier coat. It’ll also protect it against the elements if you hang it outside.
Once can is completely dry, you can add the jute for the hanger.
Using your glue gun, place a generous drop of hot glue on one side of the can and carefully press one end of the jute onto it and repeat for the opposite side.
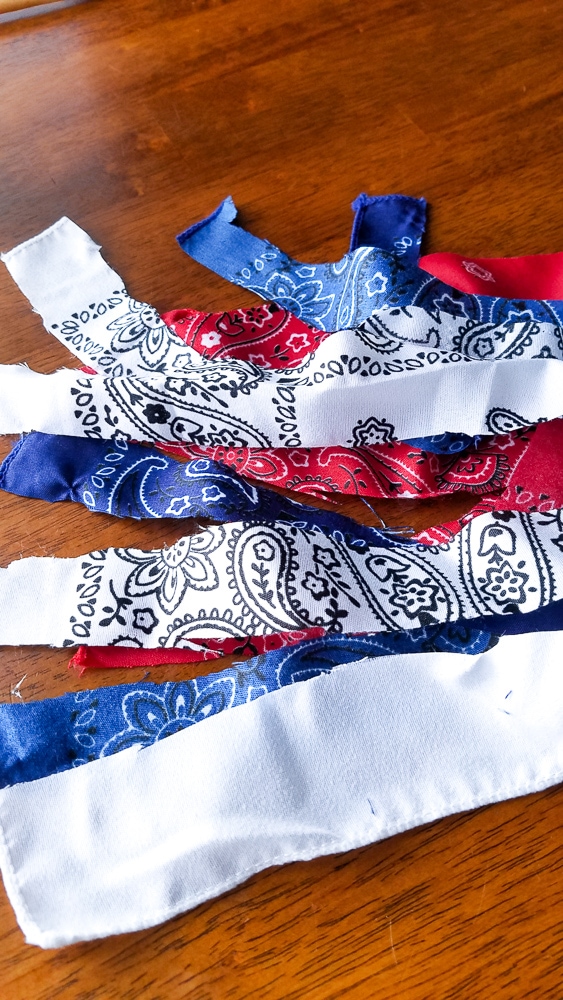
Next, cut your bandana’s into one inch strips. It took us about 4 strips of each color to go all the way around the rim of the can.
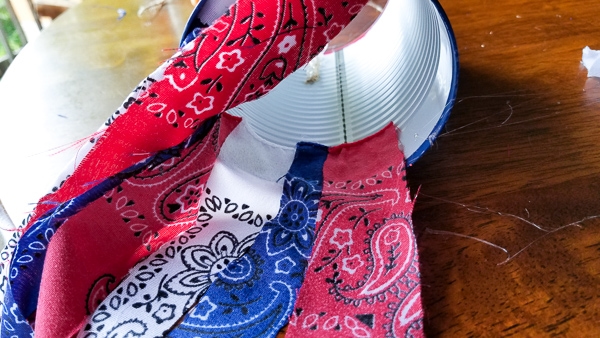
Using the glue gun, place a drop of glue on the bottom inside of the can.
Place one of the red bandana strips onto the glue.
Keep repeating steps alternating the Red, White, Blue color pattern until full.
You can partially overlap the strips to make sure you cover the gaps.
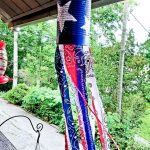
Once your glue dries completely your 4th of July windsock is finished!
You can hang it inside or out on the porch.