Clay Fox Tutorial
Looking for a fun and creative fox craft? This clay fox tutorial is a fantastic hands-on activity for kids and adults who love working with air-dry or foam clay! Whether you’re crafting for fun, decorating a woodland-themed project, or simply exploring clay modeling, this fox arts and crafts activity is easy to follow and super cute!
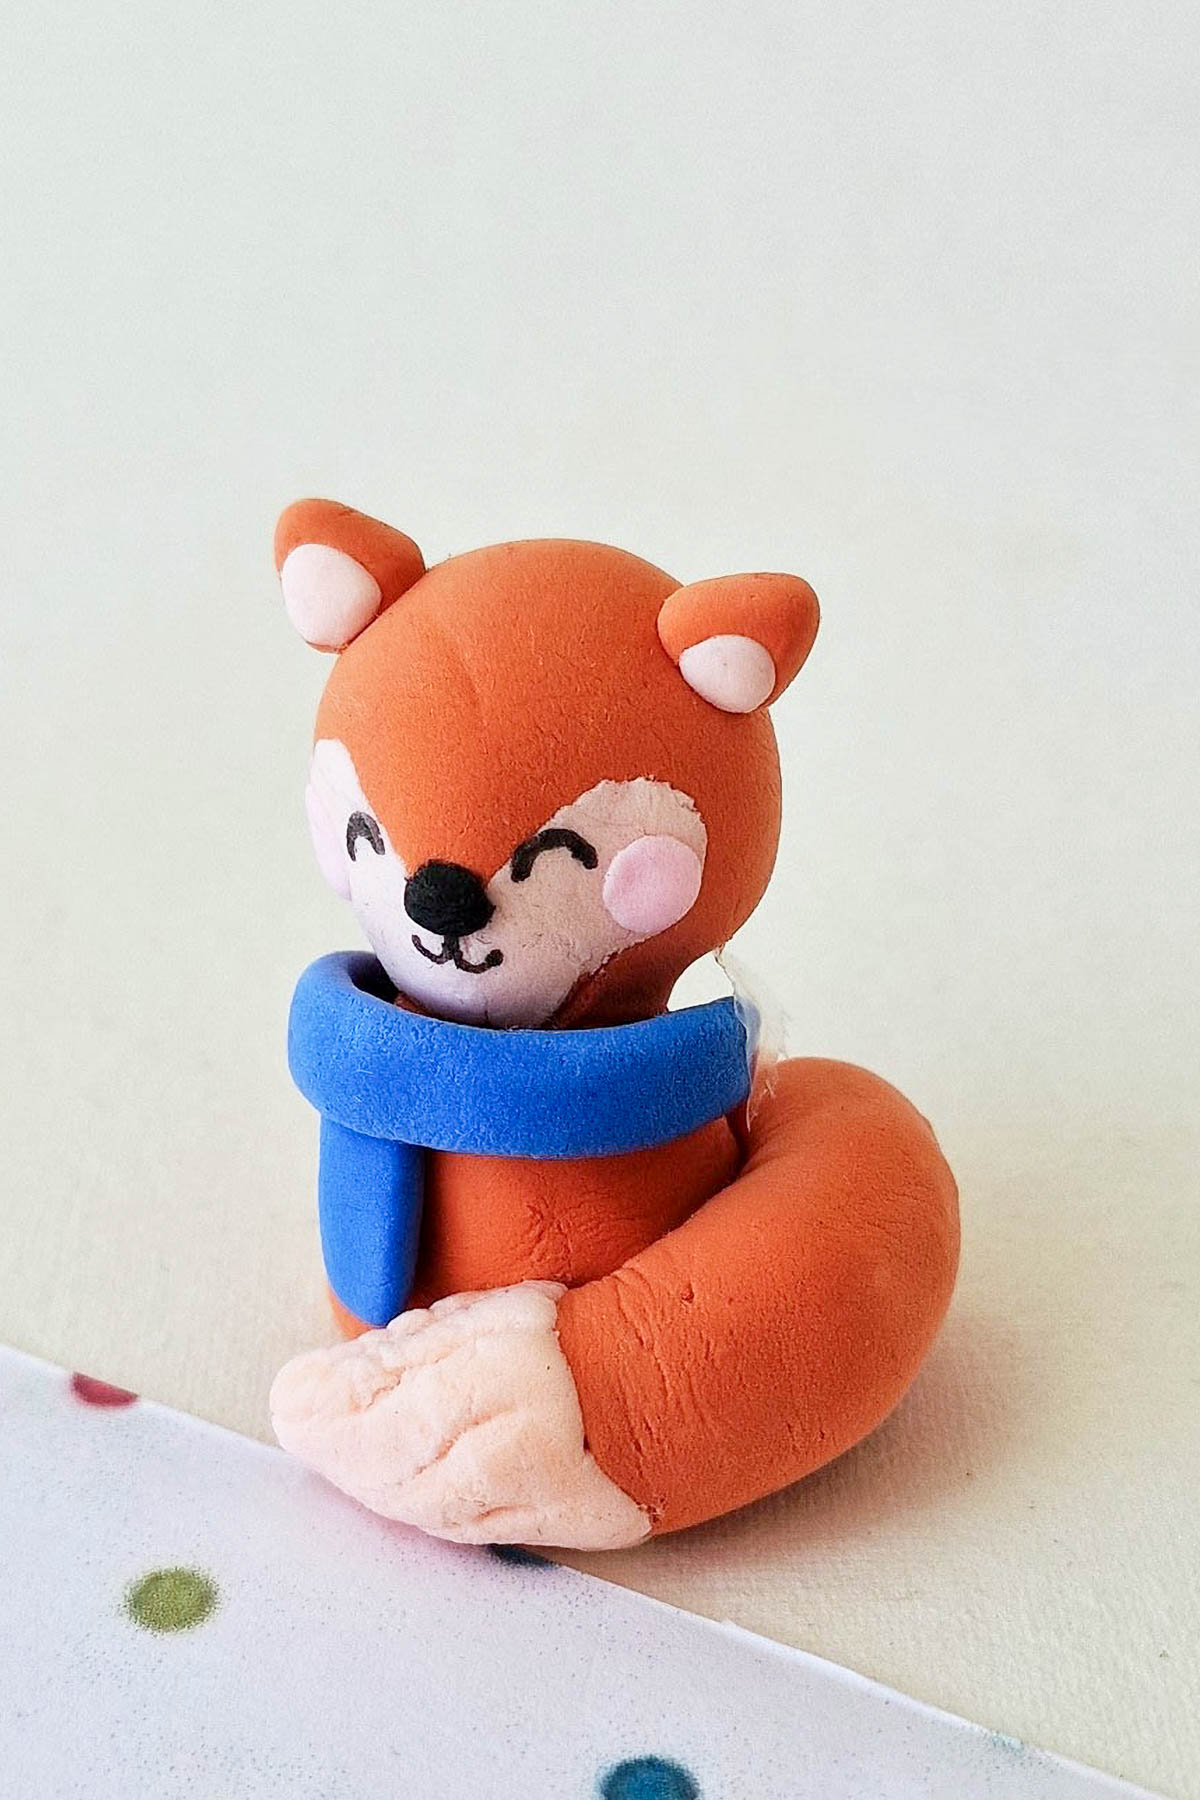
Using just a few colors of clay and simple sculpting techniques, you can create an adorable little fox that stands on its own. It’s a great way for kids to practice fine motor skills, patience, and creativity while making a fun keepsake!
If you love fox crafts, there are plenty more fun and creative projects to try! Our Cut and Paste Fox Craft is a simple and engaging activity for preschoolers that helps build fine motor skills while making an adorable paper fox.
For book lovers, the Paper Fox Bookmark Craft and Felt Fox Bookmark Craft offer two cute ways to keep your place in your favorite stories. And if you’re looking for a charming handmade decoration, our Felt Fox Ornament is a must-try!
Table of Contents
Why You’ll Love This Craft
🦊 Simple and fun! No baking required—just shape, assemble, and let dry.
✋ Great for fine motor skills! Rolling, shaping, and assembling help with dexterity.
🎨 Customizable! Use different colors or add unique details to make your fox special.
📌 Perfect for all ages! Kids, teens, and adults will all love this easy clay project.
Materials Needed

- Air-dry clay or foam clay – In orange, black, and white
- Clay tools – For shaping and adding details
- Black marker (optional) – For drawing the eyes and nose
How to Make a Clay Fox
Step 1: Prepare the Clay:
Start by selecting your orange, white, and black clay. Take a medium-sized piece of orange clay and divide it into three equal parts—one for the head, one for the body, and one for the tail. Roll each part into a smooth ball.

Step 2: Shape the Head
Take one of the clay balls and roll it between your hands to create a slightly rounded shape. This will be the fox’s head.

Step 3: Add the White Face Details
Flatten a small piece of white clay into a long shape with rounded edges.

Gently press this onto the lower part of the fox’s face, curving the edges upward to create the signature white fur markings.

Step 4: Make the Ears
Take two small pieces of orange clay and shape them into pointed ears.
Then, create two smaller pieces of white clay for the inner ears.

Attach the white inner ear pieces to the orange outer ear pieces and press them onto the top of the fox’s head.

Step 5: Shape the Body
Take another orange clay ball and roll it into a cylinder shape. This will be the fox’s body.

Use a round clay tool or the end of a pencil to create a small indent on the bottom—this helps the fox stand upright.

Step 6: Attach the Head
Press the head onto the top of the body and gently smooth the connection so it stays in place.

Step 7: Make the Tail
Take the last piece of orange clay and roll it into a long, slightly curved tail shape.

Step 8: Add the White Tail Tip
Take a small amount of white clay and shape it into a cone.

Attach the wider end of the cone to the tip of the tail and blend it slightly so it looks natural.

Step 9: Add Fur Texture
Use a clay tool or toothpick to create small indentations along the tail to give it a textured fur look.

Step 10: Attach the Tail
Press the tail onto the back of the fox’s body, curving it slightly around to the front so the white tip is visible.

Step 11: Add the Face Details
For the eyes and nose, you can either:
- Use small pieces of black clay to form the eyes and nose.
- Draw them on using a black Sharpie once the clay is dry.

Step 12: Let It Dry
Allow your clay fox to air dry completely. Depending on the type of clay you use, this can take anywhere from a few hours to a full day. Once dry, your adorable fox is ready to display or play with!

Once you’ve finished your adorable fox craft, don’t forget to pick the perfect fox name for your little creation!
Top Tips for Success
✔️ Use foam clay if crafting with younger kids—it’s lightweight and easier to shape.
✔️ Smooth the clay with a damp fingertip to remove fingerprints and creases.
✔️ Experiment with colors to make different fox variations, like arctic foxes or red foxes!
✔️ Turn it into an ornament by inserting a small hook or loop into the top before drying.
Educational Uses
This fox craft for preschool and elementary-aged kids is a fantastic learning activity!
- Fine Motor Development: Rolling, shaping, and pressing clay helps strengthen finger muscles.
- Creativity & Imagination: Kids can customize their fox, adding their own creative touches.
- Science & Nature Learning: Pair this craft with a lesson on foxes and their habitats to teach about woodland animals.
- Sensory Play: Working with clay provides a great tactile experience for younger children.

This clay fox craft is a fun and creative activity that kids and adults alike will enjoy! Whether you’re making it as a standalone project, incorporating it into a woodland animal lesson, or just crafting for fun, this cute little fox is sure to be a hit.

For even more fox arts and crafts, check out our Handprint Fox Craft—a perfect keepsake activity for little hands. If your kids enjoy pretend play, they’ll love making their own Fox Mask Templates, great for dress-up or classroom fun.
And for an eco-friendly craft, our Toilet Paper Roll Fox Craft turns recyclables into an adorable woodland friend. If you want to create an interactive scene, don’t miss our 3D Fox Scene Craft—a fun way to bring these cute creatures to life!
Try making your own today, and don’t forget to share your creations—I’d love to see how your clay foxes turn out! Happy crafting! 🦊✨