
Cute Felt Ghost Craft (With Free Printable Pattern!)
These cute felt ghosts are perfect for using as Halloween ornaments on a spooky tree or to give as a gift, where a ghost would be meaningful to the gift receiver.
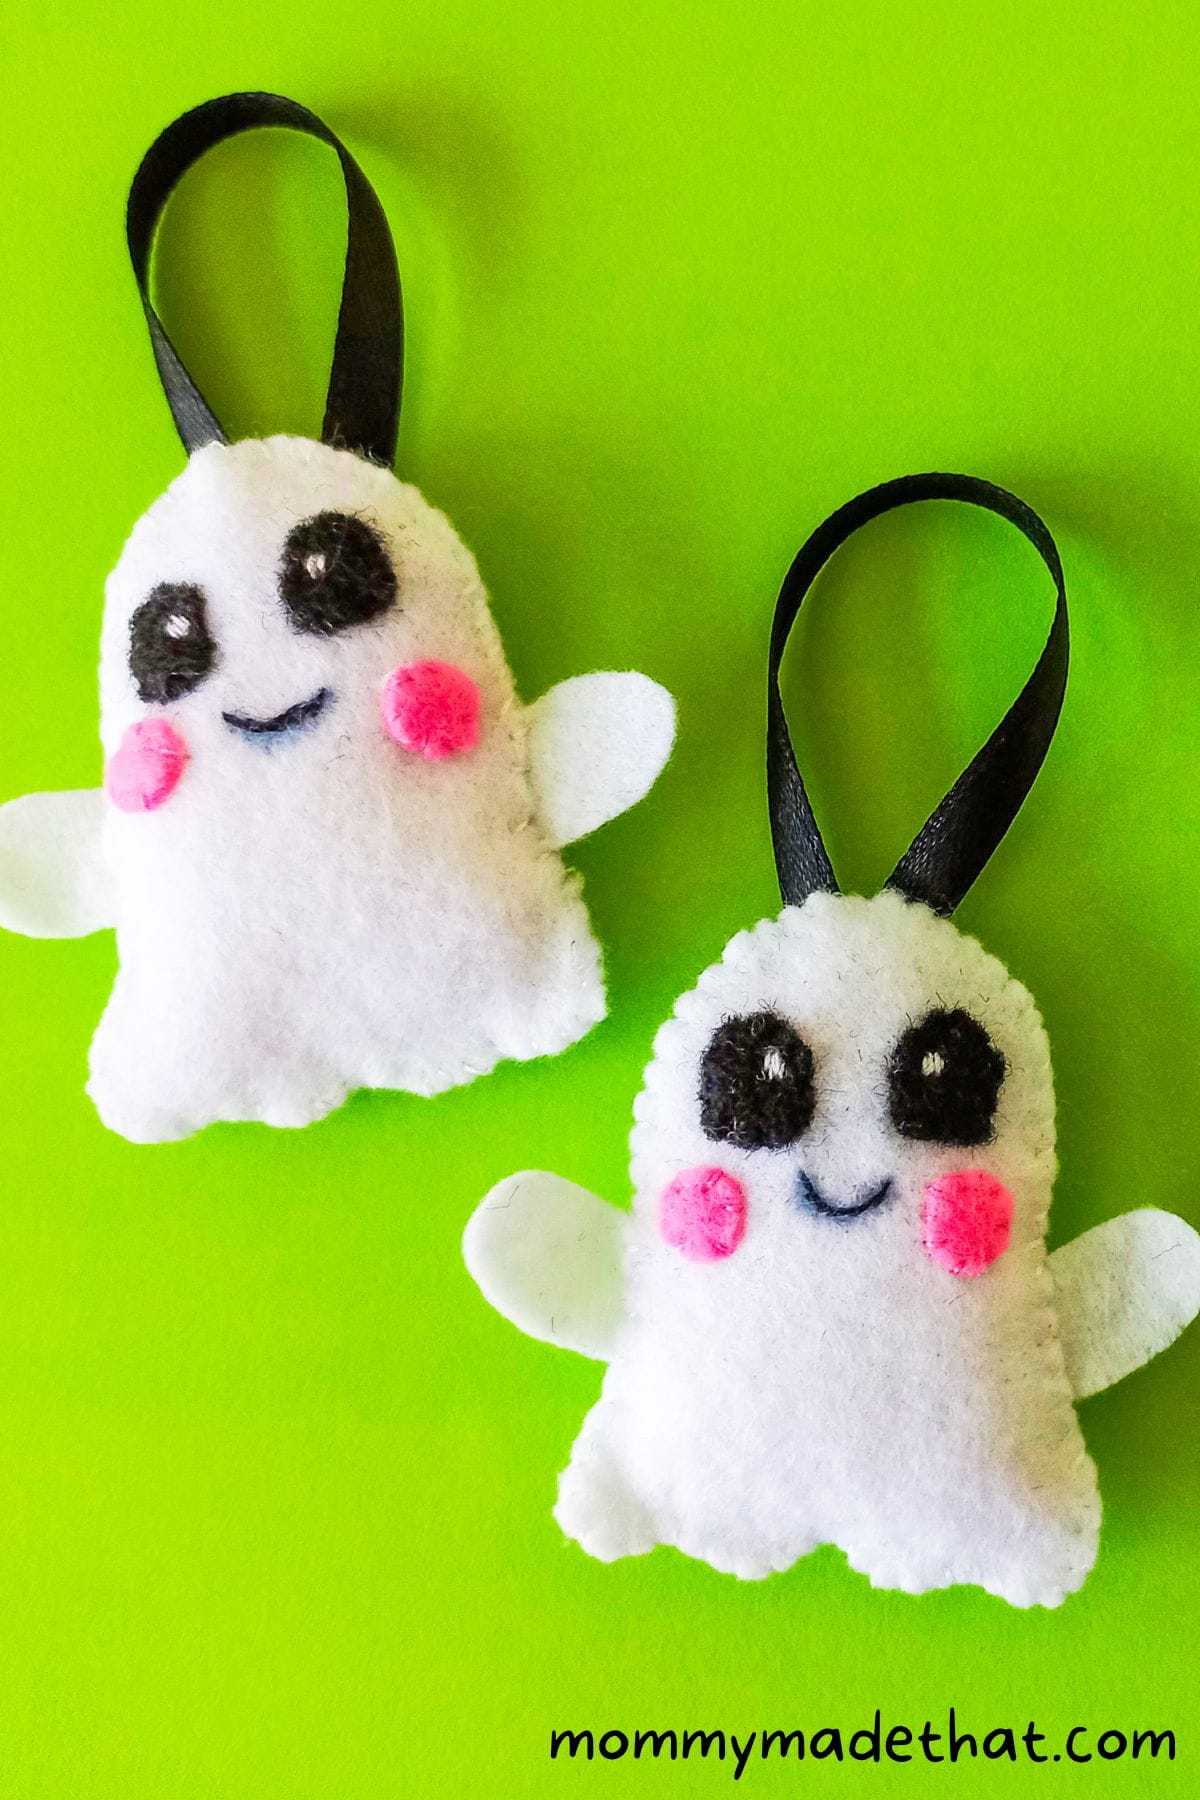
Making your own felt ghost is a fun and easy way to get into the Halloween spirit!
This project is perfect for kids and adults alike, and it’s a great way to use up any spare felt you have lying around.
Plus, there’s a free printable pattern available, which makes it really easy to make your own ghost!
If you like this craft, make sure to check out our printable ghost templates and our free ghost coloring pages!
Once your felt ghost is stitched and ready to hang, give it a friendly (or spooky!) name from our Ghost Names list, it’s a great way to bring personality to your Halloween decor.
Table of Contents
Materials
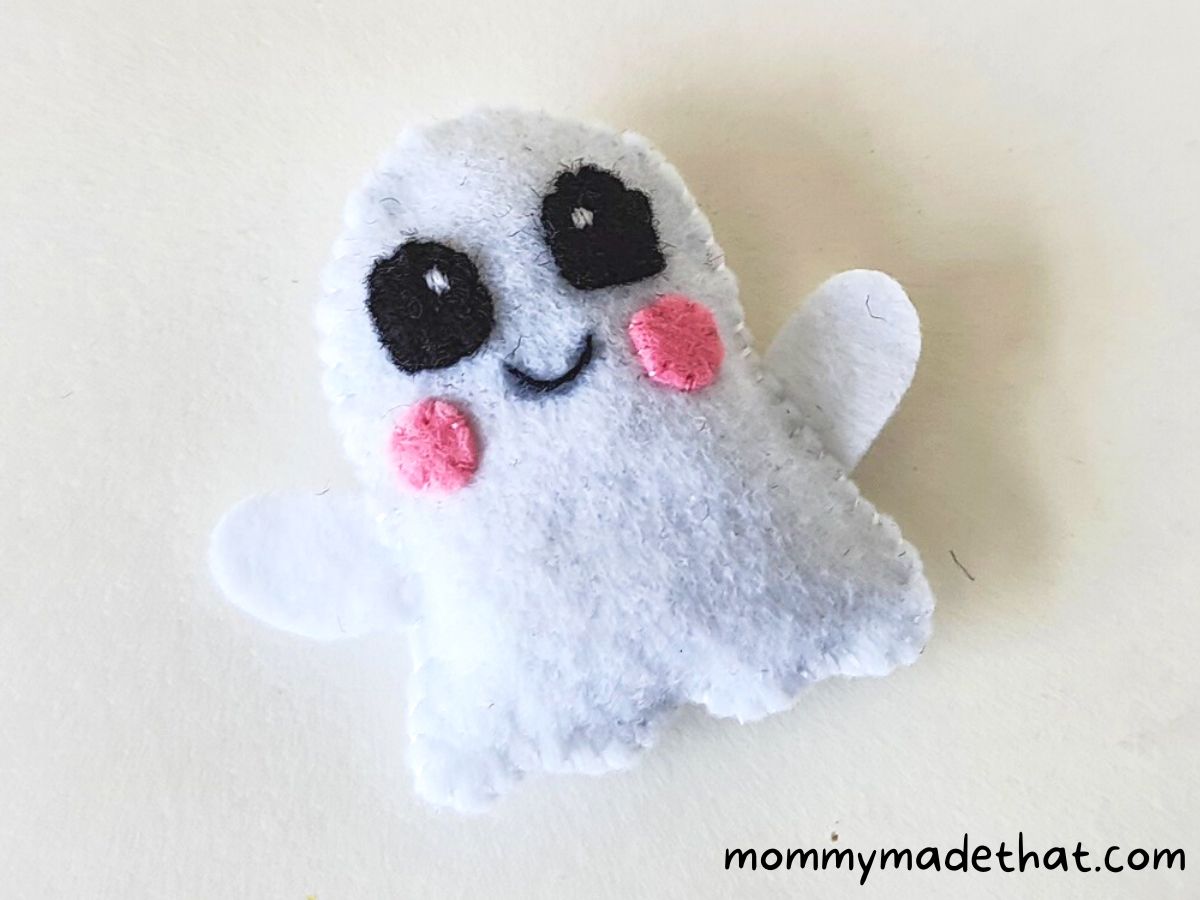
Colored felt fabric: We used mostly white for our ghost, but we did use a few small pieces of black and pink for the eyes and cheeks.
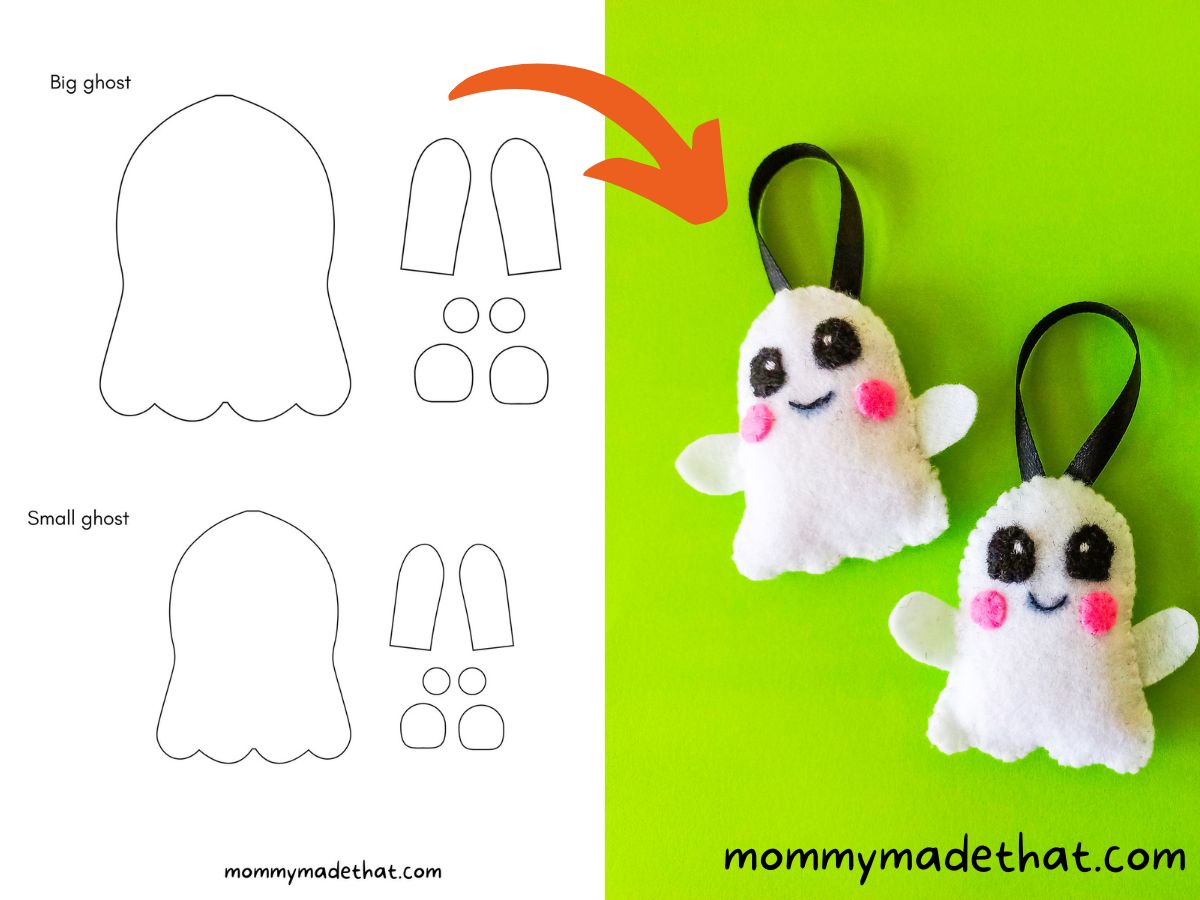
Printable Ghost pattern: We have a free felt ghost pattern you can grab at the end of the tutorial!
Colored thread: We used thread to match the different colors of felt, so for our we used white, black and pink.
You’ll also need some basic supplies, like:
- Needle
- Scissors
- Pencil – to trace the template
Instructions
First start by grabbing and printing out the felt ghost pattern. Then grab your felt sheets.
We used white for the ghost body, pink for the cheeks and black for the eyes.
The template includes a base pattern (You’ll need to cut out 2 of the ghost body shapes) 2 arm pieces, 2 eyes and 2 checks.
Step 1: Cut out the Pattern Pieces
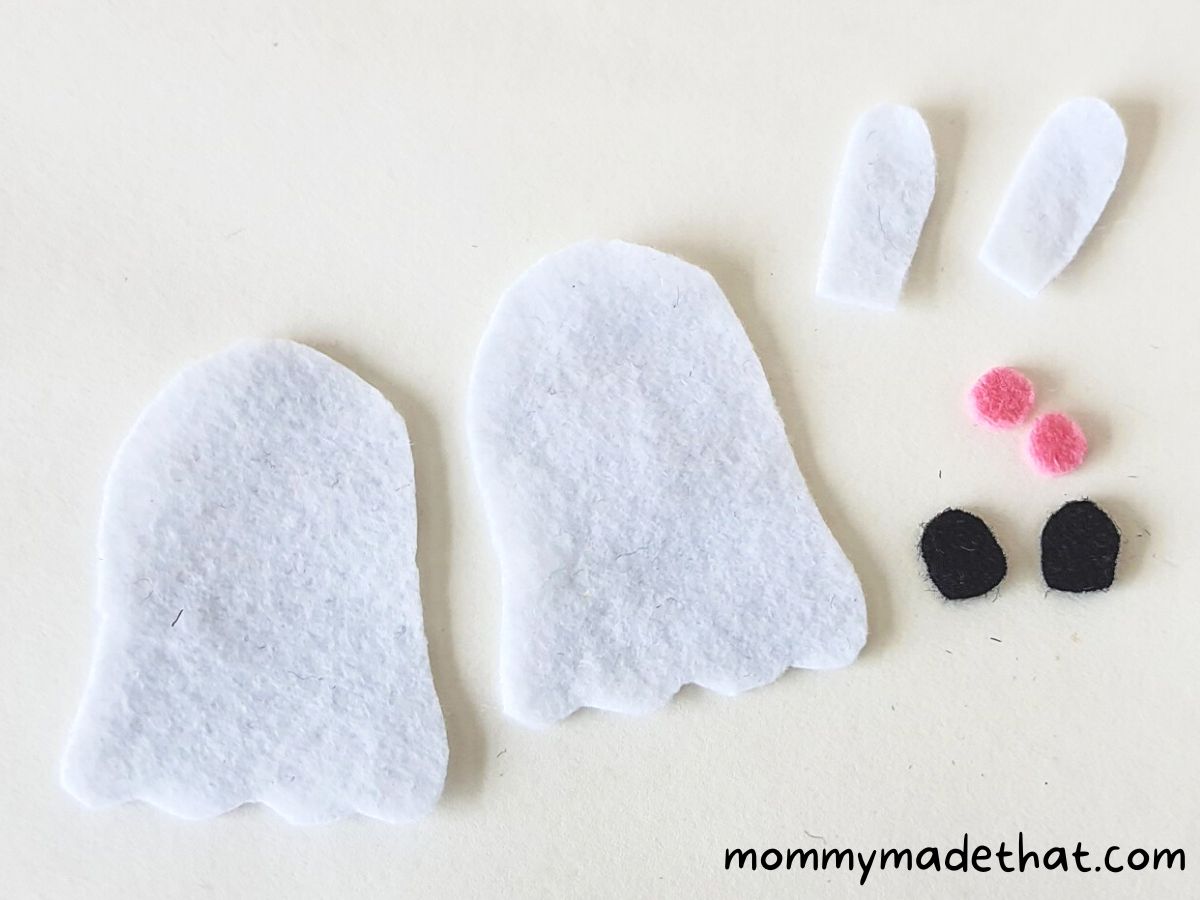
Trace and cut out all the pattern pieces from the felt.
Step 2: Attach an Eye
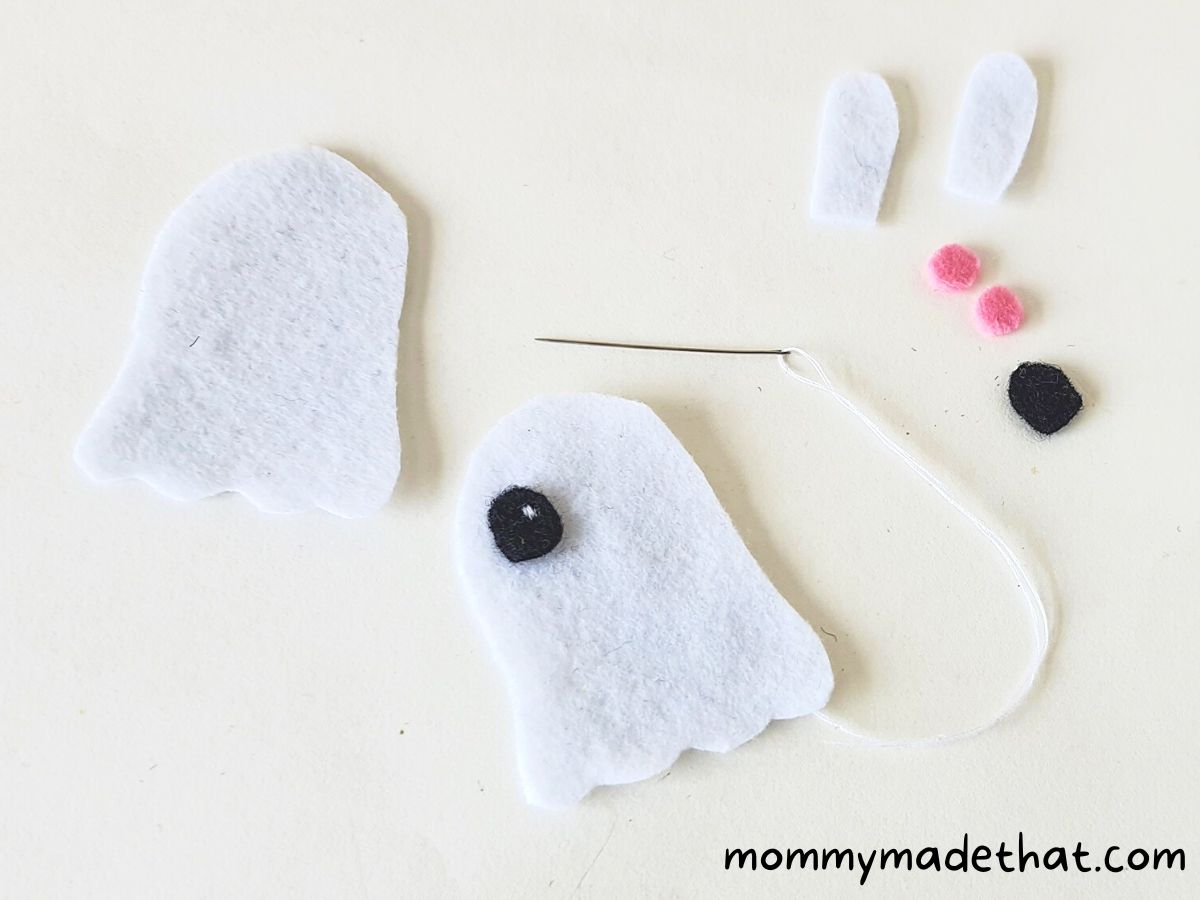
Grab one of the eye pieces and attach to one of the ghost body bases.
Use white thread to make a single dot in the eye, attaching it to the base piece.
Step 3: Attach the Other Eye
Then attach the other eye in the same manner. Using black thread, stitch a mouth onto the ghost’s face under the eyes.
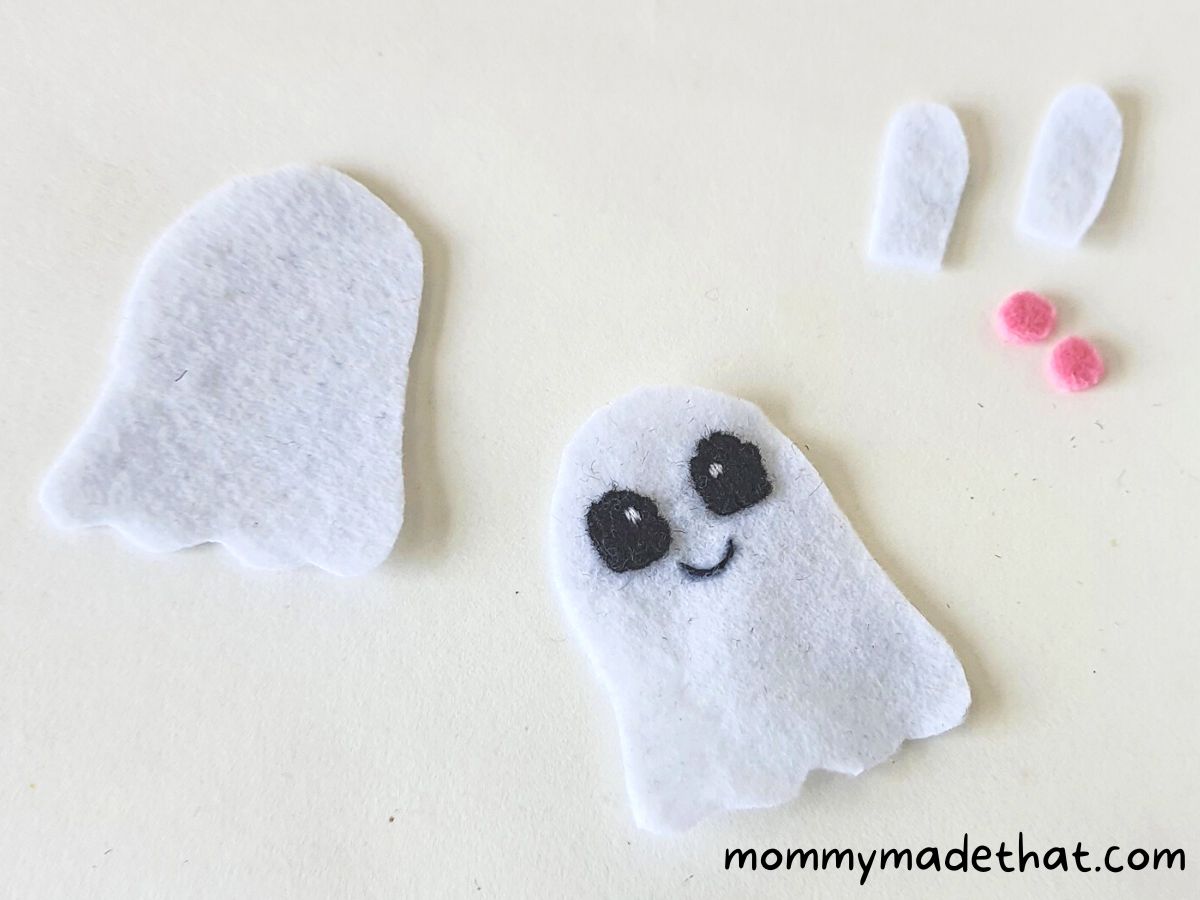
Step 4: Complete the Face
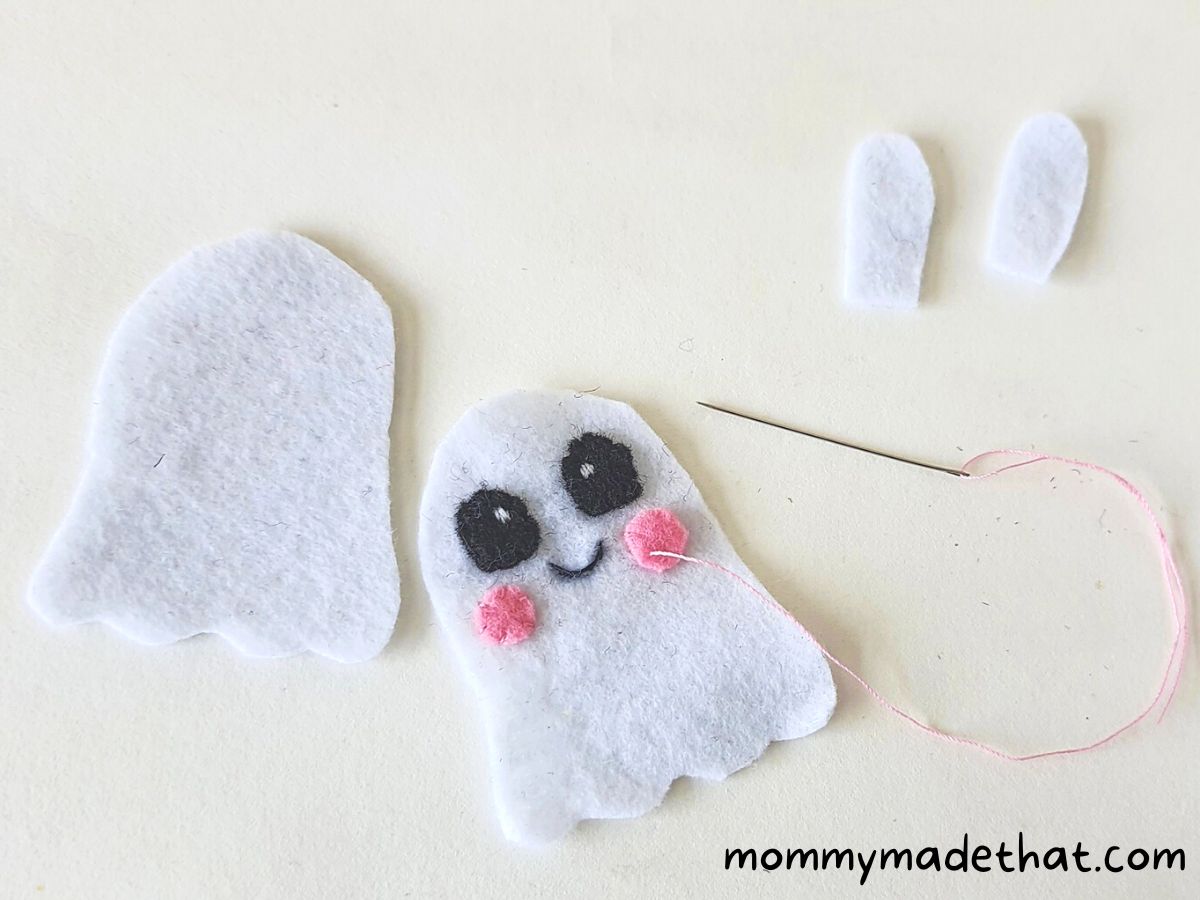
Using pink thread, stitch the cheeks of the ghost on either side of the mouth.
Step 5: Add Arms
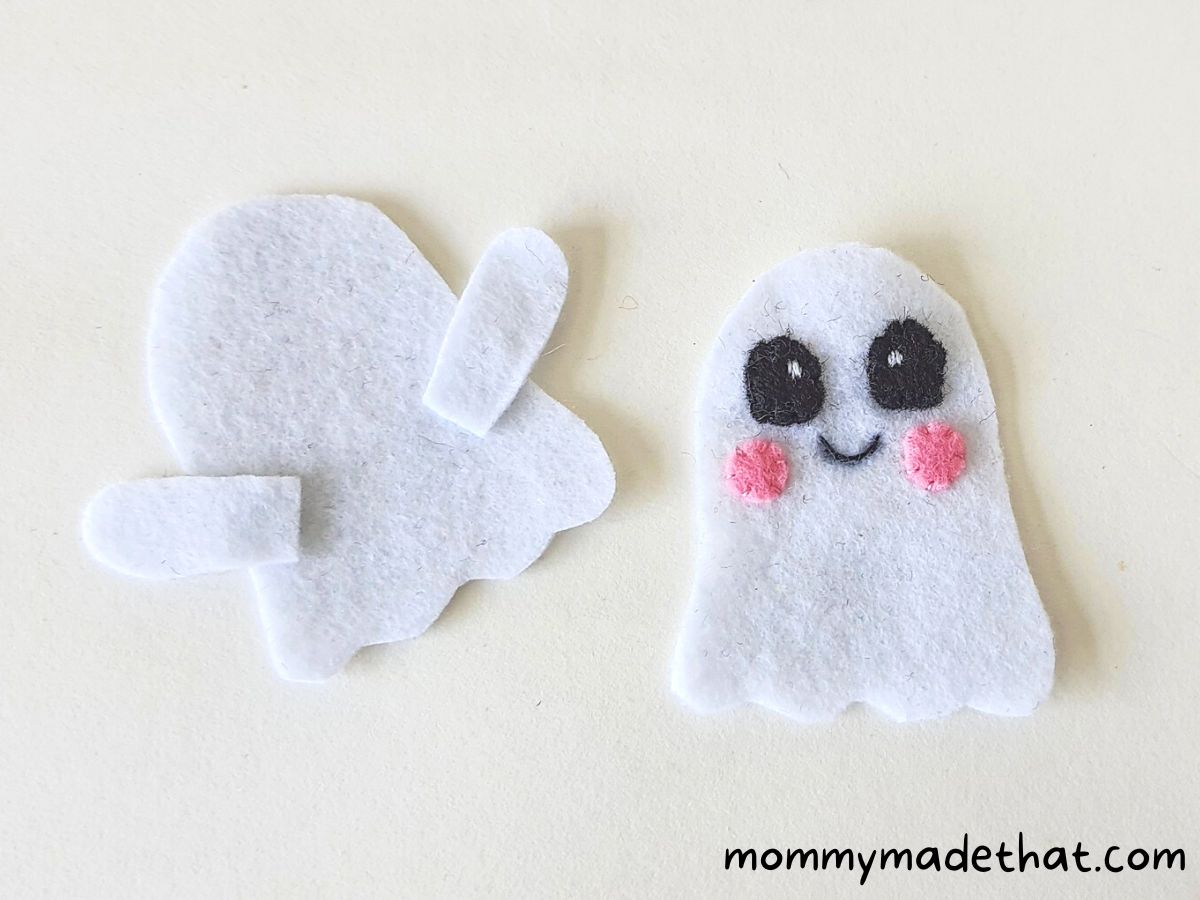
Next, grab the other base piece and lay it flat. Place the arm pieces on both sides of the base.
Step 6: Attach the Pieces Together
Then lay the other ghost piece with the embroidery on top of the other piece face up, making sure that the arms are sandwiched in between the two base layers.
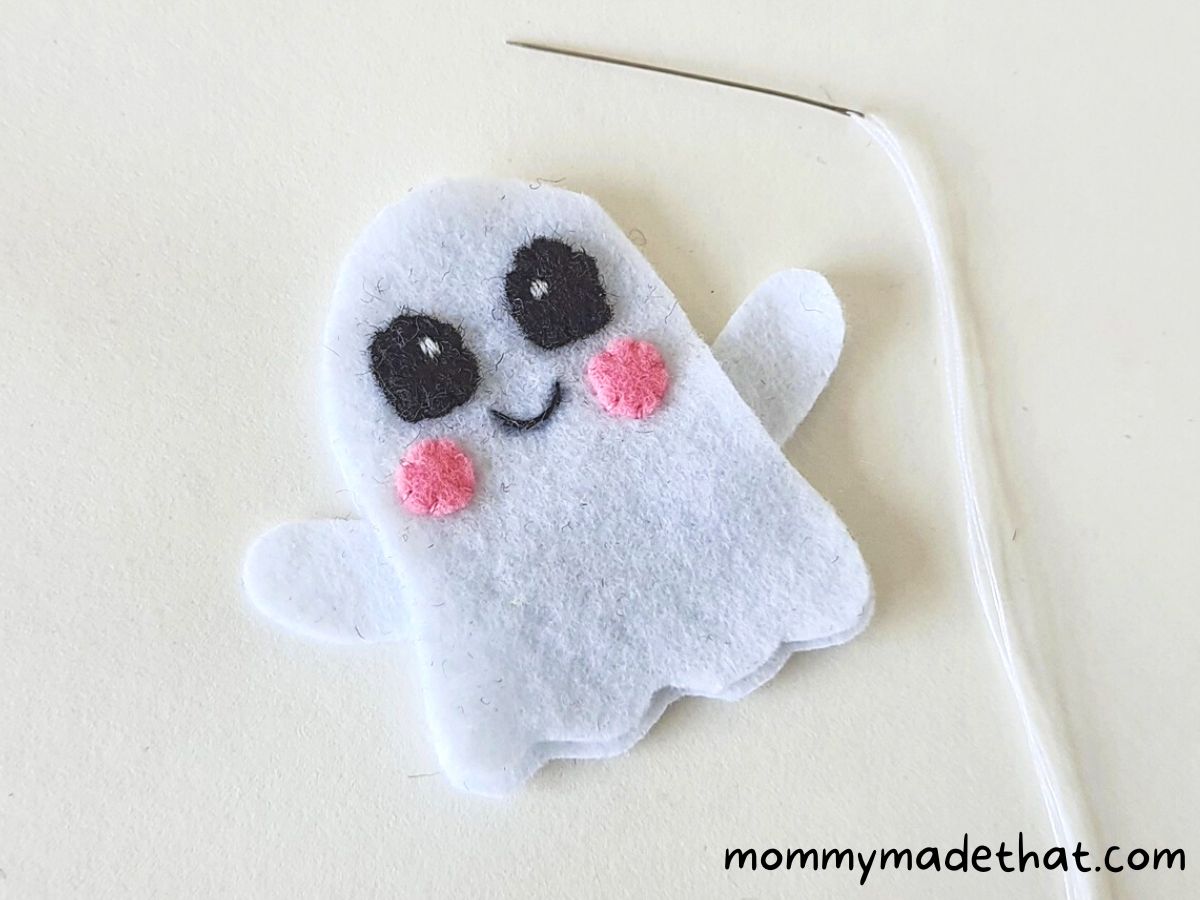
Step 7: Stuff the Ghost
Start stitching around the sides of the ghost to attach them together. Make sure to leave a small opening so you can stuff the ghost.
Use some of the left over felt scraps to stuff the ghost.
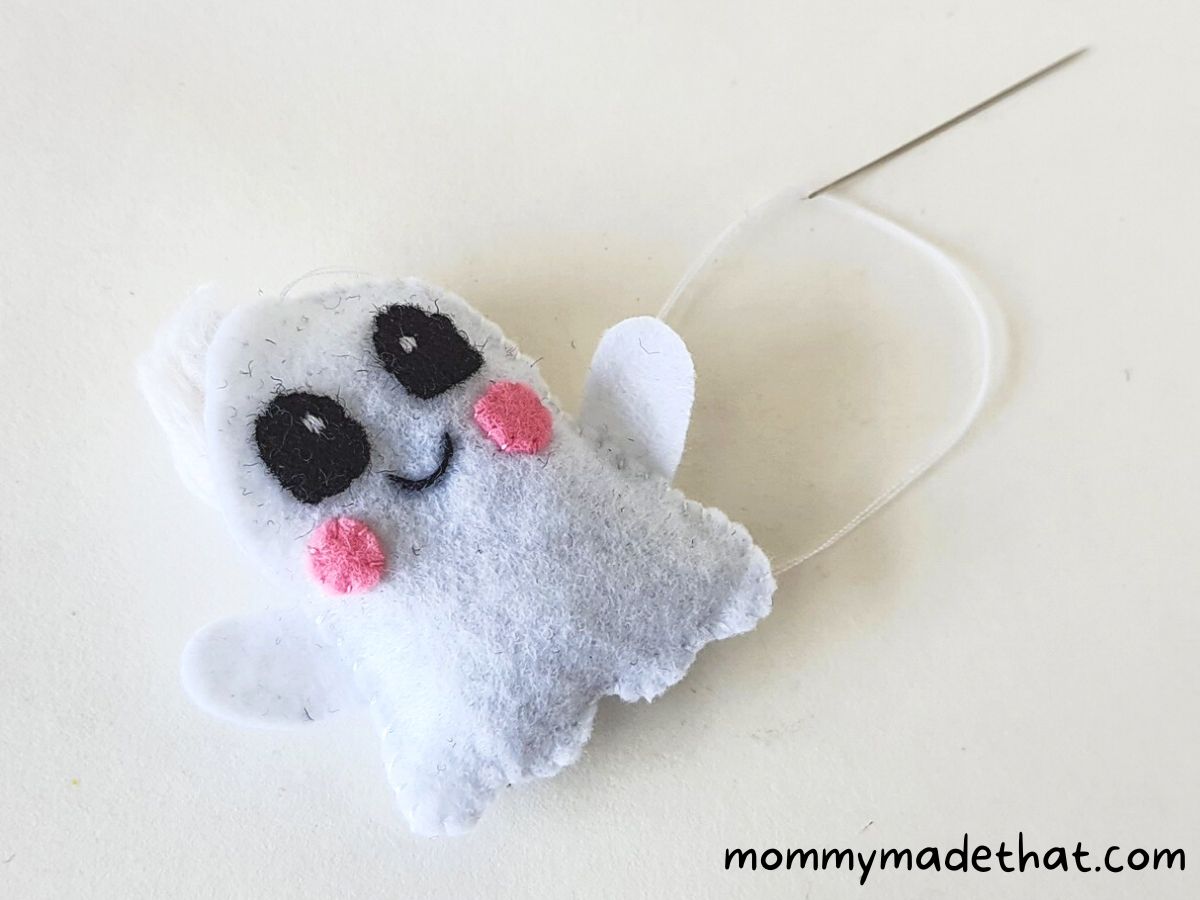
Step 8: Finish Sewing
After you’ve stuffed the felt ghost, finish stitching up the opening to keep all the stuffing inside.
Tie off the thread with a couple of knots and cut off any excess thread.
Step 9:

Finally, cut a piece of small ribbon and make a loop with it.
Attach it the back side of the ghost with a few stitches.
And now your ghost ornament is complete!
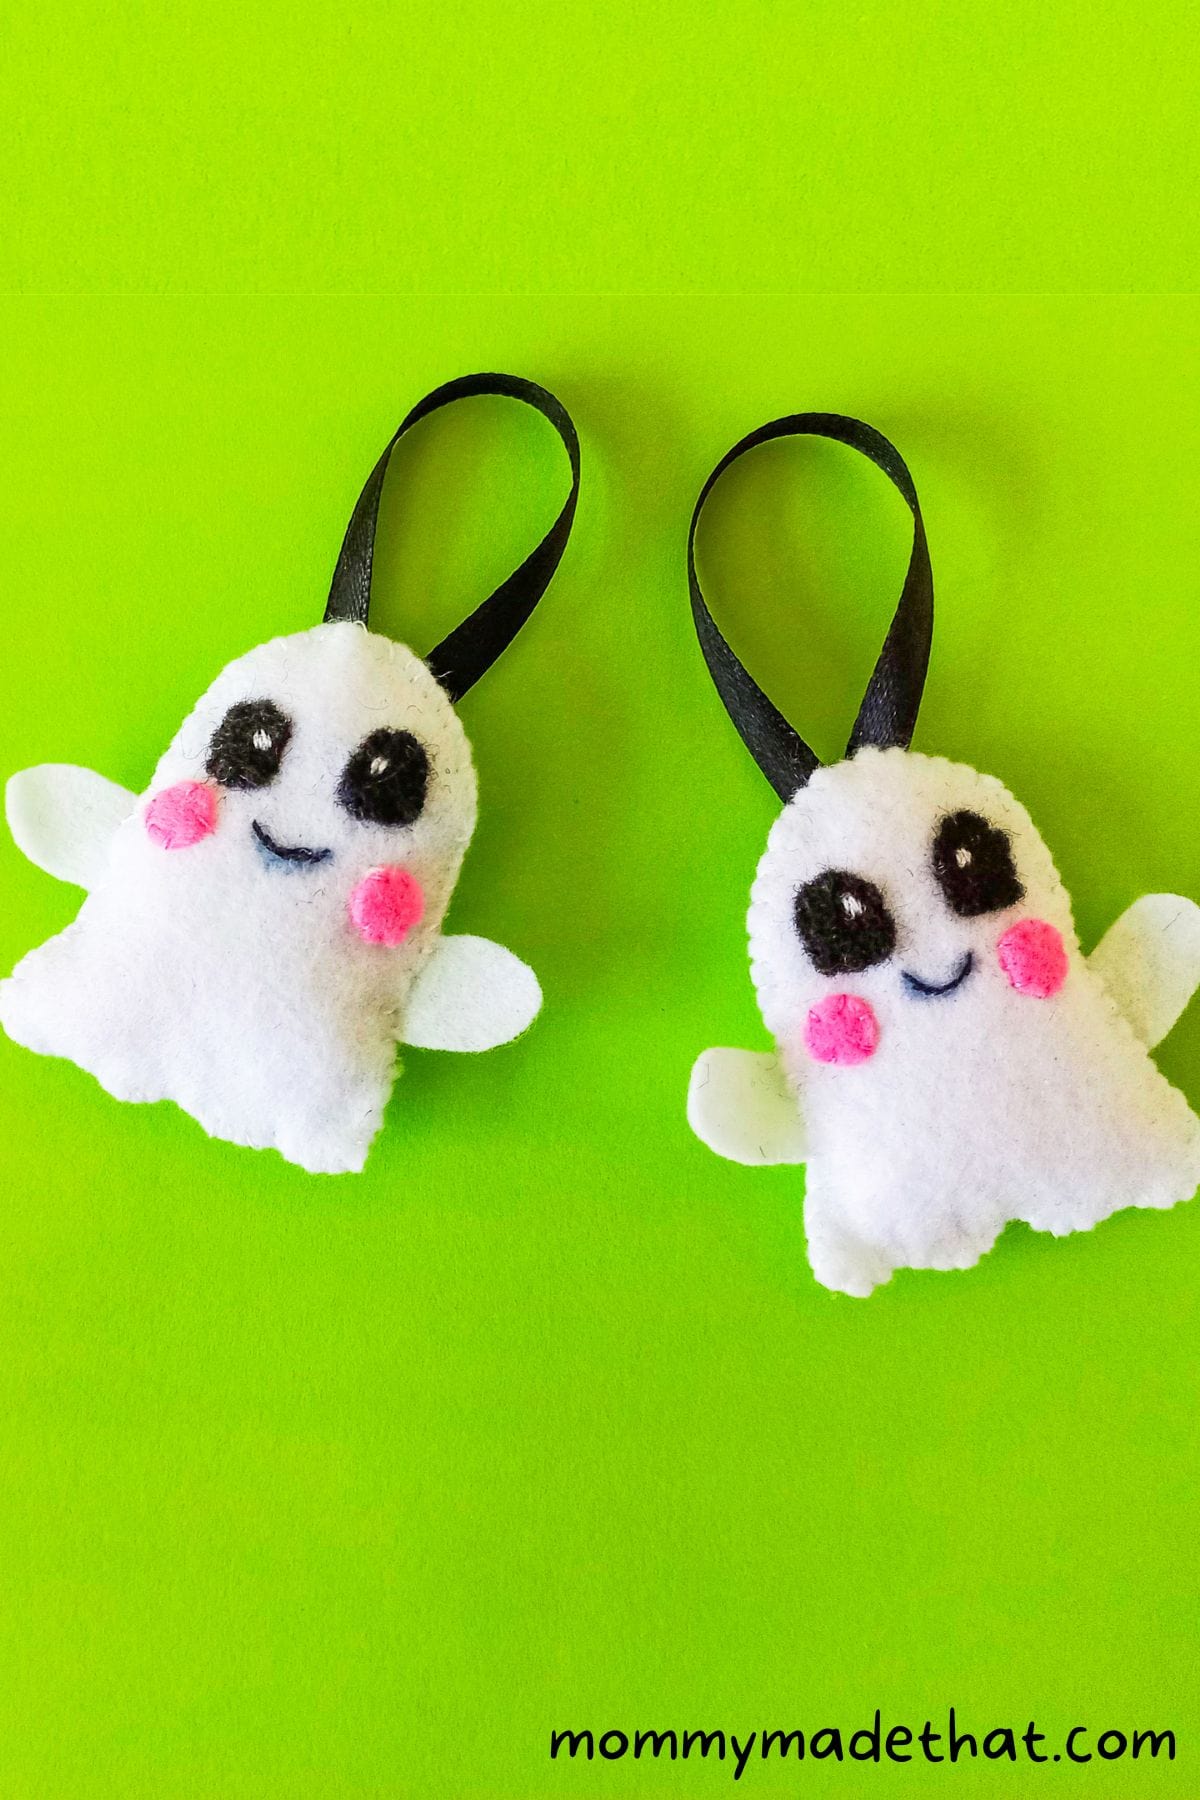
Aren’t they cute!
Grab the Free Printable Pattern
To grab our free printable felt ghost pattern, place your email in the box below.
We’ll send the template straight to your inbox, and let you know when we come out with more free printable patterns!
These patterns are for personal or classroom use only, not for commercial use. But you are most certainly welcome to sell any felt ornaments you make! (Just not the pattern!) Thank you!

Felt Ghost
This adorable felt ghost craft creates cute ghost ornaments. Perfect for decorating for Halloween, or those who enjoy a spooky Christmas ornament. Grab the free pattern!
Materials
- Colored felt fabric
- Matching threads
- Ghost template pattern
Tools
- Needle
- Scissors
- Pencil
Instructions
- Print out the ghost pattern. Grab your felt fabrics and cut out all the pieces of the ghost template.
- Attach one eye piece and to one of the ghost body bases using a white stitch to create a "dot" in the upper part of it's eye. Make sure it attaches to the base,
- Attach the other eye in the same manner. Stitch a mouth using black thread.
- Using pink thread, stitch the cheeks of the ghost on either side of the mouth.
- Next, grab the other base piece and lay it flat. Place the arm pieces on both sides of the base.
- Lay the other ghost piece with the embroidery on top of the other piece face up, making sure that the arms are sandwiched in between the two base layers.
- Start stitching around the sides of the ghost to attach them together. Make sure to leave a small opening so you can stuff the ghost. Use some of the left over felt scraps to stuff the ghost.
- After you've stuffed the felt ghost, finish stitching up the opening to keep all the stuffing inside.Tie off the thread with a couple of knots and cut off any excess thread.
- Finally, cut a piece of small ribbon and make a loop with it. Attach it to the back side of the ghost with a few stitches. And now your ghost ornament is complete!
Notes
The colors we used for the ghost are white felt for the body, black felt for the eyes and pink felt for the cheeks.
Loving the different ideas for felt Christmas decorations. Thanks for the instructions and patterns.