
Adorable Felt Gnome Plushie
If you love gnomes, you’re about to fall in love with this adorable Felt Gnome Plushie. There’s no denying that this gnome craft is one that creates a fun and snuggly little guy. Just in time for the holidays, too!
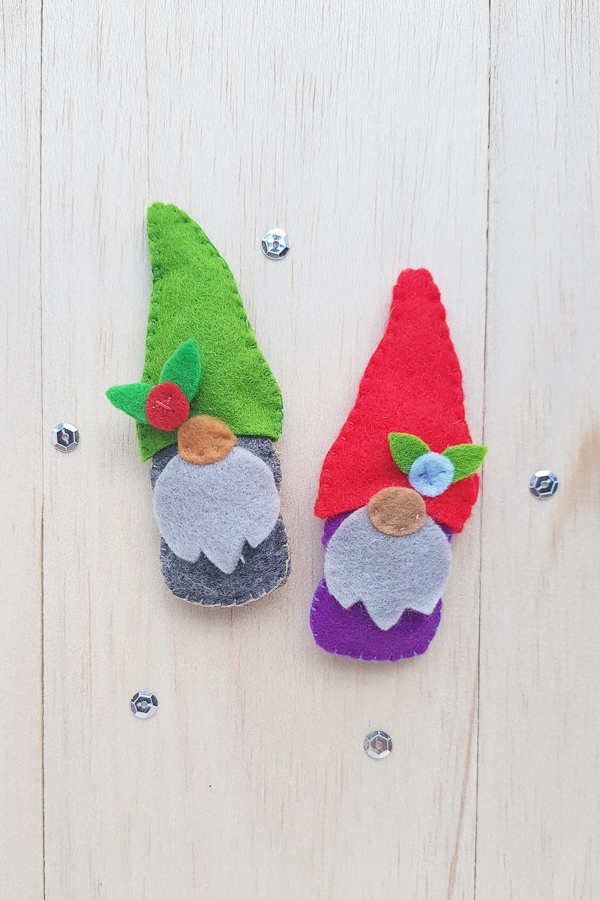
There’s no denying the cuteness of this Felt Gnome Plushie. Just look at all the varying options of how you can easily create one!
It’s a fun Christmas craft for kids and adults alike.
What I love most about this simple needlecraft is that it’s simple and makes a great holiday decoration.
It’s a great DIY felt ornament craft. And would look super cute on the Christmas tree.
This is one holiday craft that we can easily make together as a family or whip up in no time at all to gift to our family and friends.
Giving the gift of homemade is always a great idea! The bonus of it being a gnome just makes it extra special!
What I love about these little gnomes, is that they make excellent DIY Christmas Ornaments too.
This post may contain affiliate links. This means, if you click a link and make a purchase, we may earn a commission at no cost to you. You can read our full disclosure here.
Supplies Needed
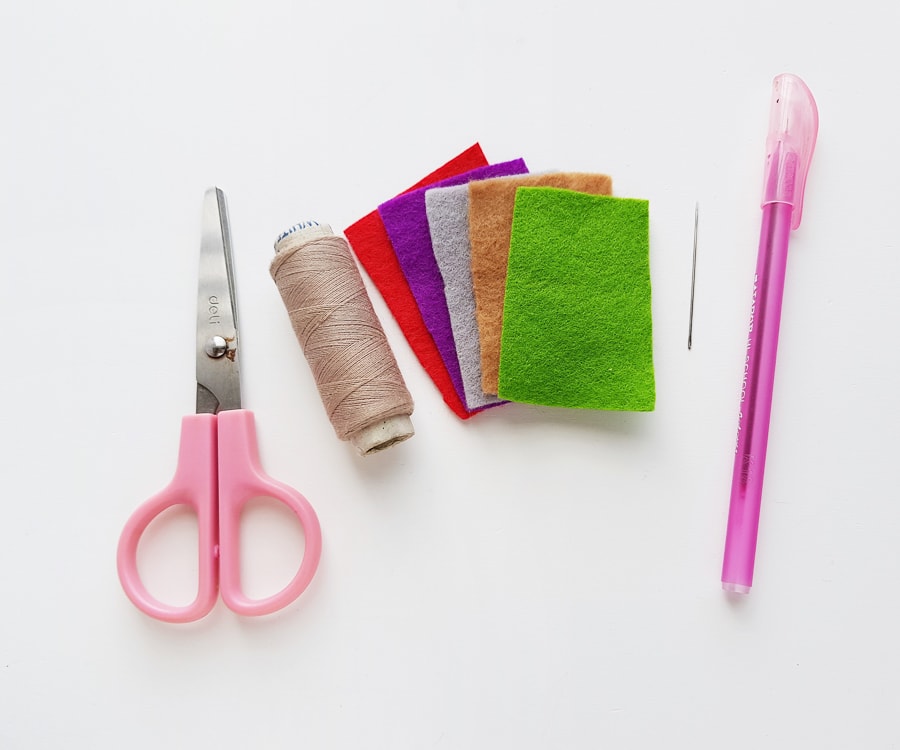
- Felt fabric
- Needle
- Thread
- Pencil or fabric marking pen
- Scissors
HOW TO MAKE THESE felt Gnome Plushies
Just gather up the simple ingredients that you need and get crafting. You’re going to love the outcome!
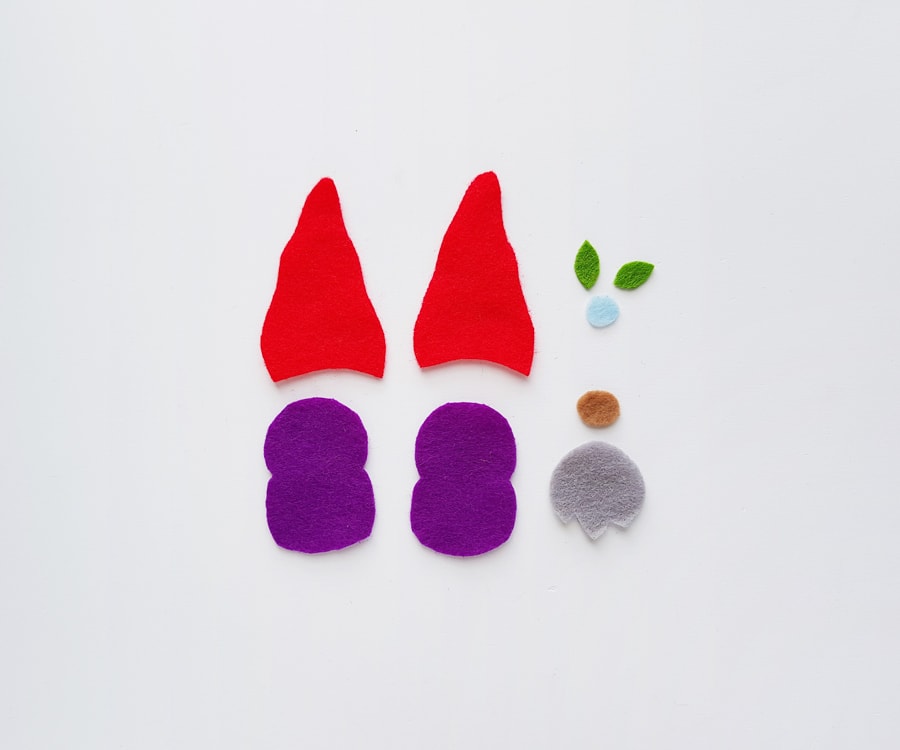
Step 1: print and cut out the patterns
This step is where you’re going to print and cut out the patterns from the template.
Pick out your fabrics that you’re wanting for this craft and then trace the patterns on the fabric using your pencil or even a fabric marker.
Cut out the pattern with scissors.
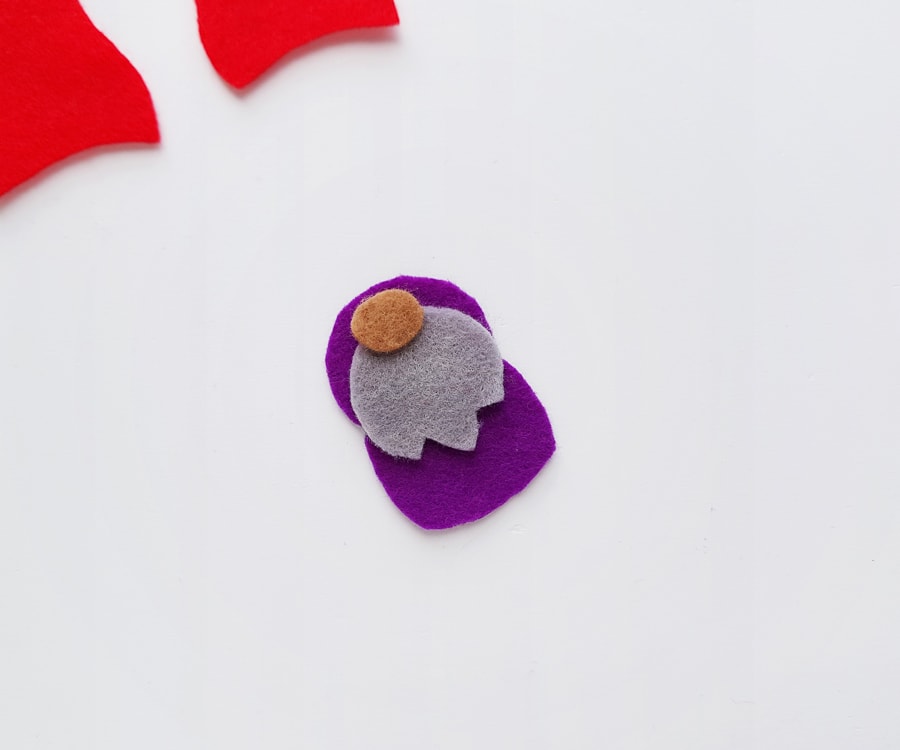
The provided template includes a pattern for the body, the hat, the nose, the beard, and also leaves and a cherry.
Step 2: Assemble the pattern
Take one of the body patterns, the nose, and the beard and put the body portion of the pattern on a flat surface.
Put the beard on the middle part of the body and place the nose on the top side of the beard. Make certain that you overlap half the nose with the top of the beard.
Step 3: Prepare the thread
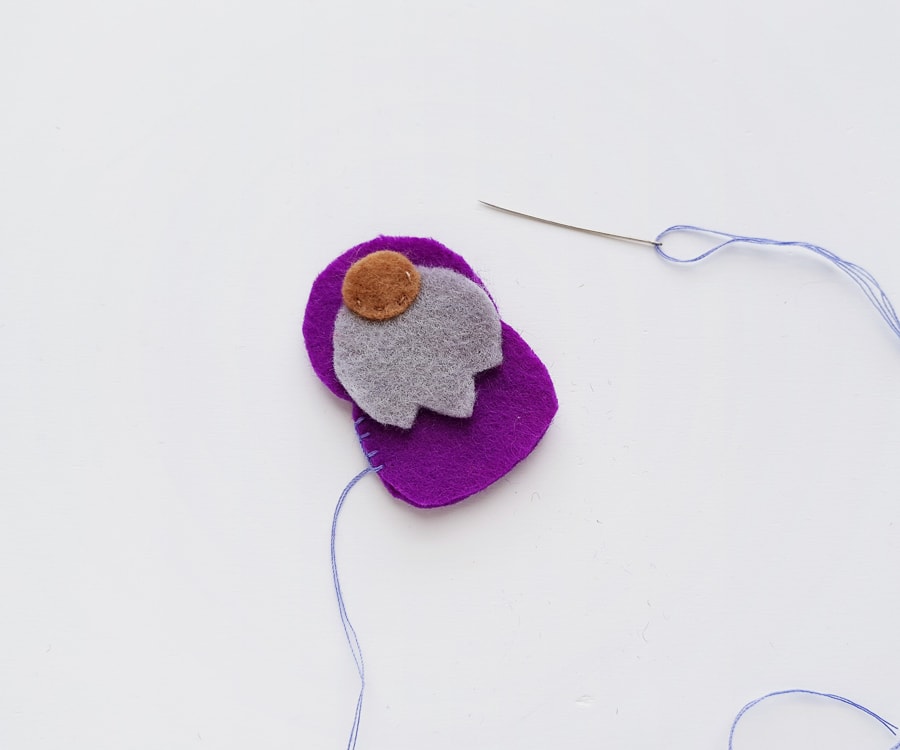
Take your matching thread (matches the nose) and put it through the needle.
Stitch only the overlapped part of the beard and nose.
Make certain to stitch the body part with them as well.

Step 4: Complete the sewing
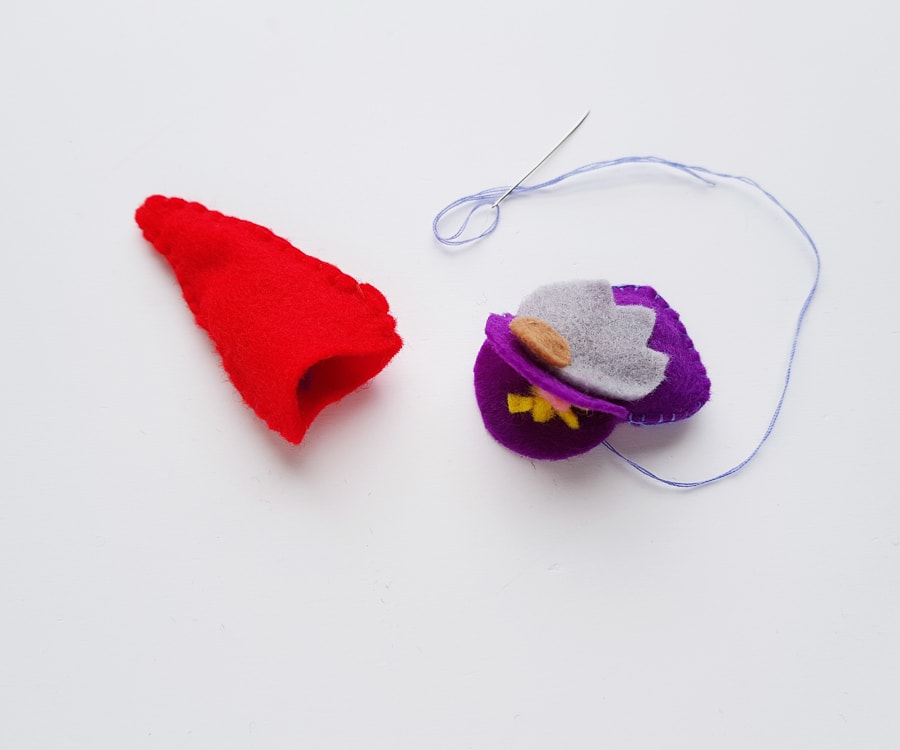
Place the other body pattern (the plain pattern) under the stitched one.
Make sure that both body patterns are matched nicely on all sides.
Start to stitch the body patterns around the sides.
Step 5: put in the stuffing
Keep in mind that while you’re stuffing, you need to leave a small opening to add in the stuffing.
Use scrap or cotton as the stuffing.
You can even cut up some scrap felt pieces to use as well.

Step 6: Fill the rest of the pattern with stuffing
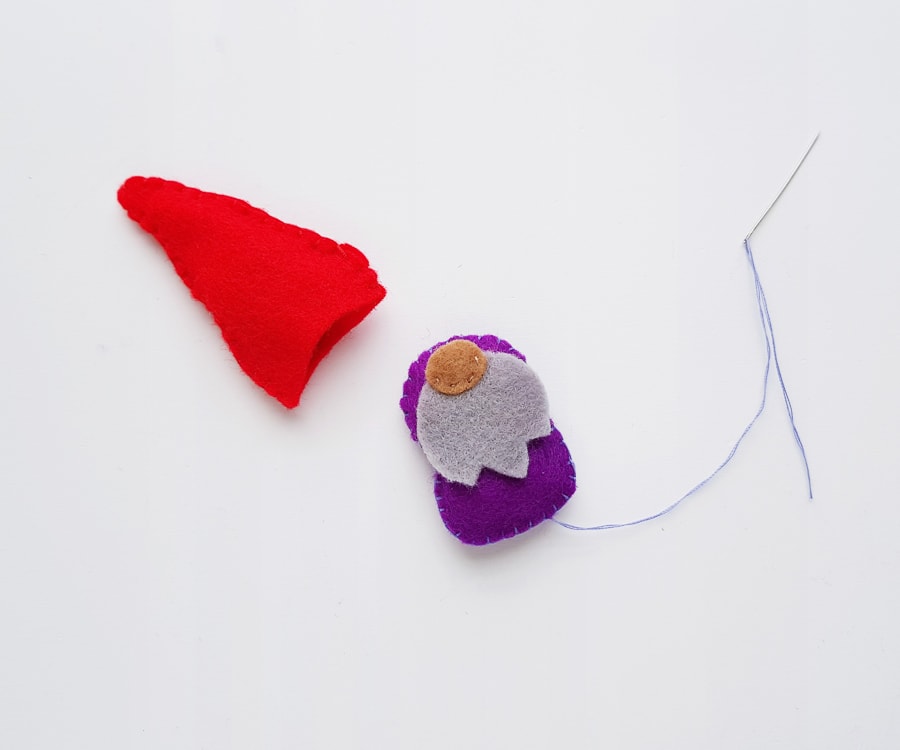
Keep filling it with stuffing until you are happy.
Also, grab the hat cutouts and stitch them on as well but make certain to keep the bottom straight and intact. Stuff the hat through the bottom.
Step 7: Close up the gnome
Close up the opening of the body gnome once stuffed.
Tie a knot and draw the needle through the gnome and draw the needle out.
Then, cut off any extra thread.
Step 8: Finish up the hat
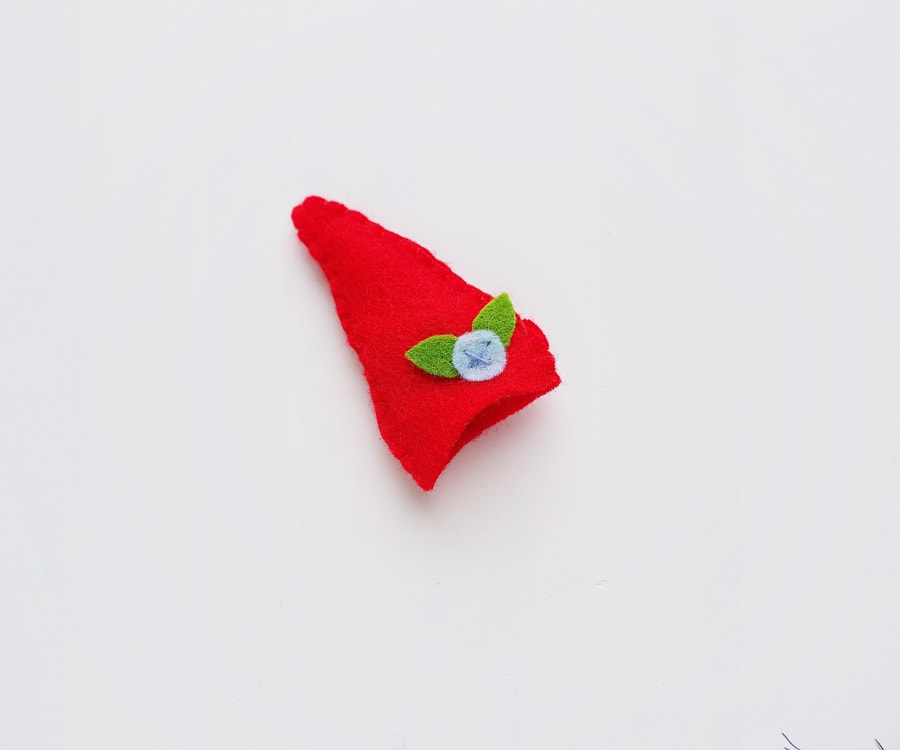
Grab the hat and put the 2 leaf patterns on the hat as well.
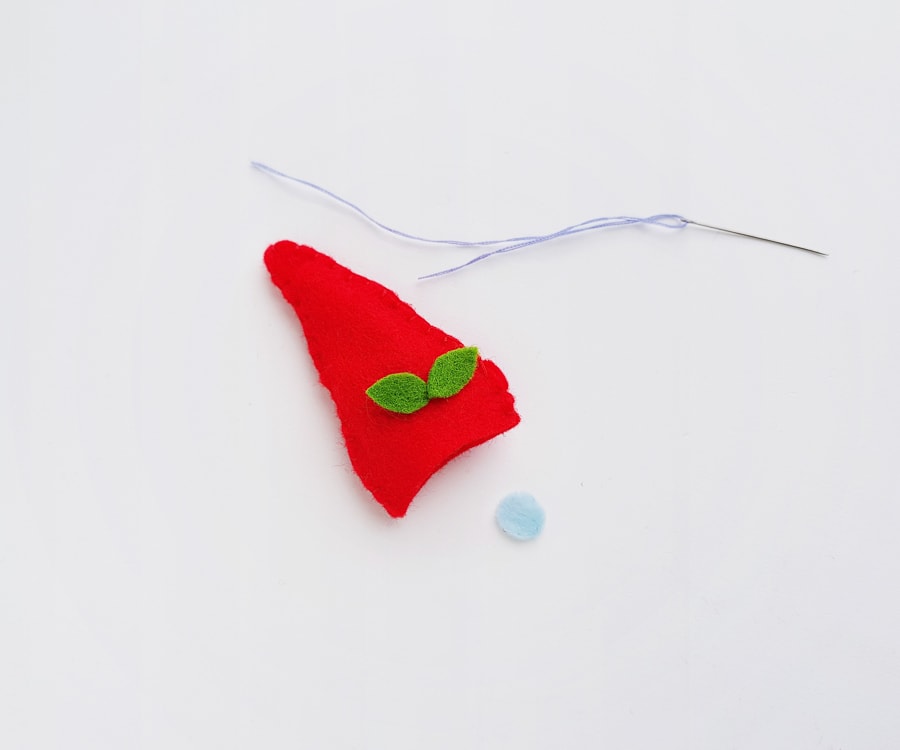
Step 9: Put the cherry on top
Take the cherry felt piece and put on the leaves and stitch them together.
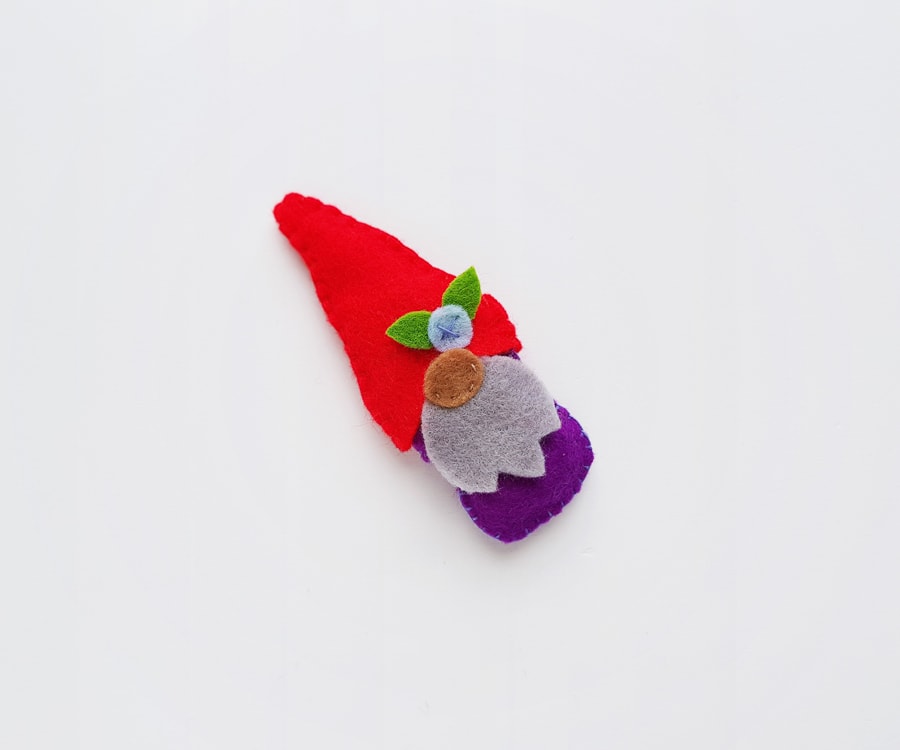
Step 10: Sew on the gnome hat
Take your gnome hat and push the head side of the felt gnome inside the felt hat.
The hat needs to reach the nose of the gnome.
Once that happens, stitch to join the hat to the gnome.
Tie a knot and cut off the extra thread.
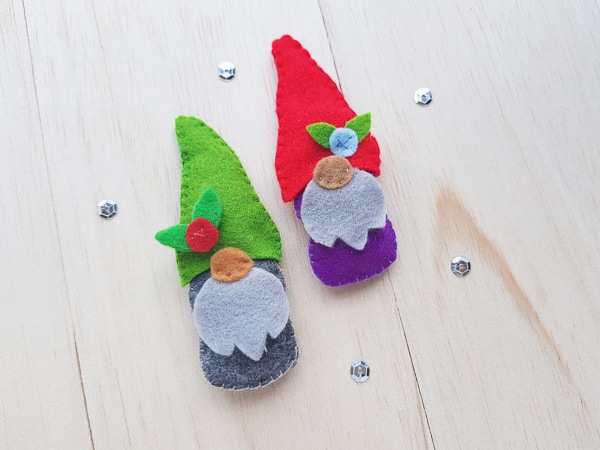
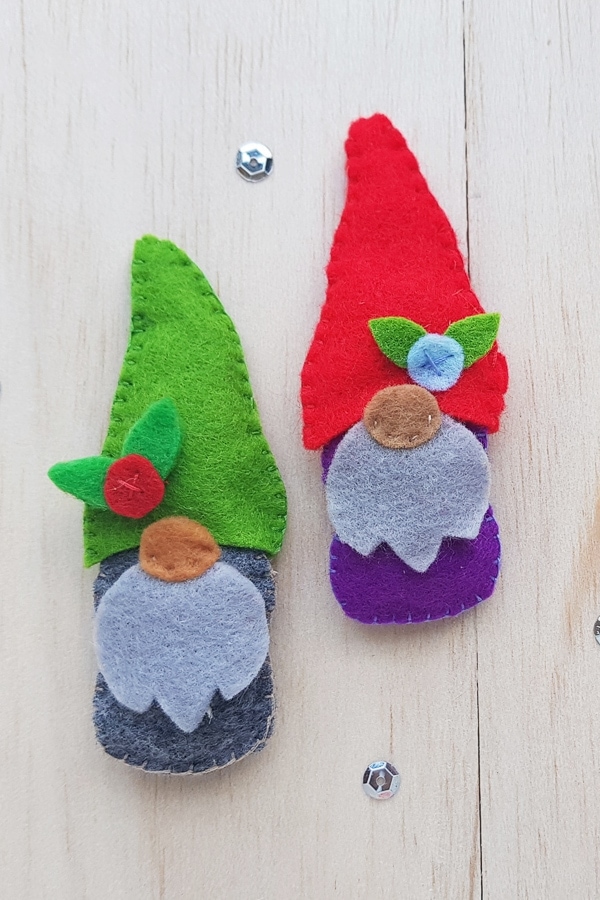
Now your felt gnomes are all finished and ready to go.
They’d make adorable felt Christmas ornaments.
Make sure to check out our fun no-sew felt gnome as well.
They are just as cute, but require no sewing!


I LOVE this, but I don’t see the template. Where can I get that?
Hi there! You can find the gnome plushie template in our craft resource library =)