Handprint Rocket Ship Craft
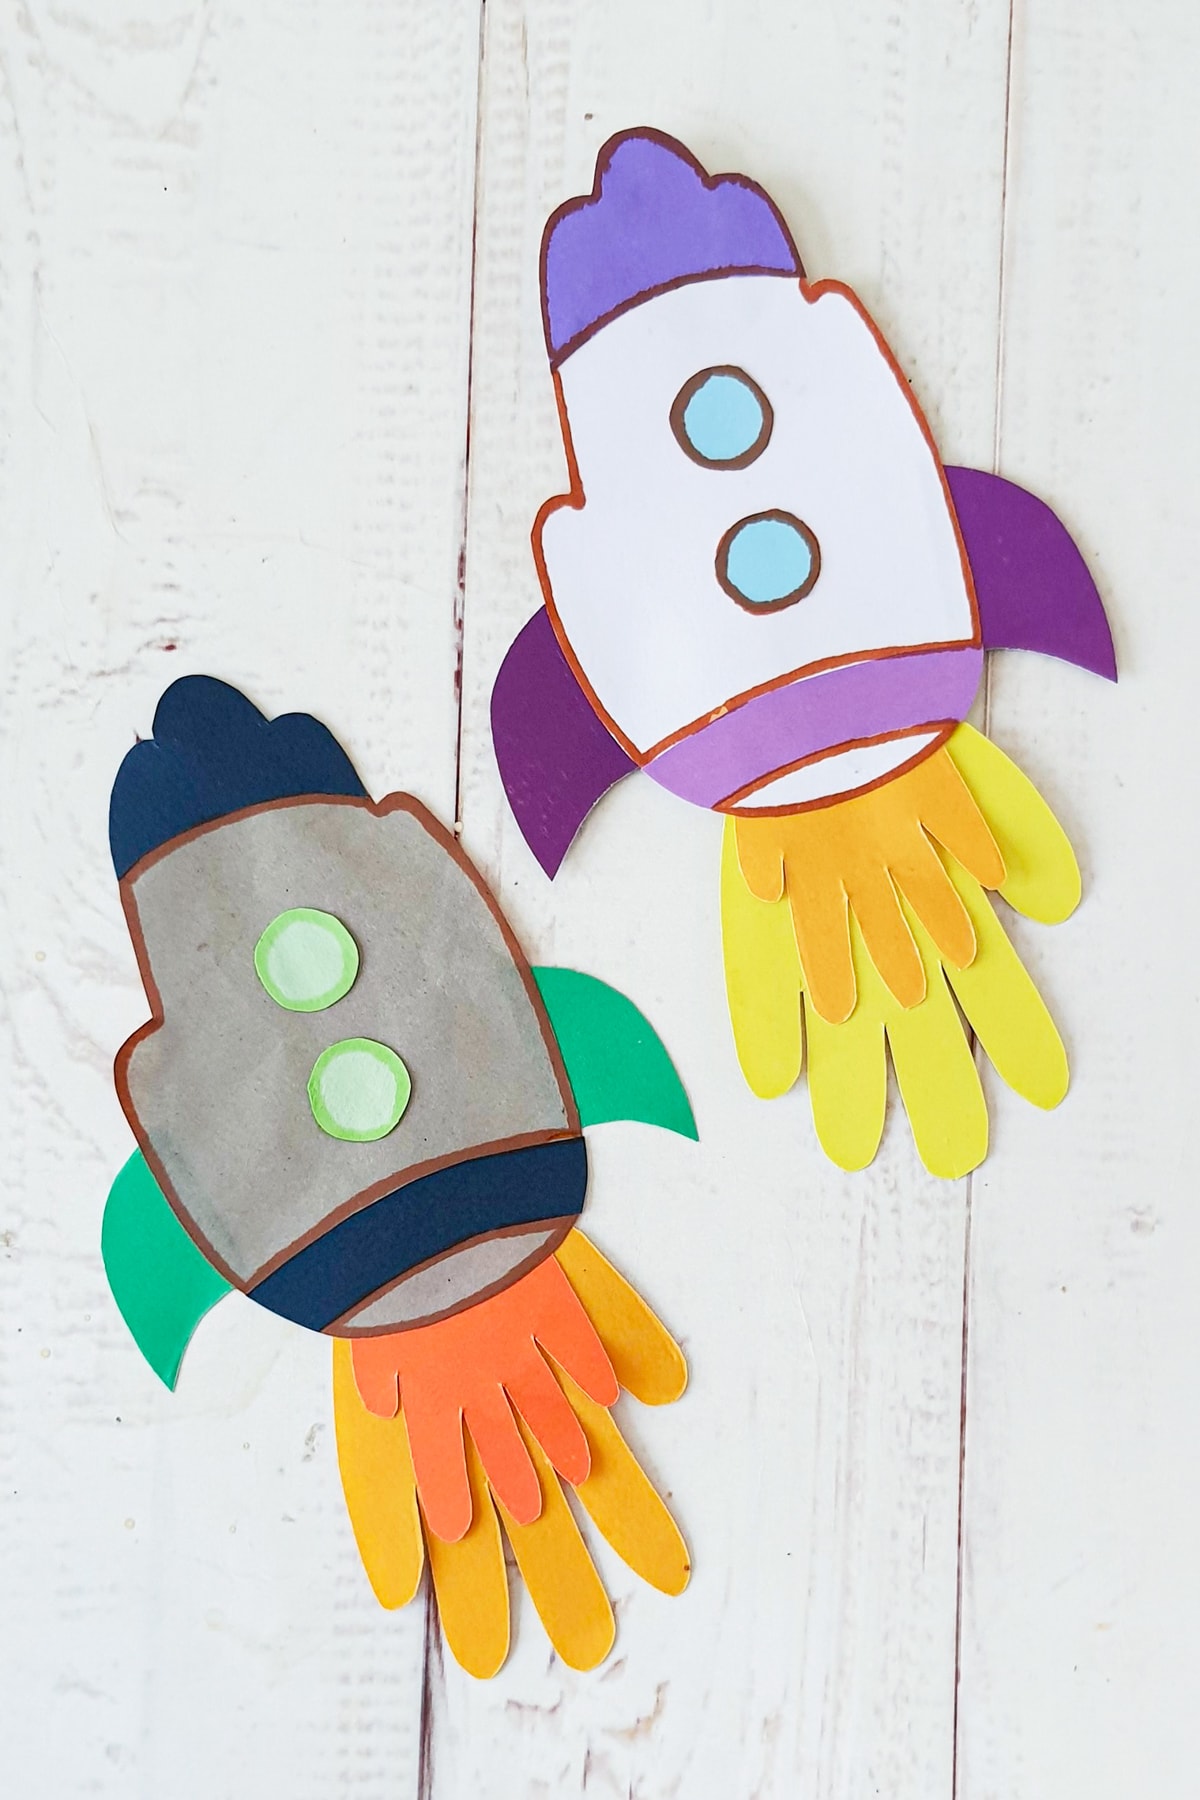
Today we have this adorable handprint rocket ship craft! This adorable rocket is made from handprints and construction paper!
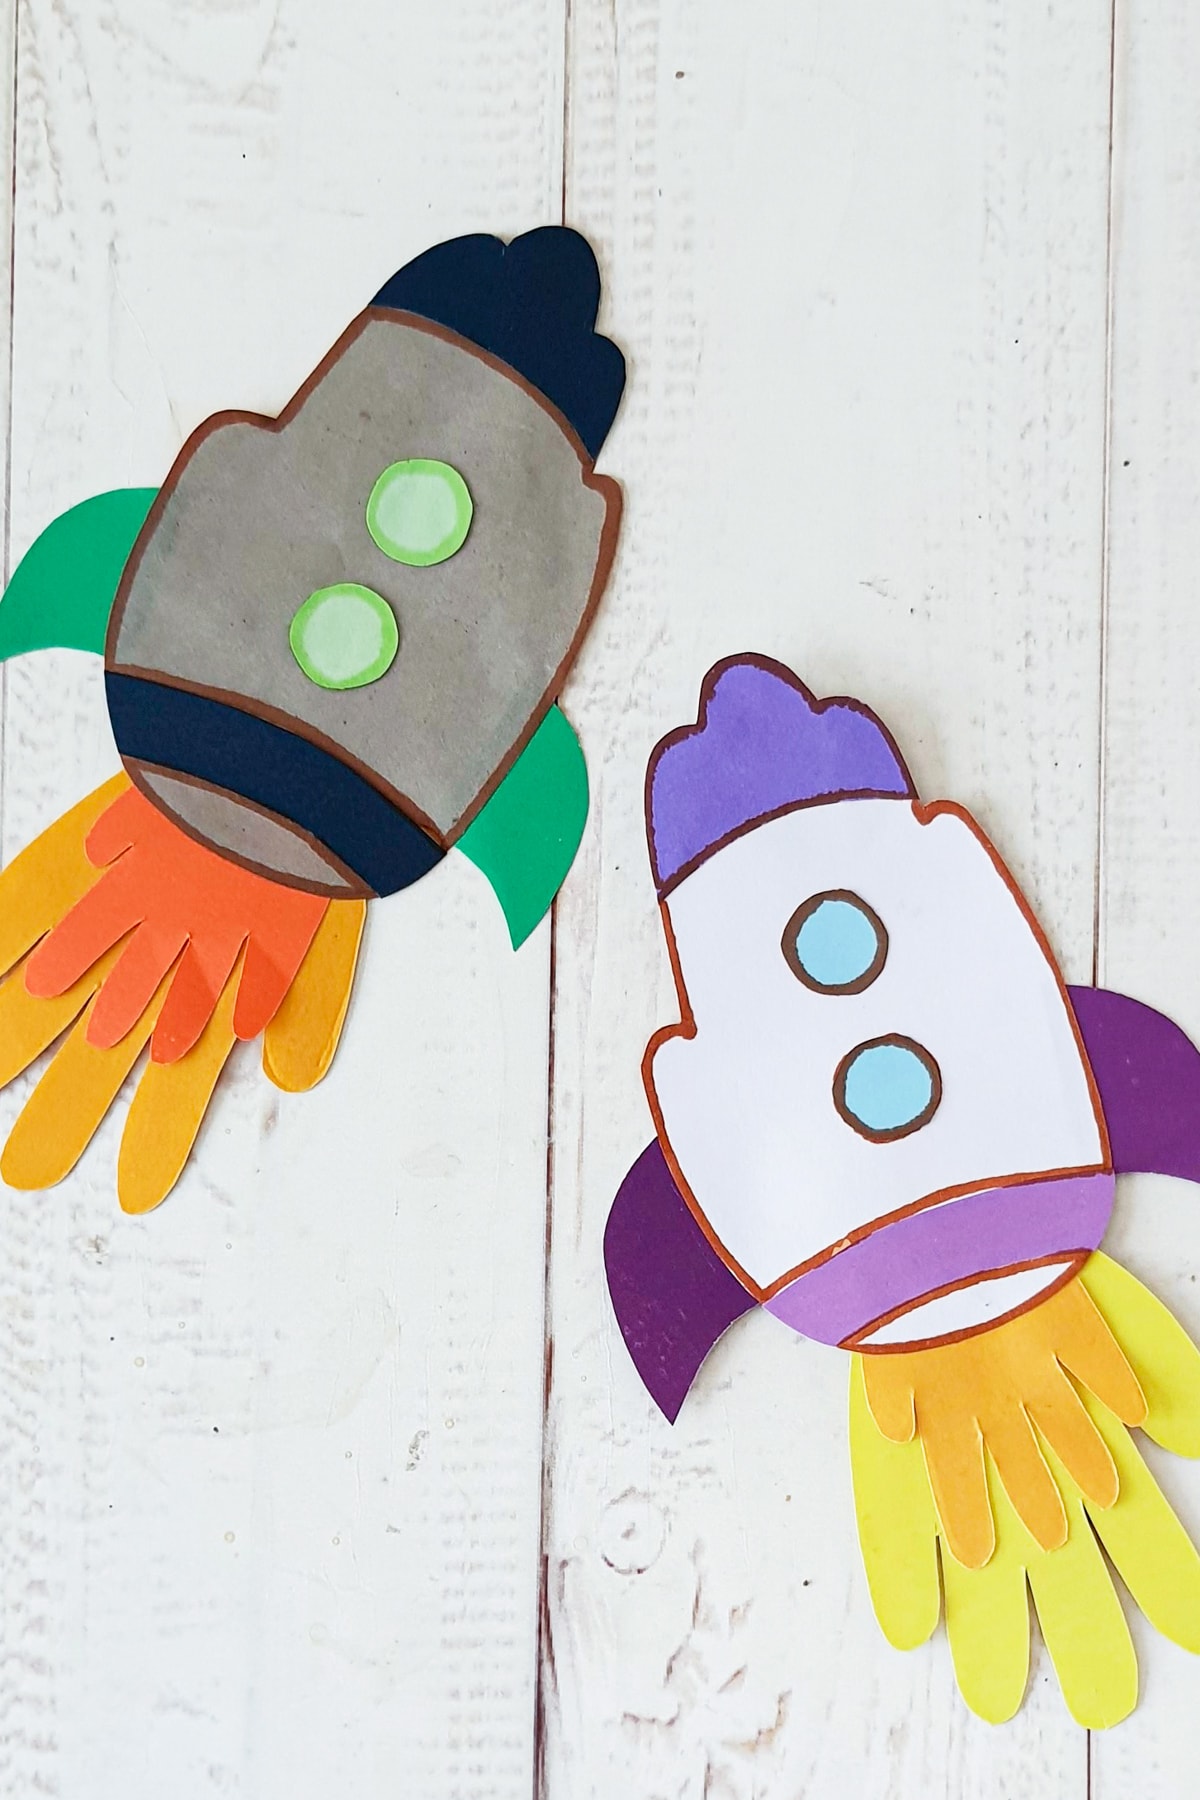
Get ready to blast off with today’s craft, this super cute Handprint Rocket! It’s a fun, colorful project that transforms your child’s handprint into a vibrant rocket.
Perfect for nurturing creativity and fine motor skills, this craft is a hit for space enthusiasts and budding artists alike.
This is a great space craft that pairs well with our rocking space crafts.
We’ve also got other great space themed activities like our space crossword puzzle, space i spy activity and our cute printable solar system crafts.
Why You’ll Love This Craft
- Easy and Engaging: Simple steps and colorful results keep kids interested.
- Educational: Enhances fine motor skills and creativity.
- Customizable: Kids can choose their favorite colors and personalize their rockets.
- Great for Various Occasions: Perfect for school projects, parties, or just a fun day at home.
Materials
Colored Craft Papers: Bright and fun colors make the best rockets.
Pencil: To trace the template or your child’s handprint.
Scissors: For cutting out the craft paper shapes.
Craft Glue: To assemble the rocket.
Sharpies: For adding details and outlines to the craft.
Instructions
Selecting Colors and Tracing: Begin by choosing a variety of brightly colored craft papers. These colors will make your rocket vibrant and eye-catching.
Once you’ve picked your colors, use the rocket template to trace the rocket and handprint patterns (or better yet, use real hands!) onto your selected papers.
Remember, the more creative the colors, the more unique your rocket will be!
Then cut out all the pieces.

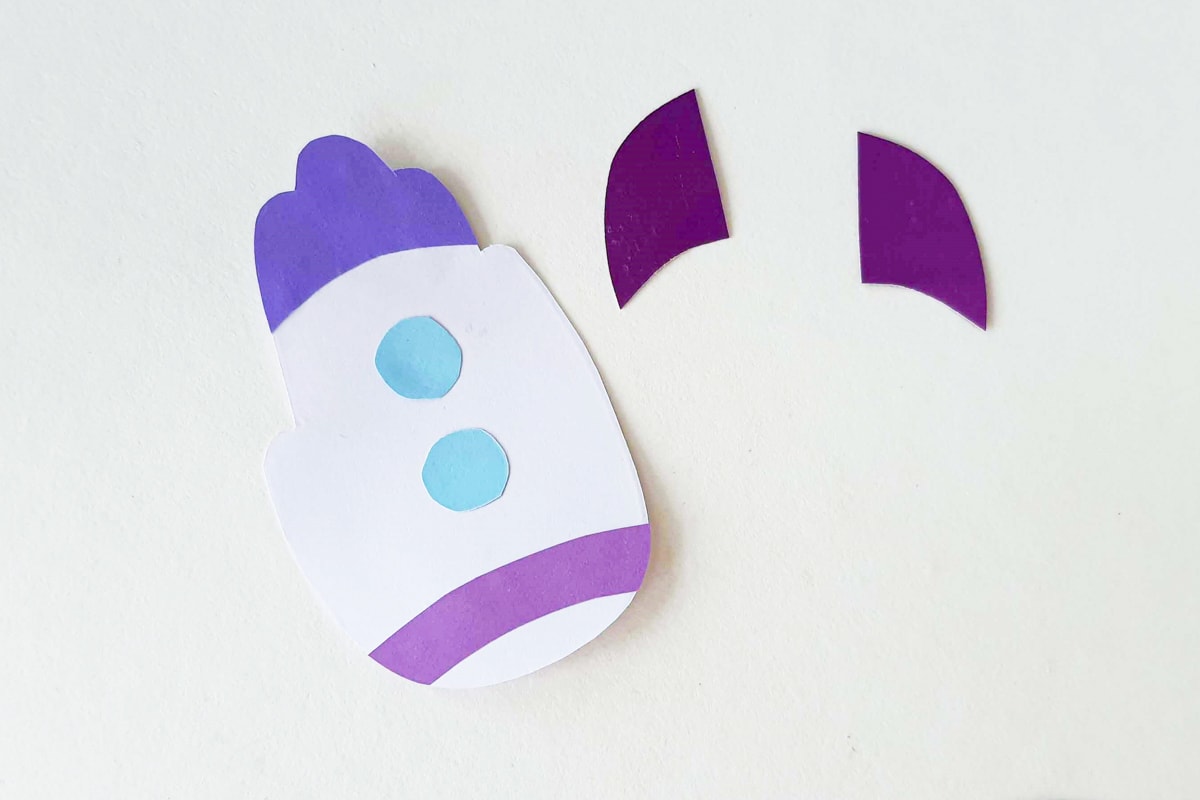
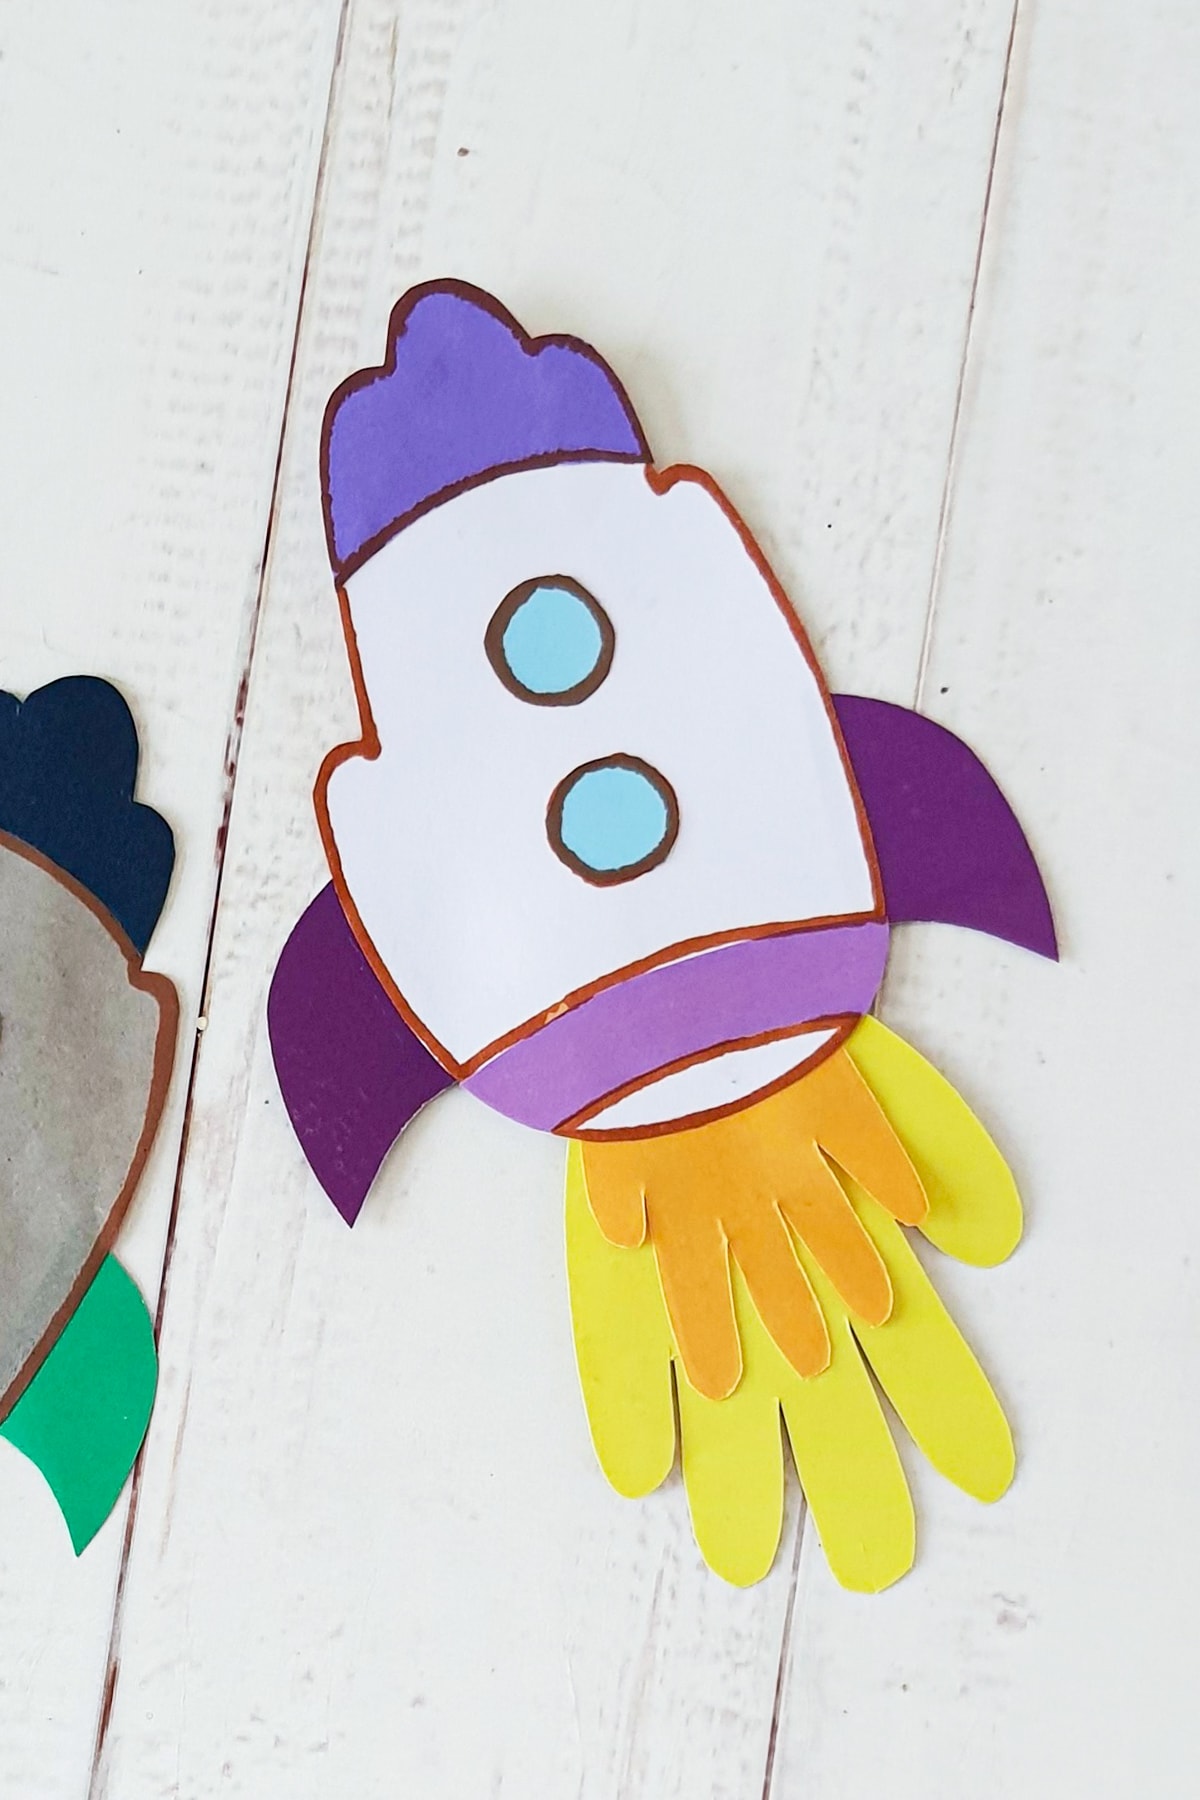
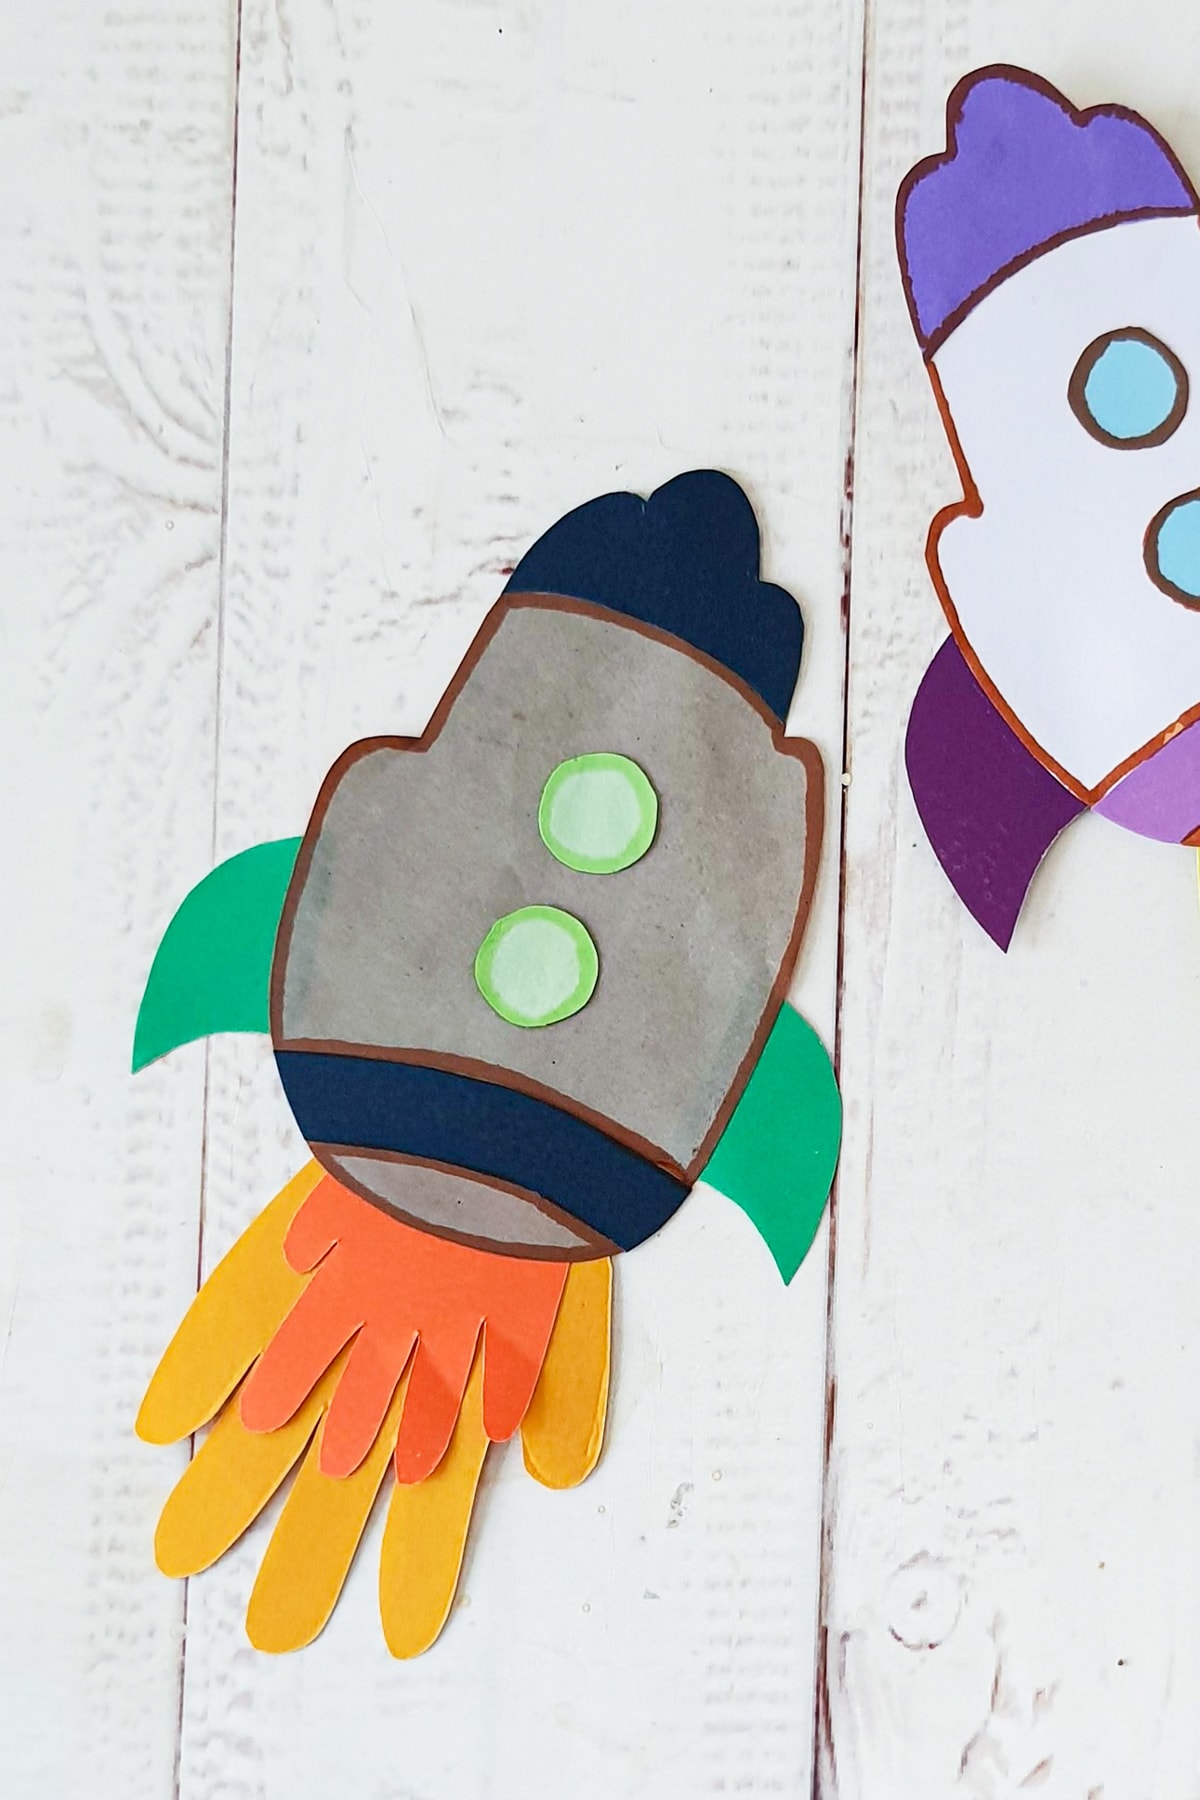
Assembling the Rocket’s Top: Now, take the cut-out piece that forms the top of the rocket.
Apply a bit of craft glue on its back and stick it to the top part of your rocket base, which is the closed handprint. Make sure it’s centered and aligned for the best look.
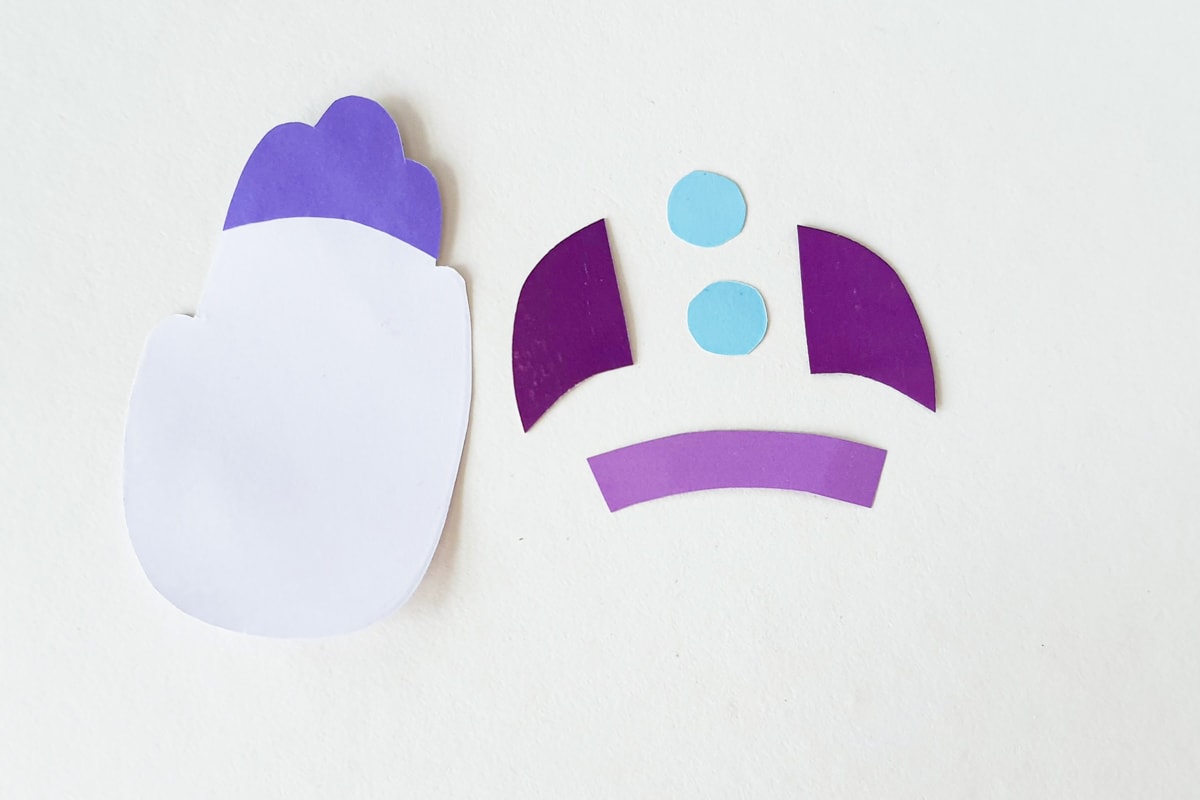
Adding Circular Elements: Look for the round cutouts you made earlier. These will be used to add details to your rocket.
Glue these circles onto the rocket base, spacing them evenly.
They can represent windows or just decorative elements on your rocket.

Placing the Strip Cutout: Find the strip cutout and glue it near the bottom part of the rocket base.
This strip acts as a sort of launching pad or base for your rocket, giving it a more realistic and detailed appearance.
Layering the Hands: It’s time to use the hand cutouts. If you have two different sizes (a small and a big hand layout), glue the smaller hand cutout on top of the larger one.
This layering creates a 3D effect and makes your rocket more dynamic.
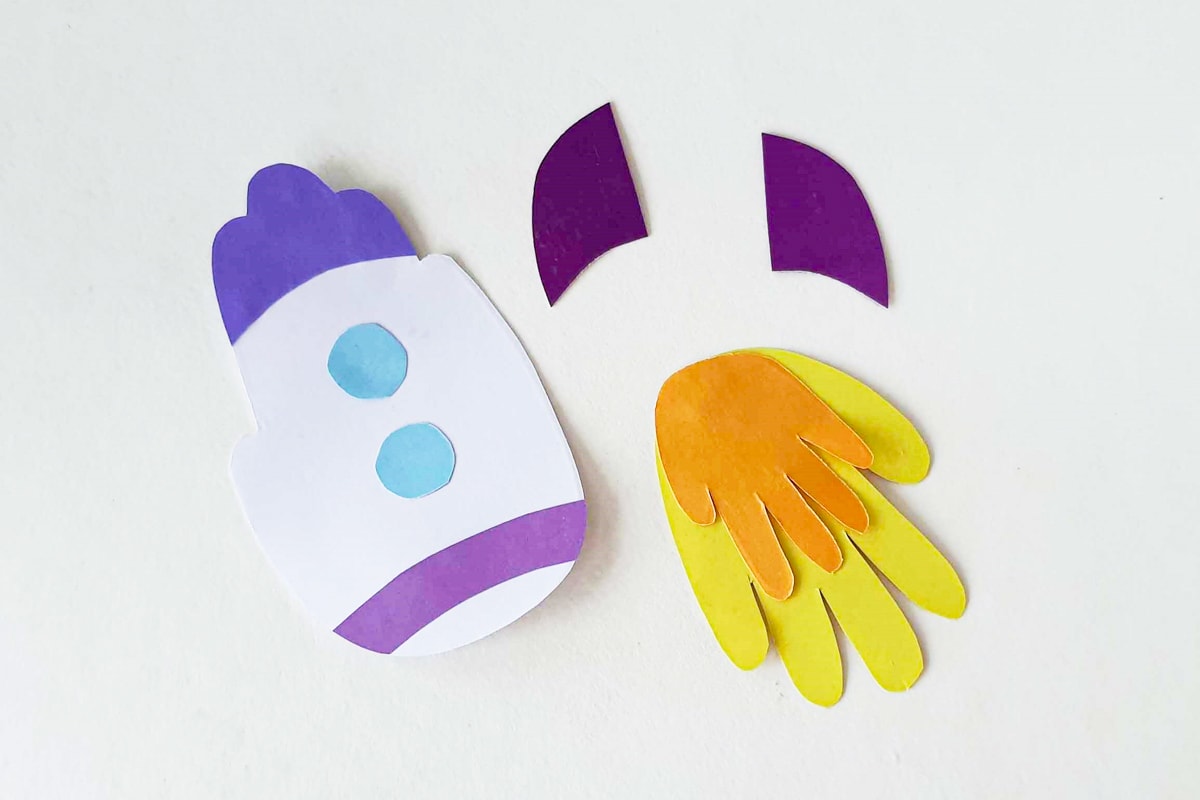
Attaching Side Triangles: Next, take the triangle cutouts and attach them to both sides of the rocket base.
These triangles can be seen as the rocket’s fins or wings, giving it a more authentic spacecraft look.

Hand Patterns at the Bottom: Now, stick the hand patterns (the ones that look like a hand’s outline) to the bottom side of the rocket.
They add an interesting texture and design to the craft, making it more visually appealing.
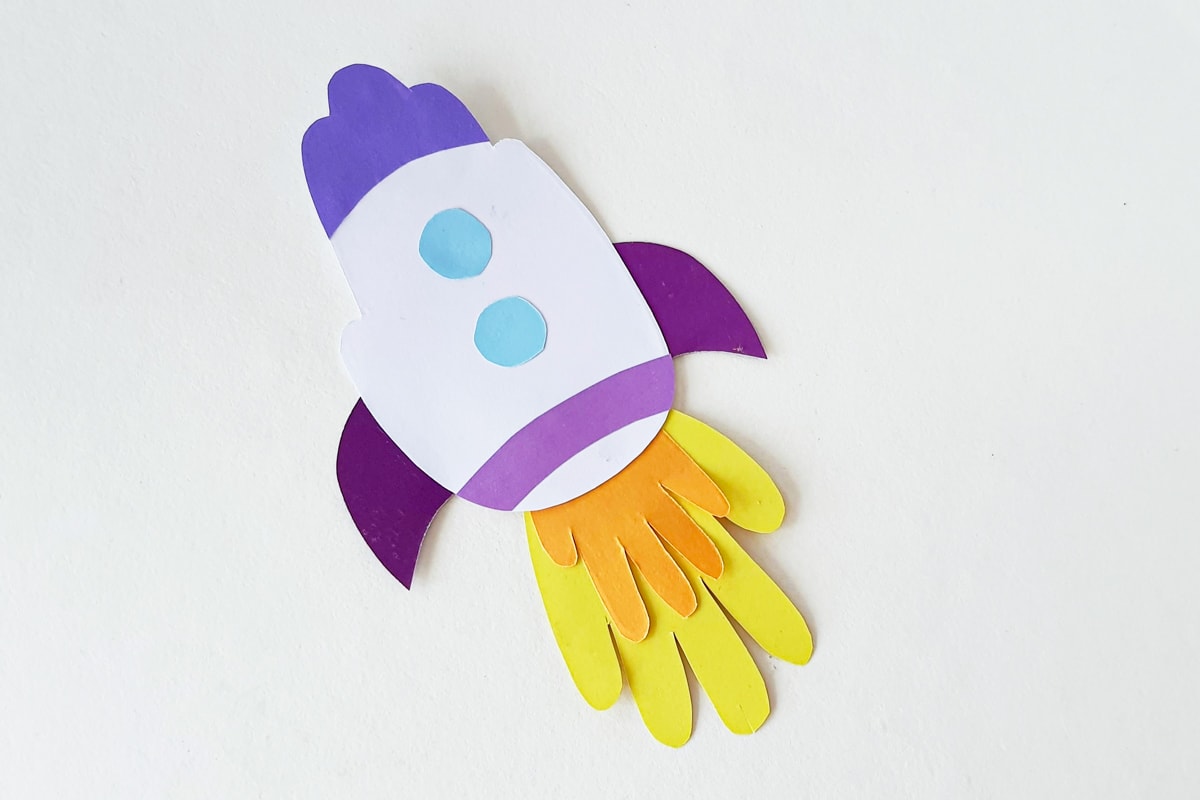
Detailing with Sharpies: Finally, grab your sharpies and get creative! You can trace outlines along the rocket base or add any other details you like.
This is where your child can really personalize their rocket. They can draw patterns, stars, or even write their name on it.

Remember, the key to a successful craft is to have fun and let your child’s imagination take the lead.
Each step is an opportunity for learning and creativity, so encourage your child to experiment and make the craft their own.
And that’s it! Your adorable rocket ship craft is finished!
Top Tips
- Let Creativity Flow: Encourage kids to choose their own colors and patterns.
- Embrace Imperfections: Perfect cuts aren’t necessary; it’s all about fun and learning.
- Display Proudly: Hang the finished rockets in your child’s room or on the fridge.
Educational Opportunities
The Paper Handprint Rocket Craft offers a range of educational opportunities, suitable for both home and classroom settings:
- Space Exploration: After crafting the rocket, explore space-related topics, like planets, stars, and astronauts, through books or videos.
- Color & Shape Learning: Use the craft to teach younger children about different colors and shapes, enhancing their recognition skills.
- Group Project: Have students collaborate on a large space mural, with each child contributing their handprint rocket.
- Science Lesson Integration: Tie the craft into lessons about space science, discussing rockets, gravity, and the solar system.
- Art and Creativity: Encourage students to personalize their rockets, fostering creativity and self-expression. This can also be an opportunity to discuss the importance of individuality and uniqueness.
Grab the Free Printable
To get your free printable template for this craft, just enter your name and email in the pink box below.
We’ll send it directly to your inbox. Plus, you’ll be the first to know about our new free printables.
This is for personal or classroom use only, please – not for commercial use. Thank you!
This Paper Handprint Rocket craft is a fantastic way to spend quality time with your children while fostering their creativity.
It’s simple, enjoyable, and the end result is always uniquely theirs. So, let’s get crafting and see where their imagination takes them!