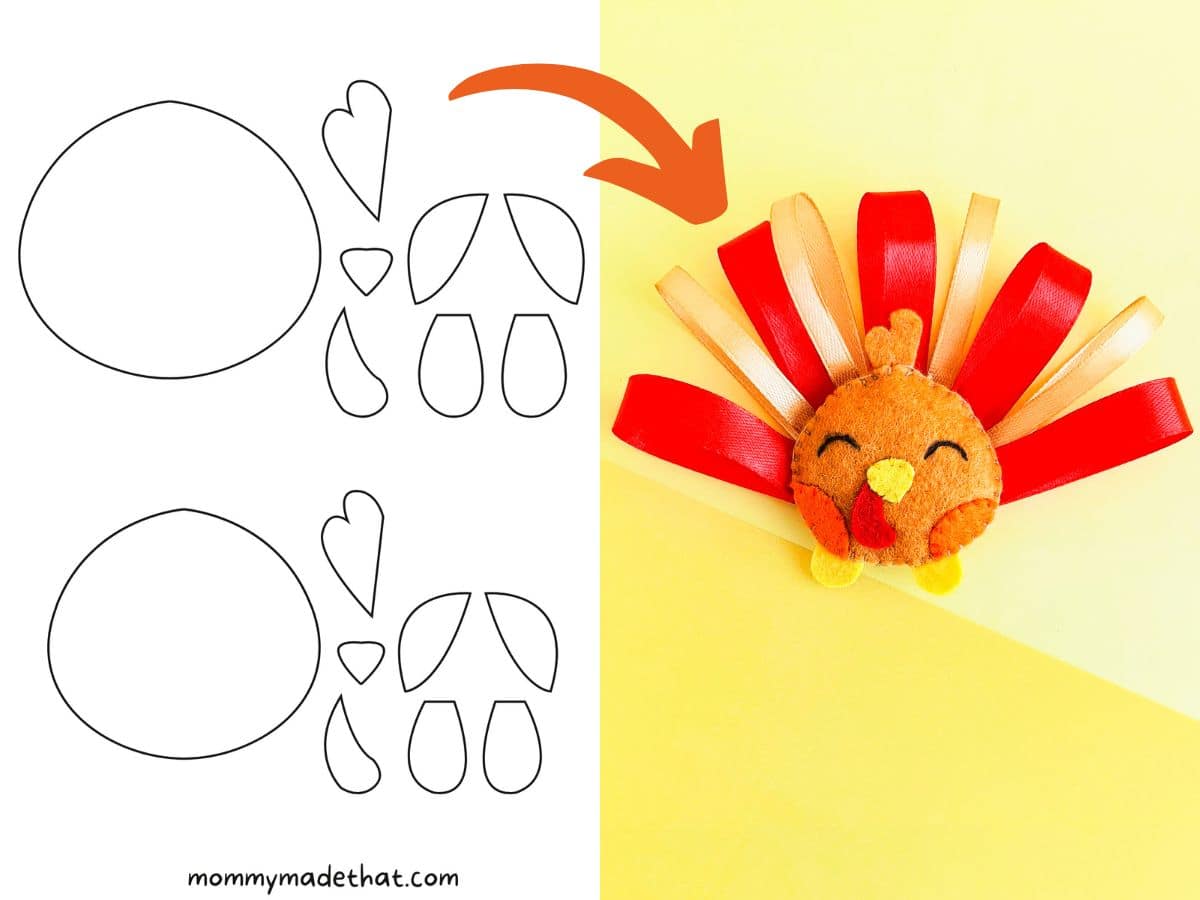
The Cutest Felt Turkey (With Free Printable Pattern!)
This cute felt turkey is a cute and fun fall craft. Plus, we give you the free printable pattern so you can make your own little turkey.

With fall in full swing, we’ve been having fun making little felt animals.
This felt turkey is a cute Thanksgiving craft and turkey craft that’s perfect for those who enjoy a bit of hand sewing.
We also have some super cute turkey coloring pages.
Material
To make this felt turkey, you’ll need the following materials:
Colored felt fabric: We used brown, orange, red and yellow.
The felt turkey template: You can grab the free printable template at the bottom of this tutorial.
Matching thread: Pick thread the same colors you use for the felts, you’ll end up with a much better looking turkey.
Ribbon: We used several pieces of ribbon to create the turkey’s tail.
You’ll also need some basic supplies like
- Needle
- Pencil
- A pair of sharp scissors
How to Make a Felt Turkey
Start out by downloading and printing out the turkey template. Then cut out all the pattern pieces.
Step 1: Cut out the Pattern Pieces
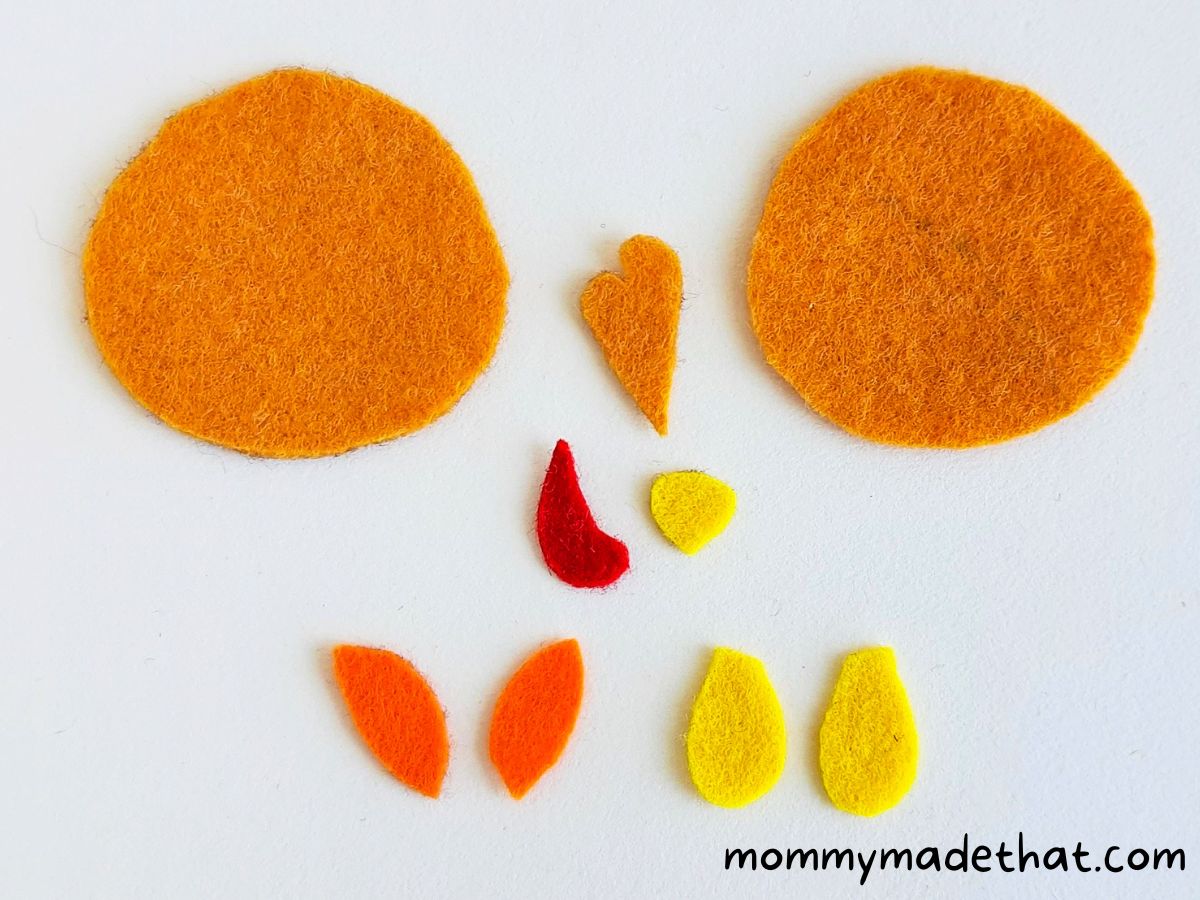
Grab your colored felt fabrics and trace out all the patterns onto the felt. Then cut out all the felt pieces.
Step 2: Position the Beak and Wattle
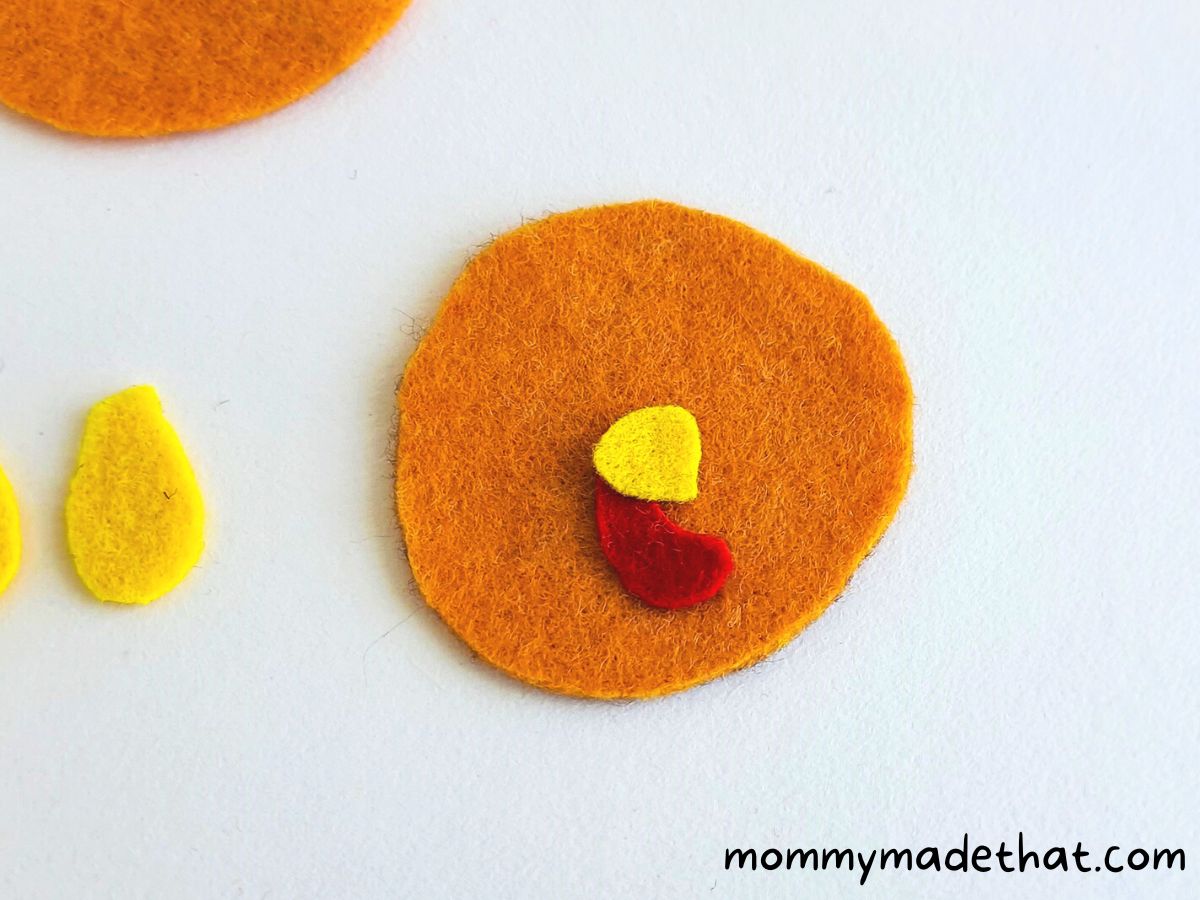
Grab one of the base cutouts. This will be the turkey’s face. Place the wattle in the center, rounder side toward the bottom.
Then place the beak over the wattle. Using a matching thread, stitch down the beak, making sure the wattle is underneath and being tacked down with the beak onto the turkey’s face.
Step 3: Draw the Eyes
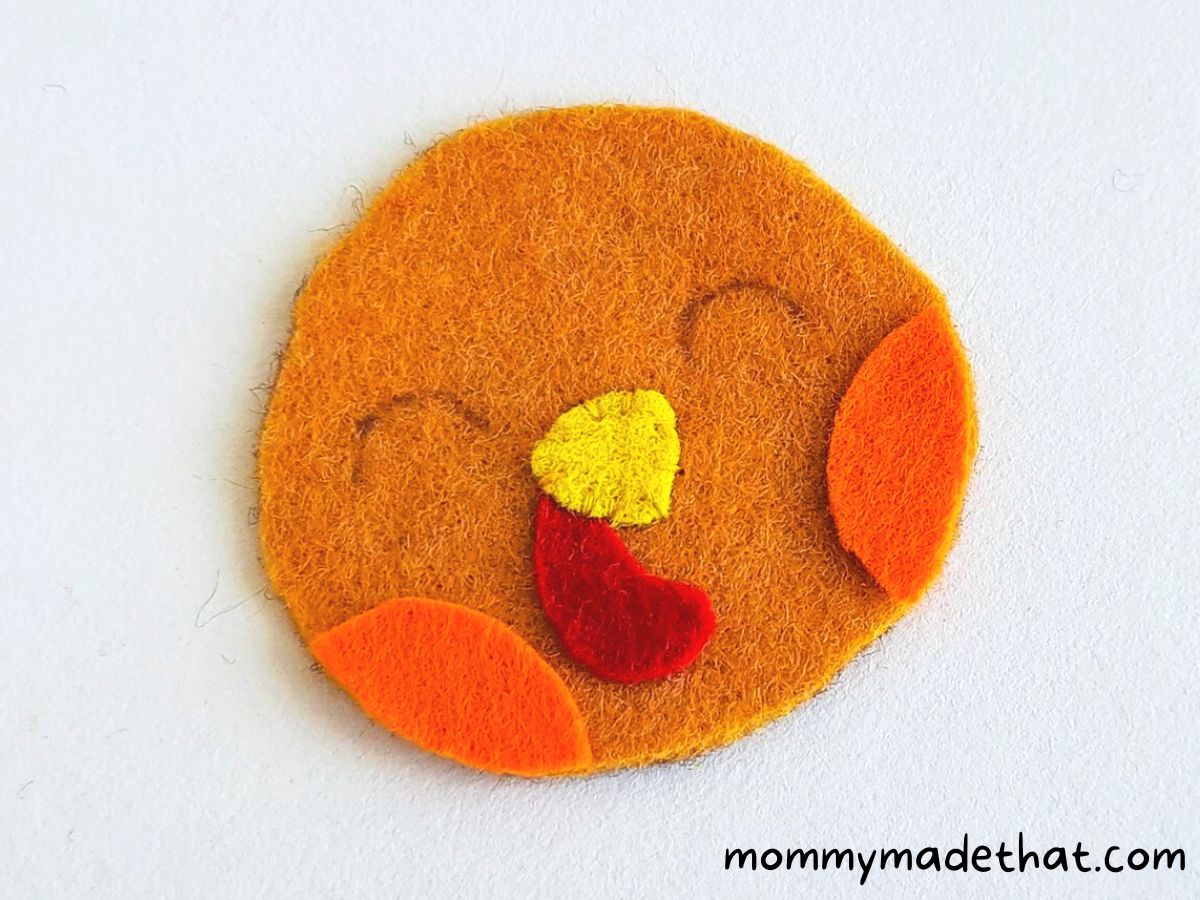
Place the turkey’s wing cutouts onto each side of the base pattern. Then use a pen or pencil to draw little eyes on your turkey’s face.
Step 4: Stitch on the Wings
Use a matching color thread to stitch the wings onto the base of the turkey.
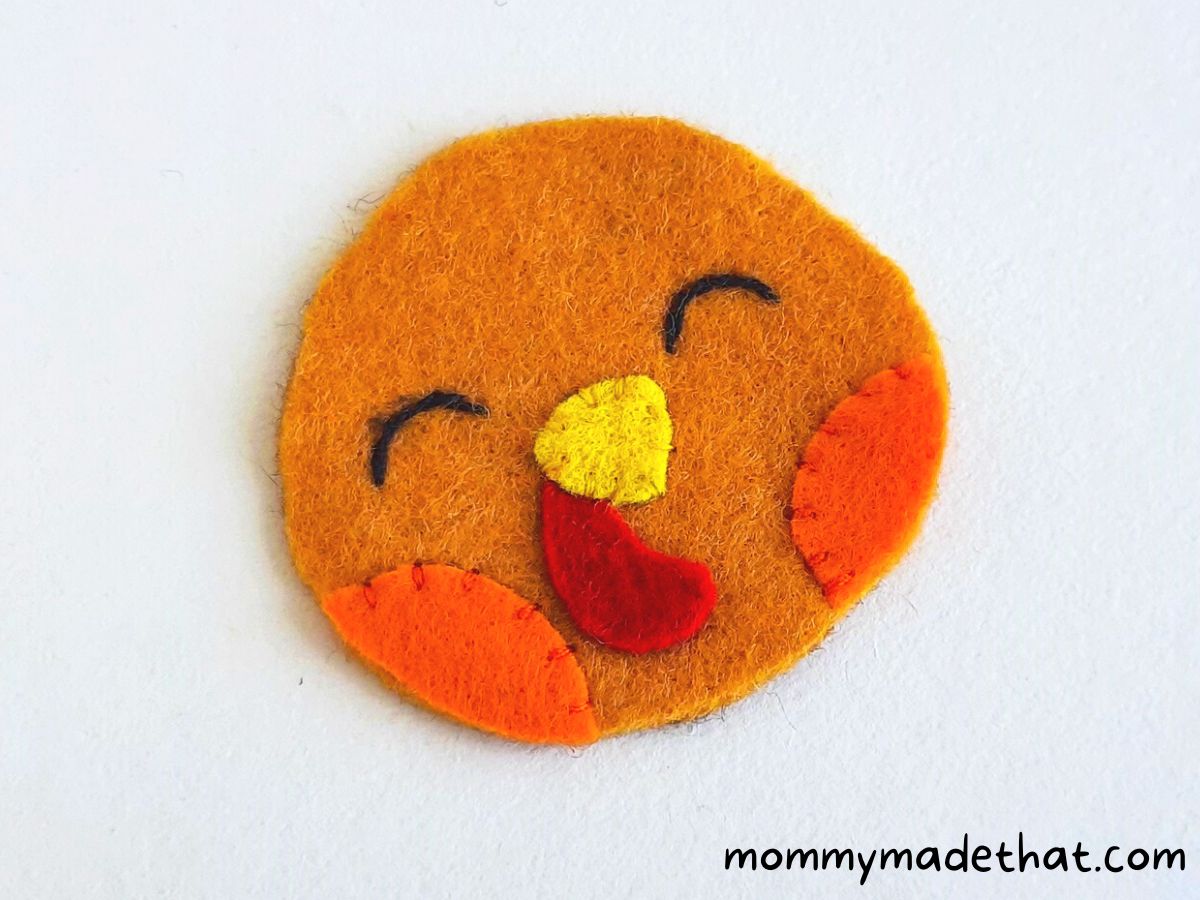
Switch out the thread out to black and stitch on the eyes.
Step 5: Prepare the Base
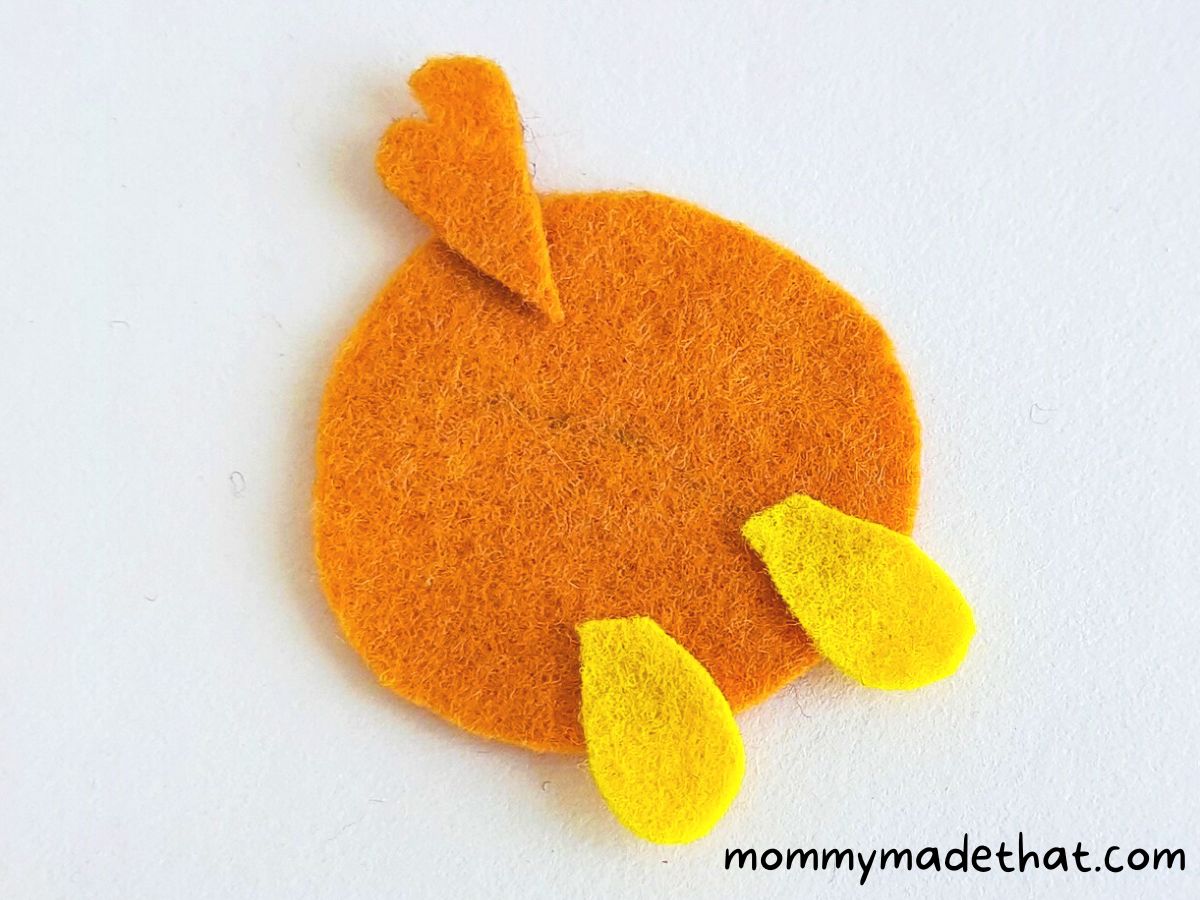
Grab the other base of the turkey and lay it on a flat surface.
Place the hair cutout onto the top of the base piece, and the legs on the bottom. Be sure they are overlapping onto the turkey base.
Step 6: Add the Top Pattern

Next, place the other base piece with the face, on top of the other one, making sure to sandwich the legs and hair in between the two.
Step 7: Stitch Around the Turkey
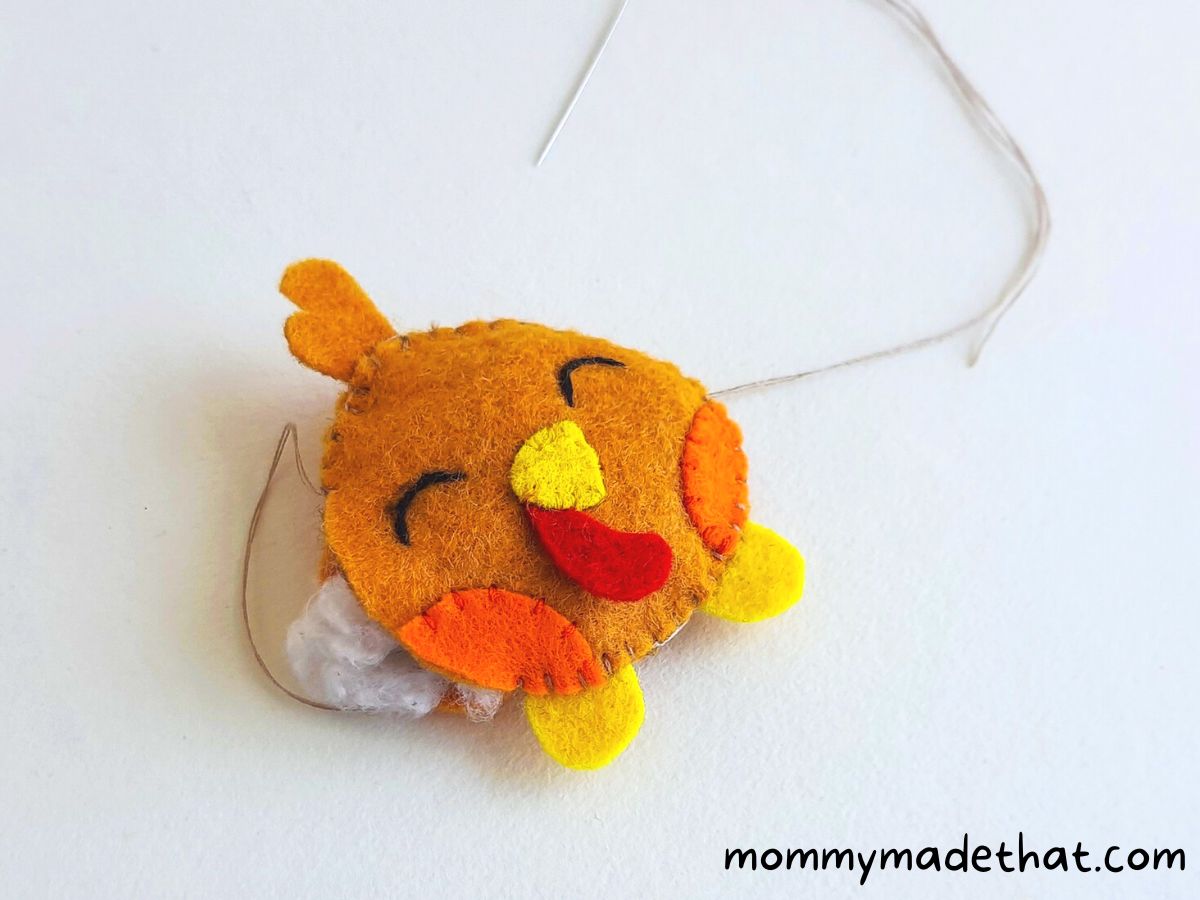
Using a thread the same color as the base of your turkey, sew around the edges, leaving just a small pocket on one side.
Stuff the turkey with a piece of cotton or some scrap felt pieces, then finish stitching up the turkey.
Step 8: Cut the Ribbons
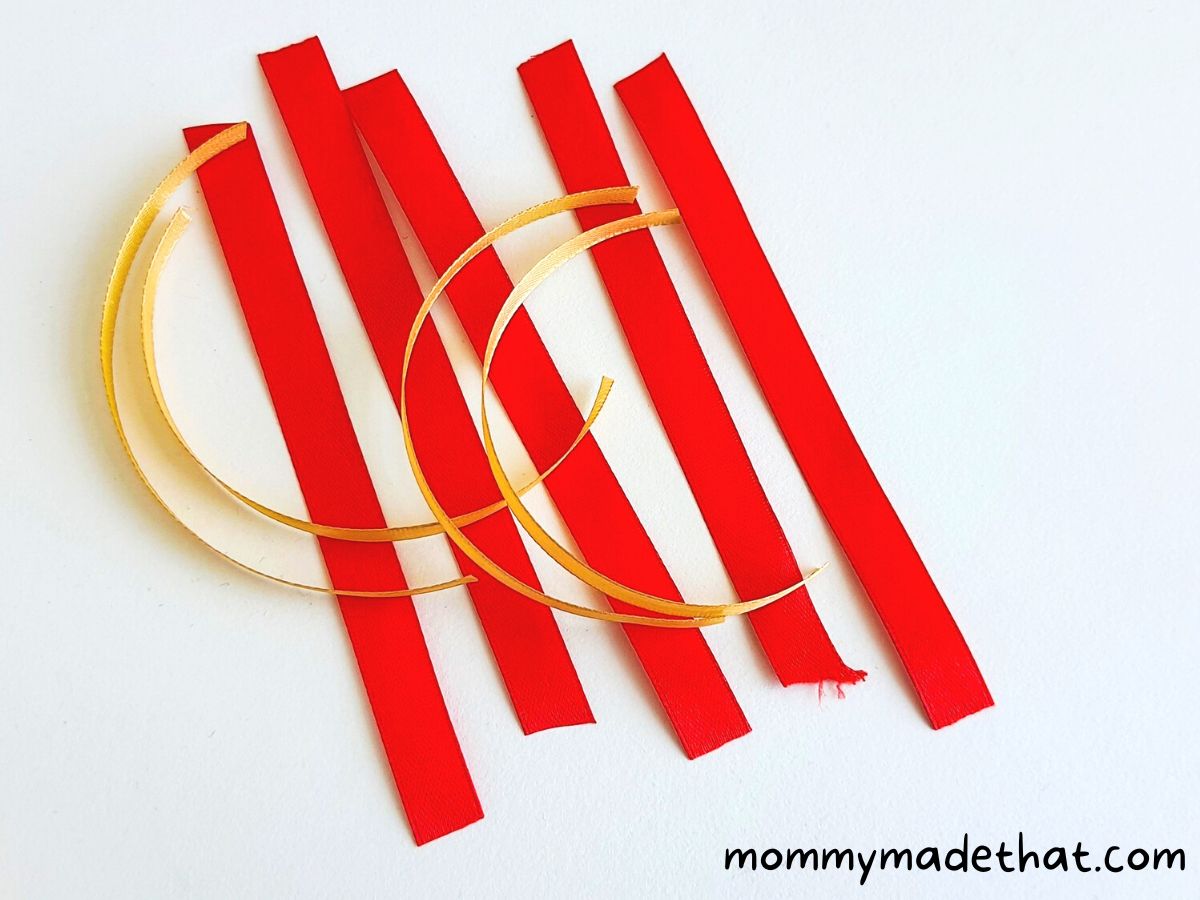
Next, cut several piece’s of ribbon 3 or 4 inches in length. We used a thinner ribbon, 1 – 1.5 cm thick. We used around 9 pieces all together. 5 red and 4 yellow.
Step 9: Create Ribbon Loops

Next, using a small piece of felt, cut an semi-circle shape out to use for the base of the tail.
Fold all the ribbon pieces in half, and glue the ends together so they form loops.
Step 10: Start Stitching on the Tail
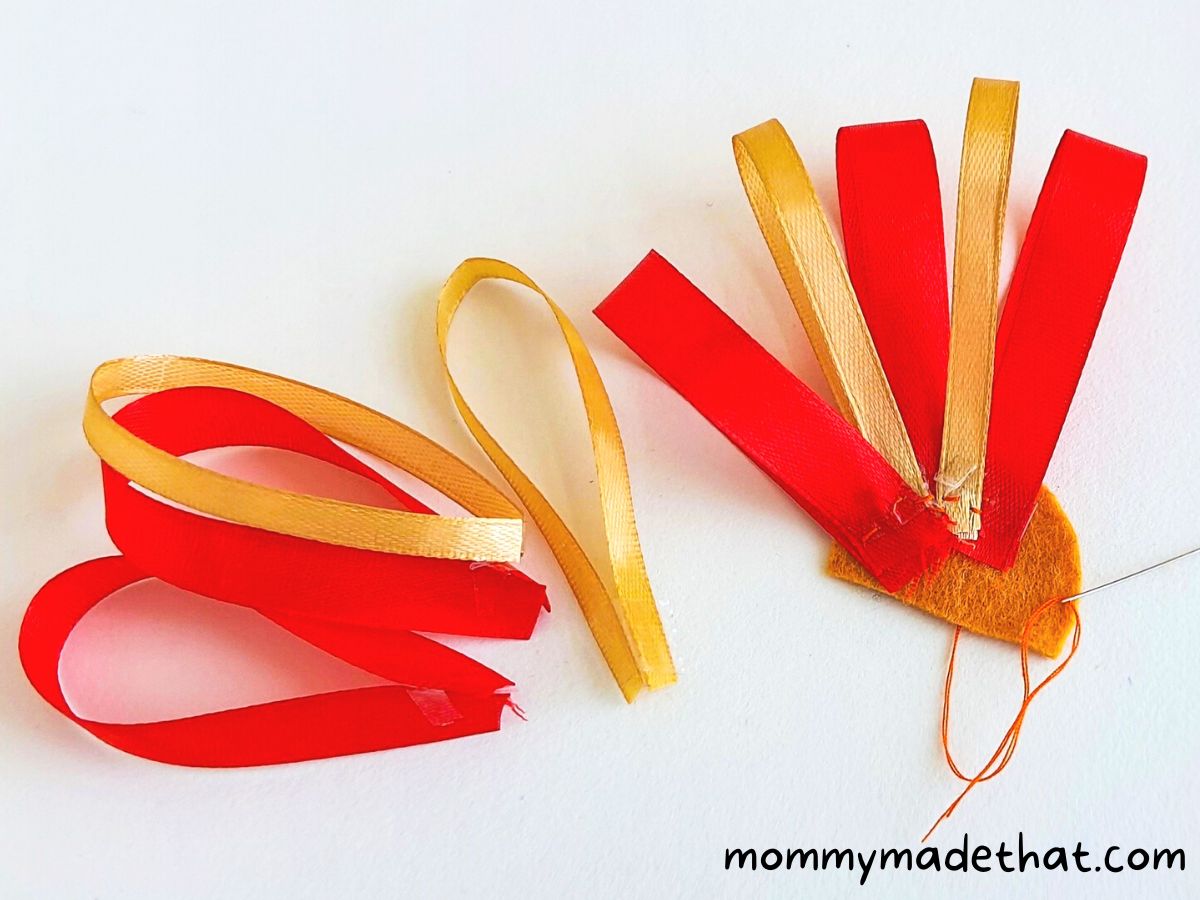
Next, start sewing the loops onto the felt base you just created, starting from one side and working your way around the rounded edge.
Step 11: Finish the Ribbon Tail
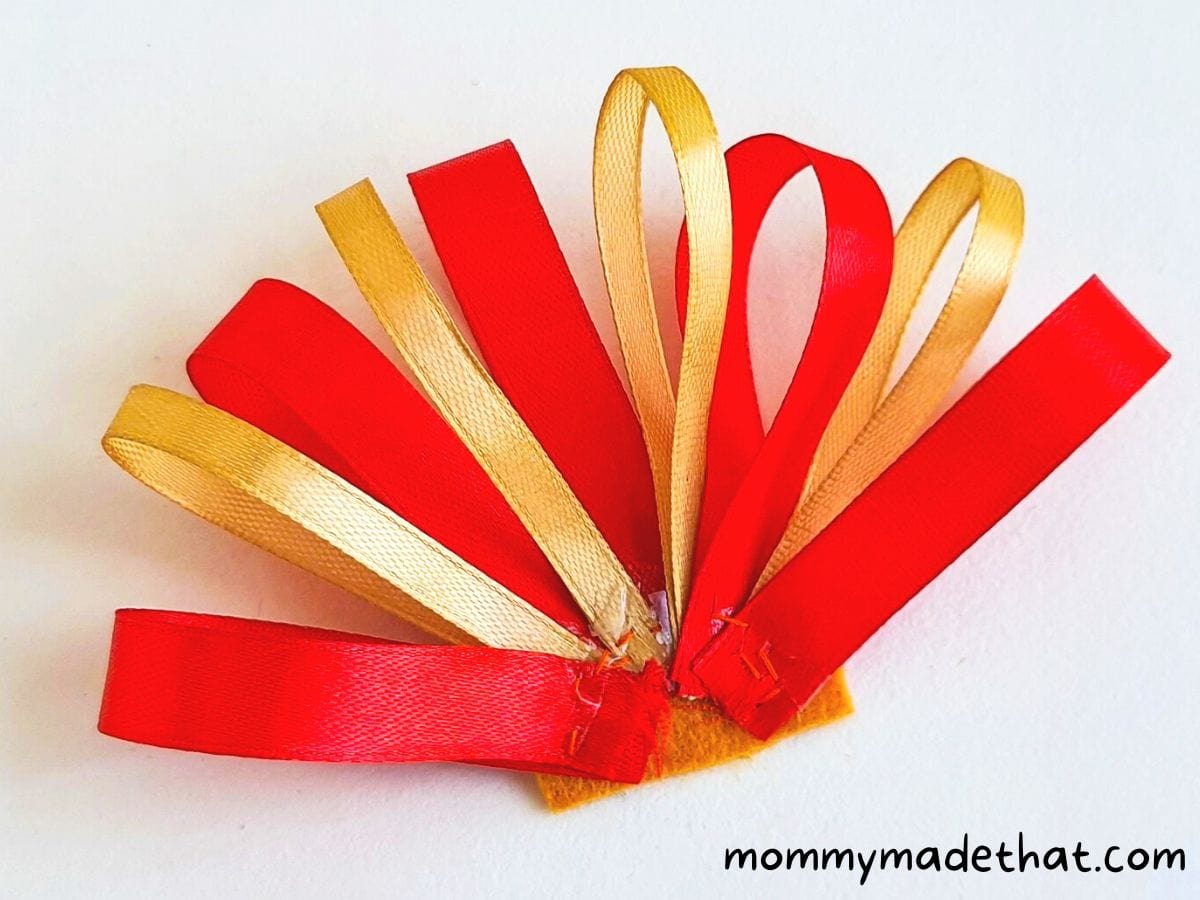
Keep attaching the ribbon loops until your tail is full.
Step 12: Attach the Tail to the Turkey

Finally sew the felt turkey on to the ribbon tail to complete your craft.
If you plan on using him as a DIY felt ornament, create one more additional ribbon loop and attach it to the top of your turkey so you can hang him up.
Grab the Free Printable Pattern
To grab our free printable turkey pattern, place your email in the box below.
We’ll send the template straight to your inbox, and let you know when we come out with more free printable patterns!
These patterns are for personal or classroom use only, not for commercial use. But you are most certainly welcome to sell any felt ornaments you make! (Just not the pattern!) Thank you!

Felt Turkey
This felt turkey is an adorable felt craft that could easily be turned into a cute ornament. It's perfect for the holiday season, and comes with a free pattern!
Materials
- Felt fabrics
- Turkey pattern template
- Matching threads
- Ribbon
Tools
- Scissors
- Needle
- Pencil
- Craft glue
Instructions
Start out by downloading and printing out the turkey template. Then cut out all the pattern pieces. Grab your colored felt fabrics and trace out all the patterns onto the felt. Then cut out all the felt pieces.
Grab one of the base cutouts. This will be the turkey's face. Place the wattle in the center, rounder side toward the bottom. Then place the beak over the wattle. Using a matching thread, stitch down the beak, making sure the wattle is underneath and being tacked down with the beak onto the turkey's face.
Place the turkey's wing cutouts onto each side of the base pattern. Then use a pen or pencil to draw little eyes on your turkey's face.
Use a matching color thread to stitch the wings onto the base of the turkey. Switch out the thread out to black and stitch on the eyes.
Grab the other base of the turkey and lay it on a flat surface. Place the hair cutout onto the top of the base piece, and the legs on the bottom. Be sure they are overlapping onto the turkey base.
Next, place the other base piece with the face, on top of the other one, making sure to sandwich the legs and hair in between the two.
Using a thread the same color as the base of your turkey, sew around the edges, leaving just a small pocket on one side. Stuff the turkey with a piece of cotton or some scrap felt pieces, then finish stitching up the turkey.
Next, using a small piece of felt, cut a semi-circle shape out to use for the base of the tail. Fold all the ribbon pieces in half, and glue the ends together so they form loops.
Notes
When creating the tail, we used a thinner yellow ribbon and a thicker red ribbon. Then alternated them, creating a pretty and colorful tail.