
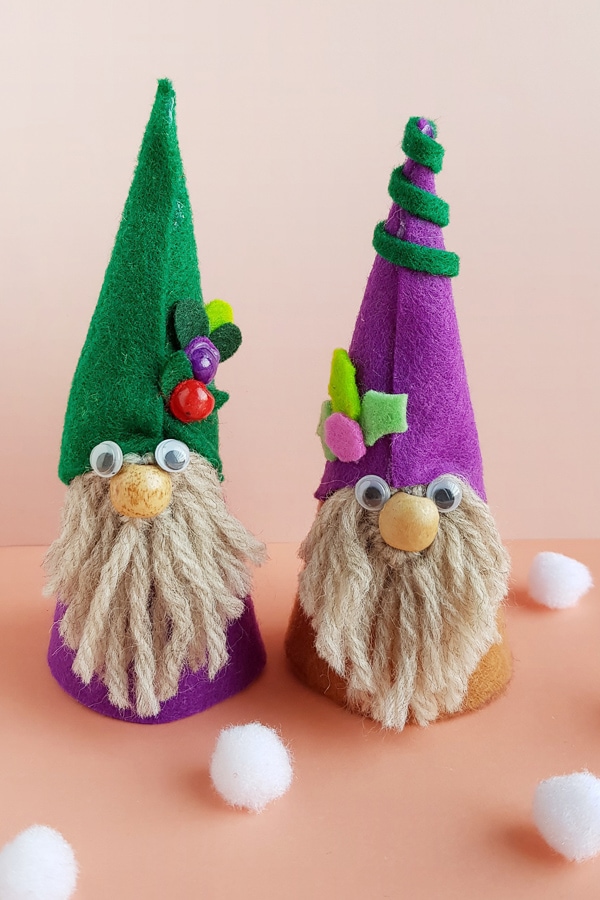
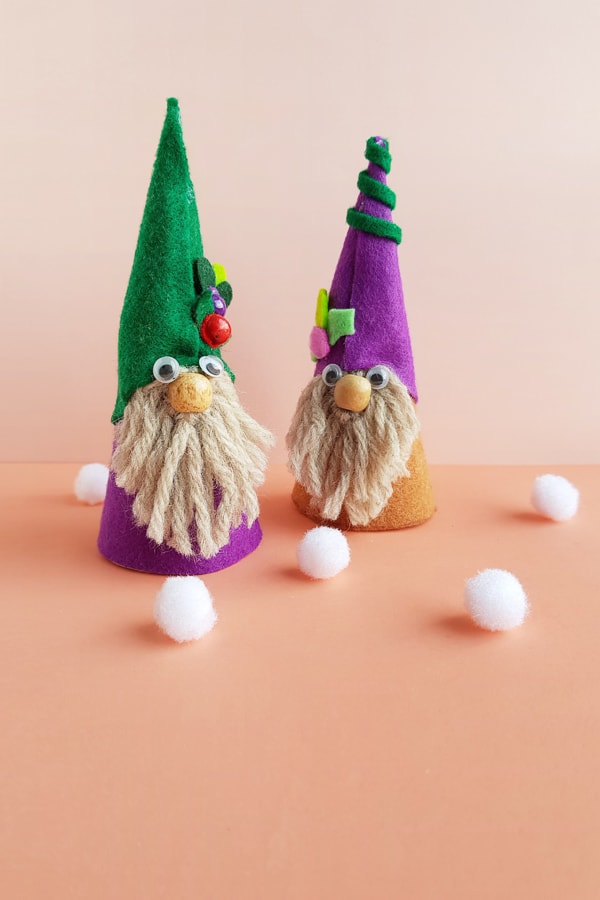
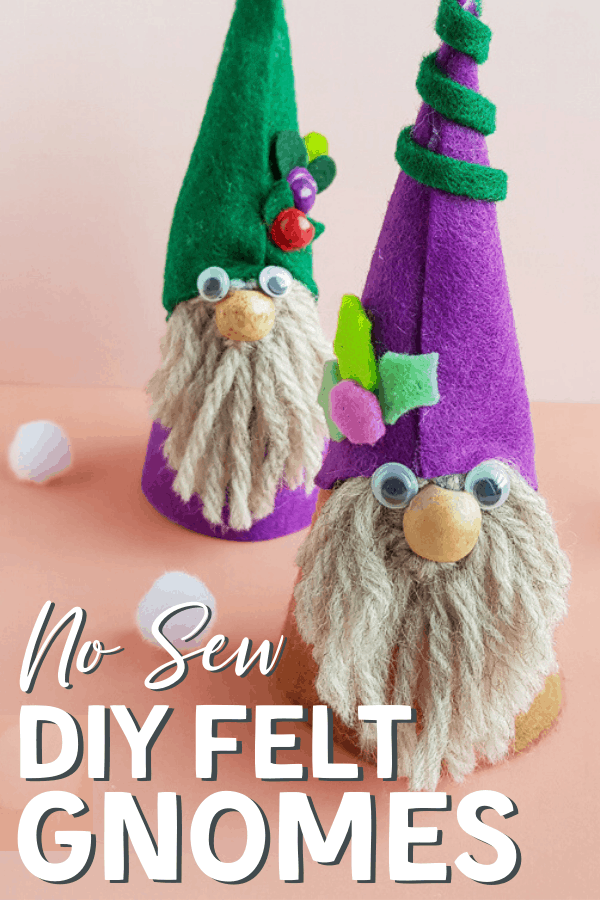
Adorable No Sew Felt Gnomes
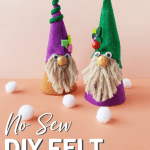

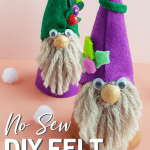
Today we have an oh so cute easy DIY felt gnome craft! These gnomes are super cute and easily made with just a few bits of felt and some yarn!

These little gnomes are so cute and would make a fantastic room decoration, DIY Christmas ornament or sweet DIY gift.
They’re one of my favorite winter crafts we’ve made. It’s also a great Christmas craft for kids and adults.
It’s fun finding new and creative ways to make felt gnomes.
This craft uses yarn to make their iconic beards instead of a typical piece of fur, making them super fun.
This post may contain affiliate links. This means if you click a link and make a purchase, we may earn a small commission at no cost to you. You can read our full disclosure here.
Table of Contents
List of Supplies Needed for No-Sew Gnome Craft
To get started making these no-sew gnomes, start by gathering the supplies you’ll need like these listed below:
- Piece of cardstock for the gnome’s body
- Felt fabric
- Pencil
- Googly eyes
- Yarn for the gnome’s beard
- Half wooden bead for his nose
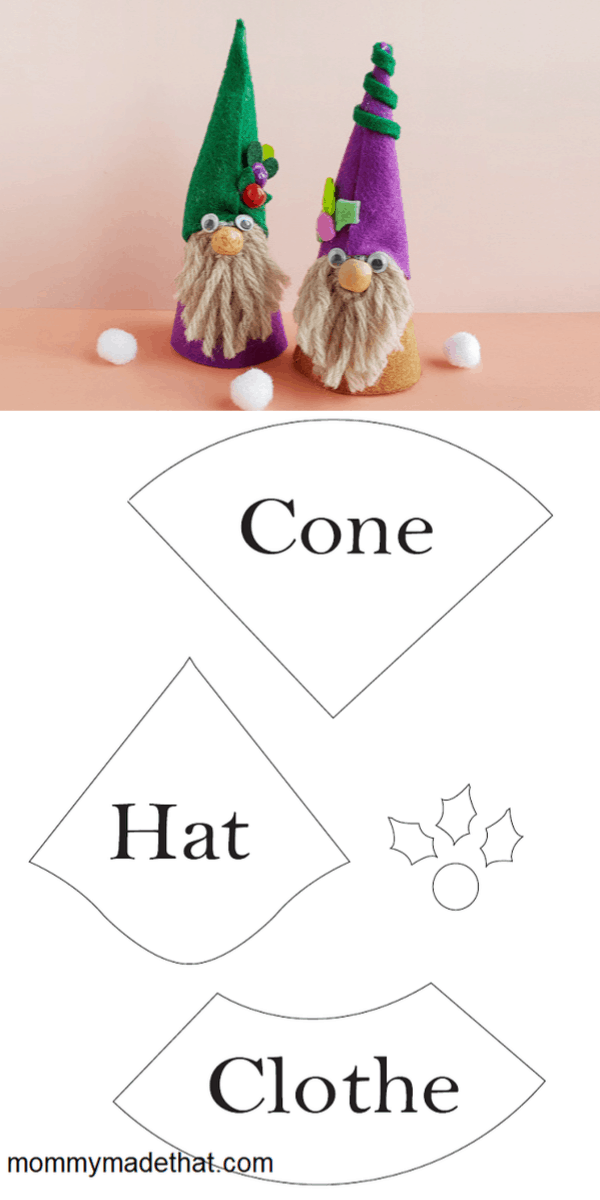
- Free Printable Gnome Template
- Scissors
- Glue Gun
Make sure to also head over to our free printable gnome pattern from the crafty printable library.
It includes the gnome’s body, and the pieces need for your gnome’s clothing and hat accessories.
How to Make a No-Sew Felt Gnome
To make these little gnome dolls, start by gathering all of your supplies, then download and print out the cone template.
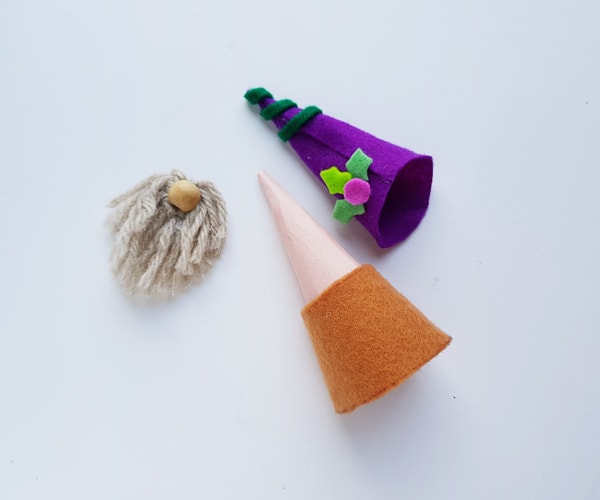
Step 1: Create the Gnomes Body
Cut out and trace the template onto your piece of cardstock.
If you’d rather, you could also just freehand draw a quarter circle on to the cardstock.
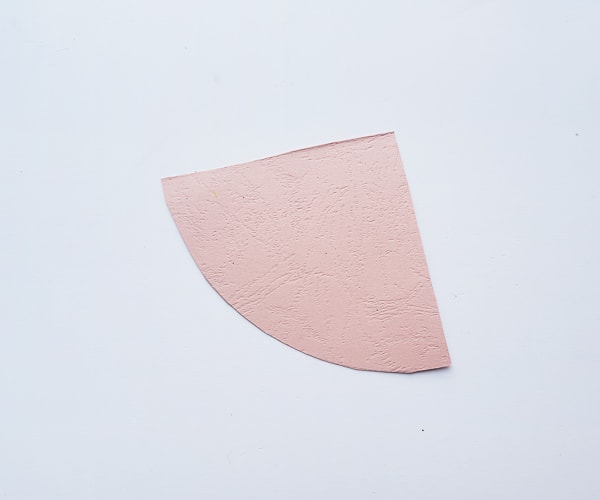
Step 2: Roll the Gnome Body
Next, roll the quarter circle piece into a cone shape for your gnomes body.
Glue the overlapping pieces together to secure the cone with hot glue.

How to Make the Felt Gnomes Beard
Next, we’ll start crafting the gnomes beard completely from yarn.
Step 3: Starting the Beard
Select the color of yarn you’d like to craft into your gnomes beard.
Cut several strands of yarn 3 inches long.
It’s better to keep the yarn pieces longer than shorter, as you can trim them up later and it’ll allow you to shape the beard.
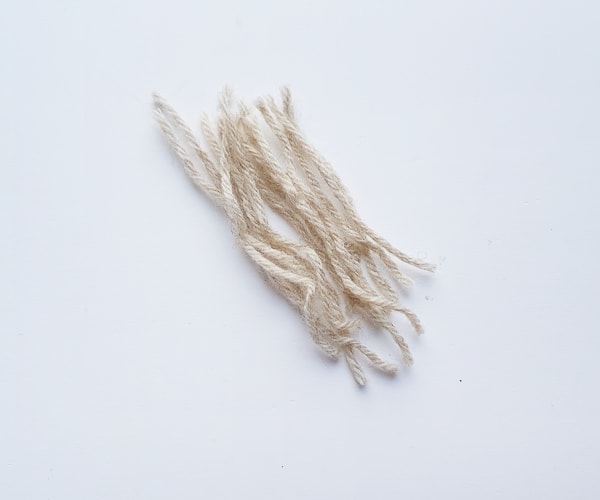
Step 4: Now place your yarn strands onto a flat surface.
Now grab 2 of the strands and fold them in half. place the folded strands over a flat laying single-strand like shown below.
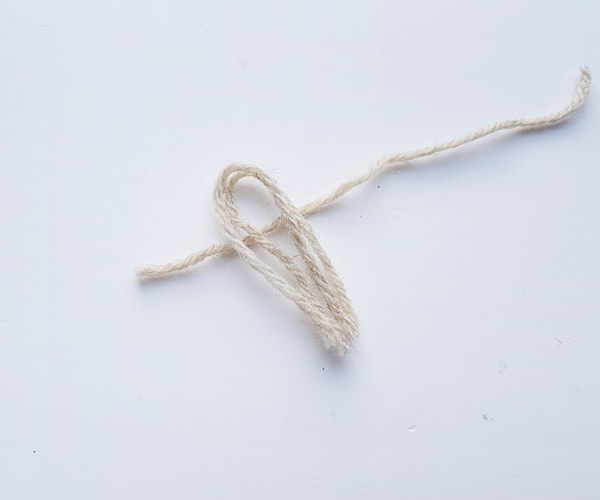
Step 5: “Looping” Your Beard
Now, hold the open ends of the double strands and draw them thought it’s loop from under the single strand of yarn.
Pull the open ends all the way through and tighten the double strands with the single strand.
It should end up looking like this below:
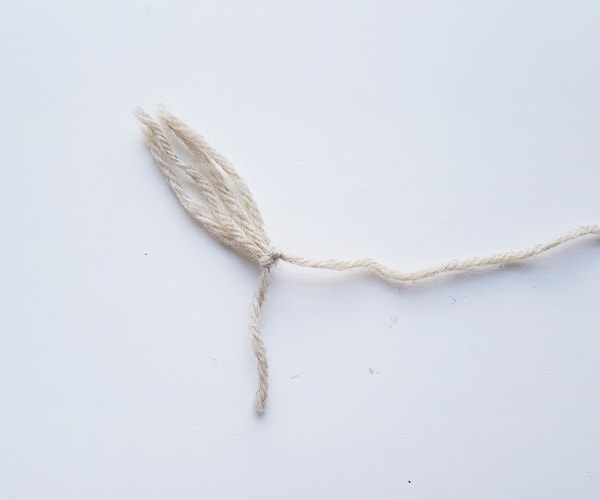
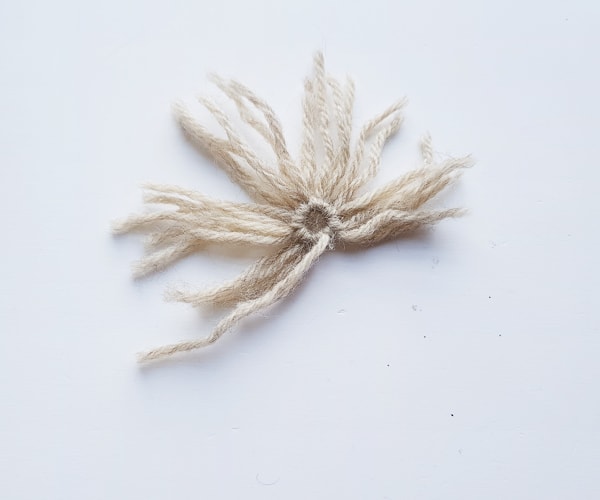
Step 6: Add more Bulk to Gnomes Beard
Repeat the above steps to that same single strand of yarn creating a fuller beard for your gnome doll.
Step 7: Continue Crafting Your Beard
Once your beard is nice and thick, tie a tight knot with the 2 open ends of the single strand.
This will create a small hole in the middle of the yarn strands, like shown below.
And, in case that’s confusing, your gnomes bead nose will end up in that hole, by the way.
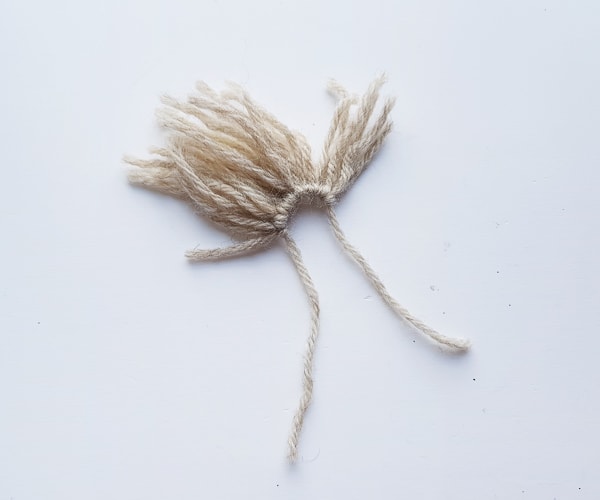
Step 8: Secure the Beard
Cut out a small piece of felt fabric and also set the yarn strands towards any one direction.
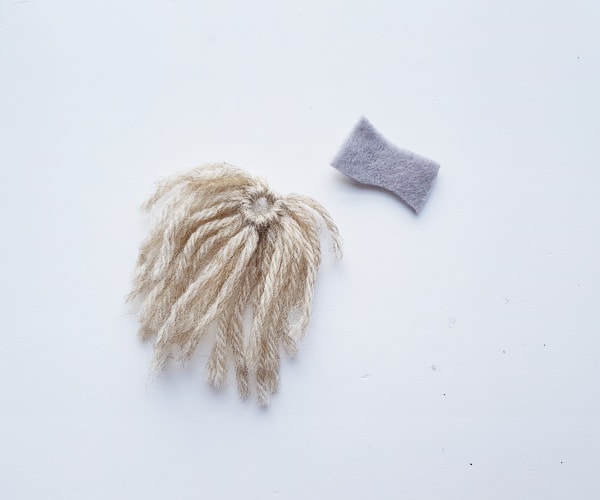
Step 9: Attach the Beard to the Felt
Next, using your hot glue gun, attach the beard to the piece of felt.
Making the Gnomes Clothes
Now that your gnomes beard is finished, it’s time to move on to making the gnomes clothes and hat!
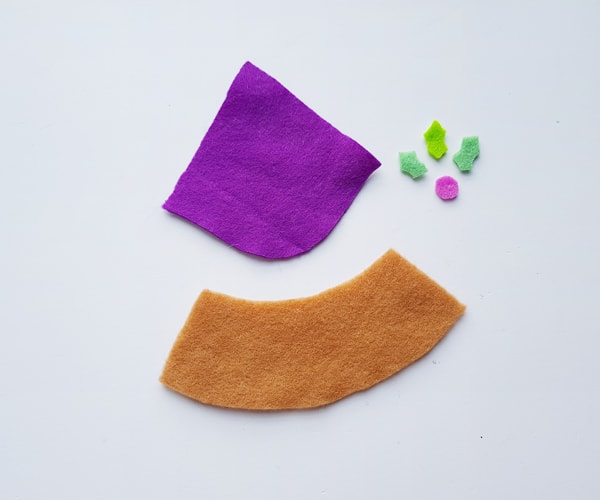
Step 10: Start Making Gnome Clothes
Grab a few of the colored pieces of felt fabric to craft the gnomes clothing.
Using our downloadable gnome template, trace out the clothing patterns onto your felt fabrics and cut.
We choose brown for the body, purple for the hat, and green/pin for the hat accents.
Step 11: Attach the Gnomes Nose
Now attach the wooden bead onto the beard hole and set aside.
Roll the felt hat to form a cone and attach the leaf accents, along with the cherry to decorate your gnomes hat.
Your welcome to add other accents too at this time. We added a little swirled strip of felt to the top of our hat.
Finally, add the body clothing piece to the bottom half of your cardstock cone.
Attach all the pieces using your hot glue gun.
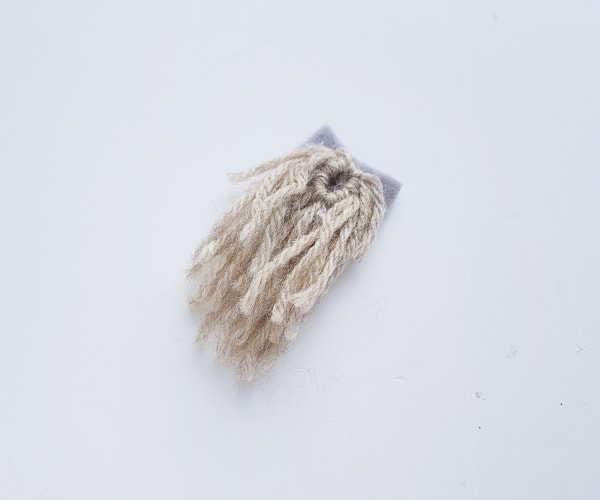
Step 12: Attaching the Beard
Now glue the beard to the cardstock cone right above where the felt clothing starts.
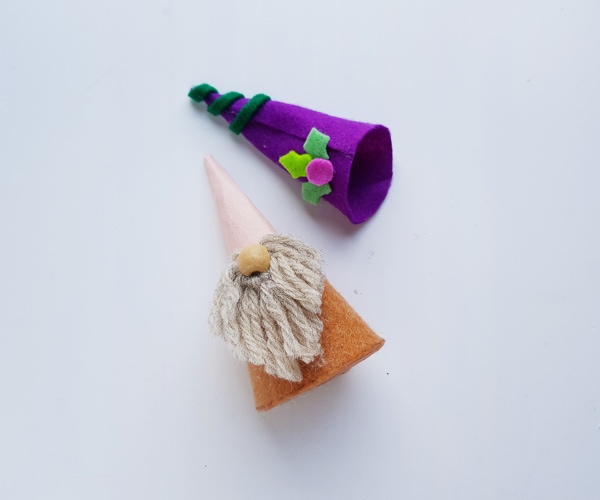
Step 13: Attach the Gnomes Hat
Next, glue on your gnomes felt hat to the top of the cardstock cone.

Step 14: Adding Eyes?
Finally, if desired, you can add a set of googly eyes to your gnomes.
Of course, lots of gnomes lack eyes, or “they’re hiding under the hat” per se.
But this step is optional, but can add a cute touch to your no-sew gnome!
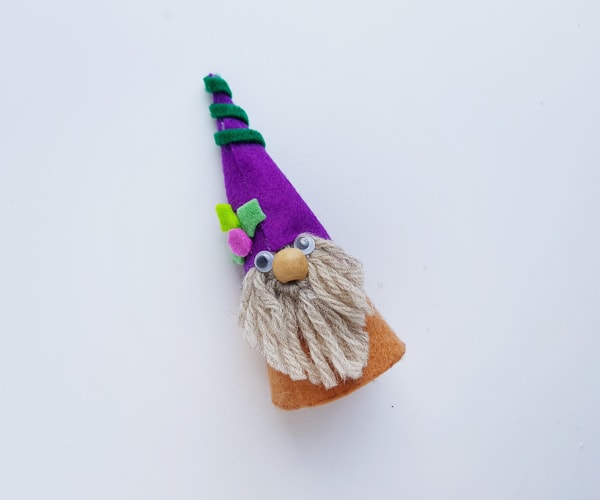
We think he looks cute with the googly eyes.
Hi there . Love your Gnomes! . Unfortunately I can’t seem to find the pattern in this tutorial . Can you please direct me? . Many thanks, Gail 😊🌻
sure thing! You can find it in our craft resource library.
CUTE!! WHATS Old is new AGAIN Lolo 👍🏼👏🏼♥️And SO Glad For NO Sew If Dont Have To.. Thank you For Sharing templates😊G-d♥️Bless
Need template for gnome hat
Hi, could you please tell me how big the half wood beads are for the nose?
Very cute craft!
Thanks, Cathy